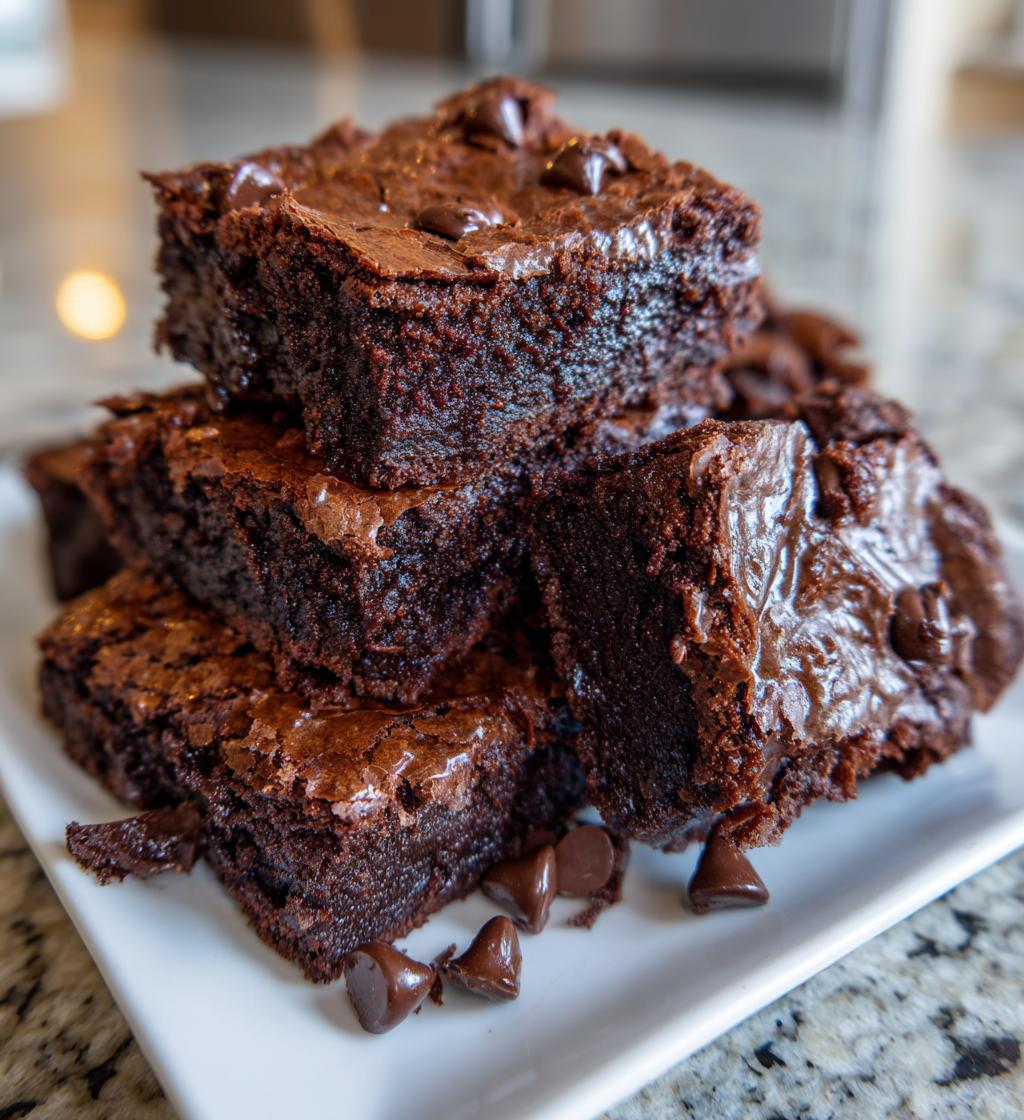
Ah, Valentine’s Day! A time for love, laughter, and, of course, delicious sweets that make your heart sing! I’ve always believed that the best way to show someone you care is through a little homemade treat. There’s just something magical about whipping up a batch of warm, gooey chocolatey goodness that makes the whole room feel cozy and romantic. I remember the first time I made these sweets for my partner—he walked in, and the aroma filled the air like a warm hug. It was love at first bite!
These *Valentine’s Day sweets* are not just easy to make; they’re a delightful way to share your feelings. With just a handful of ingredients, you can create something that’s both indulgent and heartfelt. Picture this: rich chocolate, a soft and chewy texture, and a touch of sweetness that dances on your taste buds. Whether you’re surprising your significant other or making a batch to share with friends, these treats are sure to impress. Trust me, when you present these to your loved ones, you’ll see their eyes light up with joy. Let’s dive into this sweet adventure together!
Ingredients for Valentines Day Sweets
Here’s what you’ll need to whip up these delicious *Valentine’s Day sweets*. Each ingredient plays a crucial role in creating that perfect balance of flavor and texture. Gather these up, and let’s get started!
- 1 cup all-purpose flour: This will form the base of your sweets, giving them structure.
- 1/2 cup sugar: For just the right amount of sweetness that complements the rich chocolate.
- 1/4 cup unsweetened cocoa powder: This adds deep chocolate flavor without additional sweetness.
- 1/2 cup butter, softened: Real butter is key for richness and that melt-in-your-mouth texture.
- 2 large eggs: These help bind everything together and give the sweets their lovely fluffiness.
- 1 teaspoon vanilla extract: A little splash of vanilla enhances all the flavors beautifully.
- 1/2 teaspoon baking powder: This is your leavening agent, helping the sweets rise nicely.
- 1/4 teaspoon salt: A pinch of salt balances the sweetness and enhances the chocolate flavor.
- 1 cup chocolate chips: These little gems bring extra bursts of chocolate goodness in every bite!
How to Prepare Valentines Day Sweets
Let’s dive into the deliciousness! I promise, the process to make these *Valentine’s Day sweets* is straightforward and oh-so-rewarding. Follow these steps, and you’ll have a batch of heavenly treats in no time!
- Preheat your oven: First things first, set your oven to 350°F (175°C). This ensures it’s nice and hot when your sweets are ready to go in!
- Mix the dry ingredients: In a medium bowl, whisk together the all-purpose flour, cocoa powder, baking powder, and salt. This step helps to evenly distribute the dry ingredients, so your sweets rise perfectly.
- Cream the butter and sugar: In a separate large bowl, beat the softened butter and sugar together until the mixture is light and fluffy. This usually takes about 2-3 minutes. Trust me, this step adds so much air into the batter, giving your sweets that lovely texture!
- Add the eggs and vanilla: Crack in the eggs one at a time, mixing well after each addition. Then stir in that delightful teaspoon of vanilla extract. The batter should feel smooth and creamy now!
- Combine wet and dry ingredients: Gradually add your dry ingredient mixture into the wet mixture. Gently fold it in using a spatula or wooden spoon. You want to mix until just combined—be careful not to overmix because we want those sweets to stay tender!
- Fold in the chocolate chips: Now comes the best part! Gently fold in the chocolate chips until they’re evenly distributed throughout the batter. I always sneak a few extra for myself at this point!
- Prepare your baking pan: Grease a baking pan with butter or cooking spray to prevent sticking. Pour the batter into the pan, spreading it out evenly with a spatula.
- Bake to perfection: Pop your pan in the preheated oven and bake for 25-30 minutes. You’ll know they’re done when a toothpick inserted into the center comes out with a few moist crumbs—yum!
- Cool before serving: Once baked, remove the pan from the oven and let it cool for about 10-15 minutes before serving. This waiting time lets the flavors settle and makes them even more irresistible!
That’s it! You’ve just prepared some delightful *Valentine’s Day sweets* that are sure to impress. Now, let your loved ones dive in and savor every chocolatey bite!
Why You’ll Love This Recipe
This recipe for *Valentine’s Day sweets* is more than just a treat; it’s a heartfelt way to show your love. Here’s why you’ll absolutely adore making and sharing them:
- Quick and Easy: With only 15 minutes of prep time, you can whip these up in a flash! Perfect for those last-minute sweet cravings or romantic surprises.
- Delicious Flavor: Rich chocolate combined with a soft, chewy texture creates a heavenly experience in every bite. You’ll find it hard to resist going back for seconds (or thirds!).
- Romantic Presentation: Serve these sweets warm, maybe with a scoop of ice cream or a dollop of whipped cream, and watch the smiles light up! They make any moment feel special.
- Customizable: Whether you want to add nuts, swap out chocolate types, or even create fun shapes, the possibilities are endless. You can make them uniquely yours!
- Perfect for Sharing: This recipe yields 12 servings, making it the perfect treat to share with loved ones, friends, or even coworkers. Who wouldn’t want a slice of love?
Trust me, once you dive into these delightful sweets, you’ll find yourself making them for every occasion, not just Valentine’s Day!
Tips for Success with Valentines Day Sweets
Want to elevate your *Valentine’s Day sweets* experience? I’ve got some pro tips that will help you nail this recipe every single time. Follow these suggestions, and you’ll be the star of the dessert table!
- Use room temperature ingredients: Make sure your butter and eggs are at room temperature. This helps them mix together more smoothly and creates that lovely fluffy texture you want in your sweets.
- Don’t skip the cooling time: Allowing your sweets to cool in the pan for a bit helps them set properly. If you cut them too soon, they might crumble or fall apart, and we don’t want that!
- Add a pinch of espresso powder: If you want to take the chocolate flavor to the next level, try adding a teaspoon of instant espresso powder to the dry ingredients. It enhances the chocolate taste without making them taste like coffee!
- Experiment with chocolate chips: Mix and match different types of chocolate chips—dark, semi-sweet, or even white chocolate! This not only changes the flavor but also adds a fun visual element to your sweets.
- Dress them up: Once cooled, consider drizzling melted chocolate on top or dusting them with powdered sugar for a beautiful presentation. A few fresh strawberries on the side never hurt either!
- Check for doneness carefully: Everyone’s oven is a little different, so start checking your sweets a couple of minutes before the recommended baking time. You want them to be just set but still moist!
- Use parchment paper: Lining your baking pan with parchment paper can make removing the sweets a breeze. Just lift them out by the edges of the paper once they’re cooled!
These tips will not only help you make perfect *Valentine’s Day sweets* but also ensure that you enjoy the process and the lovely results. Happy baking!
Variations of Valentines Day Sweets
If you’re feeling adventurous and want to switch things up a bit, there are so many fun ways to customize your *Valentine’s Day sweets*! Here are a few variations that’ll keep your treats exciting and tailored to your taste:
- Add nuts: For a delightful crunch, consider folding in some chopped nuts like walnuts or pecans. They add a lovely texture and a nutty flavor that pairs beautifully with chocolate.
- Swap the chocolate chips: Feel free to experiment with different types of chocolate chips! You can use white chocolate for a sweeter twist, dark chocolate for a richer flavor, or even peanut butter chips for a fun surprise.
- Mix in fruit: For a burst of freshness, try adding some dried cranberries or cherries to the batter. They not only add a pop of color but also a lovely tartness that contrasts wonderfully with the sweetness of the chocolate.
- Infuse with flavors: Get creative with flavor extracts! A splash of almond or orange extract can give your sweets an intriguing depth. Just be careful not to overpower the chocolate—start with just a half teaspoon!
- Make it gluten-free: If you need a gluten-free option, substitute the all-purpose flour with a gluten-free blend. Just make sure the blend includes xanthan gum for the best texture!
- Shape it differently: Instead of baking them in a pan, scoop the batter into muffin tins for individual servings or roll them into balls for decadent chocolate truffles. You can even dip them in melted chocolate for an extra indulgent treat!
- Top with frosting: Once cooled, why not add a layer of chocolate frosting on top for an over-the-top dessert? A simple cream cheese frosting can also complement the chocolate flavor beautifully.
These variations will not only make your *Valentine’s Day sweets* uniquely yours, but they’ll also surprise your loved ones with delightful twists they won’t expect. So go ahead, get creative, and let your imagination run wild in the kitchen!
Serving Suggestions for Valentines Day Sweets
Now that you’ve mastered the art of making these delightful *Valentine’s Day sweets*, let’s talk about how to elevate the experience even further! Serving these treats with a few simple accompaniments can turn them into a truly memorable dessert. Here are some of my favorite ideas:
- Whipped Cream: A dollop of freshly whipped cream adds a light and airy touch that beautifully complements the rich chocolate flavors. You can even sweeten it with a bit of vanilla extract or a sprinkle of cocoa powder for an extra twist!
- Ice Cream: Oh, the classic pairing! Whether you choose vanilla, chocolate, or even a raspberry sorbet, a scoop of ice cream alongside your warm sweets creates a delightful contrast of temperatures and textures. The creaminess of the ice cream mingling with the warm, fudgy centers is pure bliss.
- Fresh Berries: Adding some fresh strawberries, raspberries, or blueberries not only enhances the visual appeal but also introduces a burst of tartness that balances the sweetness of the chocolate. Plus, they’re so pretty on the plate!
- Chocolate Sauce: For the chocoholics out there, drizzling warm chocolate sauce over the top takes these sweets to another level. It’s decadence in every bite! You could even make a simple sauce by melting down some chocolate chips with a splash of cream.
- Caramel Drizzle: If you’re feeling adventurous, a drizzle of salted caramel can add a delightful sweet and salty contrast. The gooey texture pairs wonderfully with the soft, chewy sweets and makes for an irresistible combination.
- Nuts for Crunch: Serve with a small bowl of chopped nuts on the side, like toasted almonds or pecans. They add not only a satisfying crunch but also a nutty flavor that contrasts beautifully with the soft sweets.
- Festive Garnishes: Don’t forget to sprinkle some powdered sugar on top or add a few edible flowers for a romantic touch. It’s all about the presentation, and a little effort goes a long way in impressing your loved ones!
These serving suggestions will not only enhance the flavors of your *Valentine’s Day sweets* but also create a beautiful spread that’s perfect for sharing. So, set the scene, light some candles, and enjoy these treats with your favorite accompaniments for a truly special experience!
Storage & Reheating Instructions
Now that you’ve made a delicious batch of *Valentine’s Day sweets*, let’s talk about how to store any leftovers (if there are any!). Proper storage will keep them fresh and tasty for days, allowing you to savor the love long after the baking is done!
Storing Leftovers: Allow your sweets to cool completely in the pan before transferring them. Once cooled, you can store them in an airtight container at room temperature for up to 3 days. If you want them to last longer, pop them in the fridge, where they’ll stay good for about a week.
If you’ve made a big batch and want to save some for later, freezing is a great option! Just cut the sweets into individual pieces, wrap each piece tightly in plastic wrap, and then place them in a freezer-safe bag or container. They can be frozen for up to 3 months. Make sure to label the container so you know what you’re saving for those sweet-tooth moments!
Reheating Your Sweets: When you’re ready to enjoy your leftovers, here’s how to bring them back to life. If they’re at room temperature, you can pop them in the microwave for about 10-15 seconds. This will warm them up nicely without drying them out. For a slightly gooey experience, you can heat them a bit longer, but keep an eye on them!
If you prefer a crispier texture, try reheating them in the oven. Preheat your oven to 350°F (175°C), place the sweets on a baking sheet, and warm them for about 5-10 minutes. This method will give them a lovely fresh-baked feel, and your home will smell divine all over again!
By following these simple storage and reheating tips, you’ll ensure that your *Valentine’s Day sweets* remain just as delightful as the day you made them. Enjoy every last bite!
Nutritional Information Disclaimer
When it comes to enjoying these delightful *Valentine’s Day sweets*, it’s important to keep in mind that nutritional information can vary based on the specific ingredients and brands you use. While I can provide some general estimates, precise nutritional values for your batch may differ. Factors like the type of chocolate chips or whether you choose salted or unsalted butter can all impact the final numbers.
So, while you can expect a typical serving to contain around 200 calories, please remember this is an approximation. I always encourage my fellow bakers to check labels on their ingredients for the most accurate information. After all, the joy of baking is about enjoying the process and the delicious results, so let’s focus on the love that goes into making these sweets!
FAQ About Valentines Day Sweets
Got questions about making these delightful *Valentine’s Day sweets*? Don’t worry, I’ve got you covered! Here are some common queries that pop up, along with helpful answers to make your baking experience even sweeter.
- Can I use a different type of flour? Absolutely! If you’re looking for a gluten-free option, you can substitute all-purpose flour with a gluten-free blend. Just make sure it includes xanthan gum to maintain the texture. For a healthier twist, whole wheat flour works too, but it may change the texture slightly.
- What can I use instead of chocolate chips? If you’re not a fan of chocolate chips, you can swap them out for white chocolate chips, peanut butter chips, or even butterscotch chips for a fun flavor twist. You can also chop up your favorite chocolate bar for a chunkier texture.
- How do I store these sweets? Store any leftovers in an airtight container at room temperature for up to 3 days. If you want to keep them longer, refrigerate them for about a week or freeze them for up to 3 months. Just remember to wrap them tightly to avoid freezer burn!
- Can I make these ahead of time? Yes! You can prepare the batter in advance and store it in the fridge for up to 24 hours before baking. When you’re ready, just pour it into the pan and bake as usual. This is perfect for those last-minute Valentine’s Day surprises!
- What if my sweets turn out too dry? If you find your *Valentine’s Day sweets* are a bit dry, it could be due to overbaking or measuring too much flour. Always check for doneness a couple of minutes before the timer goes off. If they do come out dry, try serving them with whipped cream or ice cream to add some moisture back!
- Can I add fruit to the batter? Definitely! Adding dried fruits like cranberries or cherries can create a lovely burst of flavor. Just make sure to chop them up a bit so they distribute evenly throughout the batter. Fresh fruit is great too, but be cautious with moisture levels.
- How can I make these sweets more festive? To add a romantic flair, consider drizzling melted chocolate over the top or dusting them with powdered sugar. Adding some colorful sprinkles or edible glitter before serving also gives a fun and festive touch!
I hope these FAQs help you on your journey to create the perfect *Valentine’s Day sweets*! Remember, baking is all about having fun and making memories, so don’t stress too much—just enjoy the process!
Print
Valentines Day Sweets: 5 Joyful Treats to Melt Hearts
- Total Time: 45 minutes
- Yield: 12 servings 1x
- Diet: Vegetarian
Description
Delicious and romantic sweets for Valentine’s Day.
Ingredients
- 1 cup all-purpose flour
- 1/2 cup sugar
- 1/4 cup unsweetened cocoa powder
- 1/2 cup butter, softened
- 2 large eggs
- 1 teaspoon vanilla extract
- 1/2 teaspoon baking powder
- 1/4 teaspoon salt
- 1 cup chocolate chips
Instructions
- Preheat the oven to 350°F (175°C).
- In a bowl, mix flour, cocoa powder, baking powder, and salt.
- In another bowl, cream butter and sugar until light.
- Add eggs one at a time, then stir in vanilla.
- Gradually add dry ingredients to wet ingredients.
- Fold in chocolate chips.
- Pour batter into a greased baking pan.
- Bake for 25-30 minutes.
- Allow to cool before serving.
Notes
- Store leftovers in an airtight container.
- Try adding nuts for extra crunch.
- Serve with whipped cream or ice cream.
- Prep Time: 15 minutes
- Cook Time: 30 minutes
- Category: Dessert
- Method: Baking
- Cuisine: American
Nutrition
- Serving Size: 1 piece
- Calories: 200
- Sugar: 15g
- Sodium: 100mg
- Fat: 10g
- Saturated Fat: 5g
- Unsaturated Fat: 3g
- Trans Fat: 0g
- Carbohydrates: 25g
- Fiber: 2g
- Protein: 3g
- Cholesterol: 30mg
Keywords: valentines day sweets, chocolate dessert, romantic treats


