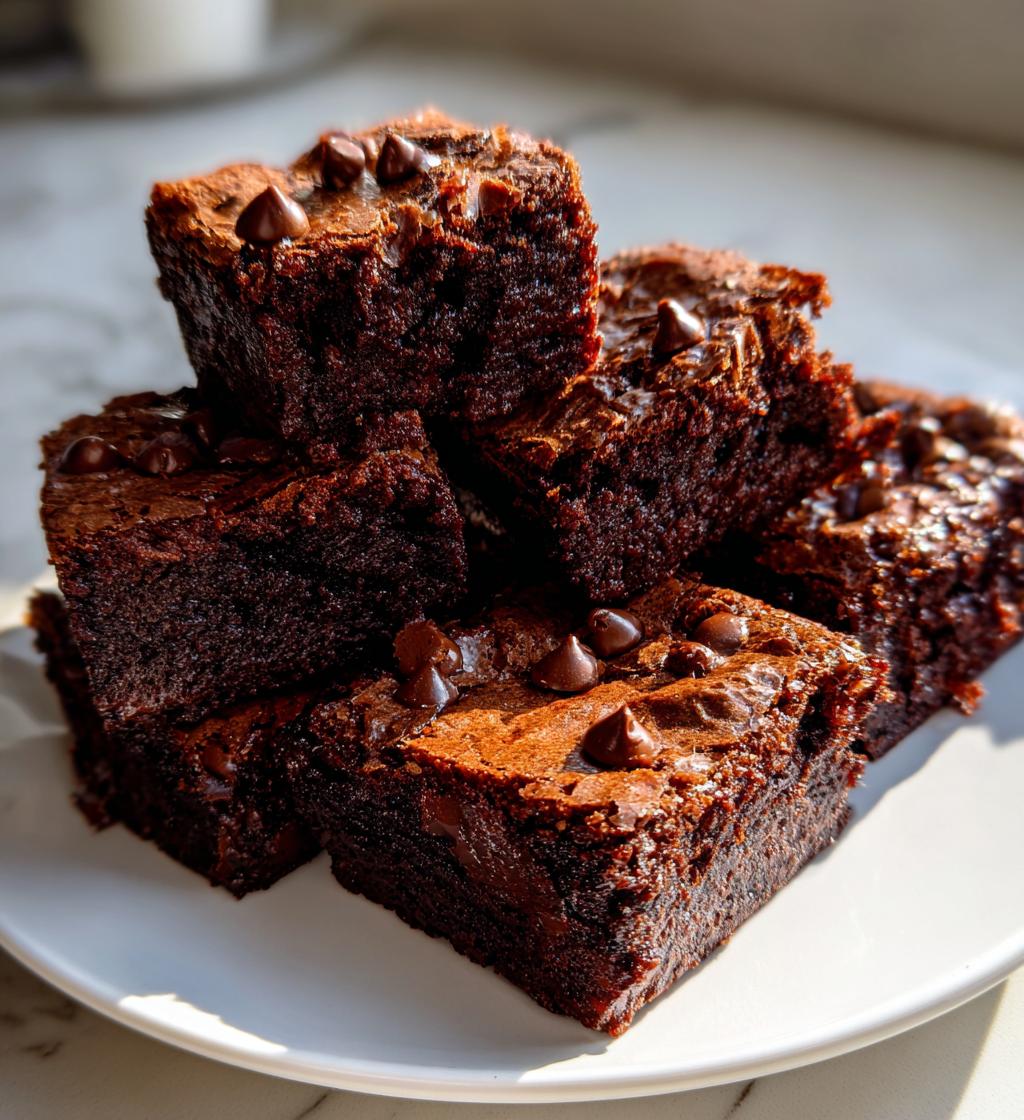
Valentine’s Day is just around the corner, and you know what that means—it’s time to whip up something sweet for those special people in your life! There’s just something magical about sharing homemade treats that makes the heart feel a little fuller. Whether it’s for a romantic partner, your kids, or even your best friends, nothing says “I love you” quite like a batch of decadent brownies fresh out of the oven. And trust me, these *valentines brownies* are not just any brownies; they’re rich, fudgy, and oh-so-satisfying. Imagine biting into a gooey, chocolatey square that melts in your mouth, leaving you craving more! Plus, the best part? They’re super easy to make, even if you’re not a baking pro. So, grab your apron and let’s get ready to create a sweet masterpiece that’ll have everyone falling in love all over again. I promise, this recipe is going to become your go-to for every Valentine’s Day celebration!
Why You’ll Love This Recipe
Oh, let me tell you, there are so many reasons to adore these *valentines brownies*! First off, they come together in a snap—seriously, you can have a warm, gooey batch ready in just 45 minutes! That means less time in the kitchen and more time enjoying those sweet moments with your loved ones. Plus, the rich, chocolaty flavor is simply irresistible. Each bite is like a little hug for your taste buds, and the texture? Perfectly fudgy with a slight crust on top—just the way a brownie should be!
Quick and Easy
Making these brownies is a breeze, and I can’t emphasize that enough! You start by melting butter—easy peasy. Then, you mix in sugar, eggs, and vanilla, which takes no time at all. After that, it’s just a matter of folding in your dry ingredients and those delightful chocolate chips. It’s all about simplicity here, and I love how everything comes together in one bowl. You don’t need any fancy equipment; just a saucepan and a whisk will do the trick. Trust me, your kitchen will be filled with the most mouthwatering aroma while they bake!
Perfect for Sharing
These brownies are not just delicious; they’re also perfect for sharing! Picture this: you whip up a batch, cut them into squares, and present them to friends or family. They’re a delightful surprise for any gathering—birthdays, anniversaries, or just because! You can even package them up in cute little boxes with a ribbon for a thoughtful homemade gift that shows you care. Everyone loves a sweet treat, and I guarantee these *valentines brownies* will put a smile on anyone’s face. So go ahead, spread the love this Valentine’s Day!
Ingredients List
Here’s what you’ll need to create these irresistible *valentines brownies*. Make sure to have everything measured and ready to go for a smooth baking experience!
- 1 cup unsalted butter, melted
- 2 cups granulated sugar
- 4 large eggs, at room temperature
- 1 teaspoon vanilla extract
- 1 cup all-purpose flour
- 1 cup unsweetened cocoa powder
- 1/2 teaspoon salt
- 1/2 teaspoon baking powder
- 1 cup chocolate chips
Every ingredient plays a crucial role in making these brownies rich and flavorful. The melted butter adds a beautiful moisture, while the cocoa powder gives that deep chocolate flavor we all crave. Trust me, once you have these ingredients lined up, you’ll be just moments away from heavenly brownies!
How to Prepare *Valentines Brownies*
Getting these delicious *valentines brownies* ready is a straightforward process that will have your kitchen smelling heavenly in no time. Follow these simple steps, and you’ll be on your way to brownie bliss!
Step 1: Preheat and Prepare
First things first, you’ll want to preheat your oven to 350°F (175°C). This is a crucial step because a properly heated oven ensures even baking. While that’s warming up, grab your trusty 9×13 inch baking pan and grease it well. You can use butter or non-stick spray—whatever you have on hand. I like to line the bottom with parchment paper too; it makes for super easy removal later. Trust me, no one wants crumbled edges when you cut into those fudgy squares!
Step 2: Mix the Wet Ingredients
Now, let’s get to the fun part! In a medium saucepan, melt your unsalted butter over low heat. Keep an eye on it, so it doesn’t burn—nobody wants that! Once it’s melted, remove the saucepan from the heat and stir in the granulated sugar. You want to mix this until it’s nice and combined, which shouldn’t take long at all. Then, crack in those four large eggs and add the vanilla extract. Give everything a good whisk until it’s smooth and beautifully blended. This mixture will be the foundation of your brownie goodness, so make sure it’s well combined!
Step 3: Combine the Dry Ingredients
In a separate bowl, whisk together your all-purpose flour, unsweetened cocoa powder, salt, and baking powder. This step helps to evenly distribute the baking powder and salt throughout the flour, ensuring your brownies rise perfectly. Once that’s done, gently fold the dry ingredients into your wet mixture. You want to do this carefully—overmixing can lead to tough brownies, and nobody wants that! Just combine everything until you see no more flour streaks, and then stop.
Step 4: Add Chocolate Chips
Now for the best part: the chocolate chips! Fold in your cup of chocolate chips, making sure they’re evenly distributed throughout the batter. I always sneak a few extra chips in for good measure—who can resist more chocolate? At this point, the batter might look a little thick, but that’s exactly what you want. It’ll create those rich, chewy brownies we all love!
Step 5: Bake and Cool
Pour your luscious brownie batter into the prepared baking pan, spreading it out evenly. Pop it in the oven and let it bake for about 25-30 minutes. You’ll know they’re done when the edges look set and a toothpick inserted in the center comes out with a few moist crumbs—this is the key to that fudgy texture! Once they’re done, take them out of the oven and let them cool in the pan for about 10-15 minutes. After that, transfer them to a wire rack to cool completely before cutting into squares. I know the temptation is real, but let them cool to achieve that perfect texture!
Tips for Success
Want to ensure your *valentines brownies* turn out perfectly every single time? Here are some tried-and-true tips that I always keep in mind when whipping up a batch!
- Use room temperature ingredients: Make sure your eggs are at room temperature before mixing. This helps create a smooth batter and ensures everything combines evenly.
- Don’t overmix: When combining the dry and wet ingredients, mix just until you don’t see any flour streaks. Overmixing can lead to tough brownies, and we don’t want that!
- Check for doneness: Use the toothpick test but remember that you want a few moist crumbs on it when you pull it out. If it comes out completely clean, your brownies might be overbaked!
- Let them cool completely: As tempting as it is to cut into them right away, allowing the brownies to cool completely helps them set and makes for cleaner cuts.
- Experiment with mix-ins: Feel free to add your favorite nuts or use different types of chocolate chips. It’s a fun way to personalize these brownies!
- Store them properly: Keep your brownies in an airtight container to maintain their freshness. They’ll stay delicious for about a week—if they last that long!
With these tips in your back pocket, you’ll be a brownie-making pro in no time. Happy baking!
Variations
One of the best things about these *valentines brownies* is how versatile they are! If you’re feeling adventurous or want to impress someone special, here are some fun ideas to switch things up a bit. Trust me, these variations will keep your brownie game fresh and exciting!
Nutty Delight
If you’re a fan of crunch in your brownies, why not add some nuts? Chopped walnuts or pecans can bring a lovely texture contrast to the fudgy base. Just fold in about a cup of your favorite nuts along with the chocolate chips, and you’re good to go. The nutty flavor pairs beautifully with the rich chocolate!
Different Chocolate Types
Feeling like a chocolate connoisseur? Experiment with different types of chocolate chips! Try white chocolate or dark chocolate chips for a unique twist. You could even use a combination of semi-sweet and milk chocolate for a balanced sweetness. Another fun idea is to swirl in some melted chocolate or caramel before baking for a marbled effect!
Decadent Frosting
For an extra indulgence, consider adding a layer of frosting on top of your brownies. A simple cream cheese frosting or a rich chocolate ganache can elevate these treats to a whole new level. Just let the brownies cool completely before frosting, so everything stays nice and neat. You could also sprinkle some sea salt on top of the frosting for an irresistible sweet-and-salty combo!
Minty Fresh
If you love mint chocolate, you can easily incorporate that flavor into your brownies. Just add a teaspoon or two of peppermint extract to the wet ingredients. You can also mix in some mint chocolate chips for an extra burst of flavor. This refreshing twist is perfect for those who enjoy a bit of minty freshness!
Fruit Fusion
Looking for a fruity twist? You can fold in some chopped raspberries or cherries into the batter for a delightful surprise in each bite. The tartness of the fruit complements the sweetness of the brownies beautifully. Just be sure to cut back on the chocolate chips a little, so the batter doesn’t become too wet.
With these variations, you can customize your *valentines brownies* to suit any taste preference or occasion. So, get creative and have fun experimenting! No matter how you make them, I know they’ll be a hit!
Storage & Reheating Instructions
Once you’ve made your delicious *valentines brownies*, you’ll want to keep them stored properly to maintain their fresh, fudgy goodness. Here’s how to do it!
First, let the brownies cool completely in the pan. This is super important because if you try to store them warm, they can become soggy. Once they’re cool, you can either keep them in the pan covered with plastic wrap or transfer them to an airtight container. I love using a container that’s just big enough to fit them snugly—that way, they don’t dry out and stay nice and moist!
Store your brownies at room temperature for up to a week. If you think you won’t finish them in that time (but trust me, they’ll disappear quickly!), you can also freeze them for longer storage. Just wrap them tightly in plastic wrap and then place them in a freezer-safe bag or container. They’ll keep in the freezer for about 3 months. When you’re ready to enjoy them again, just let them thaw at room temperature for a few hours, or pop them in the microwave for about 10-15 seconds to warm them up!
When reheating, keep an eye on them—you want them warm and gooey, not hot and bubbling! A quick zap in the microwave can bring back that fresh-out-of-the-oven texture that makes these brownies so irresistible. Enjoy every last bite of your *valentines brownies*, whether they’re fresh or reheated!
Nutritional Information
Now, let’s talk about the nutritional details of these delicious *valentines brownies*! It’s always good to have an idea of what you’re indulging in, right? Keep in mind that these values are estimates and can vary based on the specific ingredients you use.
- Serving Size: 1 brownie
- Calories: Approximately 200
- Total Fat: 10g
- Saturated Fat: 6g
- Cholesterol: 50mg
- Sodium: 100mg
- Total Carbohydrates: 28g
- Dietary Fiber: 2g
- Total Sugars: 18g
- Protein: 3g
So, whether you’re treating yourself or sharing with loved ones, you can feel good about enjoying these brownies in moderation. Just remember, the joy of baking and sharing sweet treats is what it’s all about! Happy indulging!
FAQ Section
Can I use a different type of flour?
Absolutely! While I recommend using all-purpose flour for that classic brownie texture, you can definitely experiment with other types. For a gluten-free option, try a 1:1 gluten-free baking flour blend. If you’re looking for something a bit heartier, whole wheat flour can work too, but it might give your brownies a denser texture. Just keep in mind that the flavor may vary slightly, so adjust your expectations accordingly. Whatever you choose, make sure to measure accurately for the best results!
How can I tell when the brownies are done?
Ah, the age-old question of brownie doneness! I always rely on the trusty toothpick test. When you insert a toothpick into the center, you want it to come out with a few moist crumbs sticking to it—not wet batter, but not completely clean either. If it’s too clean, your brownies might be overbaked and dry. Also, keep an eye on the edges; they should look set and slightly pulled away from the sides of the pan. Trust me, mastering the doneness will make all the difference in achieving that perfect fudgy texture!
Can I freeze these brownies?
You bet! Freezing these *valentines brownies* is a fantastic way to save some for later. Just let them cool completely, then wrap them tightly in plastic wrap, making sure there’s no air getting in. After that, pop them in a freezer-safe bag or container. They’ll stay delicious in the freezer for up to 3 months. When you’re ready to enjoy them again, simply let them thaw at room temperature or microwave them for a quick warm-up. You’ll be in brownie heaven all over again!
Print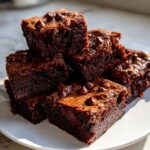
Valentines Brownies: 5 Irresistible Ways to Spread Love
- Total Time: 45 minutes
- Yield: 24 brownies 1x
- Diet: Vegetarian
Description
Delicious brownies perfect for Valentine’s Day.
Ingredients
- 1 cup unsalted butter
- 2 cups sugar
- 4 large eggs
- 1 teaspoon vanilla extract
- 1 cup all-purpose flour
- 1 cup cocoa powder
- 1/2 teaspoon salt
- 1/2 teaspoon baking powder
- 1 cup chocolate chips
Instructions
- Preheat oven to 350°F (175°C).
- Grease a 9×13 inch baking pan.
- In a saucepan, melt butter over low heat.
- Stir in sugar, eggs, and vanilla extract.
- Mix in flour, cocoa powder, salt, and baking powder.
- Add chocolate chips and stir well.
- Pour batter into the prepared pan.
- Bake for 25-30 minutes.
- Let cool before cutting into squares.
Notes
- For extra flavor, add nuts or frosting.
- Store in an airtight container.
- Best enjoyed within a week.
- Prep Time: 15 minutes
- Cook Time: 30 minutes
- Category: Dessert
- Method: Baking
- Cuisine: American
Nutrition
- Serving Size: 1 brownie
- Calories: 200
- Sugar: 18g
- Sodium: 100mg
- Fat: 10g
- Saturated Fat: 6g
- Unsaturated Fat: 4g
- Trans Fat: 0g
- Carbohydrates: 28g
- Fiber: 2g
- Protein: 3g
- Cholesterol: 50mg
Keywords: valentines brownies


