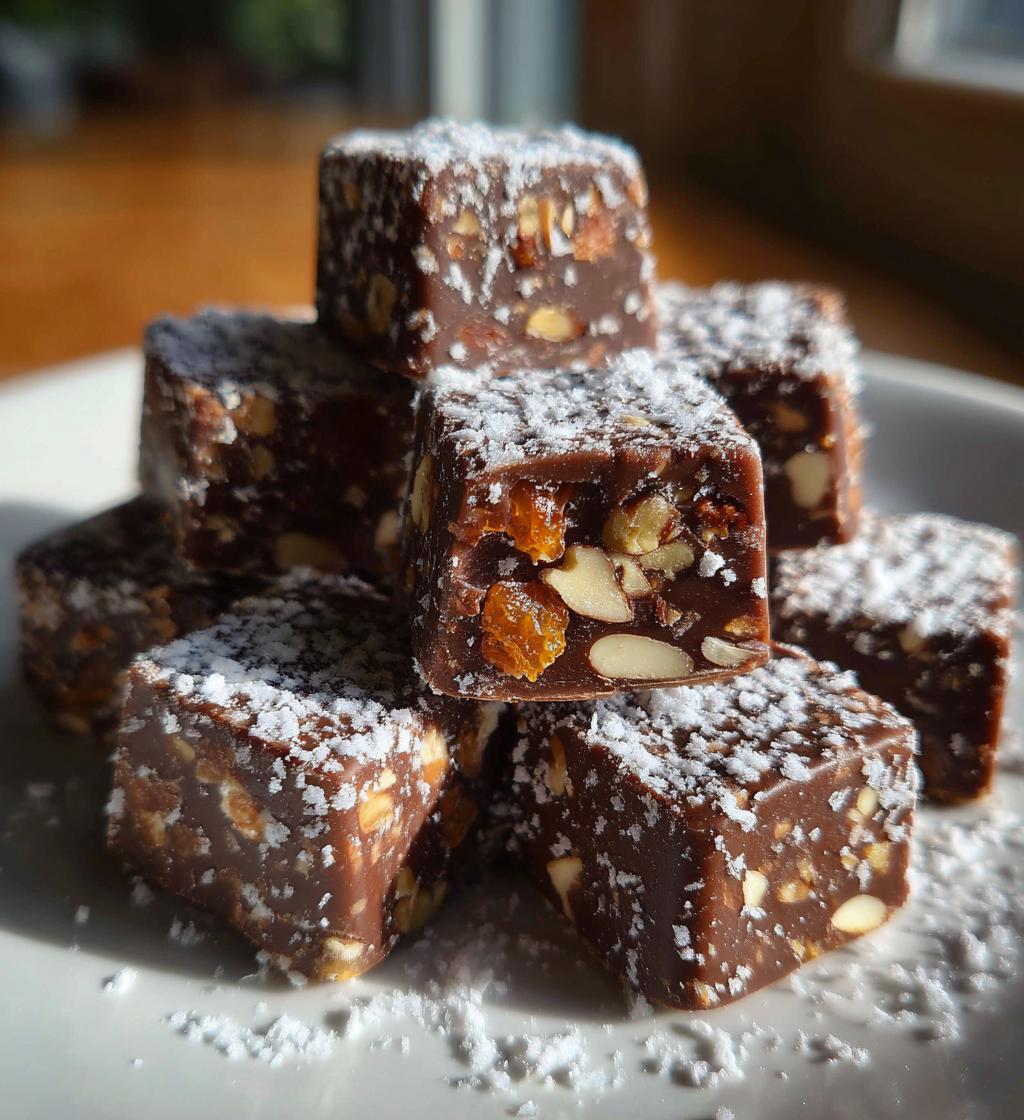
Oh, the joy of making homemade treats for Valentine’s Day! There’s something so special about crafting those little bites of love in your own kitchen. Imagine the delight on your loved one’s face when they unwrap a beautiful box of these *valentines day chocolates*. It’s like wrapping your affection in chocolate form! Trust me, there’s no better way to say “I love you” than with a sweet, thoughtful gift made from scratch.
I remember the first time I decided to make chocolates for my partner. I was so nervous, but as soon as I melted the chocolate and mixed in those crunchy nuts and chewy dried fruits, I felt like a culinary magician! The kitchen filled with the rich aroma of chocolate, and I couldn’t help but sneak a taste or two. When I finally presented the chocolates, his eyes lit up, and he couldn’t believe I had made them myself. That moment was priceless, and it started a sweet tradition that we cherish every year!
So, whether you’re making these delightful chocolates for a partner, a friend, or even yourself (because you totally deserve it!), I promise they’ll be a hit. Let’s dive into this delicious adventure together!
Ingredients List
Here’s what you’ll need to whip up these delicious homemade *valentines day chocolates*. Gather the following ingredients, and let’s make some magic happen!
- 200g dark chocolate: Choose a good quality dark chocolate for a rich flavor. I like to use something around 70% cocoa for that perfect balance of sweetness and depth.
- 100g milk chocolate: This adds a creamy sweetness that complements the dark chocolate beautifully.
- 50g butter: Unsalted butter is best here. It helps to create that luscious, velvety texture!
- 1 cup chopped nuts: Use your favorites—walnuts, almonds, or hazelnuts all work wonderfully. They add a delightful crunch!
- 1/2 cup dried fruit: I love using dried cherries or cranberries, but feel free to mix it up with apricots or raisins for a different twist.
- 1/4 cup powdered sugar: This is for dusting the finished chocolates, giving them a lovely, sweet finish.
Make sure everything is ready to go, and let’s get started on creating these sweet little treasures! You’re going to love how easy it is to bring these chocolates to life!
How to Prepare *Valentines Day Chocolates*
Making these *valentines day chocolates* is a delightful process that’s easier than you might think! Just follow these simple steps, and you’ll have a batch of homemade chocolates that are sure to impress. Ready? Let’s get started!
Step 1: Melting the Chocolates
First things first, we need to melt our dark and milk chocolate with the butter. I recommend using a double boiler for this step. If you don’t have one, you can create your own by placing a heatproof bowl over a pot of simmering water. Just make sure the bottom of the bowl doesn’t touch the water! This gentle heat keeps the chocolate from seizing up.
Chop the dark and milk chocolate into small pieces for even melting. Add the chocolate and butter into the bowl, stirring occasionally until everything is smooth and glossy. Keep an eye on the temperature – you want it to be around 120°F (49°C) to avoid burning. This process usually takes about 5-7 minutes, so be patient! The aroma of melting chocolate is pure bliss.
Step 2: Mixing Ingredients
Once your chocolate is beautifully melted, it’s time to add in the fun stuff! Carefully mix in the chopped nuts and dried fruit of your choice. I like to fold them in gently with a spatula to ensure every piece is coated in that luscious chocolate. This is where you can really get creative – make sure everything is evenly distributed so each bite is a delicious surprise!
Step 3: Pouring into Molds
Now comes the exciting part! Grab your chocolate molds and pour the mixture in. I recommend using a small ladle or a measuring cup to avoid messes. Fill each mold to the top, but be careful not to overfill them—this can lead to a chocolate overflow! Give the molds a gentle tap on the counter to release any air bubbles and ensure even distribution. It’s all about that neatness, folks!
Step 4: Setting the Chocolates
After you’ve filled the molds, it’s time to let the magic happen! Place your filled molds in the refrigerator and allow the chocolates to set for about 2 hours. This is crucial! The cool temperature helps the chocolates harden properly, giving them that perfect snap when you bite into them. So, resist the urge to check them too often – patience is key!
Step 5: Finishing Touches
Once your chocolates are set, carefully pop them out of the molds. If they’re stubborn, a gentle twist can help release them. Now, for the finishing touch! Dust the tops with powdered sugar for a beautiful presentation. Not only does it look lovely, but it also adds a sweet touch that makes them even more irresistible. Trust me, they’ll look like they came straight from a fancy chocolate shop!
Tips for Success
Alright, let’s make sure your *valentines day chocolates* turn out absolutely perfect! Here are some tried-and-true tips to help you along the way, plus a few fun ideas for customizing your chocolates to make them truly unique!
Ingredient Substitutions
Feel free to get creative with your ingredients! If you’re not a fan of dark chocolate, you can swap it out for white chocolate or even a flavored chocolate, like caramel or mint. Just keep in mind that the melting process may vary slightly, so watch it closely!
As for the nuts, if you have allergies or just prefer something different, try using seeds like sunflower or pumpkin seeds for that same delightful crunch. And if dried fruits aren’t your thing, you can add in some mini marshmallows or even some crushed pretzels for a sweet and salty combo!
Customizing Your Chocolates
Want to elevate your chocolates even more? Consider adding a dash of flavor! A splash of vanilla extract or a sprinkle of sea salt can take your chocolates to a whole new level. For a fun twist, try adding spices like cinnamon or cayenne for a hint of warmth.
And don’t forget about toppings! After dusting with powdered sugar, you can add a drizzle of melted chocolate on top or sprinkle some colorful sprinkles for a festive touch. The possibilities are endless, so let your imagination run wild!
Storing Your Chocolates
Once you’ve made your beautiful chocolates, proper storage is key to keeping them fresh. Store them in an airtight container at room temperature if you plan to eat them within a week. If you want to keep them longer, pop them in the fridge, but let them come to room temperature before serving for the best texture!
With these tips in mind, I know you’ll create some amazing homemade *valentines day chocolates*! Happy chocolate-making!
Nutritional Information
Now, let’s chat about the nutritional side of these delightful *valentines day chocolates*. While indulging in homemade treats is all about enjoyment, it’s always good to know what you’re treating yourself to, right? Here’s a rough breakdown of the typical nutritional values for one piece of chocolate:
- Calories: 120
- Fat: 8g
- Saturated Fat: 4g
- Unsaturated Fat: 3g
- Trans Fat: 0g
- Cholesterol: 10mg
- Sodium: 5mg
- Carbohydrates: 12g
- Fiber: 1g
- Sugar: 10g
- Protein: 2g
Keep in mind, these figures are estimates and can vary based on the specific brands and types of ingredients you choose to use. So, while you’re crafting these sweet treats, don’t stress too much about the numbers—just enjoy the process and the sweet rewards!
FAQ Section
Got questions about making your own *valentines day chocolates*? No worries! I’m here to help with all the common queries you might have. Let’s dive in!
Can I use different types of chocolate?
Absolutely! One of the best things about making your own chocolates is the flexibility you have with the types of chocolate you use. If you’re not a fan of dark chocolate, feel free to swap it for white chocolate, milk chocolate, or even a flavored variety like caramel or orange. Just keep in mind that different chocolates have varying sweetness levels and melting points, so you’ll want to adjust your process slightly. For instance, white chocolate tends to melt at a lower temperature, so watch it closely to avoid burning. Experimenting with different chocolates can lead to some delicious surprises!
How should I store these chocolates?
Storing your homemade chocolates properly is key to keeping them fresh and tasty! If you plan to enjoy them within a week, you can keep them in an airtight container at room temperature. Just make sure they’re in a cool, dry place away from direct sunlight. If you want to save them for a little longer, pop them in the fridge! But remember, when you’re ready to indulge, let them come to room temperature before digging in. This way, you’ll enjoy that perfect melt-in-your-mouth experience!
Can I add other ingredients?
Oh, definitely! The beauty of making your own *valentines day chocolates* is that you can customize them to your heart’s content. Feel free to add a variety of nuts, dried fruits, or even some fun extras like mini marshmallows or crushed pretzels for that sweet-and-salty vibe. You can also spice things up with a pinch of cinnamon, a dash of vanilla extract, or even a hint of cayenne pepper for a surprising kick! The possibilities are endless, so let your creativity shine and make these chocolates uniquely yours!
Why You’ll Love This Recipe
Let me tell you why this *valentines day chocolates* recipe is a total winner! You’re going to fall in love with it for so many reasons, and I can’t wait to share them with you!
- Easy Preparation: Seriously, making these chocolates is a breeze! With just a handful of simple ingredients and straightforward steps, you’ll be a chocolate-making pro in no time.
- Customizable Options: You can totally make these chocolates your own! Swap in your favorite nuts, dried fruits, or even different types of chocolate. The flexibility is endless, so get creative!
- Perfect for Gifting: Homemade chocolates are such a heartfelt gift! There’s something extra special about giving a treat that you’ve made with love. They’re sure to impress your loved ones!
- Fun for All Occasions: While they’re perfect for Valentine’s Day, these chocolates are great for any celebration or just because! You can whip them up for birthdays, holidays, or even a cozy night in.
- Deliciously Satisfying: The combination of rich chocolate, crunchy nuts, and chewy fruit creates a flavor explosion that’s simply irresistible. Trust me, one bite and you’ll be hooked!
With these benefits, what’s not to love? Grab your ingredients and let’s make some sweet memories together!
Serving Suggestions
Now that you’ve made these delightful *valentines day chocolates*, let’s talk about how to serve them up for maximum enjoyment! Pairing your chocolates with the right accompaniments can elevate the experience to a whole new level. Here are some of my favorite suggestions:
- Coffee: A rich cup of coffee is the perfect match for these chocolates! The deep flavors of the coffee complement the sweetness of the chocolate beautifully. Whether you prefer a classic espresso or a creamy cappuccino, this duo is sure to delight.
- Red Wine: For the adults in the room, a glass of red wine—especially a smooth Merlot or a bold Cabernet Sauvignon—pairs wonderfully with dark chocolate. The fruity notes in the wine enhance the chocolate’s rich flavors, making for a luxurious treat.
- Milk or Hot Chocolate: If you’re craving something cozy, serve your chocolates with a glass of cold milk or a warm mug of hot chocolate. This combination is especially fun for a chilly evening, and it brings out the kid in all of us!
- Fresh Berries: For a refreshing twist, add some fresh strawberries, raspberries, or blueberries on the side. Their tartness cuts through the sweetness of the chocolates and adds a lovely pop of color to your presentation.
- Ice Cream: Want to take your dessert to the next level? Serve these chocolates alongside a scoop of vanilla or chocolate ice cream. The contrast in temperatures and textures will make each bite a heavenly experience!
These pairings not only enhance the deliciousness of your homemade chocolates, but they also make for a stunning presentation if you’re serving guests. So, get ready to impress and enjoy every moment of indulgence with your *valentines day chocolates*! Happy savoring!
Print
valentines day chocolates: 5 Ways to Spread Sweet Love
- Total Time: 2 hours 25 minutes
- Yield: 20 pieces 1x
- Diet: Vegetarian
Description
Delicious homemade chocolates perfect for Valentine’s Day.
Ingredients
- 200g dark chocolate
- 100g milk chocolate
- 50g butter
- 1 cup chopped nuts
- 1/2 cup dried fruit
- 1/4 cup powdered sugar
Instructions
- Melt dark and milk chocolate with butter in a double boiler.
- Add chopped nuts and dried fruit to the melted chocolate.
- Mix well until combined.
- Pour the mixture into a chocolate mold.
- Refrigerate for 2 hours until set.
- Remove from mold and dust with powdered sugar.
Notes
- Use your favorite nuts and dried fruits.
- Store chocolates in a cool place.
- Customize with different toppings if desired.
- Prep Time: 15 minutes
- Cook Time: 10 minutes
- Category: Dessert
- Method: Melt and mix
- Cuisine: American
Nutrition
- Serving Size: 1 piece
- Calories: 120
- Sugar: 10g
- Sodium: 5mg
- Fat: 8g
- Saturated Fat: 4g
- Unsaturated Fat: 3g
- Trans Fat: 0g
- Carbohydrates: 12g
- Fiber: 1g
- Protein: 2g
- Cholesterol: 10mg
Keywords: valentines day chocolates, homemade chocolates, chocolate recipe


