There’s something magical about making strawberry jam, don’t you think? It’s like capturing summer in a jar! This strawberry freezer jam recipe is my go-to for preserving those vibrant, juicy strawberries while keeping their fresh flavor intact. I still remember the first time I attempted to make jam. I was a bit nervous, but once those sweet strawberries mingled with sugar and lemon juice, I was hooked! The kitchen filled with this unbelievable aroma, and I knew I was onto something special. Trust me, if you’ve never made jam before, this simple no-cook method will have you feeling like a pro in no time!
Ingredients List
Gathering the right ingredients is crucial for this strawberry freezer jam recipe. Here’s what you need:
- 2 cups fresh strawberries, crushed: Make sure you pick ripe, sweet strawberries for the best flavor. They’re the star of the show!
- 2 cups granulated sugar: This sweetener balances the tartness of the strawberries and helps the jam set perfectly.
- 1/4 cup lemon juice: Freshly squeezed is best! It adds a zesty brightness and helps preserve the jam.
- 1 package (1.75 oz) fruit pectin: This magical ingredient is what helps your jam thicken and set up nicely.
With these simple ingredients, you’re well on your way to creating a delightful treat that captures the essence of summer in every spoonful!
How to Prepare Strawberry Freezer Jam Recipe
Now that we have our ingredients ready, it’s time to dive into the process! Making this strawberry freezer jam is super straightforward, and I promise you’ll feel a sense of accomplishment with each step. Let’s break it down!
Step 1: Prepare the Strawberries
First things first, let’s wash those lovely strawberries! Rinse them under cool water to remove any dirt, and then, using a clean cutting board, hull them by removing the green tops. Now, here comes the fun part: crush the strawberries! You can use a potato masher or even a fork for this. Just make sure they’re nicely crushed but not completely pureed. You want to keep some of that juicy texture. Trust me, ripe strawberries will make all the difference in flavor, so choose the best ones you can find!
Step 2: Combine Sugar and Strawberries
Next, add the granulated sugar to your crushed strawberries. This is where the magic starts to happen! Mix it all together well and let it sit for about 10 minutes. This waiting period allows the sugar to draw out the natural juices from the strawberries, creating a delicious syrup that will make your jam taste even better. Don’t skip this step; it’s key to achieving that burst of strawberry flavor!
Step 3: Make the Pectin Mixture
While your strawberries are sitting, grab a separate bowl and combine the lemon juice with the fruit pectin. This step is super easy, just stir them together until they’re mixed well. The lemon juice not only adds a bright flavor but also helps the pectin activate properly. And don’t worry, it’s a quick mix—no fancy techniques needed here!
Step 4: Combine Mixtures
Now, it’s time to bring everything together! Pour that pectin mixture into your strawberry and sugar mixture. Stir gently but thoroughly until everything is well combined. You’ll notice it starts to thicken a bit—that’s the pectin doing its job. Just make sure there are no lumps of pectin left; you want a nice, smooth consistency.
Step 5: Pour into Containers
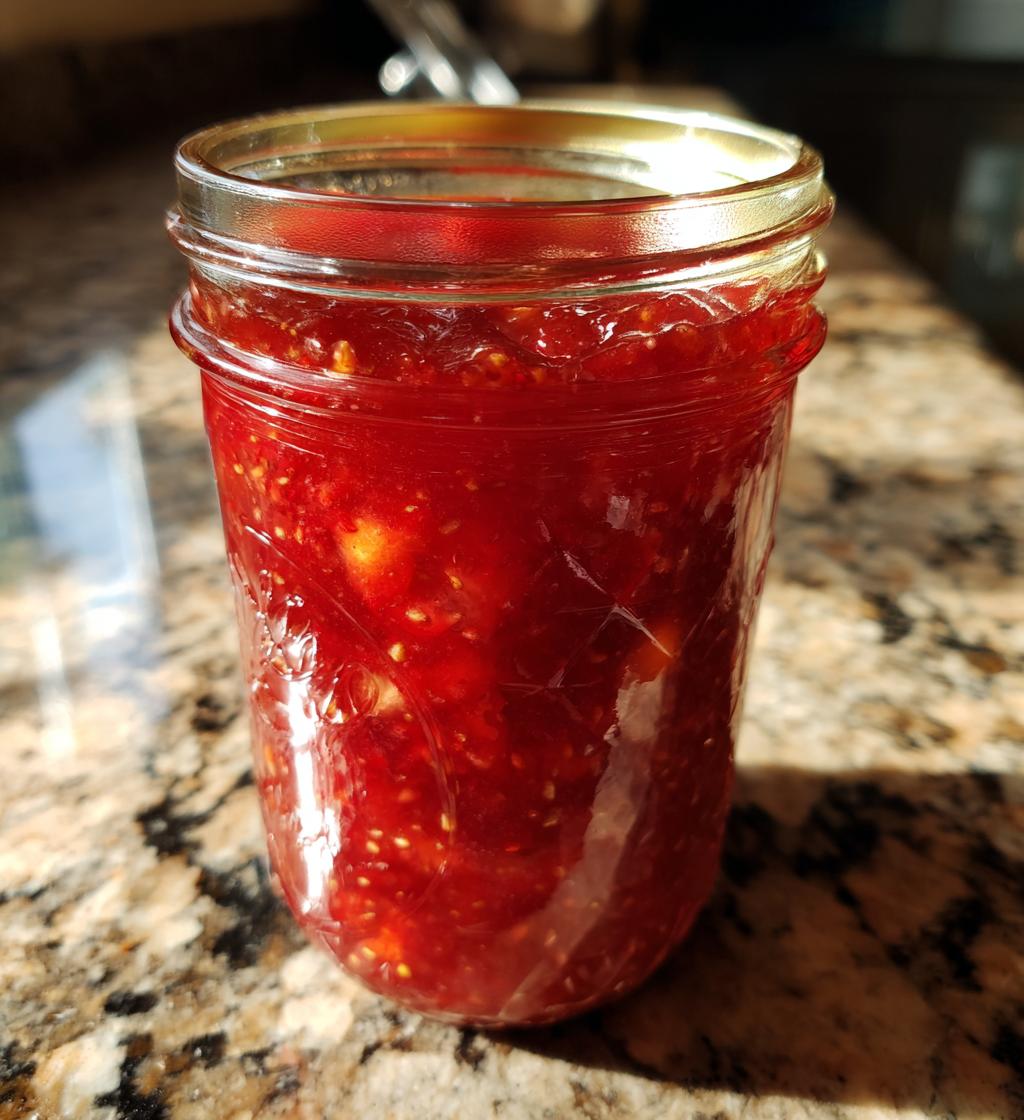
With our jam mixture ready, let’s get it into containers! I always use clean, freezer-safe jars or plastic containers. Carefully pour the jam into your chosen containers, leaving about half an inch of headspace at the top. This is super important because as the jam freezes, it needs room to expand. You don’t want any messy surprises!
Step 6: Let the Jam Set
Alright, now it’s time for the jam to set! Seal your containers with lids and let them sit at room temperature for about 24 hours. This is when the flavors meld beautifully, and the jam thickens up. It’s like a little waiting game, but trust me, it’s worth it!
Step 7: Freezing the Jam
After 24 hours, your jam should be perfectly set! Now, pop those containers into the freezer. You can store this delightful strawberry freezer jam for up to one year. Just remember to label them with the date so you know when you made them. When you’re ready to enjoy, just thaw the jam in the refrigerator overnight. It’ll be just as fresh and delicious as the day you made it!
How to Prepare Strawberry Freezer Jam Recipe
Now that we have our ingredients ready, it’s time to dive into the process! Making this strawberry freezer jam is super straightforward, and I promise you’ll feel a sense of accomplishment with each step. Let’s break it down!
Step 1: Prepare the Strawberries
First things first, let’s wash those lovely strawberries! Rinse them under cool water to remove any dirt, and then, using a clean cutting board, hull them by removing the green tops. Now, here comes the fun part: crush the strawberries! You can use a potato masher or even a fork for this. Just make sure they’re nicely crushed but not completely pureed. You want to keep some of that juicy texture. Trust me, ripe strawberries will make all the difference in flavor, so choose the best ones you can find!
Step 2: Combine Sugar and Strawberries
Next, add the granulated sugar to your crushed strawberries. This is where the magic starts to happen! Mix it all together well and let it sit for about 10 minutes. This waiting period allows the sugar to draw out the natural juices from the strawberries, creating a delicious syrup that will make your jam taste even better. Don’t skip this step; it’s key to achieving that burst of strawberry flavor!
Step 3: Make the Pectin Mixture
While your strawberries are sitting, grab a separate bowl and combine the lemon juice with the fruit pectin. This step is super easy, just stir them together until they’re mixed well. The lemon juice not only adds a bright flavor but also helps the pectin activate properly. And don’t worry, it’s a quick mix—no fancy techniques needed here!
Step 4: Combine Mixtures
Now, it’s time to bring everything together! Pour that pectin mixture into your strawberry and sugar mixture. Stir gently but thoroughly until everything is well combined. You’ll notice it starts to thicken a bit—that’s the pectin doing its job. Just make sure there are no lumps of pectin left; you want a nice, smooth consistency.
Step 5: Pour into Containers
With our jam mixture ready, let’s get it into containers! I always use clean, freezer-safe jars or plastic containers. Carefully pour the jam into your chosen containers, leaving about half an inch of headspace at the top. This is super important because as the jam freezes, it needs room to expand. You don’t want any messy surprises!
Step 6: Let the Jam Set
Alright, now it’s time for the jam to set! Seal your containers with lids and let them sit at room temperature for about 24 hours. This is when the flavors meld beautifully, and the jam thickens up. It’s like a little waiting game, but trust me, it’s worth it!
Step 7: Freezing the Jam
After 24 hours, your jam should be perfectly set! Now, pop those containers into the freezer. You can store this delightful strawberry freezer jam for up to one year. Just remember to label them with the date so you know when you made them. When you’re ready to enjoy, just thaw the jam in the refrigerator overnight. It’ll be just as fresh and delicious as the day you made it!
Frequently Asked Questions
Can I use other fruits for jam?
Absolutely! One of the best things about freezer jam is its versatility. You can easily swap out strawberries for other fruits like raspberries, blueberries, or even peaches. Just make sure to adjust the sugar and pectin levels according to the fruit’s sweetness and natural pectin content. For instance, blueberries might need a little more sugar since they can be less sweet than strawberries. Feel free to experiment and create your own delightful flavor combinations!
How long does strawberry freezer jam last?
When stored properly in the freezer, your strawberry freezer jam will last up to one year! Just make sure to use freezer-safe containers or jars to prevent freezer burn. Once you thaw it, it’s best to use the jam within a few weeks. Trust me, it’s hard to resist once you taste that fresh strawberry goodness!
Can I can this jam instead of freezing it?
Yes, you can! While this recipe is designed for freezing, if you prefer canning, you can adapt it. Just follow the proper canning guidelines, which include sterilizing your jars and processing them in a boiling water bath for the recommended time. Keep in mind that the texture might differ a bit since freezer jam tends to be chunkier. But oh, the satisfaction of hearing those jars pop as they seal is totally worth it!
Why You’ll Love This Strawberry Freezer Jam Recipe
This strawberry freezer jam recipe has so many wonderful benefits that make it a must-try! Here are just a few reasons why you’ll fall in love with it:
- Easy to Make: With just a few simple steps and no cooking required, you can whip up this jam in no time!
- Fresh Taste: Using ripe strawberries means you’re capturing that delicious, fresh flavor that reminds you of summer.
- No Cooking Required: This no-cook method preserves all the nutrients and vibrant color of the strawberries, making your jam not only tasty but also healthy!
- Quick Set Time: The jam sets at room temperature in just 24 hours, so you won’t be waiting forever to enjoy your creation.
- Versatile: Feel free to experiment with other fruits or add spices like cinnamon for a unique twist!
- Perfect for Gifting: Homemade jam makes a wonderful gift! Just pop it in a cute jar, and you’ve got a heartfelt present for friends and family.
Once you try it, I promise you’ll want to make this strawberry freezer jam recipe every summer! It’s a delightful treat that brings a little sunshine into your kitchen all year long.
Tips for Success with Strawberry Freezer Jam Recipe
Making strawberry freezer jam is a delightful adventure, but just like any recipe, there are a few pro tips to help you achieve the best results. Trust me, these will make your jam sing with flavor and texture!
Choose the Ripest Berries
The most important tip I can give you is to select the ripest, sweetest strawberries you can find. Look for berries that are deep red and fragrant. Overripe strawberries can be mushy and not hold their shape, while underripe ones will lack that rich sweetness. When you bite into your jam later, you want that burst of flavor to remind you of a summer day!
Measure Accurately
Precision is key, especially when it comes to sugar and pectin. Use a kitchen scale if you have one, or make sure you’re using dry measuring cups for the sugar. Too much sugar can lead to overly sweet jam, while too little might affect the setting process. Consistency is everything!
Mix Gently but Thoroughly
When combining your strawberry mixture with the pectin, be gentle yet thorough. You want to avoid lumps of pectin, which can result in uneven texture. Stir until everything is well blended, but don’t overmix—just enough to combine is perfect!
Let It Rest
Don’t rush the waiting periods. Letting the strawberries sit with the sugar for those 10 minutes helps develop the syrupy goodness that makes your jam so delicious. Similarly, allowing the jam to set for 24 hours at room temperature is crucial for proper thickening. Patience will reward you with the best flavor!
Use Freezer-Safe Containers
Always opt for containers that are specifically labeled as freezer-safe. This will prevent freezer burn and keep your jam fresh for longer. Glass jars are great, but make sure to leave headspace at the top to allow for expansion. Nobody wants a jam explosion in their freezer!
Label and Date Your Jars
As you’re filling your containers, take a moment to label and date them. It’s a simple step that helps you keep track of how long they’ve been in the freezer. You’d be surprised how quickly time flies, and you’ll want to enjoy that fresh strawberry taste before it’s too late!
With these tips in your back pocket, you’re all set to make the most incredible strawberry freezer jam! It’s all about using quality ingredients and following the process, and soon enough, you’ll be savoring your very own jars of sunshine.
Nutritional Information Section
Understanding the nutritional values of what you’re making is always helpful, especially when it comes to delicious treats like this strawberry freezer jam. Here’s a typical estimate of the nutritional values based on a serving size of 1 tablespoon:
- Calories: 50
- Sugar: 13g
- Fat: 0g
- Saturated Fat: 0g
- Unsaturated Fat: 0g
- Trans Fat: 0g
- Carbohydrates: 13g
- Fiber: 0g
- Protein: 0g
- Cholesterol: 0mg
- Sodium: 0mg
Keep in mind that these values are estimates and can vary based on the specific ingredients you use. But knowing that you’re enjoying a treat made from fresh strawberries and simple ingredients makes it even sweeter, don’t you think?
Storage & Reheating Instructions
Storing your homemade strawberry freezer jam is super simple, and I want to make sure you get the most out of your delicious creation! Here’s how to keep it fresh and ready to enjoy whenever you crave that sweet strawberry goodness.
First off, once your jam is set and securely sealed in containers, pop those beauties straight into the freezer. They can last for up to one year, which is fantastic for enjoying that summer flavor all year long! Just be sure to use containers that are labeled as freezer-safe—trust me, it makes a huge difference in preventing freezer burn.
When you’re ready to indulge in your strawberry jam, simply take out the container you want to use and transfer it to the refrigerator. Thawing in the fridge is the best method because it keeps the jam at a safe temperature while it melts. Allow it to sit in the refrigerator overnight, and you’ll have a perfectly spreadable treat by morning!
If you’re in a hurry, you can also let it sit at room temperature for a couple of hours, but I recommend the fridge method for the best flavor and texture. Once thawed, give it a gentle stir before using to mix any separated liquid.
And don’t forget to enjoy your jam within a few weeks after thawing for the best taste. You can spread it on toast, swirl it into yogurt, or even use it to top off pancakes! Whatever you choose, I promise it’ll be a delightful experience!
Share Your Experience
I absolutely love hearing from you after you try this strawberry freezer jam recipe! Your thoughts and experiences mean the world to me. Did you have a blast making it? Maybe you added your own twist with a different fruit? Whatever it is, I encourage you to leave a comment below and share your story!
If you found the jam as delightful as I do, please consider rating the recipe! Your feedback helps me create more delicious treats that you’ll love. Let’s keep the conversation going about all things jam! I can’t wait to read about your kitchen adventures!
Print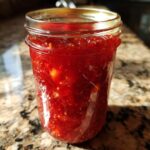
strawberry freezer jam recipe: 7 Steps to Pure Delight
- Total Time: 24 hours
- Yield: 4 cups 1x
- Diet: Vegetarian
Description
This strawberry freezer jam recipe is a simple way to preserve fresh strawberries while keeping their flavor intact.
Ingredients
- 2 cups fresh strawberries, crushed
- 2 cups granulated sugar
- 1/4 cup lemon juice
- 1 package (1.75 oz) fruit pectin
Instructions
- Prepare the strawberries by washing and crushing them in a bowl.
- Add sugar to the crushed strawberries and mix well. Let sit for 10 minutes.
- In a separate bowl, combine lemon juice and fruit pectin.
- Stir the pectin mixture into the strawberry mixture until well combined.
- Pour the jam into clean containers, leaving some headspace.
- Seal the containers and let them sit at room temperature for 24 hours to set.
- Store in the freezer for up to one year.
Notes
- Use ripe strawberries for the best flavor.
- Containers should be freezer-safe.
- Thaw in the refrigerator before using.
- Prep Time: 15 minutes
- Cook Time: 0 minutes
- Category: Dessert
- Method: No-Cook
- Cuisine: American
Nutrition
- Serving Size: 1 tablespoon
- Calories: 50
- Sugar: 13g
- Sodium: 0mg
- Fat: 0g
- Saturated Fat: 0g
- Unsaturated Fat: 0g
- Trans Fat: 0g
- Carbohydrates: 13g
- Fiber: 0g
- Protein: 0g
- Cholesterol: 0mg
Keywords: strawberry freezer jam recipe


