There’s something truly magical about the aroma of freshly baked sourdough sandwich bread wafting through the house. It’s like a warm hug for your senses! This recipe is so simple yet delivers a loaf that’s soft, flavorful, and utterly satisfying. I still remember the first time I baked bread at home; I was a nervous wreck! But as I pulled that golden-brown beauty from the oven, I felt a rush of pride and joy that I’d created something so special. The crust crackles, the inside is pillowy soft, and the flavor? Oh boy, it’s a game changer for sandwiches! Trust me, once you’ve tasted homemade sourdough, you’ll never want to go back to the store-bought stuff. Let’s get baking!
Ingredients List
Let’s gather the ingredients that will bring this lovely sourdough sandwich bread to life! You’ll want to start with:
- 500g bread flour: This is the backbone of your loaf, giving it that perfect structure. I always opt for high-protein bread flour for the best rise!
- 350ml water: Use lukewarm water to help awaken your sourdough starter. It should feel just slightly warm to the touch, like a cozy bath.
- 100g sourdough starter: Make sure your starter is active and bubbly! Feed it a few hours before baking to ensure it’s ready to work its magic.
- 10g salt: This not only enhances the flavor but also strengthens the dough. I like to use sea salt for a little extra taste.
Having these ingredients ready to go will set you on the path to baking some truly delightful bread! Remember, precise measurements are key, so I always use a kitchen scale to keep everything spot on.
How to Prepare Sourdough Sandwich Bread
Let’s dive into the wonderful world of sourdough sandwich bread! This step-by-step guide will help you create a loaf that’s soft and flavorful. Don’t worry if it feels overwhelming; I promise it’s easier than it sounds!
Step 1: Mixing the Dough
First things first, grab a large mixing bowl and combine your 500g of bread flour with 350ml of lukewarm water. Use a spatula or your hands to mix them together until you’ve got a shaggy dough that’s just combined. You’re looking for a texture that’s a little rough around the edges but holds together. No need to overthink it right now! Just make sure there are no dry bits of flour left hanging out.
Step 2: Adding the Starter and Kneading
Now, it’s time to add the magic: your 100g of active sourdough starter and 10g of salt. I like to sprinkle the salt over the dough for even distribution. Then, knead the dough on a clean, lightly floured surface. You can do this by folding it over itself and pushing it down with the heel of your hand. Keep kneading for about 10 minutes until it feels smooth and elastic. You’ll know it’s ready when it springs back when poked, and it’s a joy to work with!
Step 3: First Rise
Time to let the dough do its thing! Place it in a greased bowl, cover it with a damp cloth or plastic wrap, and leave it to rise at room temperature for about 4-6 hours. You want it to double in size, so find a warm spot in your kitchen. If it’s cool, you might want to preheat your oven to the lowest setting for a minute, then turn it off and let the dough rise inside. It’ll love the warm environment!
Step 4: Shaping the Dough
Once your dough has risen beautifully, it’s time to shape it! Gently turn it out onto a floured surface. Flatten it slightly into a rectangle, then fold the edges towards the center and roll it up tightly, like a burrito. Pinch the seams to seal. This shaping helps create surface tension, which is key for a good rise in the oven. Place this lovely loaf seam-side down in your greased loaf pan.
Step 5: Second Rise
Cover your loaf again and let it rise for another 2-3 hours. During this time, you’ll want to keep an eye on it. You’re looking for it to puff up nicely, filling the pan and rising above the edges slightly. It’s so satisfying to watch it grow!
Step 6: Preheating and Baking
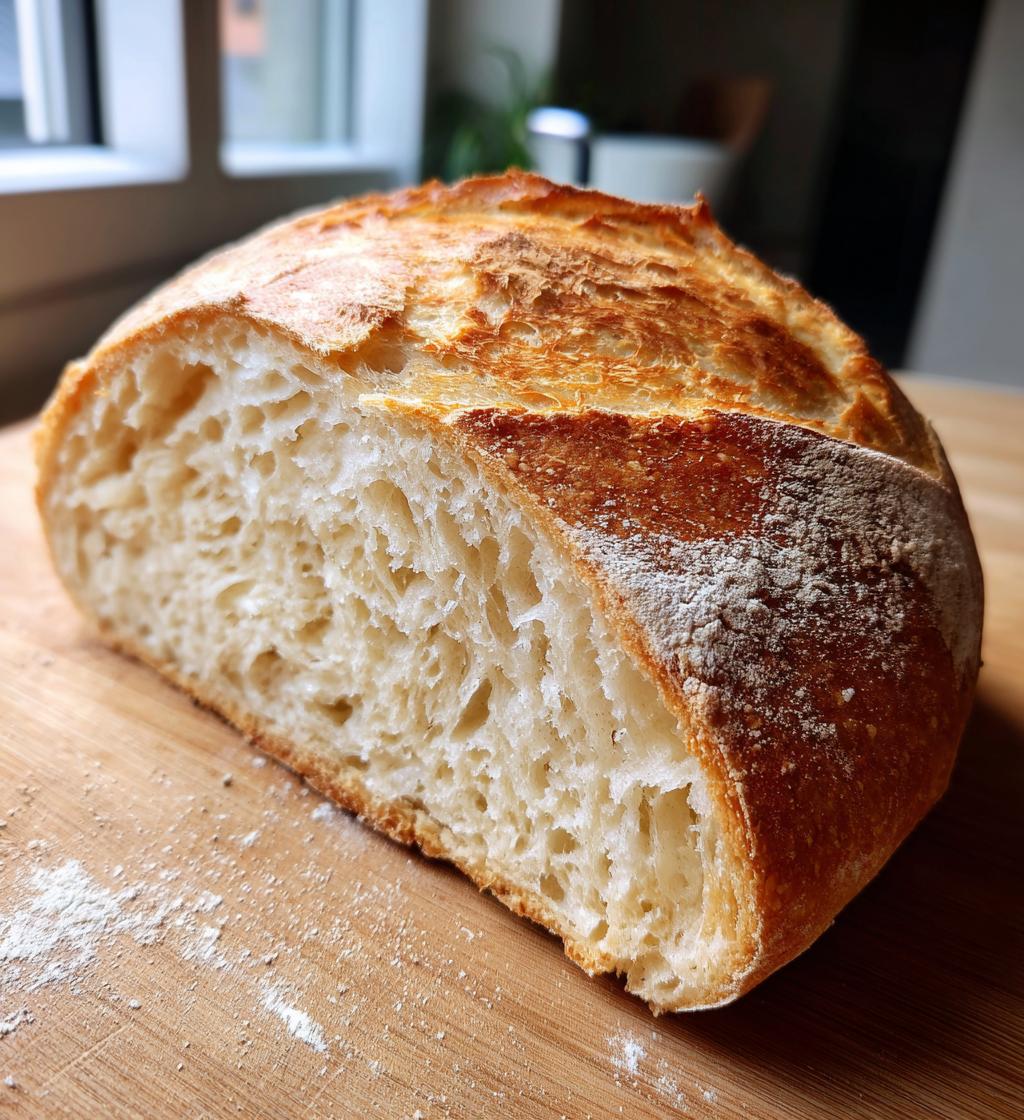
Preheat your oven to 220°C (430°F) while your dough is finishing its second rise. Once it’s ready, pop that loaf in the oven and bake for 30-35 minutes. You want it to turn a lovely golden brown, and the best part? When you tap the bottom of the loaf, it should sound hollow. That’s music to my ears! Once it’s done, let it cool completely on a wire rack before slicing. Patience is key here, but trust me, that first slice will be worth every minute!
Tips for Success
To ensure your sourdough sandwich bread turns out perfectly every time, I’ve got some handy tips for you! First, invest in a good kitchen scale. Trust me, measuring your ingredients by weight is way more accurate than cups, and it makes a huge difference in your bread’s texture.
Next, always check your sourdough starter before using it. It should be bubbly and active, like it’s ready for a party! If it’s been a while since you’ve fed it, give it a good refresh a few hours beforehand to ensure it has the strength to raise your dough.
Finally, don’t rush the rising times. Letting your dough rise until it has doubled in size is key to a light and airy loaf. The magic happens when you give it the time it needs to develop flavor and structure. Happy baking!
Nutritional Information
Here’s a quick look at the nutritional values for each slice of this delightful sourdough sandwich bread. Keep in mind these are estimates, but they give you a good idea of what you’re enjoying:
- Calories: 120
- Fat: 1g
- Protein: 4g
- Carbohydrates: 24g
- Sodium: 200mg
- Fiber: 1g
- Sugar: 0g
This bread is not only delicious but offers a wholesome option for your sandwiches. Enjoy every bite knowing it’s made with love and care!
FAQ Section
What can I use if I don’t have a sourdough starter?
If you don’t have a sourdough starter, no worries! You can use a store-bought yeast to make a quick bread. Just mix around 7g (or 2 ¼ teaspoons) of instant yeast with your flour, and adjust the water slightly, as you won’t need the additional hydration that comes from a starter. This will give you that lovely rise and a nice texture, but keep in mind, it won’t have that distinctive tangy flavor that sourdough brings. If you want to try making your own starter, it’s a fun project! Just combine equal parts flour and water, let it sit, and feed it daily until it’s bubbly and active!
How do I know when my bread is done?
Knowing when your sourdough sandwich bread is done can be a bit tricky, but there are a few signs to look out for! First, the crust should be a beautiful golden brown, and when you tap the bottom of the loaf, it should sound hollow. This hollow sound is like music to a baker’s ears! Also, you can use an instant-read thermometer to check the internal temperature; it should read about 90°C (190°F) when fully baked. Lastly, if it feels firm and springs back when you press it gently, it’s ready to come out!
Can I freeze sourdough sandwich bread?
Absolutely! Freezing sourdough sandwich bread is a fantastic way to keep it fresh for later. Once your bread has cooled completely, wrap it tightly in plastic wrap, then place it in a resealable freezer bag. This double layer helps prevent freezer burn. When you’re ready to enjoy it, simply take it out and let it thaw at room temperature or pop it in the toaster for a quick warm-up. You’ll love having fresh bread on hand whenever the craving strikes!
Why You’ll Love This Recipe
This sourdough sandwich bread recipe brings so many wonderful benefits to your kitchen! Here’s why you’ll absolutely adore it:
- Soft and Tasty: This bread is incredibly soft, making it perfect for sandwiches, toast, or just enjoying with a little butter. Each slice is packed with flavor that store-bought bread just can’t compete with!
- Healthier Option: With simple, wholesome ingredients and no preservatives, this homemade bread is a healthier choice for you and your family. You know exactly what’s going into it!
- Fun to Make: Baking sourdough is such a rewarding experience! You’ll find joy in the process, from mixing the ingredients to watching the dough rise and transforming into a beautiful loaf.
- Versatile: Whether you’re making classic sandwiches, French toast, or savory toast toppings, this bread adapts beautifully to whatever you’re craving!
Trust me, once you’ve made this sourdough sandwich bread at home, you’ll wonder how you ever lived without it!
Print
Sourdough Sandwich Bread: 5 Steps to Pure Bliss
- Total Time: 5 hours 5 minutes
- Yield: 1 loaf 1x
- Diet: Vegetarian
Description
A simple recipe for making sourdough sandwich bread that is soft and flavorful.
Ingredients
- 500g bread flour
- 350ml water
- 100g sourdough starter
- 10g salt
Instructions
- Mix the flour and water in a bowl until combined.
- Add the sourdough starter and salt, and knead the dough until smooth.
- Let the dough rise for 4-6 hours at room temperature.
- Shape the dough and place it in a loaf pan.
- Let it rise again for 2-3 hours.
- Preheat the oven to 220°C (430°F).
- Bake for 30-35 minutes or until golden brown.
Notes
- Use a kitchen scale for accurate measurements.
- Ensure your sourdough starter is active.
- Let the bread cool completely before slicing.
- Prep Time: 30 minutes
- Cook Time: 35 minutes
- Category: Bread
- Method: Baking
- Cuisine: American
Nutrition
- Serving Size: 1 slice
- Calories: 120
- Sugar: 0g
- Sodium: 200mg
- Fat: 1g
- Saturated Fat: 0g
- Unsaturated Fat: 0g
- Trans Fat: 0g
- Carbohydrates: 24g
- Fiber: 1g
- Protein: 4g
- Cholesterol: 0mg
Keywords: sourdough sandwich bread, homemade bread, baking bread


