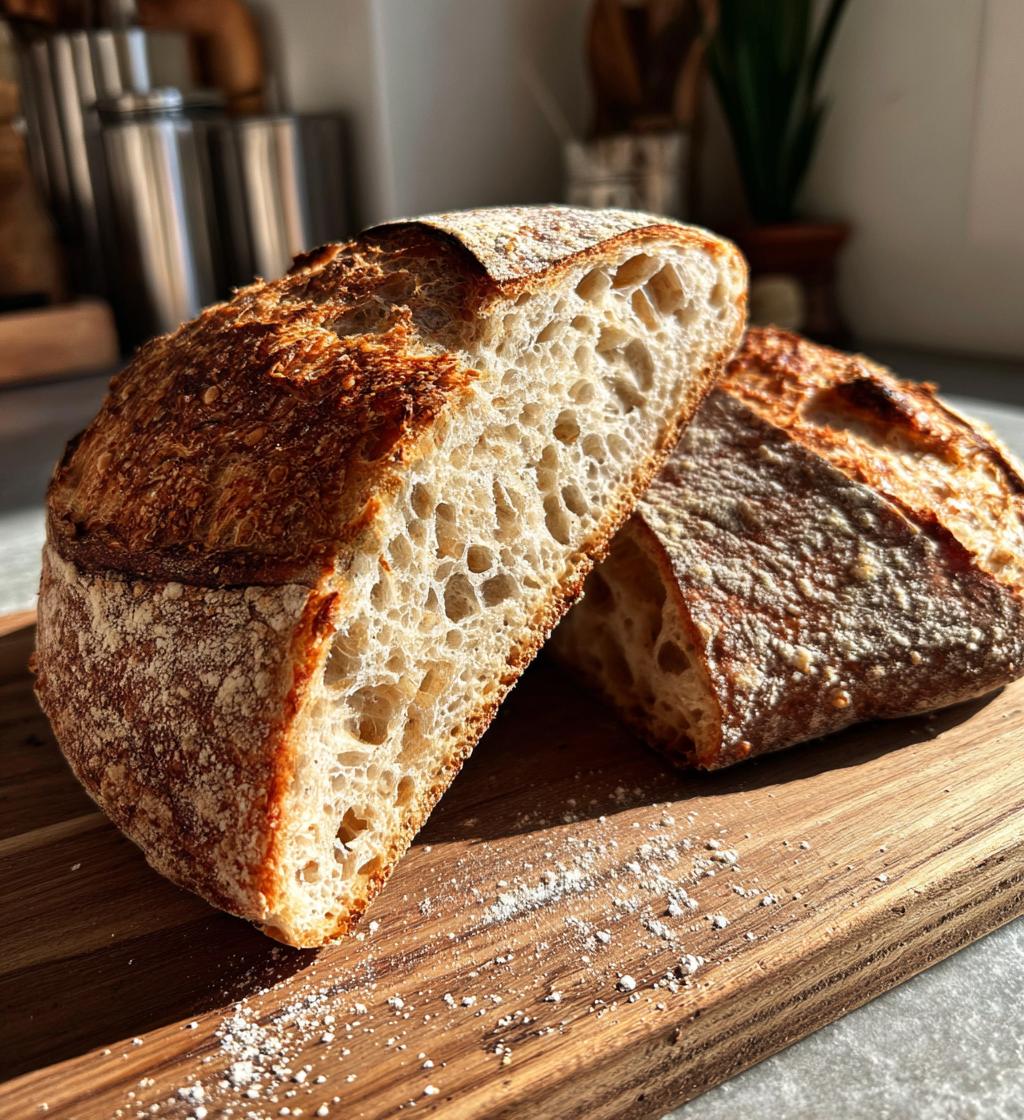
There’s something truly magical about baking sourdough bread at home. The process is not just about mixing flour and water; it’s a labor of love that transforms simple ingredients into a crusty, golden loaf that fills your kitchen with that irresistible aroma. This sourdough bread recipe is incredibly simple, and trust me, once you get the hang of it, you’ll find yourself baking it on repeat! I still remember the first time I pulled a loaf from the oven – I was practically dancing around the kitchen, it was so perfect! The crust was crispy, and the inside was soft and airy, just like I hoped it would be. It’s a recipe that anyone can master, no fancy gadgets needed. So, grab your ingredients, and let’s create something delicious together!
There’s something truly magical about baking sourdough bread at home. The process is not just about mixing flour and water; it’s a labor of love that transforms simple ingredients into a crusty, golden loaf that fills your kitchen with that irresistible aroma. This sourdough bread recipe is incredibly simple, and trust me, once you get the hang of it, you’ll find yourself baking it on repeat! I still remember the first time I pulled a loaf from the oven – I was practically dancing around the kitchen, it was so perfect! The crust was crispy, and the inside was soft and airy, just like I hoped it would be. It’s a recipe that anyone can master, no fancy gadgets needed. So, grab your ingredients, and let’s create something delicious together!
Ingredients List
- 500g bread flour (measured using a kitchen scale for accuracy)
- 350ml water (room temperature, to help activate the starter)
- 100g sourdough starter (active and bubbly for best results)
- 10g salt (fine sea salt, enhances flavor and strengthens the dough)
How to Prepare Sourdough Bread
Getting started with sourdough bread is an exciting journey, and I promise you’ll love the process! Let’s break it down step by step, so you feel confident every inch of the way. This isn’t just following a recipe; it’s about connecting with your ingredients and creating something truly special.
Step 1: Combine Flour and Water
First things first, grab your bowl and mix together the bread flour and water. It’s important to incorporate these two ingredients thoroughly before adding anything else. This step creates a dry mixture that will help to develop the gluten structure in the dough. Just use your hands (it’s fun!) or a sturdy spoon to get everything well combined. You want a shaggy, sticky texture—don’t worry; that’s just part of the magic!
Step 2: Incorporate Sourdough Starter
Next, it’s time to add your sourdough starter. Make sure it’s active and bubbly—this will give your bread that fantastic rise and flavor. Mix it in really well, using your hands or a spatula to ensure it’s evenly distributed throughout the dough. You should be able to see little flecks of starter throughout the mixture. This step is crucial, so take your time and enjoy the process!
Step 3: Add Salt and Knead the Dough
Now, sprinkle in the salt and get ready to knead! Kneading is where the dough truly transforms. You’ll want to knead for about 10 minutes, folding and pressing the dough until it becomes smooth and elastic. It should feel soft and slightly tacky but not overly sticky. If it sticks to your hands too much, just a sprinkle of flour can help. This is your workout for the day, so embrace it!
Step 4: First Rise
Once kneaded, it’s time for the dough to rise! Place it in a lightly greased bowl, cover it with a cloth, and let it rise at room temperature for about 4 hours. You’re looking for it to double in size—this is when the magic really happens! Remember, your kitchen’s temperature can affect the timing, so keep an eye on it. If it’s a warmer day, it might rise faster!
Step 5: Shape the Dough
After your dough has risen, it’s time to shape it! Lightly flour your work surface and gently turn out the dough. You want to handle it gently to keep all that lovely air inside. Shape it into a round or oval, depending on your proofing basket. Speaking of proofing baskets, they help support the dough’s shape and create those beautiful patterns on the crust. If you don’t have one, a bowl lined with a floured cloth works just fine!
Step 6: Second Proofing
Now, let your shaped dough proof for another 2 hours. This second rise is crucial—it enhances the texture and flavor of your bread. You want it to puff up a bit, but it doesn’t need to double in size like the first rise. This is the perfect time to clean up your kitchen and get excited for the next steps!
Step 7: Preheat the Oven
About 30 minutes before you’re ready to bake, preheat your oven to 230°C (450°F). Preheating is vital because it helps form that gorgeous crust as soon as the dough hits the hot oven. If you have a baking stone or Dutch oven, pop it in there to heat up too—this will help create that lovely steam environment for your bread.
Step 8: Baking the Bread
When the oven is ready, carefully transfer your dough onto a baking sheet or into your preheated Dutch oven. If you want to get fancy, score the top with a sharp knife or a bread lame. This lets the steam escape as it bakes, creating a beautiful crust. Bake for about 30 minutes, and keep an eye on it! The bread should turn a golden brown and sound hollow when tapped on the bottom. That’s your cue!
Step 9: Cool and Slice
Once baked, it’s tempting to slice right in, but hold your horses! Let the bread cool on a wire rack for at least 30 minutes before slicing. Cooling is crucial as it allows the crumb to set properly. If you slice too early, you might end up with a gummy interior. Trust me, the wait is worth it!
Tips for Success
Making sourdough bread is a delightful adventure, but there are a few tips that can really set you up for success! First off, using a kitchen scale for measuring ingredients is a game changer. It ensures accuracy, which is crucial for bread-making. If your dough feels too sticky during kneading, don’t hesitate to add a little more flour—but just a bit at a time! Remember, humidity can affect your dough, so adjust the water accordingly based on the weather.
Don’t rush the rising times; good bread takes time! If your kitchen is cool, it might take longer for the dough to double in size. Just be patient and trust the process. Lastly, if you find your crust is getting too dark before the bread is fully baked, cover it lightly with aluminum foil to protect it. With these tips in your back pocket, you’ll be well on your way to a beautiful homemade sourdough loaf!
Nutritional Information
Just a quick note before we dive into the numbers: nutritional values can vary based on the specific ingredients and brands you choose, so keep that in mind! For a typical slice of homemade sourdough bread, you’re looking at approximately:
- Calories: 200
- Fat: 1g
- Protein: 7g
- Carbohydrates: 40g
- Fiber: 2g
- Sodium: 200mg
- Sugar: 0g
This is a great balance of nutrients, making sourdough not just a delicious treat but also a satisfying option for your meals!
FAQ About Sourdough Bread
Making sourdough bread can raise a lot of questions, especially if you’re new to the process. But don’t worry, I’ve got you covered with some of the most common queries!
Can I use regular yeast instead of sourdough starter?
While you can use regular yeast, the flavor and texture will differ significantly. Sourdough starter not only helps the bread rise but also adds that unique tangy flavor we all love. If you’re looking for a classic sourdough experience, stick with the starter!
How do I know if my sourdough starter is ready to use?
Your sourdough starter should be bubbly, have doubled in size, and have a pleasant, slightly sour smell. If it’s active and ready, it will pass the “float test” – drop a small spoonful in water, and if it floats, you’re good to go!
What should I do if my dough is too sticky?
Don’t panic! Sticky dough can happen for various reasons, like humidity or too much water. If you find it difficult to handle, sprinkle a little flour on your work surface and your hands as you knead. Just be careful not to add too much flour; you want that lovely, moist texture!
Can I make sourdough bread without a Dutch oven?
Absolutely! If you don’t have a Dutch oven, you can use a baking sheet or any oven-safe pot. The key is to create steam while baking, so you can place a shallow pan with water in the oven to help achieve that crunchy crust!
How do I store leftover sourdough bread?
To keep your sourdough fresh, store it in a paper bag at room temperature. Avoid plastic, as it traps moisture and can make the crust soggy. If you want to keep it longer, slice it and freeze it in an airtight container. Just toast it straight from the freezer when you’re ready to enjoy!
Serving Suggestions
Now that you’ve mastered the art of sourdough bread, let’s talk about the delightful ways to enjoy it! This bread is incredibly versatile and pairs beautifully with so many dishes. For a cozy meal, slice it up and serve it alongside a hearty soup—think creamy tomato or a warming potato leek. It’s also fantastic with a fresh salad, adding that perfect crunch and texture to your greens.
If you’re in the mood for something lighter, try spreading a layer of creamy butter and your favorite jam on a warm slice. Or, go savory with avocado and a sprinkle of salt; it’s a match made in heaven! The possibilities are endless, so get creative!
Storage & Reheating Instructions
To keep your sourdough bread fresh and delicious, store it in a paper bag at room temperature. The paper bag allows the bread to breathe, ensuring the crust stays crispy without becoming soggy. Avoid plastic bags, as they can trap moisture and ruin that lovely texture.
If you have leftovers and want to keep the bread longer, slice it and freeze it in an airtight container. When you’re ready to enjoy a slice, simply toast it straight from the freezer. This method brings back that warm, crusty goodness that makes sourdough so special!
Print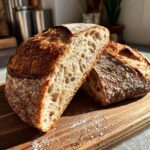
Sourdough Bread: 9 Steps to Baking Bliss at Home
- Total Time: 5 hours
- Yield: 1 loaf 1x
- Diet: Vegetarian
Description
A simple recipe for homemade sourdough bread.
Ingredients
- 500g bread flour
- 350ml water
- 100g sourdough starter
- 10g salt
Instructions
- Combine flour and water in a bowl.
- Add the sourdough starter and mix well.
- Add salt and knead the dough for 10 minutes.
- Let the dough rise for 4 hours at room temperature.
- Shape the dough and place it in a proofing basket.
- Let it proof for another 2 hours.
- Preheat the oven to 230°C (450°F).
- Bake the bread for 30 minutes.
- Cool the bread on a wire rack before slicing.
Notes
- Use a kitchen scale for accuracy.
- Adjust water depending on humidity.
- Store bread in a paper bag for freshness.
- Prep Time: 30 minutes
- Cook Time: 30 minutes
- Category: Bread
- Method: Baking
- Cuisine: American
Nutrition
- Serving Size: 1 slice
- Calories: 200
- Sugar: 0g
- Sodium: 200mg
- Fat: 1g
- Saturated Fat: 0g
- Unsaturated Fat: 0g
- Trans Fat: 0g
- Carbohydrates: 40g
- Fiber: 2g
- Protein: 7g
- Cholesterol: 0mg
Keywords: sourdough bread, homemade bread, artisan bread


