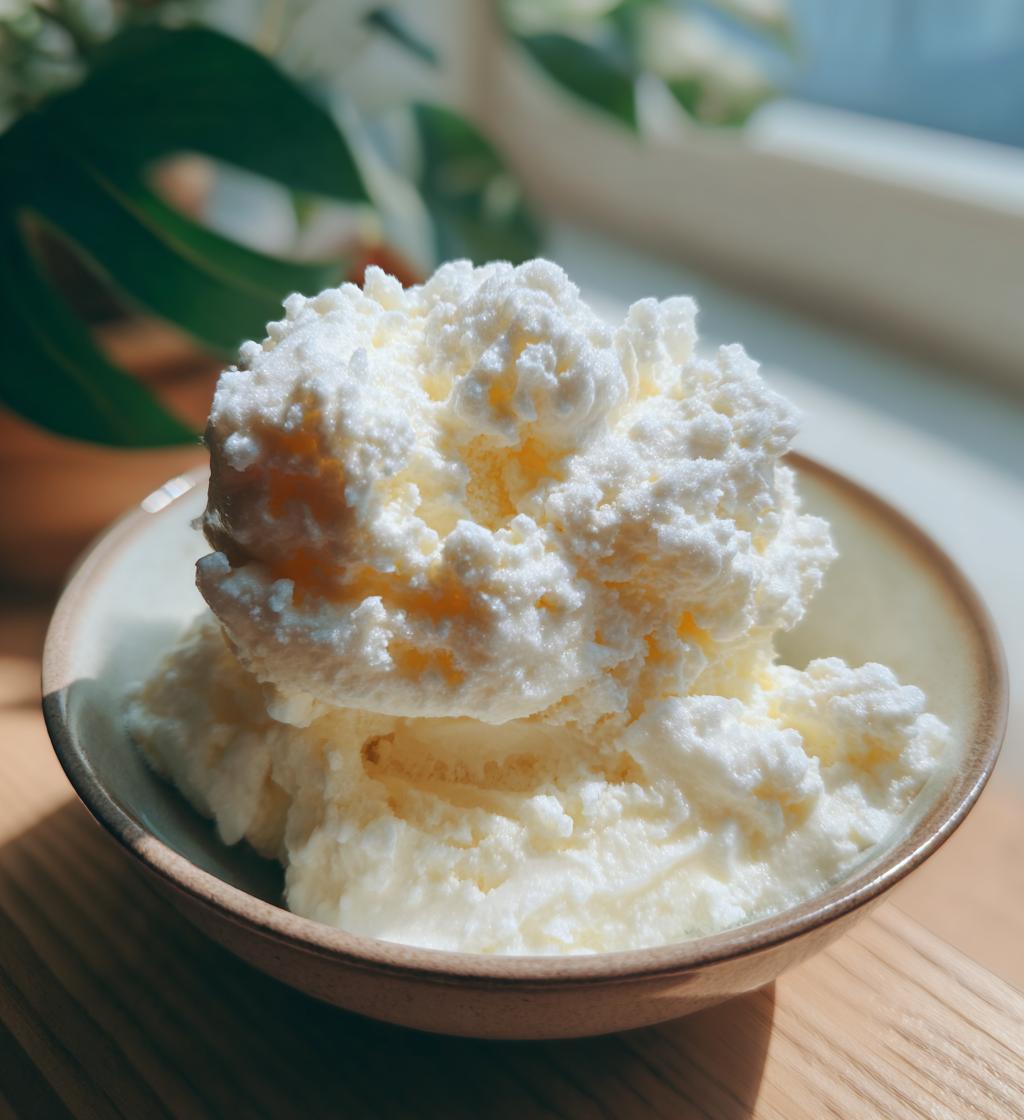
Ah, winter! There’s just something magical about those fluffy white flakes falling from the sky, isn’t there? When I was a kid, I couldn’t wait to rush outside the moment the first snow hit the ground. One of my absolute favorite winter traditions was making *snow ice cream*. It’s such a fun and unique treat that turns ordinary snow into a creamy, dreamy dessert! All you need are a few simple ingredients, and you’re on your way to a delightful winter indulgence. Seriously, you’ll be amazed at how easy this recipe is—just gather fresh snow, mix it with milk, sugar, and a splash of vanilla, and voilà! You have a deliciously sweet, cold treat that’s perfect for the season. Trust me, this is one recipe that’ll bring back those joyful childhood memories and create new ones with your loved ones. Let’s dive into how to make this winter wonder!
Ingredients List
To whip up your very own *snow ice cream*, you’ll need just a handful of simple ingredients. Here’s what you’ll need:
- 4 cups fresh snow – Make sure it’s clean and white!
- 1 cup milk – Whole milk works best for creaminess, but feel free to use your favorite alternative.
- 1/2 cup sugar – Adjust based on your sweetness preference.
- 1 teaspoon vanilla extract – This adds a lovely flavor, trust me!
That’s it! Just four ingredients, and you’re on your way to a delightful winter treat that’ll warm your heart and cool you down at the same time!
How to Prepare *Snow Ice Cream*
Making *snow ice cream* is a breeze, and it’s a fantastic way to enjoy the snowy weather! Follow these simple steps, and you’ll have a delicious treat ready in no time. Let’s get started!
Step-by-Step Instructions
- Collect the snow: Head outside and gather 4 cups of fresh, clean snow in a large bowl. Make sure the snow is white and fluffy—avoid any yellow or discolored patches! This should take about 5 minutes, depending on how quickly you can scoop it up.
- Mix the ingredients: In a separate bowl, combine 1 cup of milk, 1/2 cup of sugar, and 1 teaspoon of vanilla extract. Stir well until the sugar dissolves completely. This should take about 1-2 minutes. You want a smooth mixture, so keep stirring!
- Combine the two: Gently pour the milk mixture over the collected snow. Take your time here—this is where the magic happens! Using a spatula or a large spoon, stir gently until everything is combined. You want to avoid smashing the snow too much, so be gentle. This should only take about 1-2 minutes.
- Serve immediately: Once it’s well mixed, scoop your *snow ice cream* into bowls or cups. Trust me, it’s best enjoyed fresh, right away! This final step is super quick—just a minute or two to get everything served up.
And there you have it! Your very own *snow ice cream* is ready to be devoured. Enjoy this delightful winter treat, and don’t forget to share it with your family and friends!
Why You’ll Love This Recipe
- Quick and Easy: You can whip up *snow ice cream* in just 10 minutes! Perfect for those spontaneous winter days.
- Minimal Ingredients: With only four simple ingredients, you won’t need to make a special trip to the store. Just head outside for the main one!
- Fun for All Ages: Making this treat is a delightful activity for kids and adults alike. It’s a great way to enjoy the snow together!
- Refreshing and Unique: There’s nothing quite like the experience of eating snow ice cream. It’s a one-of-a-kind winter dessert that’s sure to impress.
- Customizable: Feel free to adjust the sweetness or mix in your favorite flavors! A sprinkle of cocoa powder or some fruit can make it your own.
- Perfect for Sharing: This recipe yields four servings, making it a great treat to share with family and friends on a snowy day.
- Nostalgic Experience: It’ll transport you back to childhood memories of playing in the snow and enjoying simple pleasures with loved ones.
Tips for Success
Getting the best results with your *snow ice cream* is all about those little details! Here are a few tips to ensure your winter treat is a hit:
- Choose the Right Snow: Make sure to gather fresh, clean snow. Look for snow that’s fluffy and white—if it’s been sitting outside for a while or has any discoloration, skip it! You want the purest snow for the best flavor.
- Adjust Sweetness to Taste: Everyone’s sweet tooth is different! Start with the 1/2 cup of sugar, but feel free to taste the mixture and add a bit more if you like it sweeter. You can even experiment with alternative sweeteners if you prefer.
- Mix Carefully: When combining the milk mixture with the snow, be gentle! You want to keep that fluffy texture, so fold and stir slowly without smashing the snow too much. It should be light and airy when you’re done.
- Enjoy Fresh: *Snow ice cream* is best served immediately. If you let it sit too long, it can lose its fluffy texture and become watery. Gather everyone around and dig in right away for the best experience!
- Get Creative: Don’t hesitate to customize your *snow ice cream*! Add a dash of cocoa powder for a chocolatey twist or some sprinkles for a festive touch. You can even mix in some berries or nuts for added flavor and texture!
Serving Suggestions
Now that you’ve made your delightful *snow ice cream*, let’s talk about how to serve it up for maximum enjoyment! Here are some fun and simple ideas to elevate your winter treat:
- Add Toppings: Get creative with toppings! Drizzle some chocolate or caramel sauce over the top, or sprinkle on crushed cookies for a little crunch. Fresh fruit like berries or banana slices can add a burst of flavor and color, too!
- Pair with Other Desserts: *Snow ice cream* is a fantastic addition to a cozy dessert spread. Serve it alongside warm brownies or a slice of pie for a delightful contrast in temperatures. The combination of creamy ice cream and warm desserts is simply irresistible!
- Create a Sundae Bar: Set up a fun sundae bar with various toppings, like whipped cream, nuts, sprinkles, and different syrups. Let everyone build their own masterpiece—it’s a great way to get the whole family involved!
- Use Waffle Cones: Scoop your *snow ice cream* into waffle cones for a portable treat that’s perfect for outdoor enjoyment. You can even dip the tops in chocolate and sprinkle them with nuts for a little extra flair!
- Serve in Fun Bowls: Use colorful or themed bowls to make serving even more fun. Kids love eating from special dishes, and it makes the whole experience feel extra festive!
These serving suggestions will not only enhance your *snow ice cream* but also create wonderful memories with friends and family. Enjoy every cold, sweet bite!
Nutritional Information
Let’s take a look at the estimated nutritional data for a serving of your delightful *snow ice cream*! Keep in mind that these values are approximations, but they’ll give you a good idea of what you’re enjoying:
- Calories: 150
- Sugar: 20g
- Fat: 5g
- Saturated Fat: 3g
- Unsaturated Fat: 2g
- Trans Fat: 0g
- Carbohydrates: 22g
- Fiber: 0g
- Protein: 3g
- Cholesterol: 15mg
- Sodium: 100mg
This simple, refreshing treat is not only fun to make but also offers a sweet indulgence that’s relatively light! Enjoy your *snow ice cream* knowing you’re treating yourself to something special this winter.
FAQ Section
Got questions about *snow ice cream*? No worries! Here are some of the most common queries I get, along with answers to help you out:
- Can I use any type of snow for this recipe? It’s crucial to use clean, white snow. Avoid any snow that’s discolored or has been on the ground for too long. Fresh, fluffy snow is the key to a delicious treat!
- Is it safe to eat snow? Absolutely! As long as you collect it from a clean area and avoid snow that’s yellow or near roads, it’s perfectly safe. Just make sure it’s fresh and free from contaminants.
- Can I make *snow ice cream* vegan? Yes, you can easily adapt this recipe! Substitute the milk with your favorite non-dairy milk, such as almond, coconut, or oat milk. The texture will still be delightful!
- How long does *snow ice cream* last? *Snow ice cream* is best enjoyed immediately. If you have leftovers, store them in an airtight container in the freezer, but keep in mind the texture may change, and it’s best to eat it fresh.
- Can I customize the flavors? Of course! You can mix in ingredients like cocoa powder, fruit purees, or even a splash of flavored extracts to create your own unique twist on this winter classic. Get creative and have fun!
If you have any more questions, feel free to reach out! Enjoy making your *snow ice cream*—it’s a delightful treat to brighten up those chilly winter days!
Storage & Reheating Instructions
When it comes to *snow ice cream*, the best way to enjoy it is fresh! However, if you happen to have some leftovers, here’s how to store them properly:
- Store in an Airtight Container: If you have any leftover *snow ice cream*, transfer it into an airtight container and store it in the freezer. This helps prevent any freezer burn and keeps it from absorbing other odors.
- Use Within a Day: For the best texture and flavor, aim to eat your *snow ice cream* within 24 hours. After that, it may become icy and lose its delightful fluffy quality.
- Reheating is Not Applicable: Since *snow ice cream* is meant to be enjoyed cold, there’s no need to reheat it. In fact, reheating isn’t recommended as it will ruin the texture!
So, while it’s tempting to save some for later, I highly recommend gathering everyone around to enjoy it right after you make it. That’s where the magic is, after all!
Print
snow ice cream: 7 Magical Ways to Enjoy Winter’s Treat
- Total Time: 10 minutes
- Yield: 4 servings 1x
- Diet: Vegetarian
Description
A simple and fun treat made with fresh snow and basic ingredients.
Ingredients
- 4 cups fresh snow
- 1 cup milk
- 1/2 cup sugar
- 1 teaspoon vanilla extract
Instructions
- Collect fresh, clean snow in a large bowl.
- In another bowl, mix milk, sugar, and vanilla until dissolved.
- Pour the milk mixture over the snow.
- Stir gently until combined.
- Serve immediately and enjoy.
Notes
- Use only clean, white snow.
- Adjust sweetness to your taste.
- Best enjoyed fresh.
- Prep Time: 10 minutes
- Cook Time: 0 minutes
- Category: Dessert
- Method: No-Cook
- Cuisine: American
Nutrition
- Serving Size: 1 cup
- Calories: 150
- Sugar: 20g
- Sodium: 100mg
- Fat: 5g
- Saturated Fat: 3g
- Unsaturated Fat: 2g
- Trans Fat: 0g
- Carbohydrates: 22g
- Fiber: 0g
- Protein: 3g
- Cholesterol: 15mg
Keywords: snow ice cream, winter treat, homemade dessert


