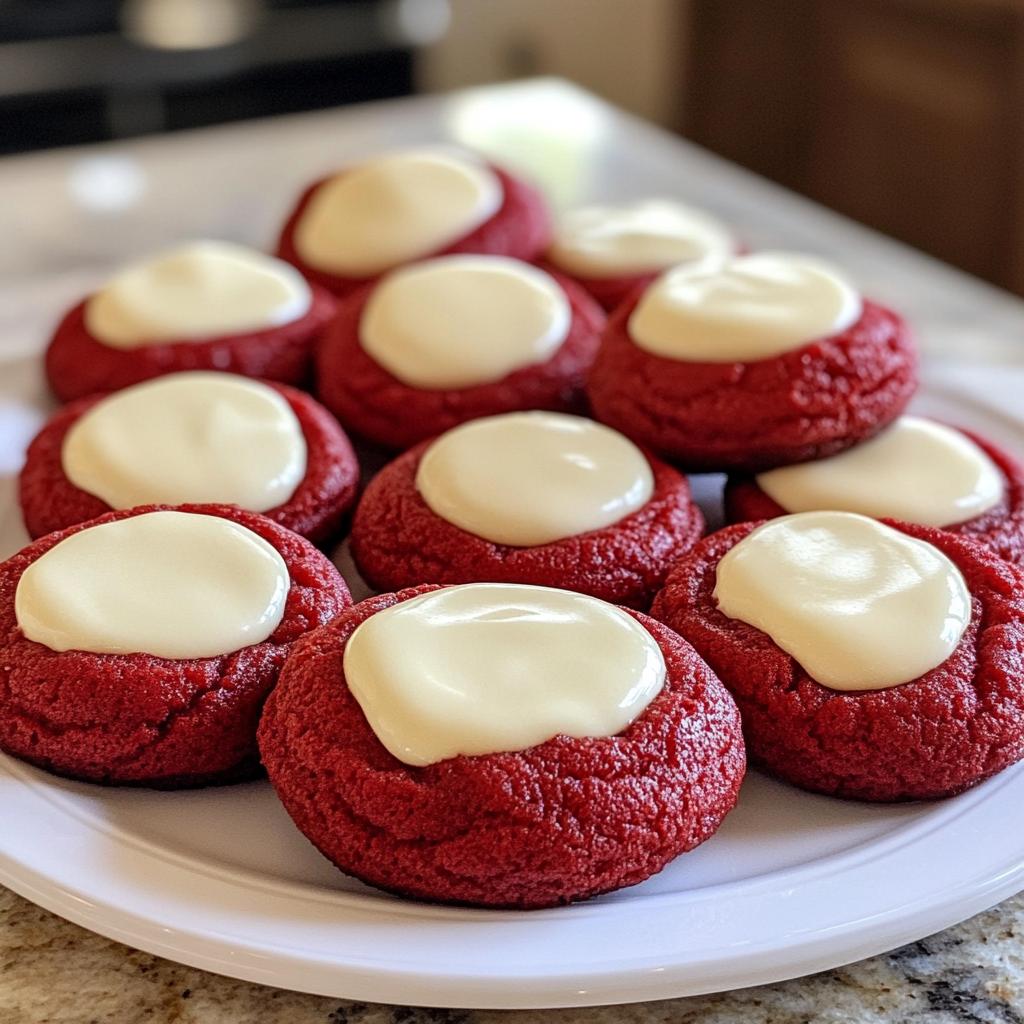
I still remember the first time I made these red velvet thumbprint cookies—my kitchen looked like a Christmas crime scene with red dough splatters everywhere, but oh, was it worth it! These soft, chewy gems with their little wells of creamy frosting are my go-to holiday treat, and they never fail to disappear faster than I can plate them. What makes them special? That perfect red velvet flavor—just enough cocoa to be interesting but not overwhelming—paired with that tangy-sweet cream cheese filling makes these thumbprint cookies irresistible. Every December, my nieces start begging for “Auntie’s red cookies,” and honestly? I don’t blame them.
Why You’ll Love These Red Velvet Thumbprint Cookies
Trust me, these cookies are absolute showstoppers—and not just because of their vibrant red hue. Here’s why they’ll become your new baking obsession:
- Effortless elegance: They look fancy but take barely 30 minutes from bowl to plate (perfect for last-minute guests!)
- That cream cheese surprise: The little frosting pools turn every bite into creamy, dreamy bliss
- Holiday magic: The red velvet color makes them festive for Christmas, Valentine’s Day, or any celebration
- Crowd-pleaser guarantee: My pickiest eaters always grab seconds—even kids who swear they “don’t like red velvet”
Ingredients for Red Velvet Thumbprint Cookies
Grab these simple ingredients—you probably have most in your pantry already! I always measure everything before starting (my grandma called this “mise en place” to sound fancy, but really it just saves me from frantic fridge dashes mid-recipe). Here’s what you’ll need:
- For the cookies:
- 1 1/4 cups all-purpose flour (spooned and leveled—no packing!)
- 1/4 cup unsweetened cocoa powder, sifted (trust me, sifting prevents lumps)
- 1/2 tsp baking soda (check it’s fresh—it should fizz when you add vinegar)
- 1/4 tsp fine sea salt (I prefer this over table salt for better distribution)
- 1/2 cup unsalted butter, softened (leave it out for 30 minutes—finger should leave a slight dent)
- 3/4 cup granulated sugar (regular white sugar works best here)
- 1 large egg, room temperature (cold eggs can make the dough seize up)
- 1 tsp pure vanilla extract (the good stuff—imitation just won’t cut it)
- 1 tbsp red gel food coloring (liquid works in a pinch, but gel gives that vibrant red)
- For the filling:
- 1/2 cup cream cheese frosting (homemade or store-bought—no judgment here!)
See? Nothing too crazy. The magic happens when these humble ingredients come together. Pro tip: If you’re using store-bought frosting, let it sit at room temp for 15 minutes so it pipes easily into those thumbprint wells!
How to Make Red Velvet Thumbprint Cookies
Okay, let’s get to the fun part—making these gorgeous cookies! I promise it’s easier than you think, but there are a few key steps that’ll make all the difference between “meh” and “WOW!” Follow along, and you’ll have perfect red velvet thumbprint cookies in no time.
Preparing the Dough
First things first—preheat that oven to 350°F (175°C) and line your baking sheets with parchment paper. Trust me, you don’t want to skip this step unless you enjoy scraping cookies off pans!
Now, whisk together your dry ingredients—flour, cocoa powder (make sure it’s sifted—no one wants lumpy cookies!), baking soda, and salt—in a medium bowl. Set this aside while you work your butter magic.
In a large bowl, cream together the softened butter and sugar until it’s light and fluffy. This takes about 2-3 minutes with a hand mixer. You’ll know it’s ready when the mixture looks almost like pale yellow whipped cream. Now beat in the egg, vanilla, and that glorious red food coloring. Don’t be shy—really let the color develop!
Here’s the crucial part: gradually add your dry ingredients to the wet mixture, mixing just until combined. Overmixing is the enemy here—it’ll make your cookies tough instead of tender. A few flour streaks are fine; they’ll disappear with one last gentle stir.
Shaping and Baking
Time to get your hands dirty! Roll the dough into 1-inch balls (about the size of a walnut). I use a small cookie scoop for consistency, but a tablespoon works too. Place them about 2 inches apart on your prepared baking sheets—they’ll spread a bit.
Now for the signature move: use your thumb (or the back of a small spoon if you’re fancy) to press a nice indentation into each cookie. Don’t be afraid to press firmly—those wells will puff up slightly during baking. Pro tip: dip your thumb in water or a bit of flour to prevent sticking!
Bake for 10-12 minutes until the edges are set but the centers still look slightly soft. They’ll firm up as they cool. Let them rest on the baking sheet for 5 minutes before transferring to a wire rack—this prevents breakage.
Adding the Cream Cheese Filling
Patience, my friend! You must let the cookies cool completely before adding the frosting, or you’ll end up with melty pink puddles (been there, done that). Once cooled, pipe or spoon about ½ teaspoon of cream cheese frosting into each thumbprint well.
If you’re feeling extra, you can sprinkle some crushed pecans or mini chocolate chips around the edges for texture. But honestly? They’re stunning just as they are—those ruby-red cookies with their snowy white centers are pure edible art!
Expert Tips for Perfect Red Velvet Thumbprint Cookies
After making these cookies more times than I can count (and yes, learning from all my mishaps), I’ve picked up some game-changing tricks that’ll take your red velvet thumbprint cookies from good to “give-me-the-whole-batch” amazing:
Gel food coloring is your best friend – That vibrant red color makes these cookies special, so skip the liquid food coloring that turns everything pink. Gel coloring gives you that rich, true red hue without watering down your dough. I like to add it with the vanilla so it blends evenly—just watch those fingers unless you want temporary red nail polish!
Oven thermometers don’t lie – My biggest cookie disaster happened when my oven ran hot and turned these into crispy pucks. Now I always double-check with an oven thermometer. These cookies bake fast at 350°F, and even 10 degrees can make the difference between perfect and overdone.
Make ahead? Store frosting separately – If you’re prepping dough ahead (smart move for holiday baking!), keep the unfrosted cookies in an airtight container and add the cream cheese filling just before serving. Nothing sadder than soggy cookie wells! The unfrosted cookies freeze beautifully for up to a month too.
The thumbprint re-press – If your indentations puff up too much during baking (they usually do a little), immediately after pulling them from the oven, use the back of a teaspoon to gently redefine the wells. Works like magic and gives you perfect little pools for that luscious frosting!
Ingredient Substitutions and Notes
Life happens, and sometimes you need to tweak recipes—I get it! Here are all my tested swaps and solutions for when you’re missing an ingredient or need special adjustments. These red velvet thumbprint cookies are surprisingly flexible!
Flour options: Need gluten-free? I’ve had great success with a 1:1 gluten-free flour blend (my favorite is the one with xanthan gum already added). Just don’t pack it when measuring—gluten-free flours tend to settle more densely. For a nutty twist, I sometimes replace 1/4 cup of flour with almond flour, which adds lovely texture.
Butter blues: If you only have salted butter, just reduce the added salt to 1/8 teaspoon. In a pinch, coconut oil works too, but your cookies will spread more and taste slightly different (still delicious though!).
Frosting shortcuts: While homemade cream cheese frosting is dreamy, I won’t judge if you use store-bought—especially during busy holidays! Just look for one labeled “whipped” as it pipes easier. Pro tip: jazz up canned frosting by mixing in a splash of vanilla or a pinch of lemon zest for extra brightness.
Red dye dilemmas: If you’re avoiding artificial colors, try beet powder (start with 2 tsp and adjust) or even pomegranate juice reduction (simmer 1 cup juice down to 2 tbsp). The color will be more muted but still pretty. For natural gel colors, look for ones made from vegetable extracts—they perform almost as well as conventional gels.
Cocoa alternatives: Out of unsweetened cocoa? Dutch-process works fine here since we’re using baking soda, but your cookies will be slightly darker. In emergencies, I’ve even used hot cocoa mix (reduce sugar by 2 tbsp since it’s sweetened).
Remember—baking is part science, part art. Don’t stress if you need to substitute; some of my best kitchen discoveries came from happy accidents! The most important thing? That first bite of creamy, red velvet deliciousness.
Serving and Storing Red Velvet Thumbprint Cookies
Now for the best part—showing off and savoring these beauties! These cookies deserve more than just being tossed on a plate. I love arranging them on a vintage cake stand with some fresh holly sprigs around Christmas, or heart-shaped doilies for Valentine’s Day. For parties, I’ll sometimes dust them with edible gold glitter—just a light sprinkle makes them look like edible jewels!
Storage is easy but important—these cookies stay fresh in an airtight container at room temperature for up to 3 days. Layer them between parchment paper so the frosting doesn’t stick. The cream cheese filling means they shouldn’t sit out more than 2 hours at room temp (though let’s be real—they rarely last that long before being devoured!).
Want to get ahead? You’ve got options:
- Freeze unfrosted cookies: Bake and cool completely, then freeze in a single layer before transferring to a freezer bag. They’ll keep for a month—just thaw and add frosting when needed.
- Freeze frosted cookies: Place them in a single layer on a baking sheet until firm, then stack carefully in containers with parchment between layers. They’ll keep for 2 weeks this way—thaw at room temp for 30 minutes before serving.
- Dough storage: The unbaked dough balls freeze beautifully too! Just freeze on a tray first, then bag them. Bake straight from frozen, adding 1-2 minutes to the baking time.
Pro tip: If your kitchen is warm, store these in the fridge—but let them come to room temp before serving so the frosting softens up nicely. And if you’re gifting them? A cute bakery box with parchment liners makes anyone feel special—I’ve converted many skeptics with these little red velvet gems!
Red Velvet Thumbprint Cookies FAQs
Over the years, I’ve gotten so many questions about these cookies—here are the ones that pop up most often with all my hard-earned answers!
Can I freeze these cookies?
Absolutely! My freezer always has a stash for last-minute guests. Freeze unfrosted cookies in a single layer first, then transfer to an airtight bag for up to a month. Add the cream cheese frosting after thawing—it takes just minutes to make them party-ready!
Why do my thumbprints puff up during baking?
Oh, this drove me crazy the first few times! The indentations will always rise slightly—it’s the baking soda doing its thing. Here’s my trick: right when the cookies come out of the oven, gently press the wells again with the back of a teaspoon. They’ll hold their shape perfectly as they cool.
Can I make these without food coloring?
You bet! The cocoa gives them a lovely reddish-brown hue naturally. For color without dyes, try 2 tsp beet powder mixed with the wet ingredients. The flavor’s neutral, and you’ll get a pretty pinkish-red result. Not quite as vibrant, but still gorgeous!
How do I prevent cracks in my cookies?
Two things: First, make sure your butter is properly softened (not melted!) so it creams evenly with the sugar. Second, don’t overmix the dough after adding the dry ingredients—those little flour pockets will hydrate as they bake, giving you smooth, crack-free tops.
Can I pipe the frosting instead of spooning it?
Please do—it looks so professional! Just let your frosting soften slightly, then use a star tip for pretty swirls. If it’s too stiff, add a teaspoon of milk. Too runy? More powdered sugar. I sometimes add a tiny bit of orange zest to the frosting for extra zing!
Nutritional Information
Okay, let’s be real—we’re not eating these cookies for their health benefits! But I know some folks like to keep track, so here’s the scoop on what you’re getting in each delicious bite. Remember, these values are estimates and will vary based on your specific ingredients and how generous you are with that cream cheese frosting!
Per cookie (based on 24 cookies per batch):
- Calories: 120
- Total Fat: 6g (3.5g saturated)
- Cholesterol: 20mg
- Sodium: 60mg
- Total Carbohydrates: 15g
- Sugars: 8g
- Protein: 1.5g
Now, my philosophy? Life’s too short to stress over cookie calories—especially when they’re this pretty! But if you’re watching your intake, you can make them slightly lighter by using reduced-fat cream cheese in the frosting or cutting the sugar by a tablespoon (though they won’t be quite as tender). Personally? I say savor every bite and maybe take an extra walk around the block!
Ready to Bake Some Magic?
There you have it—everything I’ve learned through years of red velvet thumbprint cookie triumphs (and yes, a few hilarious kitchen fails). These little gems have saved me at countless potlucks, wowed holiday guests, and become my signature “just because” treat. Now it’s your turn! Whip up a batch this weekend and watch how fast they disappear. I’d love to hear how yours turn out—did you add any fun twists? Any aha moments during baking? Drop your stories and photos in the comments below. Happy baking, my fellow cookie enthusiasts—may your thumbprints be perfectly indented and your frosting pools be plentiful!
Print
Irresistible Red Velvet Thumbprint Cookies in 30 Minutes
- Total Time: 27 minutes
- Yield: 24 cookies 1x
- Diet: Vegetarian
Description
Soft and chewy red velvet thumbprint cookies filled with cream cheese frosting. Perfect for holidays or special occasions.
Ingredients
- 1 1/4 cups all-purpose flour
- 1/4 cup unsweetened cocoa powder
- 1/2 tsp baking soda
- 1/4 tsp salt
- 1/2 cup unsalted butter, softened
- 3/4 cup granulated sugar
- 1 large egg
- 1 tsp vanilla extract
- 1 tbsp red food coloring
- 1/2 cup cream cheese frosting
Instructions
- Preheat oven to 350°F. Line a baking sheet with parchment paper.
- Whisk flour, cocoa powder, baking soda, and salt in a bowl.
- Cream butter and sugar until light and fluffy. Beat in egg, vanilla, and food coloring.
- Gradually mix in dry ingredients until combined.
- Roll dough into 1-inch balls and place on the baking sheet. Press your thumb into the center of each.
- Bake for 10-12 minutes. Let cool, then fill centers with cream cheese frosting.
Notes
- Store cookies in an airtight container for up to 3 days.
- Use gel food coloring for a more vibrant red color.
- Prep Time: 15 minutes
- Cook Time: 12 minutes
- Category: Dessert
- Method: Baking
- Cuisine: American
Nutrition
- Serving Size: 1 cookie
- Calories: 120
- Sugar: 8g
- Sodium: 60mg
- Fat: 6g
- Saturated Fat: 3.5g
- Unsaturated Fat: 2g
- Trans Fat: 0g
- Carbohydrates: 15g
- Fiber: 0.5g
- Protein: 1.5g
- Cholesterol: 20mg
Keywords: red velvet, thumbprint cookies, cream cheese frosting, dessert, holiday cookies


