Oh my goodness, let me tell you about my absolute favorite dessert creation – this Red Velvet Strawberry Cheesecake that’s become legendary among my friends and family! It all started when I accidentally brought the wrong ingredients to a potluck (oops!) and had to improvise by combining my red velvet cake mix with leftover strawberries and cream cheese. The result was pure magic – that rich cocoa flavor of red velvet paired with the bright tang of fresh strawberries in creamy cheesecake is just heavenly.
What makes this dessert so special is how perfectly balanced it is – the moist, slightly chocolatey red velvet base contrasts beautifully with the smooth strawberry cheesecake topping. It’s become my go-to for birthdays, anniversaries, or really any excuse to celebrate. Trust me, once you try this combination, you’ll understand why I make it at least once a month!
Why You’ll Love This Red Velvet Strawberry Cheesecake
This isn’t just another dessert – it’s a showstopper that’ll have everyone begging for seconds! Here’s why it’s become my most requested recipe:
- The rich cocoa flavor of the red velvet base creates this incredible contrast with the bright, tangy strawberry cheesecake topping – it’s like a flavor party in your mouth!
- That creamy cheesecake layer? So silky smooth, it practically melts on your tongue while the moist cake gives just the right amount of structure.
- Despite looking fancy, it’s surprisingly easy to make – no complicated techniques, just simple steps that come together beautifully.
- It’s a total crowd-pleaser that works for everything from fancy dinner parties to casual potlucks (I’ve brought it to both with equal success!).
- The gorgeous red and white layers make it look like you spent hours in the kitchen when really, it comes together in no time!
Honestly, the hardest part is waiting those two hours for it to chill – the anticipation just makes that first bite even more magical!
Red Velvet Strawberry Cheesecake Ingredients
Here’s everything you’ll need to create this dreamy dessert – I promise it’s all simple stuff you can find at any grocery store! The magic happens in how these basic ingredients come together:
- For the red velvet base:
- 1 1/2 cups all-purpose flour (spooned and leveled – no packing!)
- 1 cup granulated sugar (the regular white kind works perfectly)
- 1/2 cup unsweetened cocoa powder (I use Dutch-processed for richer flavor)
- 1 tsp baking soda (make sure it’s fresh!)
- 1/2 tsp salt (just regular table salt)
- 1 cup buttermilk (room temperature is best)
- 1/2 cup vegetable oil (canola works too)
- 2 large eggs (also room temp – see a pattern here?)
- 2 tbsp red food coloring (I prefer gel for more vibrant color)
- 1 tsp vanilla extract (the real stuff, not imitation!)
- For the strawberry cheesecake layer:
- 16 oz cream cheese, softened (this is two standard blocks)
- 1/2 cup powdered sugar (sifted if it’s lumpy)
- 1 cup fresh strawberries, diced small (about 10 medium berries)
Pro tip from my many trials: Measure everything before you start mixing – it makes the whole process so much smoother. And don’t skip letting ingredients come to room temperature; it really does make a difference in how everything combines!
How to Make Red Velvet Strawberry Cheesecake
Okay, let’s get baking! This recipe comes together in two main parts – first the red velvet base, then the dreamy strawberry cheesecake topping. Don’t worry, I’ll walk you through each step so you get perfect results every time!
Preparing the Red Velvet Base
First things first – preheat that oven to 350°F (175°C) and grease your 9-inch springform pan really well. Nothing worse than a beautiful cake that sticks!
- In a large bowl, whisk together the flour, sugar, cocoa powder, baking soda, and salt until everything’s evenly distributed. I like to sift the cocoa powder if it’s lumpy – makes for a smoother batter.
- In another bowl (or measuring cup), mix the buttermilk, vegetable oil, eggs, red food coloring, and vanilla. Whisk until the eggs are fully incorporated and you’ve got this gorgeous vibrant red liquid.
- Now pour the wet ingredients into the dry ingredients and mix just until combined. The batter should be smooth but don’t overmix – a few small lumps are totally fine!
- Pour into your prepared pan and bake for 25-30 minutes. You’ll know it’s done when the edges pull away slightly from the pan and a toothpick comes out with just a few moist crumbs (not wet batter!).
Let the cake cool completely in the pan on a wire rack – about an hour should do it. This patience pays off, I promise!
Making the Strawberry Cheesecake Layer
While the cake cools, let’s make that luscious strawberry topping. This is where the magic really happens!
- In a large bowl, beat the softened cream cheese until it’s completely smooth – no lumps allowed! Scrape down the sides as needed.
- Add the powdered sugar gradually while mixing on low speed (unless you want a powdered sugar cloud in your kitchen!). Beat until fully incorporated.
- Gently fold in the diced strawberries with a rubber spatula. Be careful not to overmix – we want pretty strawberry pieces throughout!
- Once the cake is completely cool, spread the cheesecake mixture evenly over the top. I like to make little swirls with the back of a spoon – makes it look extra fancy!
Now comes the hardest part – pop it in the fridge to chill for at least 2 hours (overnight is even better if you can wait that long!). This sets the cheesecake layer perfectly so it slices beautifully.
When you’re ready to serve, run a knife around the edge before releasing the springform pan. Get ready for the compliments to start rolling in!
Tips for the Perfect Red Velvet Strawberry Cheesecake
After making this dessert more times than I can count (hey, it’s for “recipe testing” – that’s my story!), I’ve picked up some foolproof tricks to make sure yours turns out spectacular every time:
- Room temp is key – Seriously, don’t skip letting your cream cheese and eggs come to room temperature! Cold cream cheese leaves lumps, and room temp eggs incorporate better for an ultra-smooth texture.
- Color control – Want that signature vibrant red? Use gel food coloring instead of liquid – you’ll need less and get richer color. Add an extra teaspoon if you want it really bold!
- Berry prep – Pat your diced strawberries dry with paper towels before folding them in. Extra moisture can make the cheesecake layer weep.
- Mix with care – Overmixing the red velvet batter makes it tough. Just stir until the flour disappears – a few small lumps are totally fine!
- Chill time matters – I know it’s tempting to cut into it right away, but that 2-hour chill sets the cheesecake perfectly for clean slices.
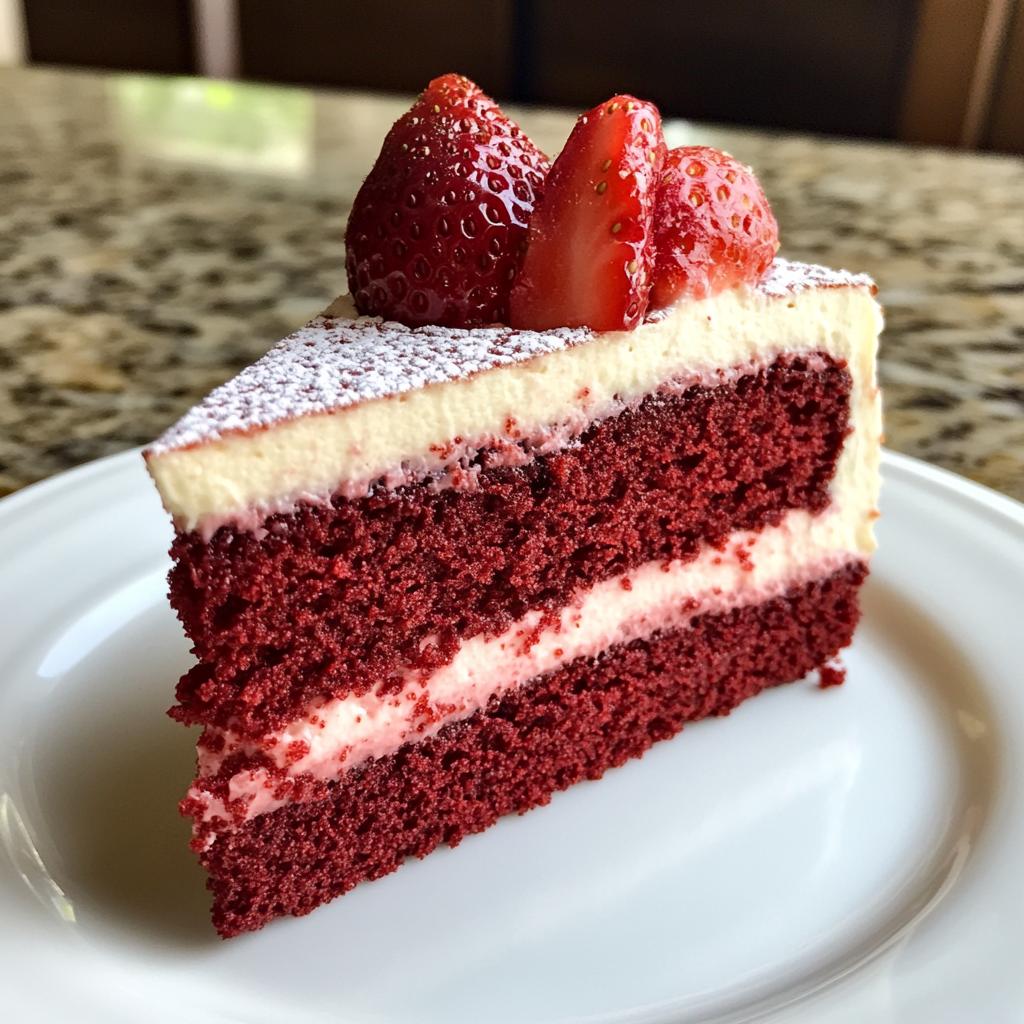
Bonus tip: Right before serving, top with extra fresh berries and a dusting of powdered sugar for a picture-perfect presentation that’ll wow your guests!
Red Velvet Strawberry Cheesecake Variations
One of my favorite things about this recipe is how easily you can tweak it to make it your own! Here are some delicious twists I’ve tried (and loved) over the years – perfect for when you want to mix things up or use what’s in season:
- Berry swap: Out of strawberries? Raspberries work beautifully and give a lovely tart contrast. Blackberries or a mix of berries are fantastic too – just keep the measurements the same.
- Chocolate lover’s dream: Add a white chocolate drizzle by melting 1/2 cup white chocolate chips with 1 tsp coconut oil. Drizzle over the chilled cheesecake layer before serving – it’s gorgeous!
- Crust upgrade: For extra decadence, press an Oreo or chocolate graham cracker crust into the pan before adding the red velvet batter. Just reduce baking time by 5 minutes.
- Citrus twist: Add 1 tsp lemon zest to the cheesecake mixture for a bright, fresh flavor that cuts through the richness.
- Mini version: Make individual servings by baking the red velvet in muffin tins (about 18 minutes), then topping with cheesecake mixture. Perfect for parties!
The best part? These variations all keep the spirit of the original recipe while letting you get creative. My friends still argue over whether the raspberry or lemon zest version is better – I say why choose when you can make both!
Serving and Storing Red Velvet Strawberry Cheesecake
Okay, here’s the fun part – serving up this gorgeous dessert! After all that waiting (I know, the anticipation kills me too), you’ll want to make the most of every beautiful slice. Here’s how I like to do it:
Serving Tips:
- Always serve chilled – that cheesecake layer needs to stay firm for perfect slices. I like to take it out of the fridge just 10 minutes before serving to take the edge off the chill.
- A thin, sharp knife dipped in hot water makes clean cuts. Wipe it between slices for picture-perfect wedges every time!
- For extra wow factor, top each slice with a dollop of whipped cream and a fresh strawberry. A mint leaf adds fancy restaurant vibes with zero effort.
- This dessert stands beautifully on its own, but vanilla ice cream or a drizzle of strawberry sauce takes it over the top for special occasions.
Storing Like a Pro:
- In the fridge: Cover tightly with plastic wrap or transfer slices to an airtight container. It keeps beautifully for 3 days – if it lasts that long!
- For longer storage: You can freeze the whole cheesecake or individual slices. Wrap tightly in plastic, then foil, and freeze for up to 2 months.
- Thawing: Move frozen cheesecake to the fridge overnight. No reheating needed – the cool, creamy texture is part of the magic!
- Pro tip: If freezing, leave off any fresh berry garnishes until after thawing to prevent sogginess.
Fun story – last Valentine’s Day, I made an extra one just to freeze, and my husband was thrilled when I “surprised” him with it a month later (okay, maybe I was more excited than he was). The texture held up perfectly – still as creamy and delicious as day one!
Red Velvet Strawberry Cheesecake FAQs
I’ve gotten so many questions about this recipe over the years – here are the answers to the ones that pop up most often! Trust me, I’ve made every mistake possible so you don’t have to.
Can I use frozen strawberries instead of fresh?
You can, but here’s my trick – thaw them completely first, then pat them super dry with paper towels. Frozen berries release more liquid, which can make your cheesecake layer weep. I actually prefer fresh for the best texture, but in a pinch, frozen will work!
How do I prevent cracks in the cheesecake layer?
Two secrets: First, make sure your cream cheese is truly room temperature before mixing – no shortcuts here! Second, don’t overbeat after adding the sugar – just mix until combined. Overworking the mixture incorporates too much air, which leads to cracks as it chills.
My red velvet layer isn’t very red – what went wrong?
Ah, the classic red velvet dilemma! Different cocoa powders can affect the color. For that signature vibrant red, use Dutch-process cocoa and gel food coloring (not liquid). If your batter looks more brown than red after mixing, add another teaspoon of coloring until you’re happy with the hue.
Can I make this ahead of time?
Absolutely! In fact, I think it tastes even better the next day. Just assemble completely, then refrigerate overnight (up to 24 hours). The flavors meld beautifully, and the cheesecake layer sets up perfectly. Add fresh berry garnishes right before serving.
Why did my cheesecake layer turn pink?
Those strawberry juices love to bleed! To minimize this, dice your berries right before folding them in, and don’t overmix. A little pink swirl is actually pretty, but if you want pure white, you could swirl in strawberry jam instead of fresh berries.
Still have questions? Drop them in the comments – I’m happy to help troubleshoot! After all my trial and error, I’ve probably encountered (and solved) every possible issue with this recipe.
Nutritional Information
Now, I’ll be honest – when something tastes this good, I don’t usually think too hard about the nutrition facts! But since some folks like to know what they’re enjoying, here’s the breakdown per slice (because let’s be real, you’re definitely having seconds):
- Calories: 380 (worth every single one!)
- Fat: 22g (but remember, fat = flavor in desserts)
- Saturated Fat: 8g (from all that delicious cream cheese)
- Carbohydrates: 42g (mostly from that perfect balance of sugars)
- Fiber: 2g (thank you, strawberries!)
- Protein: 6g (not bad for a dessert!)
- Sugar: 28g (it’s a special treat, after all)
Nutritional values are estimates and vary based on ingredients used. For example, using low-fat cream cheese or reducing the sugar slightly will change these numbers. But personally? I say life’s too short to skimp on dessert – just enjoy every decadent bite!
Ready to Make Magic in Your Kitchen?
Now that you’ve got all my best tips and tricks, it’s time to whip up your own showstopping Red Velvet Strawberry Cheesecake! Trust me, the moment you pull that gorgeous layered dessert out of the fridge and see everyone’s eyes light up, you’ll understand why I’m so obsessed with this recipe. Don’t be surprised if it becomes your new go-to for every special occasion (or, let’s be real, just because it’s Tuesday).
I’d absolutely love to hear how yours turns out – did you stick with the classic version or try one of the fun variations? Snap a photo of your masterpiece and share your experience in the comments below! And if you have any genius tweaks of your own, please tell me – I’m always looking for new ways to make this beloved recipe even better. Happy baking, friends – may your cheesecake layer be smooth and your red velvet perfectly moist!
Print
15-Min Red Velvet Strawberry Cheesecake – Irresistible Bliss
- Total Time: 2 hours 50 minutes
- Yield: 8 servings 1x
- Diet: Vegetarian
Description
A delicious combination of red velvet cake and strawberry cheesecake, perfect for special occasions.
Ingredients
- 1 1/2 cups all-purpose flour
- 1 cup granulated sugar
- 1/2 cup unsweetened cocoa powder
- 1 tsp baking soda
- 1/2 tsp salt
- 1 cup buttermilk
- 1/2 cup vegetable oil
- 2 large eggs
- 2 tbsp red food coloring
- 1 tsp vanilla extract
- 16 oz cream cheese, softened
- 1/2 cup powdered sugar
- 1 cup fresh strawberries, diced
Instructions
- Preheat oven to 350°F (175°C). Grease a 9-inch springform pan.
- Mix flour, sugar, cocoa powder, baking soda, and salt in a bowl.
- Add buttermilk, vegetable oil, eggs, food coloring, and vanilla. Mix until smooth.
- Pour batter into the pan and bake for 25-30 minutes. Let cool.
- Beat cream cheese and powdered sugar until smooth. Fold in strawberries.
- Spread cheesecake mixture over the cooled cake. Chill for 2 hours before serving.
Notes
- Use room temperature cream cheese for smoother mixing.
- Adjust food coloring for deeper red color.
- Add extra strawberries for garnish if desired.
- Prep Time: 20 minutes
- Cook Time: 30 minutes
- Category: Dessert
- Method: Baking
- Cuisine: American
Nutrition
- Serving Size: 1 slice
- Calories: 380
- Sugar: 28g
- Sodium: 320mg
- Fat: 22g
- Saturated Fat: 8g
- Unsaturated Fat: 12g
- Trans Fat: 0g
- Carbohydrates: 42g
- Fiber: 2g
- Protein: 6g
- Cholesterol: 75mg
Keywords: red velvet, strawberry cheesecake, dessert, cake, creamy


