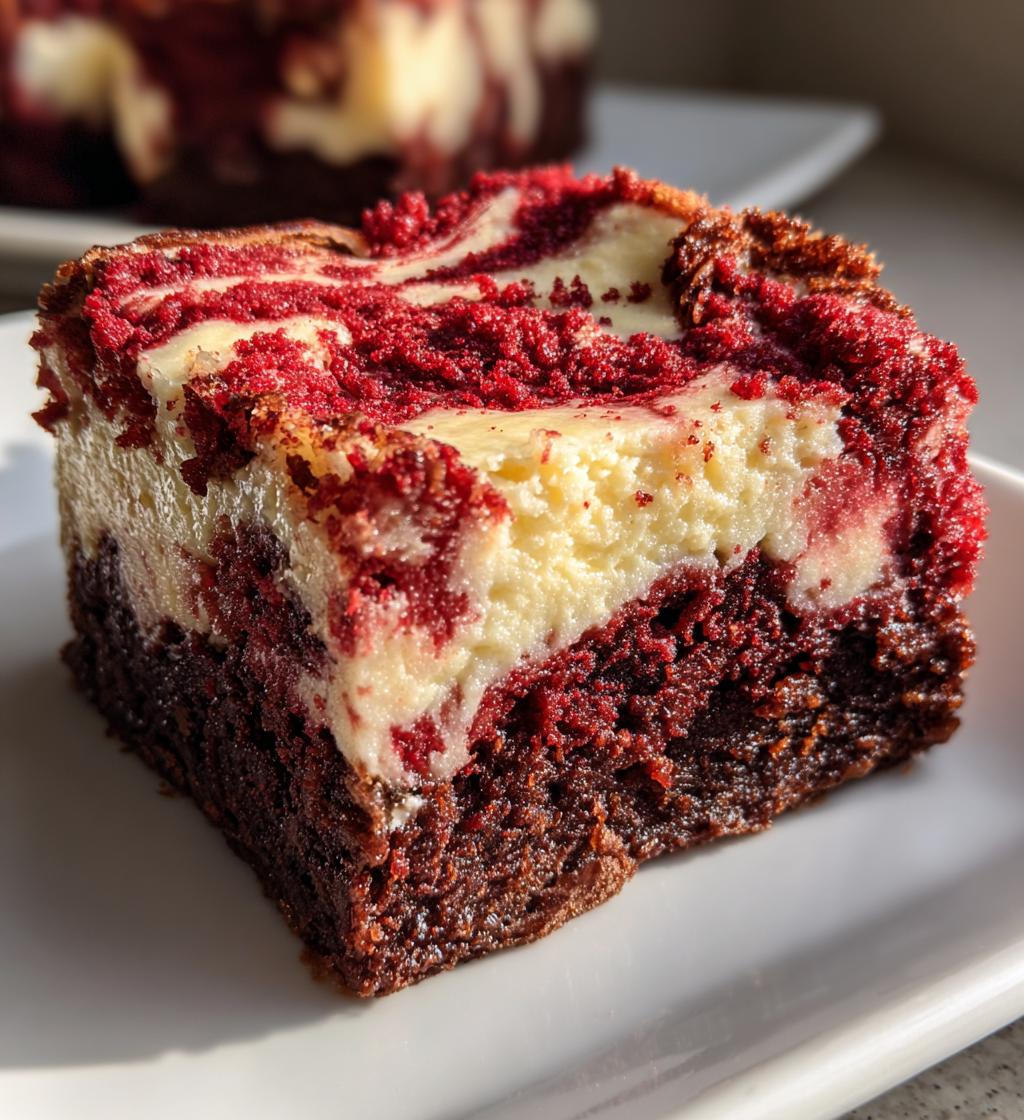
Oh my goodness, you have to try these red velvet cheesecake brownies! They’re my absolute go-to when I need a dessert that looks fancy but comes together in a snap. That perfect marriage of rich red velvet and creamy cheesecake? Pure magic. I first made these for a last-minute potluck and now friends beg me to bring them to every gathering. The best part? That gorgeous marbled top makes them look like you spent hours baking when really, we’re talking under 10 minutes of hands-on time. Trust me – one bite and you’ll be hooked!
Ingredients for Red Velvet Cheesecake Brownies
Okay, let’s gather our goodies! The beauty of this recipe is how simple the ingredient list is – just a handful of pantry staples transform into something spectacular. But here’s my secret: treating each ingredient right makes all the difference between “pretty good” and “oh-my-word-I-need-another-piece” amazing.
Red Velvet Layer
- 1 box red velvet cake mix – My personal favorite is Duncan Hines (that rich cocoa flavor just sings!), but any quality brand works
- 1/2 cup unsalted butter, melted and slightly cooled – I always use real butter here; it makes the texture so much better than oil
- 1 large egg – Room temperature blends in smoother, but straight from the fridge works in a pinch
Cheesecake Layer
- 8 oz cream cheese, softened – This is non-negotiable! Leave it out for at least an hour. Trying to mix cold cream cheese is like wrestling with wallpaper paste
- 1/4 cup granulated sugar – Just enough sweetness to balance the tang
- 1 large egg – Again, room temp is ideal
- 1 tsp vanilla extract – The good stuff, please! That imitation vanilla just doesn’t do justice to our cheesecake layer
See? Nothing fancy, but when these simple ingredients come together… wowza! Now let me grab my favorite mixing bowl (the blue one my mom gave me – it’s totally my good luck charm) and we’ll get baking!
How to Make Red Velvet Cheesecake Brownies
Alright, let’s dive into the fun part – bringing these beauties to life! Don’t let the fancy look fool you; this is seriously one of the easiest desserts you’ll ever make. Just follow these simple steps, and you’ll have brownies that’ll make everyone think you’re a pastry chef.
Preparing the Red Velvet Base
First things first – preheat that oven to 350°F (175°C). While it’s warming up, line your 8×8-inch baking pan with parchment paper, leaving some overhang on the sides. Trust me, this little step saves so much frustration later when you’re trying to get those perfect squares out!
Now grab a big bowl and dump in your red velvet cake mix. Add the melted (but not hot!) butter and one egg. Mix it up until everything comes together into this gorgeous, thick, red batter. It’ll be slightly sticky – that’s perfect!
Here’s my trick: scoop out about two-thirds of this mixture and press it firmly into the bottom of your prepared pan. I use slightly damp fingers to press it down evenly without sticking. You’re creating this beautiful scarlet canvas for our cheesecake masterpiece!
Adding the Cheesecake Layer
Time for the creamy magic! In another bowl (or just wash your first one), beat the softened cream cheese until it’s smooth and dreamy. No lumps allowed! Add the sugar and beat again until it’s all fluffy. Crack in that egg and drizzle in the vanilla, then keep mixing until everything is silky smooth.
Now gently pour this creamy goodness over your red velvet base. Use a spatula to spread it evenly right to the edges. Don’t worry if some red peeks through – we’re going for homemade charm here!
Baking and Cooling
Remember that remaining red velvet mixture? Crumble it over the top with your fingers – don’t be shy! Some big chunks, some small bits – the variation makes every bite exciting. The heat of the oven will transform these crumbles into these irresistible little red velvet gems.
Pop your creation into the oven for 30-35 minutes. You’ll know they’re done when the edges are set but the center still has just the slightest jiggle (like cheesecake should!). Resist the urge to poke at them!
Here comes the hardest part – letting them cool completely before cutting. I know, I know! But trust me, rushing this step leads to messy squares and heartbreak. I usually let mine cool on the counter for an hour, then pop them in the fridge for another hour if I can wait that long. The reward? Picture-perfect slices with those gorgeous red and creamy layers.
Tips for Perfect Red Velvet Cheesecake Brownies
After making these brownies more times than I can count (okay fine, I might have a slight addiction), I’ve learned all the little tricks that take them from good to “hide-them-from-your-family” incredible. Here’s everything I wish I knew when I first started baking these beauties!
Getting Your Ingredients Just Right
That cream cheese needs to be soft – I mean, leave-it-on-the-counter-for-hours soft. Trying to mix cold cream cheese is like trying to spread concrete. Pro tip: if you’re in a rush, microwave it for 10-second bursts at 50% power until it gives when pressed gently.
And about those eggs? Room temp blends so much smoother! I just pop mine in a bowl of warm water for 5 minutes if I forgot to take them out earlier. The difference in texture is worth the tiny bit of planning.
The Baking Sweet Spot
Watch your oven like a hawk after the 25-minute mark. These brownies go from perfect to dry fast. You want that cheesecake layer to still have the slightest wiggle in the center when you gently shake the pan. It’ll set up perfectly as it cools – promise!
If your oven runs hot (like mine does), try baking at 325°F instead. The slower bake gives the layers time to meld together beautifully without overbrowning the edges.
Next-Level Add-Ins
For special occasions, I’ll stir a handful of white chocolate chips into the cheesecake layer – the sweet creaminess plays so nicely with the tangy cheesecake. Or try a drizzle of caramel sauce over the top before baking for that gorgeous marbled effect.
Want that classic red velvet tang? A teaspoon of buttermilk powder mixed into the cake batter gives that authentic bakery flavor. And if you’re feeling fancy, a dusting of cocoa powder right before serving makes them look straight from a patisserie!
Remember – the most important tip? Have fun with it! Even if your crumble topping isn’t perfectly even or your layers aren’t razor-straight, these brownies will still taste amazing. That’s the magic of red velvet and cheesecake together – it’s pretty hard to mess up happiness in a pan!
Variations of Red Velvet Cheesecake Brownies
Oh, the fun we can have with these brownies! Once you’ve mastered the basic recipe (which is already heavenly), try playing around with these delicious twists. I’ve tested them all – you know, strictly for quality control purposes – and each version brings its own special magic to the party.
Chocolate Lovers’ Dream
For my chocoholic friends (you know who you are!), fold in a half cup of mini chocolate chips to the red velvet layer. The melty pockets of chocolate against that creamy cheesecake? Absolute perfection. Sometimes I’ll even swap the vanilla extract in the cheesecake layer for chocolate extract – just a teaspoon transforms it into double chocolate bliss!
Caramel Swirl Sensation
Here’s my secret for fancy-looking brownies with zero extra work: drizzle caramel sauce over the cheesecake layer before adding the crumble topping. Use a toothpick to swirl it gently – not too much, just enough to create those beautiful ribbons. The caramel bakes into these gooey pockets that make every bite exciting.
Nutty Crunch Surprise
My husband goes nuts for this version (pun totally intended). Sprinkle chopped pecans or walnuts over the caramel swirl before baking. The nuts toast up beautifully and add this wonderful crunch that contrasts with the creamy layers. It’s like a party in your mouth!
Berry Beautiful Twist
In the summer, I love folding fresh raspberries into the cheesecake layer. The tart berries cut through the richness beautifully. Just be gentle when mixing – you want whole berries, not jam! A dusting of powdered sugar when serving makes them look extra special.
The best part? You can mix and match these ideas! Chocolate chips AND caramel? Yes please! Nuts AND berries? Why not! That’s the beauty of these brownies – they’re like a blank canvas for your dessert dreams. Just promise me you’ll try the classic version first so you have a baseline for all this delicious experimentation!
Storing and Reheating Red Velvet Cheesecake Brownies
Let’s talk about keeping these beauties fresh – because let’s be honest, they rarely last long enough to need storing in my house! But when you do have leftovers (miraculously), here’s how to keep them tasting just-baked delicious.
The Best Way to Store Your Brownies
These brownies absolutely must go in the fridge – that cheesecake layer demands it! I pop them in an airtight container with parchment between layers if I’m stacking them. They’ll stay perfect for up to 5 days this way, though mine never make it past day 3 before mysteriously disappearing.
Pro tip from my many trials: don’t cut them all at once if you’re not serving immediately. Leave them whole in the pan, wrap tightly with plastic, and slice as needed. The edges stay so much fresher this way!
Freezing for Future Cravings
Yes, you can freeze these! I like to cut them first, then wrap each square individually in plastic wrap before tossing them in a freezer bag. They’ll keep for about 2 months this way – not that they’ve ever lasted that long in my freezer!
When the craving hits, just thaw overnight in the fridge or for an hour on the counter. The texture stays remarkably good, though I wouldn’t recommend freezing them if you’ve added fresh berries.
Reheating Like a Pro
Here’s my favorite trick: microwave individual squares for just 10-15 seconds to take the chill off. It brings back that fresh-from-the-oven warmth without overcooking them. If you’re feeling fancy, pop them under the broiler for 30 seconds to crisp up the top again – just watch them like a hawk!
For a crowd, arrange the brownies on a baking sheet and warm at 300°F for about 5 minutes. This gentle heat revives them beautifully without drying them out.
One last storage secret? The flavors actually deepen overnight! That cheesecake layer mellows into the red velvet base, creating this incredible harmony. So don’t feel bad if you “accidentally” make them a day ahead – I won’t tell!
Nutritional Information for Red Velvet Cheesecake Brownies
Okay, let’s be real – we’re not eating these brownies because they’re health food! But I know some of you like to keep track, so here’s the scoop on what’s in each delicious square. Just remember – these numbers can vary depending on your exact ingredients (like which brand of cake mix you use or how generous you are with those chocolate chip add-ins).
- Serving size: 1 brownie (about 1/9th of the pan)
- Calories: Around 280 per serving
- Total fat: 15g (9g saturated)
- Cholesterol: 70mg
- Sodium: 290mg
- Total carbohydrates: 30g
- Fiber: 1g
- Sugars: 20g
- Protein: 4g
Now, I’m no nutritionist (just a brownie enthusiast!), so consider this a friendly estimate. The actual numbers might dance around a bit based on whether you use full-fat cream cheese or light, or if you go wild with extra mix-ins. But here’s how I look at it – life’s too short not to enjoy amazing desserts sometimes!
If you’re watching your sugar intake, you could try cutting the sugar in the cheesecake layer by half – the tanginess still shines through beautifully. And honestly? These are so rich that a smaller square with a cup of coffee makes for perfect portion control (says the woman who may or may not have eaten three in one sitting last Tuesday).
Frequently Asked Questions About Red Velvet Cheesecake Brownies
I get so many questions about these brownies – everyone wants to make them just right! Here are the answers to the things people ask me most often. Don’t be shy if you’ve got more questions though – I could talk about these brownies all day!
Can I Use Homemade Red Velvet Cake Mix?
Absolutely! If you’ve got a favorite homemade red velvet cake recipe, you can totally use that instead of the box mix. Just mix up your dry ingredients (flour, cocoa, etc.) to equal about 3 cups total. You might need to adjust the butter slightly – start with 1/3 cup and add more until you get that thick, pressable consistency we want for the base.
How Do I Know When the Brownies Are Done?
The toothpick test works great here – stick it in the center and look for moist crumbs (not wet batter). But my favorite trick? Watch for the edges to pull slightly away from the pan and the top to look set with just the tiniest jiggle in the very center when you gently shake the pan. That jiggle will firm up as they cool!
Can I Freeze These Brownies?
You bet! These freeze like a dream. Let them cool completely first, then wrap individual squares tightly in plastic wrap before popping them in a freezer bag. They’ll keep beautifully for up to 2 months. Thaw overnight in the fridge or for about an hour on the counter when you’re ready to enjoy them again.
Print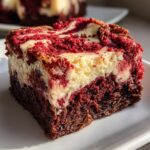
Irresistible Red Velvet Cheesecake Brownies in 35 Minutes
- Total Time: 45 mins
- Yield: 9 brownies 1x
- Diet: Vegetarian
Description
Decadent red velvet cheesecake brownies combine the rich flavor of red velvet with creamy cheesecake for a delicious dessert.
Ingredients
- 1 box red velvet cake mix
- 1/2 cup unsalted butter, melted
- 1 large egg
- 8 oz cream cheese, softened
- 1/4 cup granulated sugar
- 1 large egg
- 1 tsp vanilla extract
Instructions
- Preheat oven to 350°F (175°C) and line an 8×8-inch baking pan with parchment paper.
- In a bowl, mix red velvet cake mix, melted butter, and 1 egg until combined. Press 2/3 of the mixture into the pan.
- In another bowl, beat cream cheese, sugar, 1 egg, and vanilla until smooth. Spread over the red velvet layer.
- Crumble the remaining red velvet mixture on top. Bake for 30-35 minutes until set.
- Let cool completely before cutting into squares.
Notes
- Use room-temperature cream cheese for smoother mixing.
- For extra richness, add white chocolate chips to the cheesecake layer.
- Store leftovers in the refrigerator for up to 5 days.
- Prep Time: 10 mins
- Cook Time: 35 mins
- Category: Dessert
- Method: Baking
- Cuisine: American
Nutrition
- Serving Size: 1 brownie
- Calories: 280
- Sugar: 20g
- Sodium: 290mg
- Fat: 15g
- Saturated Fat: 9g
- Unsaturated Fat: 5g
- Trans Fat: 0g
- Carbohydrates: 30g
- Fiber: 1g
- Protein: 4g
- Cholesterol: 70mg
Keywords: red velvet, cheesecake, brownies, dessert, easy recipe


