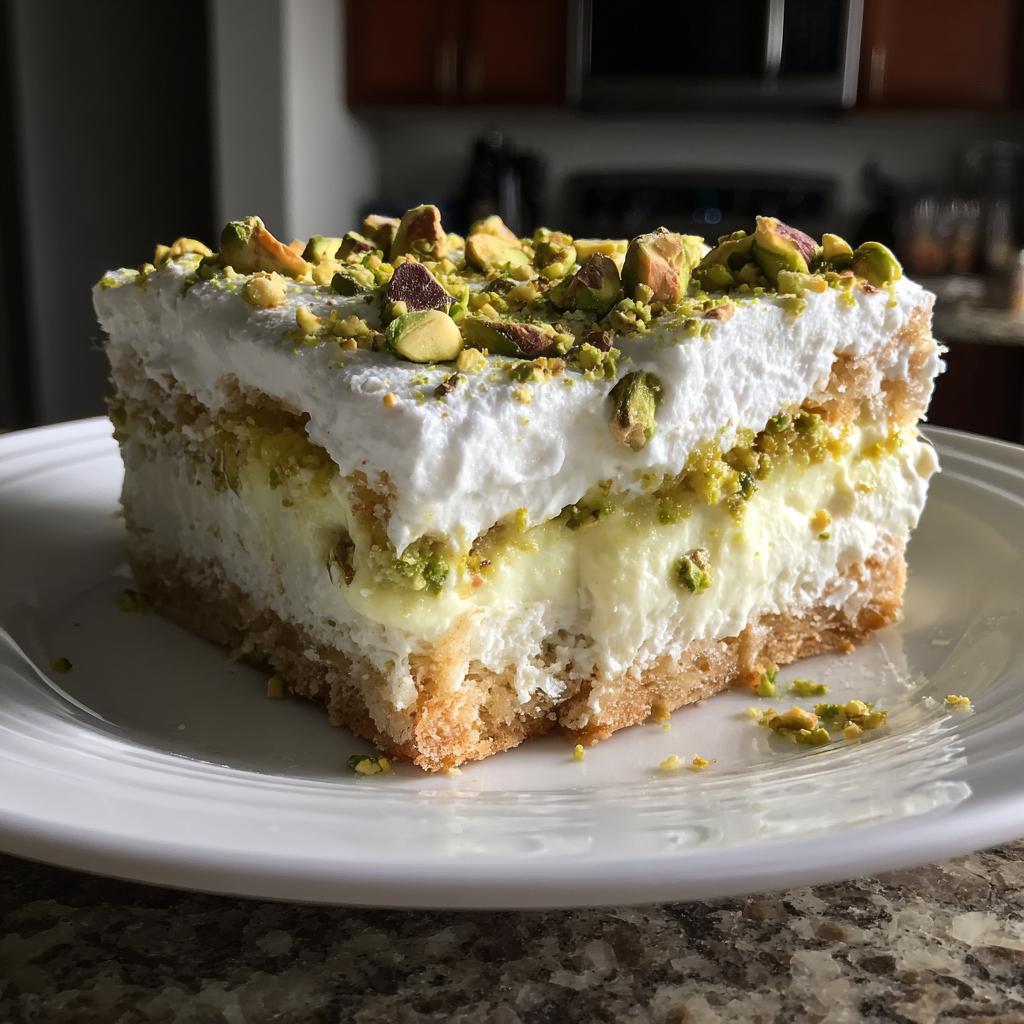
Oh my gosh, let me tell you about these Pistachio Lush Dessert Bars with Whipped Cream Layers – they’re the dessert that disappears fastest at every potluck I bring them to! Picture this: a buttery graham cracker crust, velvety pistachio pudding, and clouds of whipped cream all stacked up in perfect harmony. The best part? They come together with barely any effort – just mix, layer, and chill. I first made these for my niece’s baby shower last summer, and now I can’t show up to a family gathering without them. That gorgeous green color and creamy texture make them look fancy, but trust me, they’re easier than pie (and way more impressive).
Why You’ll Love These Pistachio Lush Dessert Bars
Listen, these bars are pure magic – and here’s why they’ll become your new go-to dessert:
- Creamy dreaminess: That pistachio pudding layer is like biting into a cloud – smooth, rich, and just sweet enough.
- No stress, no mess: No fancy baking skills needed! Just layer, chill, and watch everyone rave.
- Potluck superstar: I’ve lost count of how many times people have begged me for this recipe at parties.
- Cool as can be: Perfect for hot days when turning on the oven feels like torture (we’ve all been there).
Seriously – if happy tastes like anything, it’s these bars.
Ingredients for Pistachio Lush Dessert Bars
Gather these simple ingredients – I promise you probably have half of them in your pantry already! Here’s what you’ll need to make these dreamy bars:
For the Crust:
- 1 1/2 cups crushed graham crackers (that’s about 12 full sheets – I just toss them in a ziplock bag and roll with a wine bottle!)
- 1/2 cup melted butter (salted or unsalted both work, but I’m team salted for that sweet-salty magic)
- 1/4 cup granulated sugar (this little bit makes the crust just sweet enough without overpowering the pistachio)
For the Pistachio Layer:
- 2 (3.4 oz) packages instant pistachio pudding mix (must be instant – the cook-and-serve kind won’t set properly!)
- 3 cups cold milk (whole milk makes it extra creamy, but I’ll share alternatives below)
For the Topping:
- 1 (8 oz) container whipped topping, thawed (yes, the frozen kind – it holds up better than homemade here)
- 1/2 cup chopped pistachios (for that gorgeous green crunch on top)
Ingredient Substitutions & Notes
No whole milk? Heavy cream or half-and-half work beautifully for extra richness. For dietary needs: gluten-free graham crackers or almond flour crust (mix with butter and sugar) work great. Coconut milk can sub for dairy, but the pudding may set softer. Pro tip: chill your mixing bowl before whipping the topping for maximum fluff!
How to Make Pistachio Lush Dessert Bars
Alright, let’s get to the fun part – making these heavenly bars! I swear, it’s easier than remembering to water your houseplants (and way more rewarding). Just follow these simple steps, and you’ll have dessert magic in no time.
Step 1: Prepare the Graham Cracker Crust
First things first – preheat that oven to 350°F. While it’s warming up, grab your biggest mixing bowl (or hey, just use the pan you’ll bake in – I’m all for fewer dishes!). Mix together those crushed graham crackers, melted butter, and sugar until it looks like wet sand.
Now, here’s the secret to a perfect crust: press it firmly into your 9×13-inch pan. I mean really get in there with your fingers or the back of a measuring cup – you want it packed tight so it doesn’t crumble later. Pop it in the oven for about 10 minutes until it’s lightly golden. Oh, and here’s the important part: let it cool completely before adding the next layers. I know it’s tempting to rush, but trust me – a warm crust makes for soggy dessert bars, and nobody wants that!
Step 2: Layer the Pistachio Pudding Filling
While the crust cools, let’s make that dreamy pistachio layer. In a large bowl, whisk together the pudding mixes and cold milk for about 2 minutes. You’ll see it start to thicken right before your eyes – it’s like kitchen magic! But here’s my pro tip: stop whisking as soon as it’s smooth. Overmixing can create air bubbles that’ll mess with that perfect creamy texture we’re after.
Once your crust is completely cool (seriously, no cheating!), pour the pudding over it and smooth it out with a spatula. That vibrant green color always makes me smile – it’s like spring in a pan!
Step 3: Add Whipped Cream & Chill
Now for the cloud-like finish! Gently spread your thawed whipped topping over the pudding layer. I like to make little swoops and swirls with my spatula because pretty food tastes better – it’s science! Sprinkle those chopped pistachios over the top for that gorgeous crunch.
Here comes the hardest part: walk away. I mean it! These beauties need at least 2 hours in the fridge to set properly. I usually make them the night before because a) they slice cleaner when they’re really cold, and b) it gives me an excuse to have dessert for breakfast (don’t judge). When you’re ready to serve, use a sharp knife dipped in hot water for picture-perfect slices.
Tips for Perfect Pistachio Lush Dessert Bars
Alright, I’ve made these bars more times than I can count, and I’ve learned a thing or two! First, use ice-cold milk – it helps the pudding set up faster and gives you that dreamy, thick texture. When you’re spreading the whipped cream layer, dip your spatula in warm water first for super smooth, professional-looking swoops. And my biggest “oops” moment? Chopping the pistachios too finely – you want little chunks for that perfect crunch, not dust!
Serving & Storing Pistachio Lush Dessert Bars
Okay, here’s the best part – digging in! These bars taste best straight from the fridge – that chill makes the creamy layers even more refreshing. I love serving them on my grandma’s vintage cake stand with extra chopped pistachios scattered around for garnish. Pro tip: let them sit at room temperature for about 5 minutes before slicing if your fridge runs cold – it’ll give you cleaner cuts without squishing those beautiful layers.
Now, about leftovers (though honestly, I’ve never seen any last long!). Cover the pan tightly with plastic wrap or transfer slices to an airtight container. They’ll keep happily in your fridge for up to 3 days – though the crust might get slightly softer by day two. Whatever you do, don’t freeze them! I learned this the hard way when I tried stocking up for a party – the whipped cream layer turns grainy and the pudding weeps. Trust me, these are worth making fresh when you need them.
One last serving idea? Cut them into bite-sized squares for parties – they disappear twice as fast that way! And if you’re feeling fancy, drizzle each plate with a little melted chocolate right before serving. The chocolate-pistachio combo is absolutely divine.
Nutritional Information
Okay, let’s talk numbers – but remember, these are just estimates that can wiggle a bit depending on your exact ingredients (and let’s be real, who measures whipped cream perfectly?). Here’s the scoop per serving (that’s one glorious bar!):
- 280 calories – totally worth every single one
- 15g fat (8g saturated) – that’s where all the creamy goodness comes from
- 32g carbs with 1g fiber – the graham crust and pudding teaming up
- 18g sugar – mostly from the pudding mix and crust
- 4g protein – hey, there’s milk in there!
Now here’s my real-world nutrition advice: share these at gatherings so you’re not tempted to eat half the pan yourself (speaking from experience). And if you’re watching sugar, try reducing the crust sugar by half – the pistachio layer is plenty sweet on its own!
FAQs About Pistachio Lush Dessert Bars
Can I use homemade whipped cream instead of the frozen topping?
Absolutely! Just whip 1 cup heavy cream with 2 tbsp sugar until stiff peaks form. But know it won’t hold its shape quite as long as the frozen kind.
How do I prevent a soggy crust?
Two secrets: 1) Bake the crust until golden (10 mins), and 2) Let it cool completely before adding pudding. Warm crust = soggy disaster!
Can I make these bars ahead?
Oh yes! They’re actually better after chilling overnight. Just add the pistachio garnish right before serving so they stay crunchy.
What if I can’t find pistachio pudding mix?
Vanilla pudding + 1/2 tsp almond extract makes a decent substitute, though you’ll miss that gorgeous green color. Check international grocery stores too!
Why is my pudding layer runny?
You likely used cook-and-serve pudding by mistake. Instant pudding sets thicker – and always use ice-cold milk for best results!
Ready to Make These Pistachio Lush Dessert Bars?
Well, what are you waiting for? Your kitchen is about to become the most popular spot in the house! I can already smell that buttery graham cracker crust and see those creamy green layers coming together. Whether it’s for book club, a family BBQ, or just because Tuesday deserves dessert (my personal favorite reason), these bars never disappoint.
I’d love to hear how yours turn out! Did you add a chocolate drizzle like I sometimes do? Maybe you discovered a brilliant new twist? Tag me if you share photos – seeing your creations makes my day. Now go grab that mixing bowl – your next crowd-pleaser awaits, and I promise, it’s going to be love at first bite.
Print
Creamy Pistachio Lush Dessert Bars: A 3-Layer Dream
- Total Time: 2 hours 25 minutes
- Yield: 12 bars 1x
- Diet: Vegetarian
Description
A creamy, layered dessert with a pistachio pudding base, whipped cream, and a buttery crust. Perfect for any occasion.
Ingredients
- 1 1/2 cups crushed graham crackers
- 1/2 cup melted butter
- 1/4 cup granulated sugar
- 2 (3.4 oz) packages instant pistachio pudding mix
- 3 cups cold milk
- 1 (8 oz) container whipped topping, thawed
- 1/2 cup chopped pistachios (for garnish)
Instructions
- Preheat oven to 350°F.
- Mix crushed graham crackers, melted butter, and sugar. Press into a 9×13-inch baking dish.
- Bake for 10 minutes, then let cool.
- Whisk pudding mix with milk until thickened. Spread over the crust.
- Top with whipped cream and smooth evenly.
- Chill for at least 2 hours before serving.
- Sprinkle with chopped pistachios before slicing.
Notes
- Use full-fat milk for a creamier texture.
- Let the crust cool completely before adding pudding.
- Store leftovers covered in the fridge for up to 3 days.
- Prep Time: 15 minutes
- Cook Time: 10 minutes
- Category: Dessert
- Method: Baking
- Cuisine: American
Nutrition
- Serving Size: 1 bar
- Calories: 280
- Sugar: 18g
- Sodium: 320mg
- Fat: 15g
- Saturated Fat: 8g
- Unsaturated Fat: 5g
- Trans Fat: 0g
- Carbohydrates: 32g
- Fiber: 1g
- Protein: 4g
- Cholesterol: 25mg
Keywords: pistachio, dessert bars, whipped cream, easy dessert, no-bake


