There’s nothing quite like walking into a house filled with the rich, savory smell of a roast cooking in the oven. It instantly takes me back to Sunday dinners at my grandma’s house, where she’d pull out her well-worn roasting pan and work her magic on a big hunk of beef. That first slice – tender, juicy, and packed with flavor – was always worth the wait.
Now I’m the one who gets to create those memories in my own kitchen. Cooking a roast in the oven might sound fancy, but trust me, it’s one of the easiest ways to make an impressive meal with minimal effort. The oven does most of the work while you relax (or chase kids around the house in my case).
What I love most is how forgiving roasting can be. Even when I’ve been distracted (who hasn’t burned the rolls while tending to a roast?), that beautiful piece of meat usually turns out delicious. The secret? Simple ingredients, patience, and letting the oven work its slow-cooking magic.
Why You’ll Love Cooking a Roast in the Oven
Let me tell you why roasting beef has become my go-to dinner solution – especially when I want something special without the fuss:
- It’s practically foolproof – once that roast goes in the oven, you’re free to set the table, make sides, or just put your feet up
- The flavor develops all on its own – those simple seasonings transform into something magical as the meat slowly cooks
- Your whole house smells amazing – trust me, neighbors will be popping by “just to say hi” when that aroma wafts outside
- Leftovers (if you have any) are gold – slice thin for sandwiches, chop for hash, or just enjoy cold with mustard like my weird uncle Bob
- It looks impressive with zero effort – carving at the table makes any meal feel like a special occasion
Seriously, once you master this basic technique, you’ll find excuses to make roasts all winter long. I know I do!
Ingredients for Cooking a Roast in the Oven
Here’s what you’ll need to make the most delicious, melt-in-your-mouth roast – I promise it’s nothing fancy, just good ingredients treated right:
- 3 lbs beef roast – I prefer chuck or round for their rich flavor and tenderness when slow-roasted (but don’t stress – any roast will work in a pinch!)
- 2 tbsp olive oil – this helps our seasonings stick and gives that beautiful golden crust
- 1 tsp salt – I use kosher, but table salt works too (just use a bit less if you’re sensitive to salt)
- 1 tsp black pepper – freshly ground makes all the difference here
- 4 cloves garlic, minced – don’t you dare use that pre-minced stuff! The fresh bite mellows into something magical
- 1 tsp rosemary – rub it between your fingers first to wake up the oils
- 1 tsp thyme – same trick as the rosemary, and yes, you can use dried if that’s what you’ve got
That’s it! Seven simple ingredients that transform into something extraordinary. I always double check I have everything before starting – nothing worse than realizing you’re out of garlic mid-recipe (ask me how I know).
How to Cook a Roast in the Oven
Alright, let’s get down to business! Cooking a roast is one of those things that seems intimidating until you’ve done it once – then you’ll wonder why you ever thought it was hard. Follow these simple steps, and you’ll have a showstopper main dish that’ll make everyone think you spent hours slaving in the kitchen (we’ll keep our little secret about how easy it really was).
Preparing the Roast
First things first – take that beautiful hunk of meat out of the fridge about 30 minutes before cooking. Room temperature meat cooks more evenly, trust me on this. While it’s coming to temp, mix your olive oil, minced garlic (freshly minced, please!), salt, pepper, rosemary and thyme in a little bowl. I like to rub the spices between my fingers first to wake up their oils – smells amazing already!
Now the fun part – massage that flavorful paste all over every inch of your roast. Get in there with your hands and really work it in. Don’t be shy! Those nooks and crannies need love too. This step is messy but oh-so-satisfying. Pro tip: wash your hands well after unless you want garlic-scented fingers for hours (again, ask me how I know).
Roasting the Meat
Preheat your oven to 350°F – middle rack position is perfect for even cooking. I use a basic roasting pan with a rack if I have one, but a baking sheet with edges works in a pinch (just flip the roast halfway through). Pop that seasoned beauty in uncovered – we want that gorgeous crust to form.
Now comes the hardest part: leave it alone. No peeking, no poking, no constant basting. That oven door stays shut! The roast needs about 20 minutes per pound, but we’re not going by time alone (more on that in a sec). About halfway through, if you’re feeling fancy, you can spoon some of those delicious pan juices over the top, but honestly? It’ll be great either way.
Checking Doneness
Here’s where most people mess up – guessing doneness by time or looks. Nope! We’re using a meat thermometer like civilized people. Stick it into the thickest part (not touching bone if there is any) – 145°F gets you a perfect medium-rare.
Once it hits temp, walk away for 10-15 minutes. I know, I know – but this resting time is crucial! Those juices need to redistribute, or they’ll all end up on your cutting board instead of in your mouth. Cover loosely with foil if you’re worried about it cooling too much. Then slice against the grain (that means perpendicular to those long muscle fibers) for maximum tenderness.
See? Easy as pie (actually, way easier than pie if we’re being honest). Now go forth and roast!
Tips for Perfectly Cooking a Roast in the Oven
After making more roasts than I can count (and learning from plenty of mistakes), here are my can’t-live-without tips for oven-roasting success:
Sear first for bonus flavor! I sometimes brown my roast in a hot skillet before it goes in the oven – that caramelized crust adds incredible depth. Just pat the meat dry first so it browns instead of steams.
The foil tent trick saves dinner when your roast is browning too fast. Loosely tent some foil over the top if things are getting too dark before the inside is done. No one wants a charcoal crust!
Carving against the grain makes all the difference in tenderness. Look for those long muscle fibers and slice perpendicular to them. Your teeth will thank you.
Save those pan juices! After resting, pour them over sliced meat or whisk into gravy. Pure liquid gold, I tell you.
Remember – oven temperatures vary, so start checking early. Better safe than serving shoe leather!
Common Questions About Cooking a Roast in the Oven
I’ve gotten so many questions from friends and family about roasting beef over the years – here are the ones that come up most often with my tried-and-true answers:
Can I use a different cut of beef?
Absolutely! While chuck and round are my go-tos, other cuts work beautifully too. Ribeye roasts are luxurious (if pricier), and sirloin tip makes great budget-friendly roasts. Just adjust cooking times slightly – leaner cuts might cook a bit faster.
How do I know when it’s done without a thermometer?
I’ll be honest – I strongly recommend investing in a basic meat thermometer. But if you’re in a pinch, the “finger test” works okay: press the meat – rare feels like your cheek, medium like your chin, well-done like your forehead. Not perfect, but better than guessing!
What’s the best way to store leftovers?
Let the roast cool completely, then wrap tightly in foil or store in an airtight container. It’ll keep 3-4 days in the fridge. For longer storage, slice and freeze with parchment between slices – perfect for quick sandwiches later!
Can I cook vegetables with the roast?
Oh yes! Toss potatoes, carrots, and onions in oil and salt, then add them to the pan about 45 minutes before the roast is done. They’ll soak up all those delicious juices – just don’t crowd the pan too much.
Why does my roast sometimes turn out dry?
Usually this means it cooked too long or didn’t rest properly. Remember – carryover cooking happens while resting! Pull it at 140°F if you’re nervous, and always let it rest at least 10 minutes before slicing.
Serving Suggestions for Your Roast
Now that you’ve got this gorgeous roast ready, let’s talk about what to serve with it! My family has strong opinions (mostly from me) about the perfect roast dinner accompaniments:
- Creamy mashed potatoes – non-negotiable in my house. They’re the perfect vehicle for all those delicious pan juices
- Roasted carrots and parsnips – toss them in the pan during the last 45 minutes of cooking for effortless veggies
- Crusty bread – for mopping up every last bit of flavor from your plate
- A simple green salad – something crisp to balance the richness
- Horseradish cream sauce – my secret weapon for leftover sandwiches
Honestly though? That roast is so good it could stand alone on the plate. But where’s the fun in that?
Storing and Reheating Your Roast
Let’s talk leftovers – because let’s be real, that roast is too good to waste! Here’s how I keep every bite tasting amazing:
Fridge storage: Once cooled, wrap slices tightly in foil or store in an airtight container. They’ll stay perfect for 3-4 days. Pro tip: pour any remaining pan juices over the meat before storing – instant flavor booster!
Freezer magic: For longer storage (up to 2-3 months), I slice the roast first and separate layers with parchment paper. This way I can grab just what I need – perfect for quick sandwiches or adding to soups.
Reheating right: My favorite method? Low and slow in a 300°F oven with a splash of broth to keep things moist. Microwave works in a pinch, but cover with a damp paper towel to prevent rubbery meat. And whatever you do – don’t skip reheating those delicious juices too!
Nutritional Information
Now, I’m no nutritionist, but here’s what I can tell you about our delicious roast – it’s packed with protein and keeps things pretty simple carb-wise. The exact numbers will dance around depending on your specific cut of beef and how much of that tasty fat you leave on.
What really matters is that you’re getting a wholesome, satisfying meal made with real ingredients – no weird additives or mystery powders here. Just good old-fashioned beef with herbs and garlic doing their flavorful thing. My philosophy? Enjoy every bite and save the calculator for math class!
Rate This Recipe
Did you try this roast? I’d love to hear how it turned out for you! Leave a quick note below telling me your favorite part – was it the garlic crust? The perfect pink center? Or maybe how your kitchen smelled like Sunday dinner heaven? Your feedback helps me (and other home cooks) keep making delicious meals!
Print
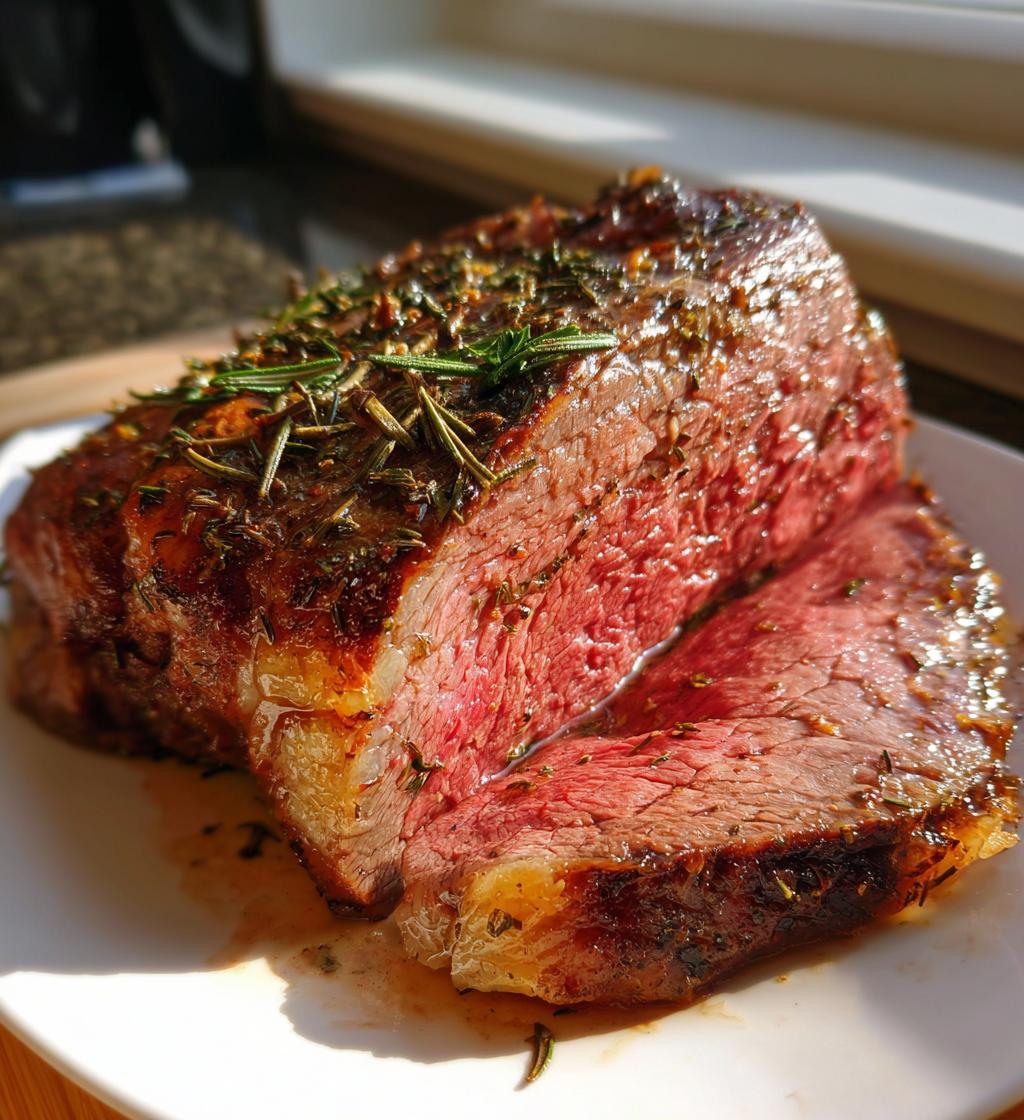
Juicy 3-Pound Roast in the Oven – Effortless Comfort Food Magic
- Total Time: 1 hour 45 minutes
- Yield: 6 servings 1x
- Diet: Low Lactose
Description
Learn how to cook a perfect roast in the oven with simple steps.
Ingredients
- 3 lbs beef roast
- 2 tbsp olive oil
- 1 tsp salt
- 1 tsp black pepper
- 4 cloves garlic, minced
- 1 tsp rosemary
- 1 tsp thyme
Instructions
- Preheat oven to 350°F.
- Rub the roast with olive oil, salt, pepper, garlic, rosemary, and thyme.
- Place the roast in a roasting pan.
- Cook for 1.5 hours or until internal temperature reaches 145°F.
- Let rest for 10 minutes before slicing.
Notes
- Use a meat thermometer for accuracy.
- Adjust seasoning to taste.
- Prep Time: 15 minutes
- Cook Time: 1 hour 30 minutes
- Category: Main Dish
- Method: Roasting
- Cuisine: American
Nutrition
- Serving Size: 1 slice (200g)
- Calories: 350
- Sugar: 0g
- Sodium: 500mg
- Fat: 20g
- Saturated Fat: 8g
- Unsaturated Fat: 10g
- Trans Fat: 0g
- Carbohydrates: 1g
- Fiber: 0g
- Protein: 40g
- Cholesterol: 100mg
Keywords: roast, beef, oven, dinner


