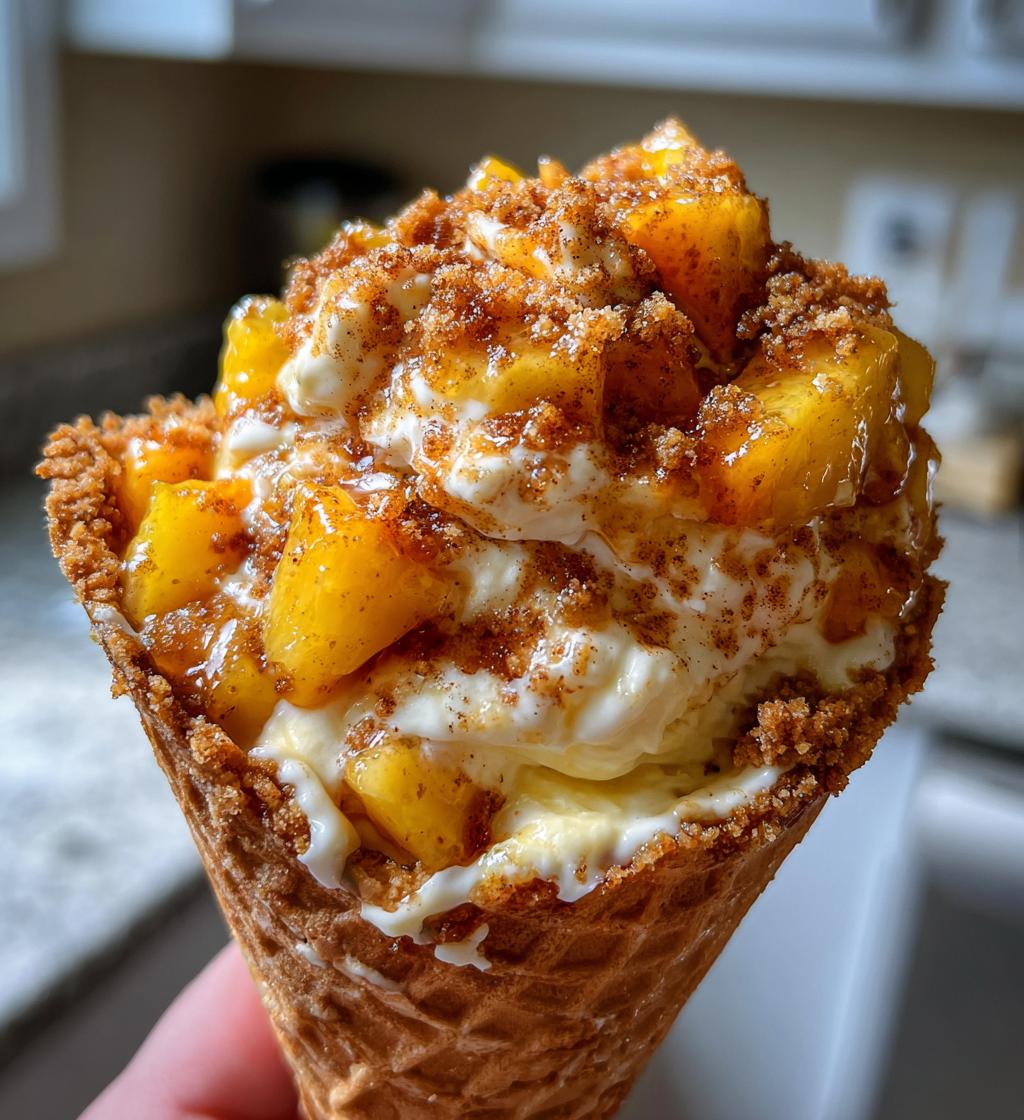
You know those summer afternoons when the air smells like ripe peaches and you’re craving something sweet but don’t want to fuss with plates? That’s exactly when I came up with these Peach Cobbler Cheesecake Cones – my perfect mashup of two classic desserts in one handheld package. I’ll never forget the first time I served these at a backyard barbecue – my cousin’s kids went wild for them, and let’s just say the adults weren’t much better at sharing!
What makes these cones so special is how they capture all the best parts of peach cobbler – those juicy, cinnamon-kissed peaches – and pair them with creamy cheesecake that’s light enough to eat under the summer sun. No forks needed, no messy dishes left behind, just pure portable deliciousness. Trust me, once you try these, you’ll be making them all season long for picnics, pool parties, or just because you deserve a treat that’s as fun to eat as it is tasty.

Why You’ll Love Peach Cobbler Cheesecake Cones
Let me tell you why these Peach Cobbler Cheesecake Cones are about to become your new favorite summer dessert. First off, they’re ridiculously easy to make. No fancy equipment, no complicated steps – just simple, delicious ingredients that come together in no time. Plus, they’re portable! No more balancing plates or worrying about spills at picnics. Just grab a cone and go.
- Perfect flavor combo: The creamy cheesecake paired with those warm, cinnamon-spiced peaches? It’s like summer in every bite.
- No-fuss serving: No plates, no forks – just pure handheld joy.
- Crowd-pleaser: Kids adore them, and adults can’t resist the nostalgic flavors.
- Customizable: Swap in your favorite fruits or toppings to make them your own.
Honestly, once you try these, you’ll wonder how you ever survived summer without them!
Ingredients for Peach Cobbler Cheesecake Cones
Here’s everything you’ll need to make these irresistible Peach Cobbler Cheesecake Cones – and trust me, every ingredient plays a special role!
- 6 waffle cones: The edible “bowl” that makes this dessert so fun to eat
- 1 cup graham cracker crumbs: Measure after crushing for that perfect cobbler-like crust
- 2 tbsp melted butter: Helps bind the crumbs – I always use unsalted
- 8 oz cream cheese: MUST be softened to room temp (no lumps allowed!)
- 1/4 cup sugar: Granulated works best for smooth filling
- 1 tsp vanilla extract: Pure vanilla makes all the difference
- 1/2 cup whipped cream: Folded in last for that dreamy lightness
- 1 cup diced peaches: Fresh is best, about 2 medium peaches
- 1 tbsp brown sugar: For caramelizing those peach pieces
- 1/2 tsp cinnamon: The secret spice that ties it all together
See? Nothing complicated – just simple ingredients that create magic together!
Equipment You’ll Need
Don’t worry – you won’t need any fancy gadgets for these Peach Cobbler Cheesecake Cones! Just grab:
- A medium mixing bowl (for that dreamy cheesecake filling)
- Hand mixer or sturdy whisk (your arms will thank you for the mixer)
- Baking sheet (to keep those cones upright while they bake and chill)
- Spatula (for scraping every last bit of filling into the cones)
- Measuring cups and spoons (precision matters with these sweet treats!)
That’s it – just basic kitchen tools you probably already have on hand!
How to Make Peach Cobbler Cheesecake Cones
Ready to turn those simple ingredients into something magical? Let me walk you through making these Peach Cobbler Cheesecake Cones step by step. I’ve made this recipe dozens of times, and I’ll share all my little tricks to ensure you get perfect results every time. The best part? You’ll go from empty cones to delicious desserts in just about an hour (plus chilling time – patience is key!).
Preparing the Cone Base
First things first – let’s give our cones that signature cobbler crunch! Preheat your oven to 350°F (175°C) and line a baking sheet with parchment paper. In a small bowl, mix the graham cracker crumbs with melted butter until it looks like wet sand. Carefully spoon this mixture into each waffle cone, packing it down gently with your fingers or the back of a spoon. Bake for just 5 minutes – you’ll smell that toasty graham cracker goodness when they’re ready. Let them cool completely before filling (about 15 minutes) or you’ll melt your cheesecake filling!
Making the Cheesecake Filling
While your cones are cooling, let’s whip up that dreamy filling. In a medium bowl, beat the softened cream cheese until it’s completely smooth – no lumps allowed! Add the sugar and vanilla, beating until everything is well combined. Now here’s the secret: gently fold in the whipped cream with a spatula until just incorporated. Don’t overmix or you’ll lose that light, airy texture we’re after. The filling should be thick but spreadable – like the perfect cheesecake-cloud hybrid.
Assembling the Peach Cobbler Cheesecake Cones
Time for the fun part! Spoon your cheesecake filling into the cooled cones, leaving about 1/2 inch at the top for the peaches. In a small bowl, toss your diced peaches with brown sugar and cinnamon – this gives them that classic cobbler flavor. Top each cone generously with the peach mixture. Now comes the hardest part: chilling them for at least an hour before serving. I know it’s tempting to dig in right away, but trust me, this wait makes all the difference in letting the flavors come together perfectly!
Tips for Perfect Peach Cobbler Cheesecake Cones
After making these cones more times than I can count, I’ve picked up some foolproof tricks to make them absolutely perfect every time. First – and I can’t stress this enough – always use room temperature cream cheese. Trying to beat cold cream cheese is like trying to spread cold butter on toast – lumpy mess waiting to happen! Let it sit out for at least an hour before starting.
For the peaches, fresh is definitely best when they’re in season, but if you’re in a pinch, well-drained canned peaches work surprisingly well. Just pat them dry before tossing with the cinnamon sugar so your cones don’t get soggy. Oh, and here’s my favorite hack – stand your filled cones in an egg carton while they chill! It keeps them upright and prevents any filling disasters in your fridge.
One last thing – these are best eaten the same day, but if you must store them, keep them uncovered in the fridge (the cones stay crispier that way). Just be warned – they have a funny habit of disappearing quickly once word gets out they’re in there!
Variations of Peach Cobbler Cheesecake Cones
Once you’ve mastered the original, get ready to play around with these fun twists! My kids love when I swap in strawberries or mixed berries instead of peaches – just toss them with a little lemon juice to balance the sweetness. For a nutty crunch, sprinkle chopped pecans or walnuts over the peach topping. Feeling fancy? Drizzle warm caramel or melted chocolate over the finished cones – it’s like a carnival and a bakery had a delicious baby! If you’re feeling adventurous, try a “peach pie” version by crumbling a buttery pie crust into the cone before adding the filling. The possibilities are endless!
Serving and Storing Peach Cobbler Cheesecake Cones
These cones are happiest when served fresh – I like to pull them from the fridge about 10 minutes before serving so the cheesecake filling softens just slightly. Arrange them standing up in a pretty glass or on a tray lined with parchment (so they don’t tip over!). If you’ve got leftovers (lucky you!), store them uncovered in the fridge for up to 24 hours – any longer and the cones start to soften. Though let’s be honest… leftovers rarely last that long in my house!
Nutritional Information for Peach Cobbler Cheesecake Cones
Here’s the scoop on the nutrition for these tasty treats! Each Peach Cobbler Cheesecake Cone comes in at about 320 calories, with 18g of fat (10g saturated), 4g of protein, and 35g of carbs. You’ll also get a little boost of fiber (2g) from the peaches and graham cracker crumbs. Keep in mind, these values can vary depending on the specific ingredients and brands you use. So, while they’re definitely a treat, they’re worth every delicious bite – especially when summer’s in full swing!
Frequently Asked Questions About Peach Cobbler Cheesecake Cones
I’ve gotten so many questions about these Peach Cobbler Cheesecake Cones since I first shared the recipe – here are the answers to everything you might be wondering!
Can I use canned peaches instead of fresh?
Absolutely! Just make sure to drain them well and pat them dry with a paper towel. The canned peaches in juice (not syrup) work best. I actually keep a can in my pantry for emergency cone cravings!
How far in advance can I make these?
You can prep the components ahead – bake the graham cracker crusts and make the filling up to a day in advance. But wait to assemble until 2-3 hours before serving, or the cones might get soggy. The peach topping should always be added right before serving.
How do I keep the cones from getting soggy?
The secret is making sure your cheesecake filling is thick enough (don’t overmix the whipped cream!) and letting the graham cracker base cool completely before filling. Also, don’t overdo the peach juice when topping – a slotted spoon helps!
Can I make these without waffle cones?
You sure can! Sugar cones work in a pinch, or get creative with short dessert cups. Just adjust your graham cracker layer accordingly – you’ll need less for smaller cones.
What’s the best way to transport these?
I swear by egg cartons or muffin tins for keeping them upright in transit. Pack them in a cooler with ice packs if it’s a hot day – nobody wants melted cheesecake filling!
Print
6 Irresistible Peach Cobbler Cheesecake Cones to Delight Your Summer
- Total Time: 1 hour 20 minutes
- Yield: 6 servings 1x
- Diet: Vegetarian
Description
A delightful dessert combining the flavors of peach cobbler and cheesecake in a convenient cone format. Perfect for summer gatherings or casual treats.
Ingredients
- 6 waffle cones
- 1 cup graham cracker crumbs
- 2 tbsp melted butter
- 8 oz cream cheese, softened
- 1/4 cup sugar
- 1 tsp vanilla extract
- 1/2 cup whipped cream
- 1 cup diced peaches
- 1 tbsp brown sugar
- 1/2 tsp cinnamon
Instructions
- Preheat oven to 350°F.
- Mix graham cracker crumbs with melted butter and press into cones.
- Bake cones for 5 minutes, then let cool.
- Beat cream cheese, sugar, and vanilla until smooth.
- Fold in whipped cream.
- Spoon cheesecake mixture into cones.
- Toss peaches with brown sugar and cinnamon.
- Top cheesecake with peaches.
- Chill for 1 hour before serving.
Notes
- Use fresh peaches for best flavor.
- Can substitute canned peaches if fresh are unavailable.
- Store in refrigerator until ready to serve.
- Prep Time: 15 minutes
- Cook Time: 5 minutes
- Category: Dessert
- Method: Baking
- Cuisine: American
Nutrition
- Serving Size: 1 cone
- Calories: 320
- Sugar: 22g
- Sodium: 180mg
- Fat: 18g
- Saturated Fat: 10g
- Unsaturated Fat: 6g
- Trans Fat: 0g
- Carbohydrates: 35g
- Fiber: 2g
- Protein: 4g
- Cholesterol: 45mg
Keywords: peach cobbler cheesecake cones, dessert recipe, summer dessert, easy cheesecake recipe


