
You know those nights when you want something delicious but don’t feel like making a whole meal? That’s how these Parmesan Cheeseburger Balls were born in my kitchen—a happy accident that’s now my go-to party trick! Crispy on the outside, packed with juicy ground beef and melty cheese, and kissed with garlic Parmesan goodness, they’re basically everything you love about a cheeseburger in bite-sized form. My kids go crazy for them, and honestly? So do my friends at game nights. The best part? They come together in under 30 minutes. Trust me, once you try these golden little flavor bombs, you’ll be hooked.
Why You’ll Love These Parmesan Cheeseburger Balls
Let me tell you why these little guys have become a staple in my kitchen—they’re the ultimate crowd-pleaser with minimal effort. Here’s what makes them so special:
- That perfect crispy-chewy bite: The golden-brown crust gives way to tender, juicy beef inside. It’s that magical texture contrast we all crave!
- Cheese, glorious cheese: With both Parmesan and cheddar melted right into each ball, you get pockets of gooey goodness in every bite. (I may or may not have snuck extra cheese in mine last time…)
- Weeknight superhero: From mixing bowl to table in under 30 minutes? Yes please! Even my teenager can whip these up when I’m running late.
- Party MVP: I’ve brought these to everything from book club to tailgates—they disappear faster than I can say “seconds please!” The garlic-Parmesan aroma alone draws people to the snack table.
- Endless adaptability: Swap in different cheeses, add spices, or make them mini for appetizers—they’re like a blank canvas for your burger cravings.
Seriously, these are the appetizer that’ll make people ask for your recipe—just like my neighbor did after our last BBQ. I may have forgotten to mention how easy they are to make!
Ingredients for Parmesan Cheeseburger Balls
Here’s everything you’ll need to make these addictive little bites. I promise it’s all simple stuff—probably already in your pantry! Just grab:
- 1 lb ground beef (80/20 blend works best) – That little bit of fat keeps them juicy
- 1/2 cup grated Parmesan cheese – Freshly grated makes a HUGE difference here
- 1/2 cup shredded cheddar cheese – Sharp cheddar gives the best flavor punch
- 1 tsp garlic powder – My secret? Sometimes I sneak in an extra half teaspoon
- 1 tsp onion powder – Adds that classic burger flavor
- 1/2 tsp salt – Adjust to your taste after mixing
- 1/2 tsp black pepper – Freshly cracked if you’ve got it
1/2 cup breadcrumbs – Plain or Italian style both work
1 large egg – The glue that holds it all together
2 tbsp olive oil – For that perfect golden crust
Ingredient Notes & Substitutions
No stress if you need to swap things out—I’ve tested tons of variations! Here’s what works:
- Ground beef: Turkey or chicken work great too—just add 1 tbsp olive oil to the mix to keep them moist
- Cheese: Pre-shredded works in a pinch, but fresh-grated melts better (and no anti-caking additives)
- Breadcrumbs: Gluten-free? Use crushed pork rinds or almond flour instead
- Spice it up: Add a pinch of cayenne or smoked paprika for a kick
- Egg-free: 1 tbsp mayonnaise can sub for the egg binder
Pro tip: If your mixture feels too wet, add breadcrumbs 1 tbsp at a time. Too dry? A splash of milk does the trick!
Equipment You’ll Need
Honestly, you probably have everything already! Here’s what I grab from my chaotic kitchen drawers:
- Large mixing bowl – Where the magic happens
- Oven-safe skillet – My trusty cast iron works perfectly
- Baking sheet – For that final bake
- Spoon or spatula – For mixing (I usually end up using my hands!)
- Measuring cups/spoons – Eyeballing works, but cheese deserves precision
That’s it! No fancy gadgets needed—just good old-fashioned burger ball making.
How to Make Parmesan Cheeseburger Balls
Okay, let’s get cooking! These Parmesan cheeseburger balls come together so easily—even my kitchen-averse cousin managed to nail them on her first try. Here’s my foolproof method:
- First, preheat that oven to 375°F (190°C). Trust me, starting with a hot oven makes all the difference for that crispy exterior.
- In your biggest mixing bowl, combine the ground beef, both cheeses, garlic powder, onion powder, salt, and pepper. Get in there with your hands—it’s the best way to mix everything evenly without overworking the meat.
- Now sprinkle in the breadcrumbs and crack in the egg. Mix just until everything comes together. You’ll know it’s ready when the mixture holds its shape when pressed.
- Time to roll! Grab small handfuls (about 1 heaping tablespoon each) and gently form them into balls. Pro tip: Wet your hands slightly to prevent sticking—the mixture will be moist but shouldn’t be mushy.
- Heat your olive oil in a skillet over medium heat. When it shimmers, you’re ready to brown those beauties!
Shaping and Browning the Balls
Here’s where the magic starts! Aim for balls about 1.5 inches across—roughly the size of a ping pong ball. This ensures they cook evenly without burning. Drop them into the hot oil (don’t crowd the pan!) and let them sizzle untouched for 2-3 minutes until golden brown on the bottom. Gently roll them over to brown all sides—you’ll start smelling that incredible garlic-Parmesan aroma!
Baking to Perfection
Once your balls are beautifully browned (they don’t need to be cooked through yet!), transfer them to a baking sheet. Pop them in the preheated oven for 10-12 minutes. They’re done when the centers reach 160°F—but honestly, I just cut one open to check for doneness. You want them juicy but not pink, with cheese oozing temptingly when you bite in. The smell will drive you crazy!
See? Told you it was easy! Now try not to eat them all straight off the baking sheet—they’re dangerously hot but oh-so-tempting.
Tips for Crispy, Juicy Parmesan Cheeseburger Balls
After making these dozens of times (okay, maybe hundreds—we’re obsessed!), I’ve picked up some tricks to guarantee perfect results every time. Here are my can’t-live-without tips:
- Chill the mixture first: If you’ve got 15 extra minutes, pop the mix in the fridge before shaping. Cold hands and cold meat make for neater balls that hold their shape beautifully.
- Don’t overmix: I learned this the hard way! Mix just until the ingredients combine—overworking makes dense, tough balls instead of light, juicy ones.
- Patience with the browning: Let them get a proper golden crust before moving them. That first crispy layer is flavor central!
- Size matters: Keep them uniform so they cook evenly. My kitchen scale helps—I aim for 1-ounce portions.
- Rest before serving: Let them sit for 5 minutes after baking. I know it’s torture, but this lets the juices redistribute so they don’t gush out on first bite.
Bonus tip from my disaster file: If your balls crack while browning, just wet your fingertips and gently smooth them back together. No one will ever know!
Serving Suggestions
Oh, the fun part—how to serve these cheesy beauties! Here’s how we love them:
- Dippin’ galore: Set out small bowls of marinara, ranch dressing, or spicy sriracha mayo (my personal weakness). The creamy coolness cuts perfectly through the warm, savory balls.
- Burger night vibes: Serve alongside all the classic fixings—crisp lettuce leaves, tomato slices, and pickle spears for DIY sliders. Bonus points for toasted mini buns!
- Game day spread: Pair with celery sticks, carrot coins, and other crunchy veggies to balance the richness. They disappear fast at parties!
- Weeknight shortcut: Toss a handful over a salad for instant protein-packed pizzazz. The cheese melts slightly into the greens—heaven!
However you serve them, just make sure napkins are nearby—things might get deliciously messy!
Storage and Reheating
Here’s the best part—these Parmesan cheeseburger balls are just as good leftover as they are fresh! My freezer always has a stash ready for emergencies. To store:
- Fridge: Keep in an airtight container for up to 3 days. They actually taste more flavorful the next day as the garlic-Parmesan melds into the meat!
- Freezer: Flash-freeze uncooked balls on a parchment-lined tray, then transfer to freezer bags for up to 2 months. No thawing needed—just add 3-4 extra minutes when baking from frozen.
For reheating, skip the microwave (it makes them soggy!). Instead, pop them in a 350°F oven for 5-7 minutes until heated through. They’ll regain that gorgeous crispiness!
Nutritional Information
Just a quick heads up—nutritional values can vary depending on the brands and specific ingredients you use. These cheeseburger balls pack plenty of protein from the beef and cheese, with that delicious crispy texture coming from just enough breadcrumbs and Parmesan. As with any good appetizer, they’re best enjoyed in moderation (though good luck stopping at just one!).
FAQs About Parmesan Cheeseburger Balls
You’ve got questions? I’ve got answers! Here are the most common things readers ask me about these addictive little cheeseburger balls:
Can I use pre-shredded cheese instead of grating my own?
You can, but fresh-grated makes all the difference! Pre-shredded cheese has anti-caking agents that keep it from melting as smoothly. That said—when I’m in a pinch (we’ve all been there!), I use pre-shredded and just add an extra tablespoon of olive oil to help with binding.
How do I know when they’re fully cooked inside?
The easiest way? Cut one open! You’re looking for no pink in the center, with clear juices running out. If you’re fancy, use a meat thermometer—they’re done at 160°F. But honestly? After making these so many times, I just give one a gentle press. If it springs back firmly, it’s ready!
Can I make these ahead of time?
Absolutely! I often mix the meat and shape the balls the night before, keeping them covered in the fridge. You can also freeze uncooked balls for up to 2 months—just add a few extra minutes when baking from frozen. They make the ultimate last-minute appetizer!
Why do mine sometimes fall apart when browning?
Usually means the mixture needs more binder. Try adding another tablespoon of breadcrumbs or chilling the mix for 15 minutes before shaping. Also—don’t move them too soon in the pan! Let that golden crust form before flipping.
Can I air fry these instead of baking?
You bet! At 375°F, they take about 8-10 minutes in the air fryer—just shake the basket halfway. They get extra crispy this way! Just don’t overcrowd, or they’ll steam instead of crisp up.
Share Your Experience
I’d love to hear how your Parmesan cheeseburger balls turned out! Did you add any fun twists? Maybe your kids went wild for them like mine do? Drop your thoughts below—your tips might just help another home cook perfect their batch. Happy cooking, friends!
Print
30-Minute Parmesan Cheeseburger Balls – Irresistibly Crispy & Cheesy
- Total Time: 27 mins
- Yield: 20 balls 1x
- Diet: Low Lactose
Description
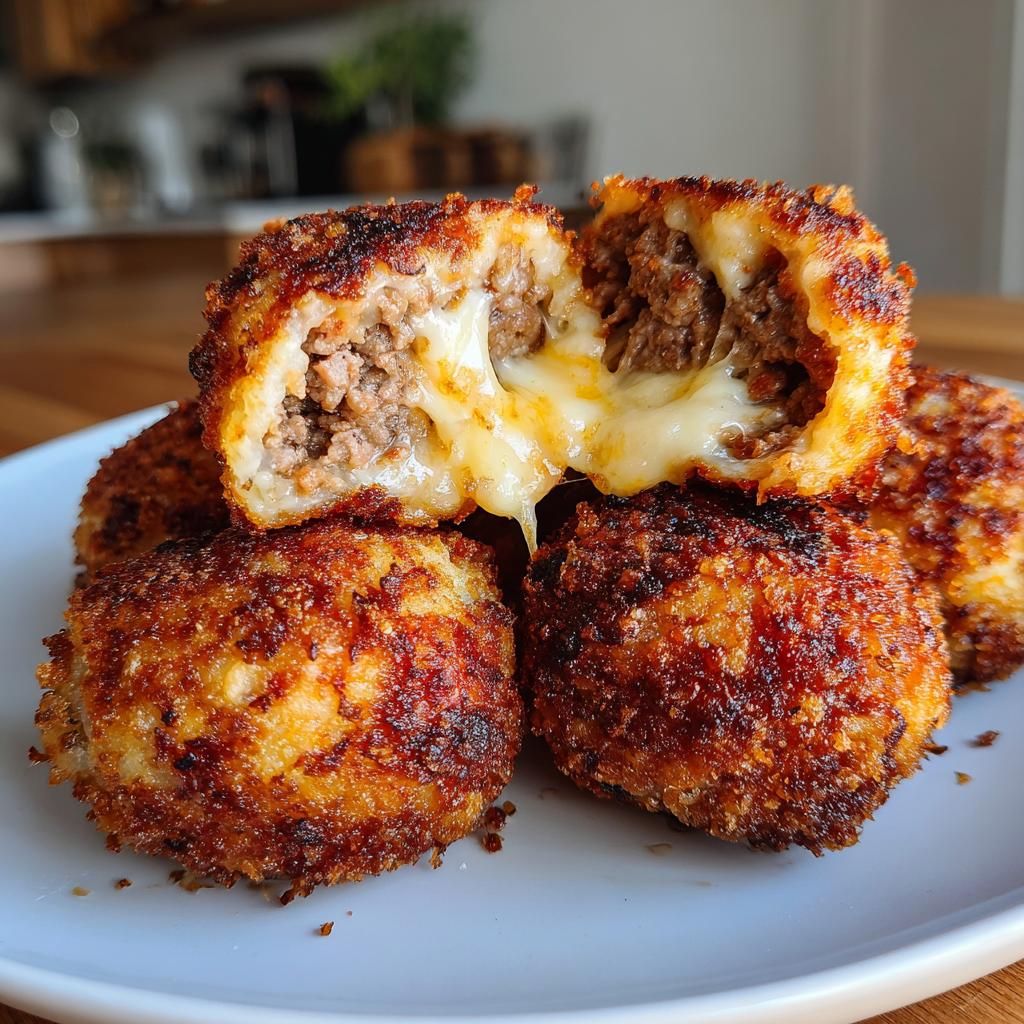
Parmesan Cheeseburger Balls are golden brown and crispy, filled with tender ground beef, melted cheese, and a touch of garlic Parmesan zest.
Ingredients
- 1 lb ground beef
- 1/2 cup grated Parmesan cheese
- 1/2 cup shredded cheddar cheese
- 1 tsp garlic powder
- 1 tsp onion powder
- 1/2 tsp salt
- 1/2 tsp black pepper
- 1/2 cup breadcrumbs
- 1 egg
- 2 tbsp olive oil
Instructions
- Preheat oven to 375°F (190°C).
- In a bowl, mix ground beef, Parmesan cheese, cheddar cheese, garlic powder, onion powder, salt, and pepper.
- Add breadcrumbs and egg, then mix until well combined.
- Shape the mixture into small balls.
- Heat olive oil in a skillet over medium heat.
- Brown the balls on all sides, then transfer to a baking sheet.
- Bake for 10-12 minutes until cooked through.
- Serve hot.
Notes
- Use fresh Parmesan for best flavor.
- Can be frozen before baking for later use.
- Serve with dipping sauces like ketchup or ranch.
- Prep Time: 15 mins
- Cook Time: 12 mins
- Category: Appetizer
- Method: Baking
- Cuisine: American
Nutrition
- Serving Size: 2 balls
- Calories: 180
- Sugar: 1g
- Sodium: 320mg
- Fat: 12g
- Saturated Fat: 5g
- Unsaturated Fat: 6g
- Trans Fat: 0g
- Carbohydrates: 5g
- Fiber: 0g
- Protein: 12g
- Cholesterol: 55mg
Keywords: Parmesan Cheeseburger Balls, beef appetizer, crispy cheese balls


