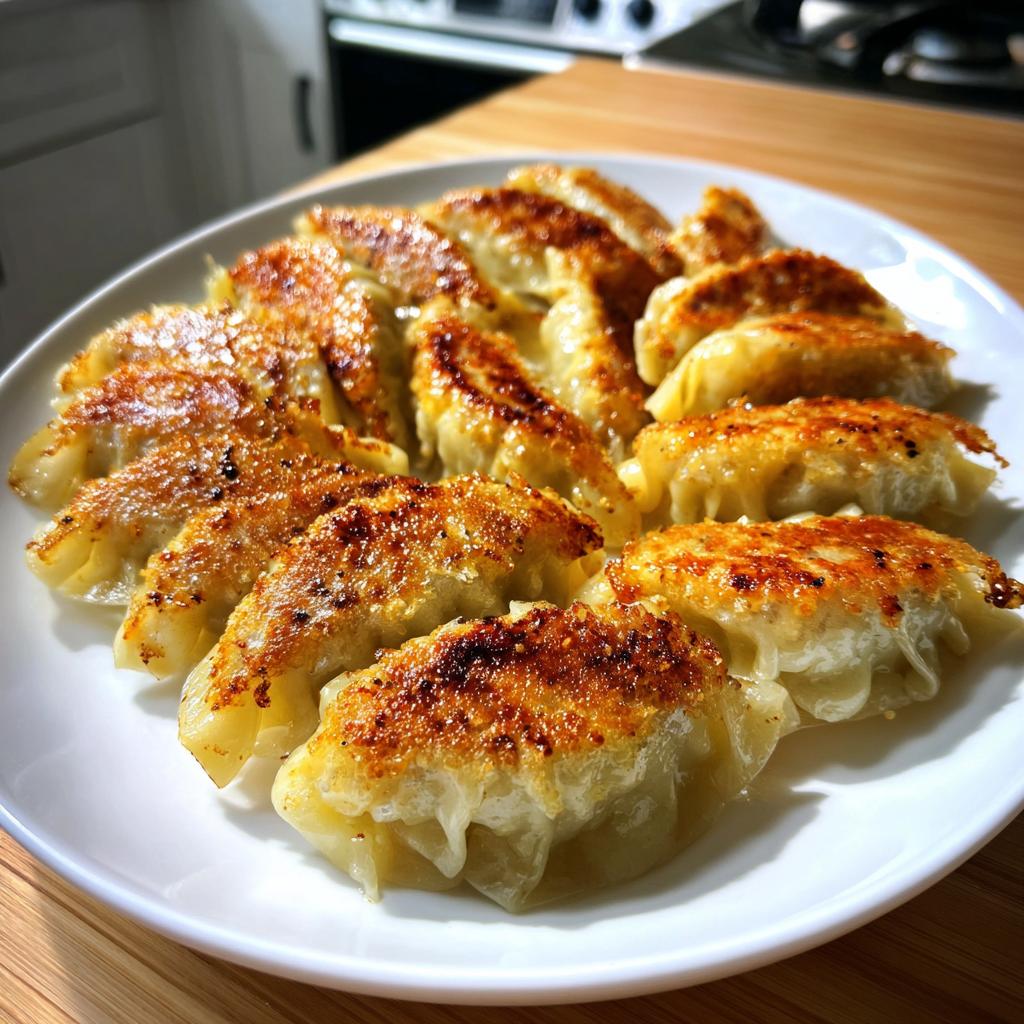
There’s nothing quite like biting into a pan-fried chicken dumpling—that perfect crunch giving way to a burst of juicy, flavorful filling. I still remember the first time I tried making them at home after falling in love with them at my favorite dim sum spot. After what felt like a hundred trials (and a few hilarious dumpling-folding disasters), I finally nailed down this foolproof method. These golden-brown beauties come together in under an hour, and trust me, once you taste that crispy bottom paired with the tender chicken and cabbage filling, you’ll never want takeout dumplings again!
Why You’ll Love These Pan-Fried Chicken Dumplings
Once you try these crispy little pockets of joy, you’ll be hooked! Here’s why:
- That perfect crunch: Golden-brown bottoms give way to tender wrappers—no sad, soggy dumplings here
- Juicy on the inside: The chicken-cabbage filling stays incredibly moist (thanks to my little steaming trick!)
- Weeknight-friendly: Ready in under 30 minutes—faster than waiting for delivery
- Endlessly adaptable: Swap in your favorite veggies or add a spicy kick if you’re feeling fancy
Honestly? I make a double batch every time—they disappear faster than I can fry them!
Ingredients for Pan-Fried Chicken Dumplings
Gather these simple ingredients—you probably have most in your kitchen already! The magic happens when they all come together:
- 1 lb ground chicken (thigh meat gives the juiciest results, but breast works too)
- 2 cups cabbage, finely chopped (I use my trusty chef’s knife, but a food processor works in a pinch)
- 3 green onions, minced (both white and green parts—waste not!)
- 2 cloves garlic, minced (fresh is best—none of that jarred stuff here)
- 1 tbsp ginger, grated (keep the peel on—it makes grating way easier)
- 1 tbsp soy sauce (I’m partial to Kikkoman, but use what you love)
- 1 tsp sesame oil (this is the flavor bomb—don’t skip it!)
- 1/2 tsp salt (I use kosher—it seasons more evenly)
- 1/4 tsp black pepper (freshly ed makes all the difference)
- 30 dumpling wrappers (look for the round ones—they’re perfect for folding)
- 2 tbsp vegetable oil (for that gorgeous golden crust)
- 1/2 cup water (the secret to steaming them perfectly)
See? Nothing fancy—just good, honest ingredients that transform into something magical. Now let’s get cooking!
How to Make Pan-Fried Chicken Dumplings
Alright, let’s get down to business! Making these dumplings is easier than you think—I’ll walk you through each step so you end up with crispy-bottomed perfection every time. Just follow along, and before you know it, you’ll be flipping dumplings like a pro.
Preparing the Filling
First things first—the filling! This is where the magic starts, and trust me, you want to get this right. Here’s how I do it:
- In a big bowl, add your ground chicken—I like to use my hands for this part because it feels more personal (and honestly, it’s kinda fun).
- Toss in the chopped cabbage, green onions, garlic, and ginger. Now, here’s a little secret: massage the cabbage with a pinch of salt first—it helps soften it up and brings out its natural sweetness.
- Drizzle in the soy sauce and sesame oil, then sprinkle the salt and pepper. Mix everything together with a fork or your hands, but don’t go crazy—overmixing makes the chicken tough. You want it just combined, like you’re gently folding clouds.
- Taste test time! Grab a small spoonful and microwave it for 10 seconds to cook it (safety first!). Adjust the seasoning if needed—sometimes I add an extra dash of soy sauce if it needs more oomph.
Folding and Sealing Dumplings
Now comes the part that intimidated me at first—folding! But don’t worry, even if they’re not perfect, they’ll still taste amazing. Here’s my no-stress method:
- Keep a small bowl of water nearby—this is your edible glue for sealing.
- Place a dumpling wrapper in your palm and add about 1 teaspoon of filling (no more, or they’ll burst!).
- Dip your finger in water and run it along the edge of the wrapper—this helps it stick.
- Fold the wrapper in half and pinch the top center to seal. Then, make little pleats along one side, pressing as you go. Don’t stress if they’re not uniform—my first ones looked like abstract art!
- Place each finished dumpling on a lightly floured tray so they don’t stick. Cover them with a damp towel to keep them from drying out while you work.
Cooking the Dumplings
Here’s where the real magic happens—that crispy-soft texture we’re after! Heat control is key here, so stay with me:
- Heat a nonstick pan over medium heat (not too hot, or the bottoms will burn before the filling cooks). Add the vegetable oil and swirl it around.
- Arrange the dumplings in the pan—don’t crowd them! Give them some personal space so they crisp up nicely.
- Let them cook undisturbed for 2-3 minutes until the bottoms turn golden brown—lift one gently to check.
- Now, the steam! Carefully pour in ½ cup water (it’ll sizzle—that’s normal), then immediately cover with a lid. Reduce the heat to medium-low and let them steam for 6-8 minutes. This cooks the filling through while keeping the tops tender.
- Remove the lid—hello, beautiful dumplings! If there’s any water left, let it evaporate for a minute or two. Then crank the heat back up to medium for another 1-2 minutes to re-crisp those bottoms. Listen for that satisfying le—that’s when you know they’re ready!
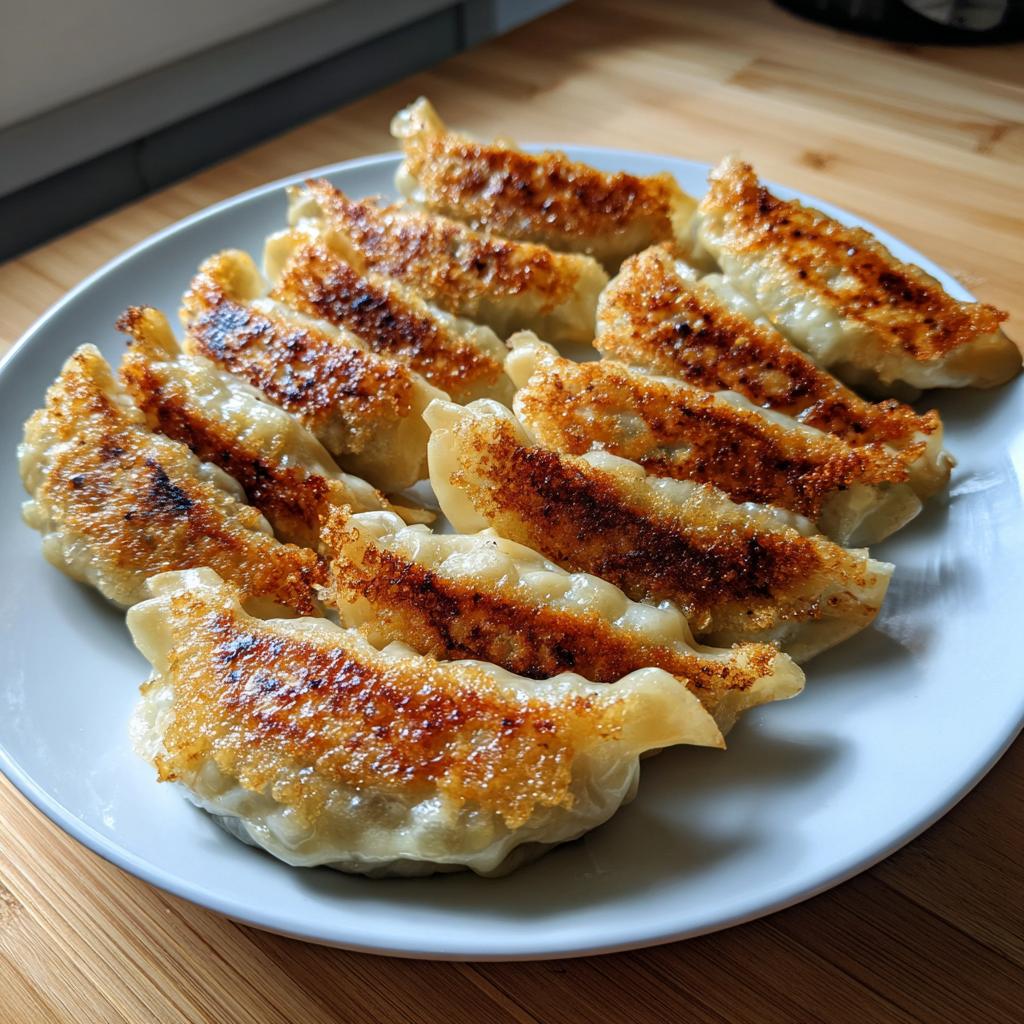
And there you have it—golden, crispy-bottomed dumplings with juicy centers. Try not to eat them straight from the pan (I won’t judge if you do). Now, who’s ready for dipping sauce?
Tips for Perfect Pan-Fried Chicken Dumplings
After making countless batches (and yes, burning a few along the way), I’ve picked up some foolproof tricks for dumpling success:
- Non-stick is your friend: Seriously, save yourself the heartache—those crispy bottoms won’t stick if you use a good non-stick pan
- Keep wrappers happy: Cover them with a damp towel while working—dry wrappers and refuse to seal properly
- Give them space: Overcrowding the pan creates steamed dumplings instead of crispy ones (learned this the hard way!)
- Listen to the sizzle: That ling sound when you add water means you’ve got the perfect heat level
- Patience pays: Resist the urge to peek while steaming—that trapped heat is cooking the filling perfectly
Follow these, and you’ll have restaurant-quality dumplings every single time—promise!
Serving Suggestions for Pan-Fried Chicken Dumplings
Now for the best part—how to enjoy your golden beauties! My family always fights over dipping sauces, so I usually set out a few options:
- Classic soy-vinegar: My go-to! Equal parts soy sauce and rice vinegar with a drizzle of sesame oil and a sprinkle of chili flakes
- Sweet chili kick: Store-bought sweet chili sauce mixed with a squeeze of lime—perfect for spice lovers
- Creamy sesame: Whisk together tahini, soy sauce, honey, and a bit of hot water until smooth
For sides, I keep it simple—steamed bok choy or a quick cucumber salad cuts through the richness. And honestly? They’re amazing straight from the pan while standing over the stove. No plate needed!
Storage and Reheating
Let’s be real—these dumplings rarely last long enough to store in my house! But when they do (miraculously), here’s how to keep them tasting fresh:
Fridge Storage
If you’ve got leftovers (you disciplined soul, you!), let them cool completely first. Then pop them in an airtight container with parchment paper between layers—they’ll keep for about 3 days. The bottoms might lose some crispness, but don’t worry, we’ll fix that when reheating!
Freezing for Later
This is my secret weapon for quick meals! Freeze uncooked dumplings on a baking sheet first (so they don’t stick together), then transfer to freezer bags. They’ll last up to 3 months—just add 2 extra minutes when cooking from frozen. No thawing needed!
Reheating Like a Pro
For that just-made crispiness:
- Stovetop method: My favorite! Heat a splash of oil in a pan over medium, add dumplings, and crisp the bottoms for 2 minutes. Add 2 tbsp water, cover, and steam for 3 minutes—good as new!
- Microwave hack: When I’m desperate, I microwave for 30 seconds, then finish in a hot dry pan for 1 minute to recrisp. Not perfect, but gets the job done!
Pro tip: Frozen dumplings steam best with a 1:1 water-to-vinegar mix—helps prevent soggy bottoms. Learned that from my dumpling-obsessed aunt!
Pan-Fried Chicken Dumplings FAQ
Over the years, I’ve gotten so many questions about these dumplings—here are the ones that pop up most often with my tried-and-true answers:
Can I use pork instead of chicken?
Absolutely! Ground pork works beautifully—it’s actually more traditional in some recipes. Just use the same amount, and maybe add an extra teaspoon of soy sauce since pork is milder. My aunt swears by a 50/50 chicken-pork mix for the best texture.
How do I prevent soggy dumplings?
Three words: heat control matters! Make sure your pan is hot enough before adding oil (test with a water droplet—it should sizzle), don’t overcrowd them, and that final uncovered crisp-up is crucial. Oh, and never skip the sesame oil in the filling—it helps repel excess moisture.
What if my dumplings stick to the pan?
First, breathe—we’ve all been there! Gently loosen them with a thin spatula while they’re still hot. Next time, try this trick: after adding water, swirl the pan gently to create a steam bath. And of course, always use that trusty non-stick pan!
Can I make these vegetarian?
You bet! Swap the chicken for crumbled firm tofu or chopped mushrooms (shiitakes add amazing umami). Just sauté the mushrooms first to remove excess water. My vegan friend adds mashed chickpeas for protein—sounds weird but tastes incredible!
Why do my dumplings burst while cooking?
Usually means either too much filling (stick to 1 tsp!) or not sealing tightly enough. Run your finger with water along the entire edge, and press out air pockets before sealing. And don’t peek while steaming—that sudden temperature change can make them explode!
Nutritional Information
Okay, let’s talk numbers—but remember, these are just estimates since your ingredients might differ slightly from mine (and I won’t judge if you sneak an extra dumpling or two!). Here’s the breakdown per serving (about 5 dumplings):
- Calories: 220 (worth every single one!)
- Fat: 8g (mostly from that glorious sesame oil and chicken)
- Saturated Fat: 2g
- Protein: 15g (hello, muscle fuel!)
- Carbs: 25g (thank those tender wrappers)
- Fiber: 2g (cabbage for the win!)
- Sugar: 1g (just a whisper from the veggies)
- Sodium: 450mg (easy to reduce if you use low-sodium soy sauce)
A quick note—these values can change based on your exact ingredients. Using thigh meat instead of breast? A tad more fat. Extra soy sauce in your dipping sauce? Sodium goes up. But honestly? When something tastes this good, I stop counting and start enjoying!
Ready to Make Pan-Fried Chicken Dumplings?
Go grab your pan—it’s time to create some crispy, juicy magic! I can’t wait for you to taste these golden pockets of happiness. Let me know how yours turn out (and how many you ate straight from the pan—no judgment here!).
Print
18-Minute Pan-Fried Chicken Dumplings – Crispy & Irresistible
- Total Time: 35 mins
- Yield: 30 dumplings 1x
- Diet: Low Calorie
Description
Crispy pan-fried chicken dumplings with a juicy, flavorful filling. Perfect as an appetizer or main dish.
Ingredients
- 1 lb ground chicken
- 2 cups cabbage, finely chopped
- 3 green onions, minced
- 2 cloves garlic, minced
- 1 tbsp ginger, grated
- 1 tbsp soy sauce
- 1 tsp sesame oil
- 1/2 tsp salt
- 1/4 tsp black pepper
- 30 dumpling wrappers
- 2 tbsp vegetable oil
- 1/2 cup water
Instructions
- In a bowl, mix chicken, cabbage, green onions, garlic, ginger, soy sauce, sesame oil, salt, and black pepper.
- Place 1 tsp filling in each dumpling wrapper. Fold and seal edges with water.
- Heat oil in a pan over medium heat. Place dumplings in the pan and cook for 2-3 minutes until golden brown.
- Add water, cover, and steam for 6-8 minutes until dumplings are cooked through.
- Remove lid and cook another 1-2 minutes to crisp the bottoms again.
- Serve hot with dipping sauce.
Notes
- Use a non-stick pan to prevent sticking.
- Keep dumpling wrappers covered to avoid drying out.
- Adjust seasoning to taste.
- Prep Time: 20 mins
- Cook Time: 15 mins
- Category: Appetizer
- Method: Pan-frying
- Cuisine: Asian
Nutrition
- Serving Size: 5 dumplings
- Calories: 220
- Sugar: 1g
- Sodium: 450mg
- Fat: 8g
- Saturated Fat: 2g
- Unsaturated Fat: 5g
- Trans Fat: 0g
- Carbohydrates: 25g
- Fiber: 2g
- Protein: 15g
- Cholesterol: 45mg
Keywords: chicken dumplings, pan-fried dumplings, homemade dumplings


