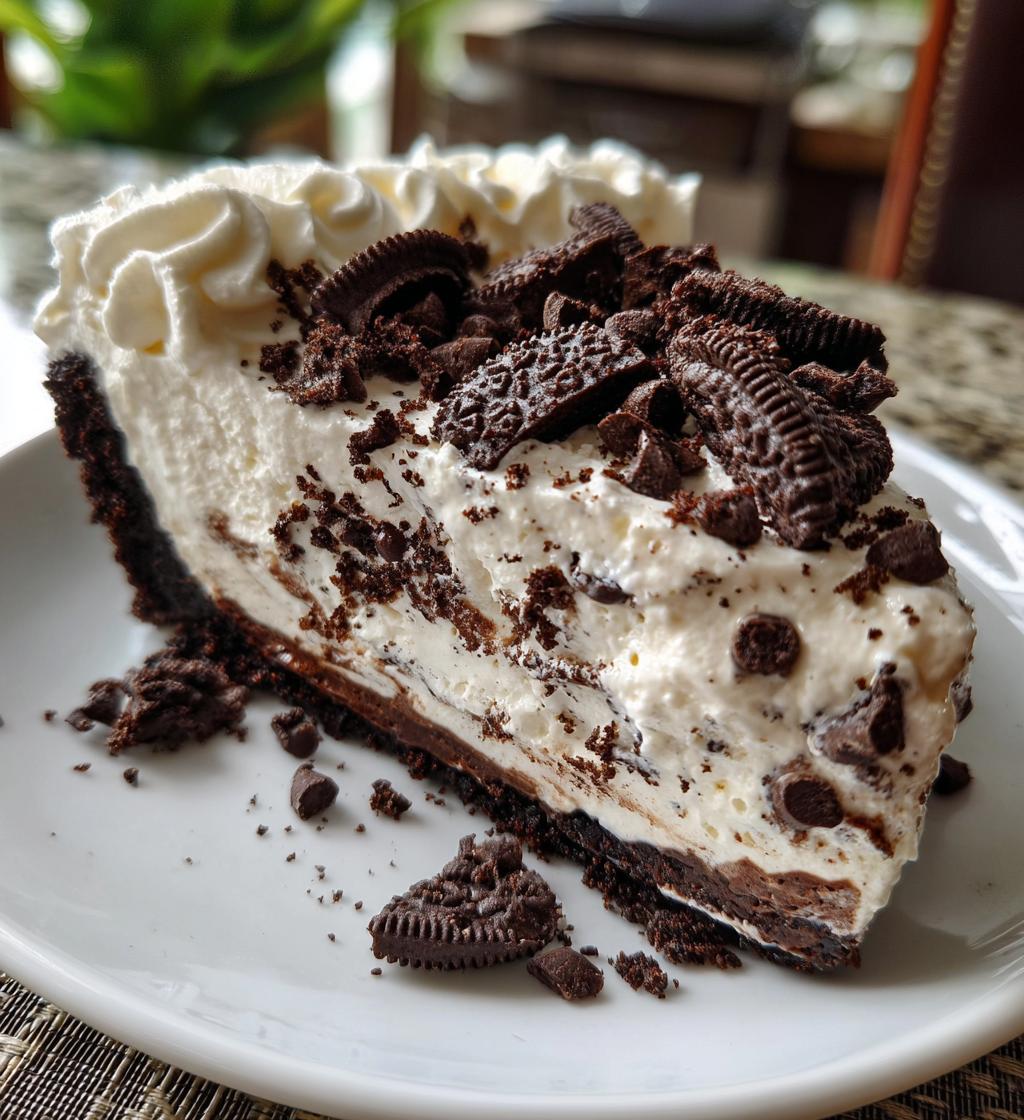
There’s something utterly magical about *Oreo desserts*. I remember the first time I made these little wonders; I was just a teenager, and my friends were coming over for a movie night. I wanted to impress them, but I was a little nervous in the kitchen. But wow, how simple it turned out to be! Just a handful of ingredients, some crushing and mixing, and soon I had a delicious treat that left everyone begging for seconds.
Honestly, the joy of making these desserts lies in how effortlessly they come together. You don’t need to be a baking pro to whip up something that tastes like a million bucks. The creamy filling paired with that classic chocolate crunch is always a hit, whether it’s for a casual gathering or a special occasion. Trust me, once you dive into the world of *Oreo desserts*, you’ll be hooked for life!
Ingredients List
Here’s what you’ll need to create these delightful *Oreo desserts*. Gather these ingredients, and let’s get started!
- 24 Oreo cookies, crushed
- 1/2 cup butter, melted
- 2 cups cream cheese, softened
- 1 cup powdered sugar
- 2 cups whipped cream
- 1 cup chocolate chips
How to Prepare *Oreo Desserts*
Now that you have all your ingredients ready, let’s dive into the fun part! Preparing these *Oreo desserts* is a breeze, and I promise you’ll be amazed at how quickly everything comes together. Just follow these simple steps, and you’ll be on your way to a dessert that everyone will love!
Step-by-step Instructions
- Preheat the oven: Start by preheating your oven to 350°F (175°C). This ensures it’s nice and hot when we pop our dessert in.
- Make the crust: In a large bowl, combine the crushed Oreo cookies with the melted butter. Mix until it’s all evenly coated – it should look like wet sand!
- Press into the dish: Take your Oreo mixture and press it firmly into the bottom of a baking dish. I like to use the back of a measuring cup for this – it makes it super easy to get a nice, even layer.
- Prepare the filling: In another bowl, beat the softened cream cheese and powdered sugar together until it’s creamy and smooth. This step is crucial – you want to make sure there are no lumps!
- Fold in the whipped cream: Gently fold the whipped cream into the cream cheese mixture. Be careful not to deflate the whipped cream too much; we want that light, airy texture!
- Spread the filling: Once it’s all combined, spread the cream cheese mixture over your Oreo crust. Make sure to get it as even as possible; it’ll look so pretty when it’s done!
- Add chocolate chips: Sprinkle the chocolate chips evenly on top of the cream cheese layer. You can never have too much chocolate, right?
- Bake: Pop your dish in the preheated oven and bake for about 20 minutes. You’ll know it’s done when the edges are slightly set but the center still has a little jiggle.
- Cool and chill: Let it cool completely after baking, then refrigerate for at least 2 hours before serving. This step is key for the flavors to meld together.
And there you have it! You’re now ready to serve up some incredible *Oreo desserts* that’ll leave everyone asking for the recipe. Enjoy every creamy, crunchy bite!
FAQ Section
Got questions about making *Oreo desserts*? Don’t worry, I’ve got you covered! Here are some common queries I often hear, along with my best tips and tricks to ensure your dessert turns out perfect every time.
Q1. Can I make these *Oreo desserts* ahead of time?
Absolutely! These desserts are perfect for making ahead. In fact, they taste even better after chilling in the refrigerator for a few hours, as it allows the flavors to blend beautifully. Just be sure to cover it well to prevent any fridge odors from sneaking in!
Q2. What can I substitute for cream cheese?
If you’re not a fan of cream cheese, you can use mascarpone or Greek yogurt as alternatives. Just remember that the taste and texture will be a bit different, but it’ll still be delicious! I love using Greek yogurt for a lighter twist.
Q3. Can I use different types of Oreos?
Of course! Feel free to get creative with your choice of Oreos. Double-stuffed Oreos give an extra creamy filling, while flavors like mint or peanut butter can add a fun twist. Just remember, the flavor of the Oreos will impact the overall taste of your dessert!
Q4. Is there a way to make these *Oreo desserts* gluten-free?
Yes! Just swap out the regular Oreos for gluten-free Oreos, and you’re all set! It’s a simple way to keep this dessert accessible for everyone, including those with gluten sensitivities.
Q5. How do I store leftovers?
Store any leftovers in an airtight container in the refrigerator for up to three days. Trust me, they won’t last long, but if they do, this will keep them fresh and delicious for your next sweet craving!
Why You’ll Love This Recipe
There are so many reasons to adore these *Oreo desserts*! Here are just a few that make them a must-try:
- Quick and Easy: With just a handful of ingredients and simple steps, you can whip up these treats in no time. Perfect for last-minute gatherings!
- Irresistibly Delicious: The combination of the crunchy Oreo crust, creamy filling, and rich chocolate chips is simply heavenly. Every bite is a delightful explosion of flavor!
- Versatile: You can easily customize the recipe to fit your taste by using different types of Oreos or adding your favorite toppings. The possibilities are endless!
- Make-Ahead Friendly: These desserts are great for prepping ahead of time. Just chill them in the fridge, and they’ll be ready when you need them.
- Always a Crowd-Pleaser: No matter the occasion, these *Oreo desserts* are sure to impress friends and family alike. They’re a guaranteed hit at parties!
Once you try them, you’ll understand why they’re such a beloved dessert in my house!
Tips for Success
Making these *Oreo desserts* is a fun adventure, but a few tips can help you achieve the best results every time! I’ve learned a thing or two along the way, and I want to share those nuggets of wisdom with you.
Use Fresh Ingredients
First things first, always use fresh ingredients! Trust me, the quality of your cream cheese and whipped cream can make a huge difference in flavor and texture. I once made these desserts with cream cheese that had been in the fridge too long, and let’s just say, it didn’t have the creamy goodness I was hoping for. Fresh is always best!
Don’t Rush the Mixing
When mixing the cream cheese and powdered sugar, take your time. You want that mixture to be perfectly smooth and free of lumps. I learned this the hard way when I was in a hurry once, and those pesky lumps stayed in the filling. It was a bummer! So, give your mixer a moment to work its magic!
Chill, Chill, Chill!
Patience is key! After baking, let your dessert cool completely before popping it in the fridge. This cooling time is crucial for letting the flavors meld together. I know it’s tempting to dive in right away, but if you rush this step, you might lose that delicious creamy texture we all love.
Watch the Baking Time
Keep an eye on your dessert while it’s baking! Ovens can be sneaky, and every one is different. I once forgot about mine and ended up with a slightly overbaked batch. The edges were still good, but the center lost its creamy magic. Check for that slight jiggle in the middle when the time is up!
Experiment and Have Fun!
Finally, don’t be afraid to get creative! I love swapping in different types of Oreos or adding nuts for a little crunch. One time, I made a batch with mint Oreos, and they were a hit during the holidays! So, let your imagination run wild and make these *Oreo desserts* your own!
With these tips in your back pocket, you’re all set to make an incredible batch of *Oreo desserts*. Enjoy the process, and happy baking!
Variations
One of the best things about *Oreo desserts* is how easy it is to customize them to fit your taste buds! Here are some fun variations that’ll take your dessert game to the next level:
Different Oreo Flavors
Why stick to the classic when you can explore the world of Oreo flavors? Try using mint Oreos for a refreshing twist, or go for peanut butter Oreos if you’re a fan of that creamy, nutty goodness. I once made a batch with red velvet Oreos around Valentine’s Day, and they were a huge hit!
Mix in Some Fun Toppings
Get creative with toppings! Consider adding chopped nuts like pecans or walnuts for some extra crunch. I love sprinkling toasted coconut on top for a tropical vibe. You can also drizzle some caramel or chocolate sauce over the finished dessert for a decadent finish!
Add a Layer of Fruit
If you’re feeling adventurous, why not layer in some fresh fruit? Strawberries or raspberries add a bright, tart contrast to the rich creaminess. Just chop them up and sprinkle them in between the layers for a burst of flavor!
Swap the Cream Cheese Filling
For a different flavor profile, try swapping out the cream cheese filling for vanilla pudding or chocolate mousse. It gives the dessert a whole new vibe! I once made a chocolate mousse version for a dinner party, and it was a delightful surprise for my guests.
Go No-Bake!
If you prefer not to bake at all, you can make a no-bake version by skipping the oven entirely. Just prepare the crust and filling as directed, then let it chill in the fridge until set. It’s a super easy way to whip up a treat on a hot day!
These variations are just the tip of the iceberg! Feel free to mix and match to find your favorite combination. The beauty of *Oreo desserts* is that they’re as versatile as they are delicious, so let your creativity shine! Enjoy experimenting and discovering your own unique twists!
Storage & Reheating Instructions
Now that you’ve whipped up these delightful *Oreo desserts*, you might be wondering how to store any leftovers—or if there even will be any! But just in case, here’s how to keep them fresh and tasty.
Storing Leftovers
First things first, make sure your dessert is completely cooled after baking. Once it’s cool, cover it tightly with plastic wrap or transfer it to an airtight container. This will help keep those delicious flavors locked in and protect it from any fridge odors. You can store your *Oreo desserts* in the refrigerator for up to three days. Trust me, they’ll still taste amazing even after a couple of days!
Reheating Instructions
If you find yourself wanting to enjoy your *Oreo desserts* warm, you can easily reheat them. Just pop a slice in the microwave for about 10-15 seconds. This will warm it up beautifully without making it soggy. Just be careful not to overdo it! You want that creamy filling to stay luscious and not turn into a melted mess.
And there you have it! With simple storage and reheating tips, you can savor your *Oreo desserts* for days to come. Enjoy every last bite!
Nutritional Information Section
While I can’t guarantee exact numbers since nutrition can vary based on the specific ingredients and brands you use, here’s a general breakdown of what to expect in each slice of these scrumptious *Oreo desserts*:
- Serving Size: 1 slice
- Calories: 300
- Sugar: 15g
- Sodium: 150mg
- Fat: 18g
- Saturated Fat: 10g
- Unsaturated Fat: 5g
- Trans Fat: 0g
- Carbohydrates: 30g
- Fiber: 1g
- Protein: 3g
- Cholesterol: 30mg
Remember, this is just a guideline! Always check your specific ingredients for the most accurate nutritional information. Enjoy your delicious creations guilt-free!
Encourage Engagement
I absolutely love connecting with you all, and I want to hear about your adventures in making these *Oreo desserts*! Have you tried any fun variations? Maybe you switched up the Oreos or added a new topping? I’d love to know what worked for you!
Also, if you enjoyed this recipe (or even if you didn’t), please leave a comment below. Your feedback means the world to me and helps fellow bakers out there find their perfect dessert match. And if you’re feeling generous, a rating would be amazing too! It only takes a second but makes a big difference.
So, let’s share the love for *Oreo desserts*! Whether you’re a seasoned baker or just starting out, your stories and tips can inspire others to get creative in their kitchens. Can’t wait to hear from you!
Print
Oreo Desserts: 7 Irresistibly Creamy Treats to Savor
- Total Time: 2 hours 40 minutes
- Yield: 12 servings 1x
- Diet: Vegetarian
Description
Delicious and easy-to-make Oreo desserts.
Ingredients
- 24 Oreo cookies, crushed
- 1/2 cup butter, melted
- 2 cups cream cheese, softened
- 1 cup powdered sugar
- 2 cups whipped cream
- 1 cup chocolate chips
Instructions
- Preheat your oven to 350°F (175°C).
- Mix crushed Oreo cookies and melted butter in a bowl.
- Press the mixture into the bottom of a baking dish.
- In another bowl, beat cream cheese and powdered sugar until smooth.
- Fold in whipped cream gently.
- Spread the cream cheese mixture over the Oreo crust.
- Sprinkle chocolate chips on top.
- Bake for 20 minutes.
- Let it cool, then refrigerate for 2 hours before serving.
Notes
- For a richer flavor, use double-stuffed Oreos.
- Store leftovers in an airtight container.
- Try adding nuts for extra crunch.
- Prep Time: 20 minutes
- Cook Time: 20 minutes
- Category: Dessert
- Method: Baking
- Cuisine: American
Nutrition
- Serving Size: 1 slice
- Calories: 300
- Sugar: 15g
- Sodium: 150mg
- Fat: 18g
- Saturated Fat: 10g
- Unsaturated Fat: 5g
- Trans Fat: 0g
- Carbohydrates: 30g
- Fiber: 1g
- Protein: 3g
- Cholesterol: 30mg
Keywords: oreo desserts, easy desserts, no-bake desserts


