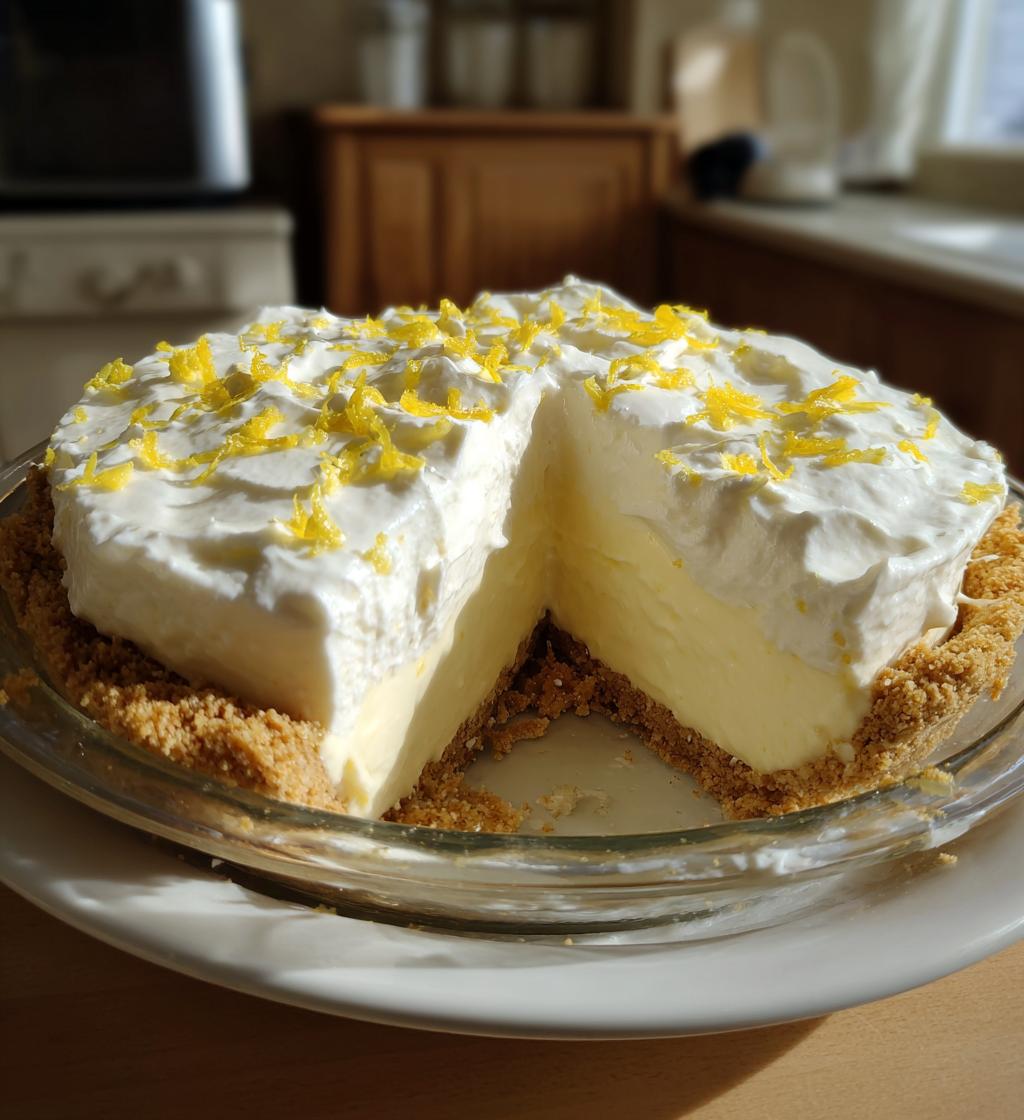
Oh, let me tell you about the wonders of a no-bake lemonade pie! This dessert is like a little slice of summer that you can enjoy any time of year. Imagine biting into a creamy, tangy pie that dances on your taste buds, refreshing you with every single bite. It’s the kind of dessert that makes you feel like you’re lounging on a sunny beach, even if you’re just at home on your couch!
The best part? It’s incredibly simple to whip up! You don’t need to turn on the oven or deal with complicated techniques. Just a few ingredients, a bit of mixing, and some chilling time is all it takes to create this delightful treat. Trust me, once you make this no-bake lemonade pie, it’ll quickly become your go-to dessert for gatherings, potlucks, or just a sweet indulgence for yourself. Plus, who can resist a dessert that looks so beautiful with those bright lemony hues? Let’s get started on this refreshing journey!
Ingredients List
Gathering your ingredients is the first step in creating this delightful no-bake lemonade pie, and I promise it’s a breeze! Here’s what you’ll need:
- 1 pre-made graham cracker crust: This is your pie’s sturdy base, ready to hold all that creamy goodness. You can buy it already made or make your own if you’re feeling adventurous!
- 1 cup lemon juice: Freshly squeezed is best for that bright, zesty flavor! You can also use bottled lemon juice if you’re in a pinch, but really, the fresh stuff makes a huge difference.
- 1 can sweetened condensed milk (14 oz): This thick, creamy sweetness adds richness to the filling. It’s the magic ingredient that brings everything together!
- 1 cup heavy whipping cream: This is what gives your pie that luscious texture. Don’t skimp on the cream—it’s essential for achieving that dreamy, light consistency.
- 1/2 cup powdered sugar: A little sweetness goes a long way. This helps balance the tartness of the lemon while keeping the filling smooth.
- 1 tablespoon lemon zest: This tiny amount packs a punch of flavor! Zest from fresh lemons not only brightens the filling but also adds a lovely aroma.
With these ingredients in hand, you’re just a few steps away from pie perfection! Let’s move on to the fun part—preparing your lemonade pie!
How to Prepare Instructions
Now that you’ve gathered all your ingredients, it’s time to dive into the fun part—making your no-bake lemonade pie! Follow these simple steps, and you’ll be on your way to a refreshing dessert that everyone will love.
Step 1: Mix the Base
First things first, grab a mixing bowl and pour in that 1 cup of lemon juice along with the 14 oz can of sweetened condensed milk. Stir them together until they’re well combined and lovely! You want a smooth, creamy mixture that’s slightly thickened. This is where the magic starts, as the tart lemon juice meets the sweet condensed milk. Trust me, the aroma alone will get your taste buds tingling!
Step 2: Whip the Cream
Next up, let’s whip that 1 cup of heavy whipping cream. Pour it into a clean mixing bowl and add in the 1/2 cup of powdered sugar. Using an electric mixer, beat the cream on medium-high speed until you see stiff peaks forming. This step is crucial! Stiff peaks mean your whipped cream holds its shape, giving your pie that light, airy texture. It should look fluffy and billowy—just like a cloud of lemony goodness!
Step 3: Combine Mixtures
Now comes the gentle part! Carefully fold the whipped cream into the lemon mixture. Use a spatula and scoop from the bottom, folding it over the top. You want to incorporate the cream without deflating it—this is what keeps your pie light and fluffy! Keep folding until you see no streaks of yellow. It should look like a creamy dream, all mixed together!
Step 4: Add Zest and Fill Crust
Time to brighten things up! Add in your 1 tablespoon of lemon zest and give it a quick stir to distribute that zesty flavor throughout. Then, pour this luscious filling into your pre-made graham cracker crust. Smooth the top with your spatula, making sure it’s nice and even. It’s okay to lick the spatula—just saying!
Step 5: Chill and Serve
Now, the hardest part—waiting! Cover your pie with plastic wrap and pop it in the refrigerator for at least 4 hours to let it set properly. If you can wait until the next day, even better! When you’re ready to serve, slice it up and garnish with fresh lemon slices or a dollop of whipped cream if you’re feeling fancy. Enjoy every refreshing bite of your homemade lemonade pie!
Nutritional Information Section
Now, let’s take a quick look at the estimated nutritional information for this delightful no-bake lemonade pie. Each slice is a perfect balance of creamy and tangy, and here’s what you can expect:
- Calories: 250
- Fat: 15g
- Saturated Fat: 10g
- Unsaturated Fat: 5g
- Trans Fat: 0g
- Cholesterol: 40mg
- Carbohydrates: 30g
- Fiber: 1g
- Sugar: 20g
- Protein: 3g
- Sodium: 150mg
Keep in mind that these values are estimates and can vary based on the specific brands of ingredients you use. But one thing’s for sure—this no-bake lemonade pie is a delicious treat that brings a burst of flavor without too much guilt! So go ahead and indulge—you deserve it!
Why You’ll Love This Recipe
- Quick and Easy: With just a few simple steps, you can whip up this pie in no time! No baking means less fuss and more fun.
- Refreshing Flavor: The bright, tangy lemon flavor combined with the creamy filling makes each bite a refreshing delight—perfect for hot days or whenever you need a pick-me-up!
- No-Bake Convenience: Forget about heating up your kitchen! This no-bake lemonade pie is a fantastic option when you want dessert without the oven.
- Perfect for Any Occasion: Whether it’s a summer picnic, a family gathering, or just a treat for yourself, this pie fits right in and impresses everyone.
- Customizable: You can easily add your favorite toppings or make variations with different citrus flavors, allowing you to personalize it to your taste!
Tips for Success
To ensure your no-bake lemonade pie turns out absolutely fabulous, here are some pro tips that I swear by. Trust me, these little tricks can make a world of difference!
- Use Fresh Ingredients: Always opt for fresh lemon juice and zest if you can. The flavor is so much brighter compared to bottled lemon juice, and it really elevates the pie!
- Chill Your Mixing Bowls: Before whipping your cream, pop your mixing bowl and whisk in the fridge for about 15 minutes. Chilled utensils help the cream whip faster and achieve those lovely stiff peaks!
- Don’t Overmix: When folding the whipped cream into the lemon mixture, be gentle! Overmixing can deflate that beautiful airiness you just created, so fold until just combined.
- Taste as You Go: I always give the filling a little taste before pouring it into the crust. If you think it needs a touch more sweetness, feel free to add a bit more powdered sugar. Adjust to your liking!
- Let It Set Longer: If you can, chill the pie overnight. This allows the flavors to meld together beautifully, and it will be even more refreshing when served the next day!
- Garnish Creatively: Don’t shy away from getting creative with your garnishes! Fresh berries, extra lemon slices, or a sprinkle of mint can add a lovely touch and a pop of color!
With these tips in your back pocket, you’ll be well on your way to creating a no-bake lemonade pie that will wow your friends and family. Enjoy the process and happy baking!
Variations
One of the best things about this no-bake lemonade pie is how adaptable it is! You can easily switch things up to create new flavor adventures that will keep your taste buds excited. Here are some delightful variations to consider:
- Key Lime Twist: Swap out the lemon juice for fresh key lime juice! This gives the pie a deliciously tart and tropical flavor profile that’s hard to resist. Just add a touch more sugar if you find it too tangy!
- Orange Creamsicle: Use fresh orange juice and zest instead of lemon for a sweet, citrusy twist reminiscent of childhood ice cream treats. Top it off with some orange slices for a beautiful presentation!
- Berry Bliss: Fold in some fresh or frozen berries like raspberries or blueberries into the filling for added flavor and a pop of color. You could even blend them into a puree and swirl it through the pie for a pretty marbled effect!
- Coconut Delight: Add some shredded coconut to the filling for a tropical vibe! You can also sprinkle toasted coconut on top for a crunchy, flavorful garnish.
- Chocolate Drizzle: For all the chocolate lovers out there, drizzle some melted chocolate over the top of the pie before serving. It adds a decadent touch that pairs surprisingly well with the tangy lemon flavor!
- Nutty Crunch: Add some crushed nuts like pecans or almonds either into the filling or as a topping for an extra layer of texture and flavor. It’s a delightful contrast to the creamy filling!
Feel free to mix and match these ideas or come up with your own! The possibilities are endless, and each variation will bring its own unique charm to your no-bake lemonade pie. Happy experimenting!
Storage & Reheating Instructions
Now that you’ve made this delightful no-bake lemonade pie, let’s chat about how to store those precious leftovers (if there are any!). Proper storage is key to keeping your pie fresh and tasty for as long as possible.
First off, cover the pie with plastic wrap or aluminum foil to prevent it from absorbing any odors from the fridge. If you have a pie carrier, that works perfectly too! Just make sure it’s sealed well. This pie can be stored in the refrigerator for up to 3-4 days—but trust me, it’s so refreshing, it probably won’t last that long!
When you’re ready to enjoy a slice after storing, simply take it out of the fridge and slice it up. No need to reheat—this pie is best served cold! If you want to add a little flair, consider garnishing it with some extra lemon slices or a dollop of whipped cream right before serving. It’ll be just as delicious as the day you made it!
And if you happen to have more pie than you can eat within a few days, you can freeze it! Just slice the pie, place the slices in an airtight container or wrap them tightly in plastic wrap, and pop them in the freezer. It can last up to 2 months in there. When you’re ready to indulge again, let the slices thaw in the refrigerator overnight for the best texture. You’ll have a little taste of summer waiting for you, even in the depths of winter!
FAQ Section
Got questions about this delightful no-bake lemonade pie? Don’t worry, I’ve got you covered! Here are some of the most common questions I get, along with my answers to help you out.
Q1: Can I use bottled lemon juice instead of fresh?
While you can use bottled lemon juice in a pinch, I highly recommend using fresh lemon juice for the best flavor. Fresh lemons give your pie that bright, zesty taste that really makes it shine!
Q2: How long can I store leftovers?
This no-bake lemonade pie can be stored in the refrigerator for up to 3-4 days when covered properly. Just make sure to keep it sealed to maintain its freshness. Trust me, it’s best enjoyed chilled!
Q3: Can I freeze the pie?
Absolutely! You can freeze slices of this pie for up to 2 months. Just wrap them tightly in plastic wrap or place them in an airtight container. When you’re ready to enjoy, let them thaw in the refrigerator overnight for the best texture.
Q4: What if I don’t have a graham cracker crust?
No worries at all! You can easily make a crust using crushed cookies like Oreos or even a nut-based crust if you’re looking for something gluten-free. Just make sure it’s sturdy enough to hold that creamy filling!
Q5: Can I add other flavors to this pie?
Definitely! This recipe is super versatile. You can swap in different citrus juices like lime or orange, or even fold in some berries for a fruity twist. Get creative and make it your own!
Q6: How do I know when the pie is set?
After chilling for at least 4 hours, the pie should be firm to the touch and hold its shape when sliced. If you leave it overnight, it will be even better, as the flavors meld together beautifully!
Hopefully, these FAQs help clarify any doubts you might have. If you have more questions, feel free to reach out! Happy baking (or no-baking, in this case)!
Print
Lemonade Pie No Bake: 5 Steps to Refreshing Bliss
- Total Time: 4 hours 20 minutes
- Yield: 8 servings 1x
- Diet: Vegetarian
Description
A refreshing no-bake lemonade pie that combines tart lemon flavor with a creamy filling.
Ingredients
- 1 pre-made graham cracker crust
- 1 cup lemon juice
- 1 can sweetened condensed milk (14 oz)
- 1 cup heavy whipping cream
- 1/2 cup powdered sugar
- 1 tablespoon lemon zest
Instructions
- In a bowl, mix lemon juice and sweetened condensed milk.
- In another bowl, whip heavy cream with powdered sugar until stiff peaks form.
- Fold the whipped cream into the lemon mixture gently.
- Add lemon zest and mix until combined.
- Pour the filling into the graham cracker crust.
- Chill in the refrigerator for at least 4 hours, or until set.
- Serve chilled and garnish with lemon slices if desired.
Notes
- Use fresh lemon juice for the best flavor.
- Store leftovers in the refrigerator.
- Can be topped with whipped cream or fresh berries.
- Prep Time: 20 minutes
- Cook Time: 0 minutes
- Category: Dessert
- Method: No-bake
- Cuisine: American
Nutrition
- Serving Size: 1 slice
- Calories: 250
- Sugar: 20g
- Sodium: 150mg
- Fat: 15g
- Saturated Fat: 10g
- Unsaturated Fat: 5g
- Trans Fat: 0g
- Carbohydrates: 30g
- Fiber: 1g
- Protein: 3g
- Cholesterol: 40mg
Keywords: lemonade pie no bake, no bake lemon pie, lemon dessert


