Oh, ice cream desserts! They’re like little scoops of happiness, aren’t they? I can’t think of a better way to cool off on a hot day or simply indulge in a sweet treat. Whether it’s a sunny afternoon or a cozy night in, nothing beats the joy of homemade ice cream. Trust me, once you make your own, you might never look at store-bought the same way again!
These delightful desserts are perfect for any occasion—birthdays, family gatherings, or even just because you deserve a treat. The beauty of ice cream desserts lies in their versatility; you can customize them with your favorite flavors and mix-ins. Plus, they’re surprisingly simple to whip up! So, grab your ice cream maker, and let’s dive into this delicious world together!
Ingredients List
Gathering the right ingredients is the first step toward creating your own dreamy ice cream desserts. Here’s what you’ll need:
- 2 cups heavy cream: This is the star of your ice cream! Heavy cream gives your dessert that rich, creamy texture we all crave. Make sure it’s fresh for the best flavor.
- 1 cup whole milk: Whole milk adds a lovely creaminess without being too heavy. It balances out the richness of the heavy cream perfectly.
- 3/4 cup granulated sugar: Sweetness is key! This sugar dissolves easily and helps create that smooth consistency. If you prefer it less sweet, feel free to adjust this amount a little.
- 1 tablespoon pure vanilla extract: Go for pure vanilla! It elevates the flavor of your ice cream, adding warmth and a touch of sweetness that’s simply irresistible.
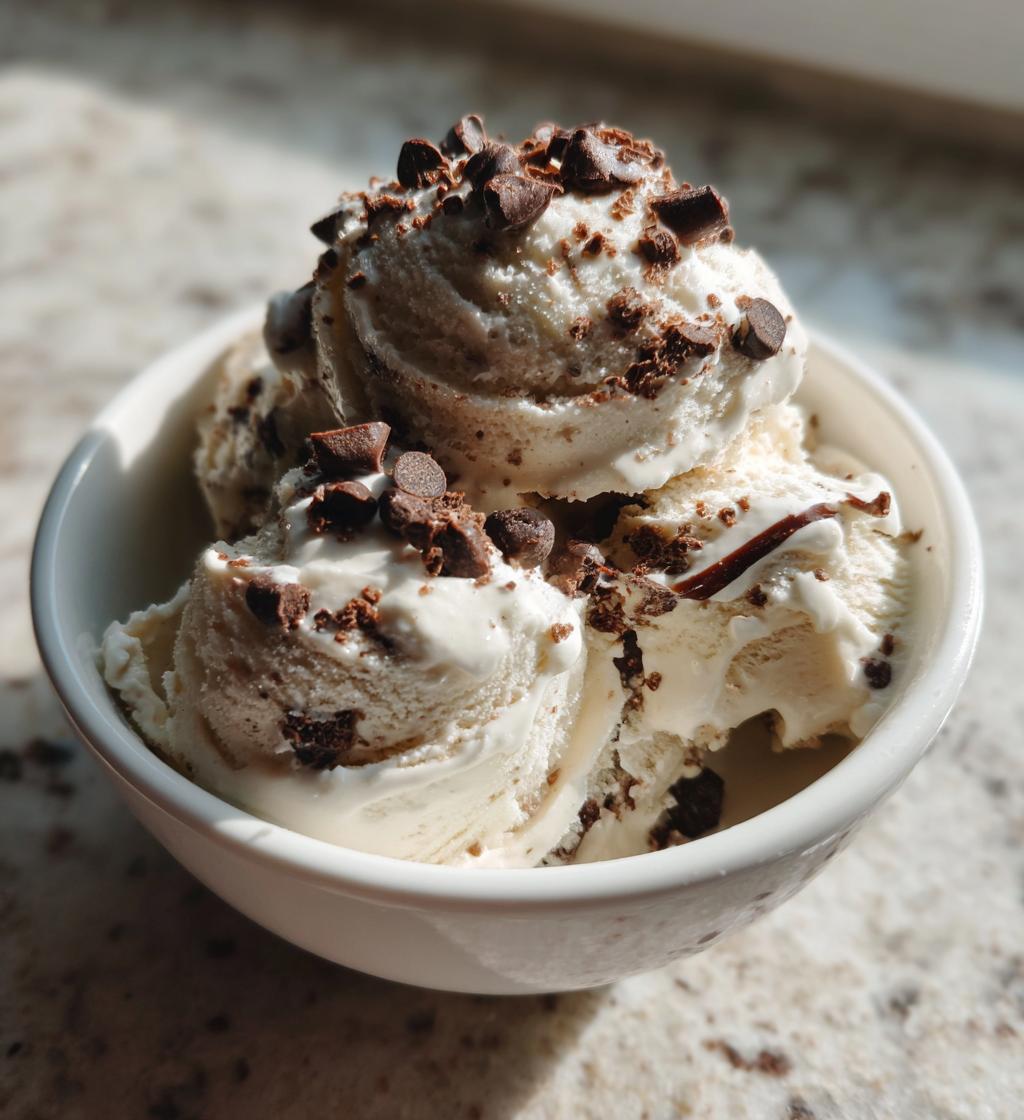
- 1/2 cup chocolate chips: These little gems bring a delightful burst of chocolatey goodness in every bite! You can use semi-sweet, dark, or even white chocolate chips—whatever makes your heart sing.
Make sure you’ve got everything measured out and ready to go before you start mixing! It makes the process so much smoother and more fun. Happy scooping!
How to Prepare Ice Cream Desserts
Now that you’ve got all your ingredients lined up, it’s time to dive into the fun part—making your ice cream desserts! Follow these simple steps for a delicious treat that’ll impress everyone.
Step 1: Mix the Base
First up, let’s create that creamy base. In a large mixing bowl, combine the heavy cream, whole milk, granulated sugar, and vanilla extract. I like to use a whisk for this—it gets everything blended nicely! Just mix until the sugar has dissolved completely, and you have a smooth, velvety mixture. It should only take a minute or two. Trust me, the aroma of vanilla wafting through the air is just the start of the magic!
Step 2: Add Chocolate Chips
Once your base is ready, it’s time for the fun part—adding the chocolate chips! Pour them into your creamy mixture and gently stir with a spatula or wooden spoon. You want to make sure they’re evenly distributed without breaking them up too much. This way, every scoop will have those delightful chocolate surprises. Yum!
Step 3: Churn the Mixture
Now, let’s get churning! Pour your mixture into your ice cream maker. Make sure to follow the manufacturer’s instructions—each machine is a little different, and you want to get it just right. Usually, you’ll churn it for about 20-30 minutes, or until it thickens to that perfect soft-serve consistency. Keep an eye on it; it’s a thrilling moment when it starts to look like real ice cream!
Step 4: Freeze the Ice Cream
Once you’ve achieved that luscious texture, it’s time to transfer your creation into a container. A plastic or glass container works beautifully; just make sure it’s airtight. Flatten the top with a spatula, and cover it well. Pop it into the freezer for at least 4 hours to firm up. I know waiting can be tough, but the end result will be absolutely worth it! When it’s finally ready, you’ll have a deliciously creamy ice cream dessert that you made from scratch!
FAQ Section
Got questions about ice cream desserts? Don’t worry, I’ve got you covered! Here are some common queries that pop up, along with my answers to help you out.
Can I make ice cream without an ice cream maker?
Absolutely! If you don’t have an ice cream maker, you can still enjoy homemade ice cream. Just pour your mixture into a shallow dish and freeze it. Every 30 minutes, stir it with a fork to break up any ice crystals until it’s fully frozen. It takes a bit more effort, but trust me, it’s worth it!
What are some great mix-in ideas?
The possibilities are endless! Besides chocolate chips, you can add chopped fruits like strawberries or bananas, nuts for a little crunch, or even cookie dough pieces for a fun twist. You could also try swirls of caramel or fudge for extra sweetness. Just keep in mind the total volume you’re adding to maintain the right consistency.
How do I store leftover ice cream?
To keep your ice cream fresh, store it in an airtight container. Press a piece of parchment paper directly onto the surface before sealing with a lid. This helps prevent ice crystals from forming. It should last in the freezer for about 2-3 weeks, but I bet it won’t last that long!
Can I use non-dairy alternatives for this recipe?
Yes, you can! Substitute the heavy cream and whole milk with coconut cream, almond milk, or any other non-dairy milk you love. Just be mindful that the texture and flavor may change a bit, but you can still enjoy a delicious ice cream dessert that fits your dietary preferences!
What if my ice cream is too hard after freezing?
If your ice cream turns out too hard, that can happen sometimes. Just let it sit at room temperature for about 5-10 minutes before scooping. This will help soften it up a bit so you can enjoy those perfect scoops!
Why You’ll Love This Recipe
This ice cream dessert recipe is a total game-changer! Here’s why I think you’ll fall head over heels for it:
- Easy Preparation: With just a few simple steps, you can whip up a delightful treat in no time. No complex techniques here—just mix, churn, and freeze!
- Versatility: You can customize this recipe to fit any mood or occasion! Whether you’re craving classic chocolate chip or want to experiment with fruity flavors, the options are endless.
- Deliciousness: Trust me, nothing beats the creamy, dreamy taste of homemade ice cream. Each scoop is packed with flavor, making it a sweet indulgence you won’t want to miss!
- Perfect for Any Occasion: Birthdays, hot summer days, or just a cozy night in—this ice cream is the perfect companion for any event. You’ll be the hero of every gathering!
- Fun for Everyone: Get the kids involved! Making ice cream can be a fun family activity. Let them choose their favorite mix-ins and watch the joy on their faces as they create their own masterpiece.
Once you try this recipe, I have no doubt that it’ll become a staple in your home. So grab those ingredients and let’s get started on this delicious journey together!
Tips for Success
Ready to take your ice cream desserts to the next level? I’ve got some pro tips up my sleeve that will help you avoid common pitfalls and ensure you whip up the creamiest, dreamiest ice cream every time. Let’s dive in!
Use Cold Ingredients
One of the best tips I can give you is to make sure your ingredients are cold before you start mixing. This helps the ice cream churn more effectively and results in a smoother texture. Pop your heavy cream and milk in the fridge for a bit before using. Trust me, it makes a difference!
Don’t Over-Churn
While we all want that perfect soft-serve consistency, be careful not to over-churn the mixture. If you go too far, it can turn into butter! Keep an eye on your ice cream maker; when it thickens and starts to hold its shape, it’s time to stop. You’ll know it’s ready when it looks like fluffy clouds of deliciousness!
Freeze the Ice Cream Maker Bowl Ahead of Time
If your ice cream maker has a removable bowl, freeze it overnight before you plan to make your ice cream. A well-chilled bowl helps the mixture freeze faster and improves the texture of your final product. I can’t stress this enough—this step is a game changer!
Experiment with Flavor Combinations
Don’t be afraid to get creative! This recipe serves as a fantastic base, but you can elevate it with unique flavors. Try adding a spoonful of peanut butter, a splash of espresso, or some toasted coconut. You’ll be amazed at the flavor combinations you can create!
Let It Sit Before Scooping
After your ice cream has frozen, it might be rock-hard when you first take it out. Let it sit at room temperature for about 5-10 minutes before scooping. This little trick makes it way easier to serve and allows the flavors to shine even more!
Keep It Airtight
To maintain that creamy texture and prevent ice crystals from forming, always store your ice cream in an airtight container. If you’re fancy, press a piece of plastic wrap directly onto the surface before sealing the lid. It’s a small step that can make a big difference in keeping your ice cream fresh and delicious!
With these tips, you’ll be well on your way to mastering the art of ice cream desserts. Get ready to impress your friends and family with your homemade creations, and enjoy every scoop of your sweet success!
Variations on Ice Cream Desserts
Now that you’ve mastered the basic recipe, let’s have some fun with variations! The beauty of ice cream desserts is how easily you can customize them to suit your taste or the occasion. Here are some delightful ideas to inspire your creativity:
Fruity Delights
If you’re a fan of fruity flavors, why not add some fresh fruits? Chopped strawberries, blueberries, or peaches work wonders in this ice cream. Just fold them in gently before churning. You’ll get pockets of juicy goodness in every scoop—perfect for a refreshing summer treat!
Nutty Indulgence
For a little crunch, consider adding nuts! Chopped almonds, pecans, or walnuts can bring a delightful texture to your ice cream. Toasting the nuts beforehand enhances their flavor even more. Just remember to add them towards the end of the mixing process to keep them nice and crunchy!
Chocolate Lovers’ Dream
If you can’t get enough chocolate, try adding cocoa powder or melted chocolate to the base for a double chocolate ice cream. You can also mix in chocolate-covered pretzels or brownie chunks for an extra indulgent treat. Chocolate lovers will be over the moon!
Decadent Swirls
Swirls of caramel, fudge, or even peanut butter can elevate your ice cream to another level. Simply drizzle the sauce into the mixture after it’s churned and gently fold it in for that beautiful marbled effect. Each bite will be a delightful surprise!
Spices and Extracts
Feeling adventurous? Add some spices or extracts to create unique flavor profiles. A pinch of cinnamon or nutmeg can add warmth, while peppermint extract can give you a refreshing twist. Imagine a mint chocolate chip ice cream that’s entirely made from scratch—how fantastic does that sound?
Serving Options
Once your ice cream is ready, think about how you want to serve it! You can scoop it into cones or bowls, and don’t forget to top it off with whipped cream, sprinkles, or a cherry on top. For a fun twist, try making ice cream sandwiches with cookies or brownies, or layer it in a parfait with your favorite toppings.
With these variations, you’ll never run out of delicious ways to enjoy your ice cream desserts. Let your imagination run wild, and remember—there’s no wrong way to make ice cream! So, get creative and enjoy every delicious scoop!
Nutritional Information Disclaimer
It’s important to note that the nutritional information for these ice cream desserts can vary based on the specific ingredients and brands you use. Factors like the type of heavy cream, milk, and even the chocolate chips can affect the final values. While I’ve provided general estimates, precise nutritional values may not be accurate for your particular batch. Always check the labels on your ingredients for the most accurate information. Enjoy your homemade treats with this in mind, and remember, balance is key in any dessert indulgence!
What to Do Next
Now that you’ve whipped up your very own ice cream desserts, I’d love to hear all about your experience! Did you try any fun variations? What flavors did you choose? Please leave a comment below and share your thoughts! I’m always excited to connect with fellow ice cream lovers and swap stories.
If you enjoyed this recipe, consider rating it! Your feedback means the world to me and helps others find this delightful treat. Plus, it’s just nice to know that you’re loving what you make!
And don’t forget to share your ice cream masterpieces on social media! Tag me in your posts or use the hashtag #MyIceCreamDesserts so we can celebrate your delicious creations together. I can’t wait to see all the tasty treats you come up with! Happy scooping!
Print
Ice Cream Desserts: 5 Sweet Ways to Indulge Today
- Total Time: 4 hours 10 minutes
- Yield: 4 servings 1x
- Diet: Vegetarian
Description
Delicious ice cream desserts for any occasion.
Ingredients
- 2 cups heavy cream
- 1 cup whole milk
- 3/4 cup granulated sugar
- 1 tablespoon pure vanilla extract
- 1/2 cup chocolate chips
Instructions
- In a bowl, mix heavy cream, whole milk, sugar, and vanilla extract until sugar dissolves.
- Add chocolate chips and stir well.
- Pour the mixture into an ice cream maker.
- Churn according to the manufacturer’s instructions.
- Transfer to a container and freeze for at least 4 hours.
Notes
- For a different flavor, add fruit or nuts.
- Store in an airtight container.
- Prep Time: 10 minutes
- Cook Time: 0 minutes
- Category: Dessert
- Method: Churning
- Cuisine: American
Nutrition
- Serving Size: 1/2 cup
- Calories: 300
- Sugar: 20g
- Sodium: 50mg
- Fat: 24g
- Saturated Fat: 14g
- Unsaturated Fat: 8g
- Trans Fat: 0g
- Carbohydrates: 27g
- Fiber: 0g
- Protein: 3g
- Cholesterol: 80mg
Keywords: ice cream, desserts, sweet treats


