Oh, let me tell you about the joy of making homemade beef jerky! There’s something incredibly satisfying about transforming a simple cut of beef into a savory, chewy snack that’s packed with protein. Seriously, it’s a game-changer for anyone who loves meat! I remember the first time I made it; the smell wafting through my kitchen was absolutely intoxicating. It’s like a warm hug from the oven! Plus, you get to customize the flavors to your heart’s content. Want it spicy? Go for extra red pepper flakes! Prefer a sweet twist? Just add more brown sugar! The possibilities are endless, and this personal touch makes it even more special.
Making beef jerky can feel like an adventure. You get to slice, marinate, and bake, all while waiting in eager anticipation for that first bite. And let’s be honest, it’s way healthier than those store-bought versions loaded with preservatives. Once you try your own, you’ll never want to go back. So, roll up your sleeves, grab your favorite cut of beef, and let’s create some mouthwatering beef jerky together!
Ingredients for Beef Jerky
To whip up a batch of delicious homemade beef jerky, you’ll need a few key ingredients that come together to create that savory, mouthwatering flavor. Here’s what you’ll need:
- 2 pounds of beef: I recommend using round or flank steak for this recipe. These cuts are lean and perfect for jerky-making, ensuring you get a nice chewy texture without excess fat.
- 1/4 cup soy sauce: This adds a rich umami flavor that’s essential for that classic jerky taste.
- 1 tablespoon Worcestershire sauce: Just a splash of this adds depth and a slight tanginess that complements the beef beautifully.
- 1 teaspoon garlic powder: Garlic powder is a must for that savory kick. It really enhances the overall flavor profile.
- 1 teaspoon onion powder: This works hand-in-hand with the garlic to create a well-rounded taste.
- 1 teaspoon black pepper: Freshly ground black pepper adds a bit of heat and a nice bite.
- 1 teaspoon smoked paprika: For that smoky flavor that makes you feel like you’re out by the campfire!
- 1 tablespoon brown sugar: This adds a touch of sweetness that balances out the saltiness of the soy sauce.
- 1/2 teaspoon red pepper flakes: Add these if you like a little heat! Adjust to your spice preference.
Gather these ingredients, and you’re well on your way to making some seriously tasty beef jerky!
How to Prepare Beef Jerky
Now that you’ve got your ingredients lined up, let’s dive into the process of making your beef jerky! This step-by-step guide will walk you through everything you need to know, from slicing the beef to baking it to perfection. Trust me, the satisfaction of crafting your own jerky will be worth every minute!
Preparing the Beef
First things first, let’s talk about slicing the beef. You want to slice it into thin strips, ideally about 1/4 inch thick. This thickness is key because it ensures that the jerky dries evenly and gets that perfect chewy texture we all crave. If the strips are too thick, they might not dry out completely, and if they’re too thin, they can become overly crunchy.
Here’s a little tip: for easier slicing, pop your beef in the freezer for about 30 minutes before you cut it. It firms up beautifully, making it a breeze to handle. Make sure to slice against the grain for tenderness—this means cutting perpendicular to the direction of the muscle fibers. Uniformity in thickness is crucial for even drying, so take your time here!
Marinating Process
Next up is the marinating! This step is where all the magic happens. In a large bowl, combine your soy sauce, Worcestershire sauce, and all those fabulous spices we talked about. Stir it all together until it’s well mixed, and then add your beef strips. Make sure each piece is coated thoroughly; this is where the flavor really sinks in!
Once everything is combined, cover the bowl with plastic wrap and let it marinate in the fridge for at least 4 hours. If you can swing it, overnight is even better! The longer the beef sits in the marinade, the more flavorful it becomes. Don’t be afraid to taste the marinade before you add the beef—this is your chance to adjust any seasonings to your liking. Want it spicier? Add a bit more red pepper flakes!
Baking Instructions
Now, onto the baking! Preheat your oven to 175°F (80°C). This low temperature is essential for drying the beef without cooking it. While that’s heating up, take your marinated beef strips and place them on a baking rack. Make sure to arrange them in a single layer, giving them some space so the air can circulate around each piece. If you don’t have a rack, you can place them directly on a baking sheet lined with parchment paper, but a rack works best for that even drying.
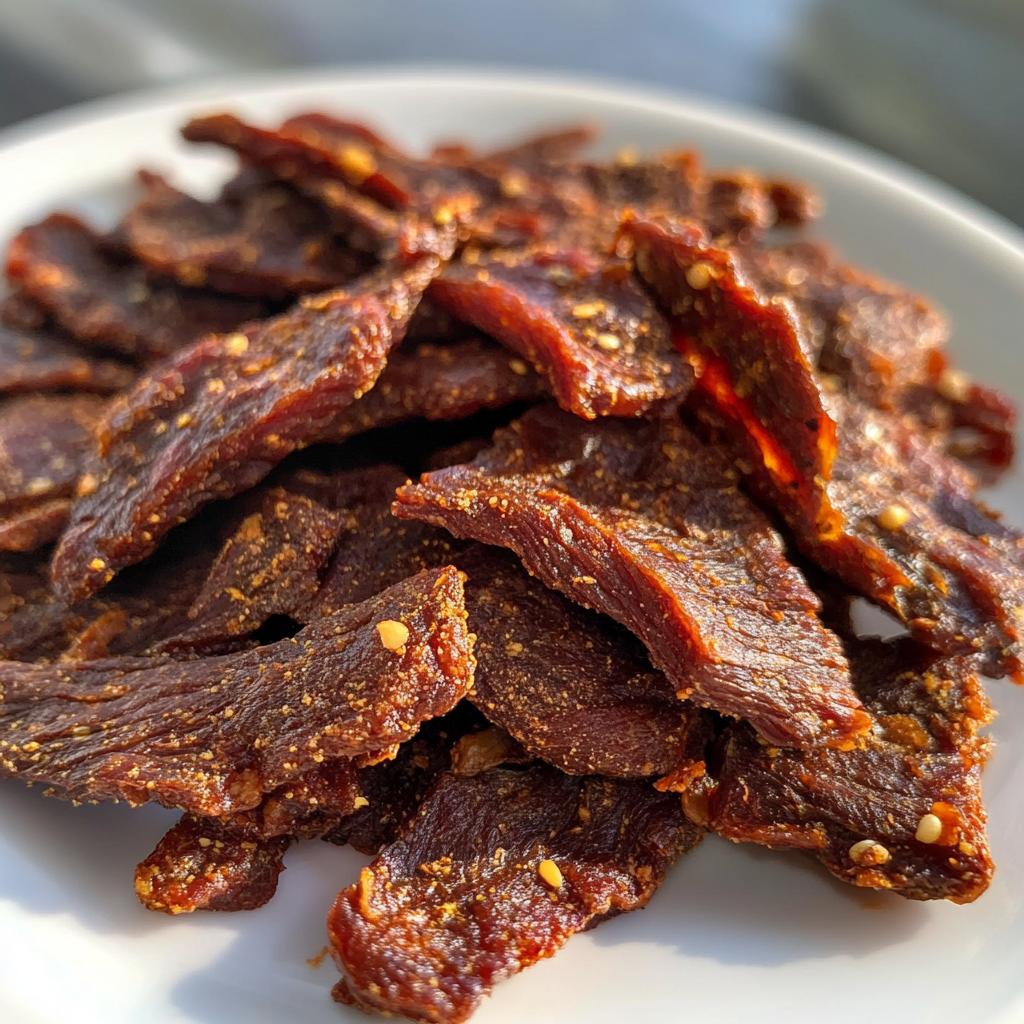
Slide the baking rack into the oven and let it bake for about 4 to 6 hours. Yes, I know it sounds like a long time, but trust me, the wait is worth it! You’ll know your jerky is done when it’s dry and chewy but still slightly pliable—no one wants jerky that crumbles into dust! A good visual cue is that the edges should look dark and slightly shriveled. Once it’s done, let it cool completely before storing it in an airtight container. Enjoy your homemade jerky adventure!
FAQ About Beef Jerky
As you embark on your beef jerky-making journey, you might have a few questions pop up along the way. Don’t worry! I’m here to help with some common queries that fellow jerky enthusiasts often have. Let’s dive in!
Can I use a dehydrator instead of an oven?
Absolutely! Using a dehydrator is a fantastic option for making beef jerky. In fact, many jerky lovers swear by it because it can provide a more controlled drying environment, which can lead to a better texture and flavor. Just follow the manufacturer’s instructions for jerky, typically setting it at around 155°F (68°C) for the best results. You’ll still want to ensure your beef strips are evenly sliced and marinated, just like with the oven method. It’s a win-win!
How should I store beef jerky?
Storing your homemade beef jerky properly is crucial to keeping it fresh and tasty. Once it’s completely cooled, transfer it to an airtight container. I recommend using glass jars or resealable plastic bags for optimal storage. Keep your jerky in a cool, dry place, away from direct sunlight. If you plan to keep it for an extended period, popping it in the fridge can help maintain its flavor and texture. Just remember, the fresher, the better, so try to enjoy it within a couple of weeks!
Can I customize the flavor of my beef jerky?
Why You’ll Love This Recipe
- Quick Preparation: With just 15 minutes of hands-on time, you can set your beef jerky to marinate and then bake while you go about your day. It’s super convenient!
- High Protein Content: This beef jerky packs a protein punch, making it a perfect snack for those looking to fuel their day without the guilt of unhealthy options.
- Customizable Flavors: You have complete control over the taste! Adjust the spices to create your perfect blend, whether that’s savory, sweet, or spicy. It’s all up to you!
- Healthier Option: Say goodbye to store-bought jerky filled with preservatives! Making your own means you can keep it clean and natural, just the way you like it.
- Fun Project: Crafting your own beef jerky can be an enjoyable kitchen adventure. It’s a great way to bond with family or friends, and everyone will love the tasty results!
Tips for Success
Ready to take your beef jerky game to the next level? Here are some pro tips to ensure you achieve the best results every time you make this delicious snack!
Selecting the Right Cut of Meat
Choosing the right cut of beef is crucial for the perfect jerky. I always recommend going for lean cuts like round or flank steak. They have less fat, which means your jerky won’t spoil as quickly. If you can find it, sirloin tip is also a fantastic option! Avoid fatty cuts like ribeye, as the fat can lead to a chewy texture and spoil faster.
Adjusting Seasonings to Your Taste
Don’t be afraid to play around with the seasonings! Start with the basic recipe, but feel free to tweak it to match your palate. If you love garlic, toss in extra garlic powder! Want more heat? Amp up those red pepper flakes! Make it your own and have fun experimenting with different flavors until you find that perfect blend.
Perfecting the Drying Technique
The drying process is where the magic happens, so let’s make sure you get it right. Remember, low and slow is the name of the game! Keep your oven temperature at that nice low setting of 175°F (80°C). If you’re using a dehydrator, follow the manufacturer’s guidelines for the best results. Whatever method you choose, check the jerky periodically during the drying process. Every oven is a little different, and you want to catch it just at the right moment when it’s dried but still has a bit of chew to it!
Storing Your Jerky Properly
To keep your jerky fresh longer, make sure it’s completely cooled before storing it in an airtight container. Consider adding a desiccant packet to absorb any moisture, which can help extend its shelf life. And remember, jerky is best enjoyed fresh, so try to consume it within a couple of weeks, although it can last longer if stored properly!
With these tips in your back pocket, you’re all set to create beef jerky that’ll impress everyone! Happy jerky-making!
Nutritional Information Disclaimer
It’s important to note that the nutritional information provided for this beef jerky recipe can vary based on the specific ingredients and brands you choose to use. Factors like the cut of beef, the type of soy sauce, and even the variations in spices can all impact the final nutritional values. The values given here are estimates and should be used as a general guideline rather than an exact measure. If you’re closely monitoring your nutrition, I recommend calculating the values based on the specific products you use. Enjoy your homemade beef jerky while keeping these variations in mind!
What to Do Next
Alright, my fellow jerky enthusiasts, now it’s your turn! I can’t wait to hear about your adventures in making beef jerky. Have you put your own twist on the flavors? Did you experiment with different cuts of meat? Or maybe you’ve got some tips of your own to share? I’d absolutely love to hear all about it!
Do me a favor and leave a comment below to share your experiences, ask questions, or tell me what you think of the recipe. Your feedback not only helps me but also inspires others in our little community of home cooks! If you enjoyed this recipe, consider giving it a rating—your support means the world to me!
So, roll up your sleeves, gather those ingredients, and dive into the delicious world of homemade beef jerky. I promise you won’t regret it! And once you’ve made your first batch, come back and let me know how it turned out. Happy jerky-making!
Print
Homemade Beef Jerky: 5 Steps to Pure Joy
- Total Time: 6 hours 15 minutes
- Yield: 10 servings 1x
- Diet: High Protein
Description
Beef jerky is a dried meat snack made from seasoned beef. It offers a savory and chewy treat for meat lovers.
Ingredients
- 2 pounds of beef (round or flank steak)
- 1/4 cup soy sauce
- 1 tablespoon Worcestershire sauce
- 1 teaspoon garlic powder
- 1 teaspoon onion powder
- 1 teaspoon black pepper
- 1 teaspoon smoked paprika
- 1 tablespoon brown sugar
- 1/2 teaspoon red pepper flakes
Instructions
- Slice the beef into thin strips.
- In a bowl, mix soy sauce, Worcestershire sauce, and spices.
- Marinate the beef in the mixture for at least 4 hours, preferably overnight.
- Preheat your oven to 175°F (80°C).
- Place the marinated beef strips on a baking rack.
- Bake for 4-6 hours until dried and chewy.
- Let it cool before storing in an airtight container.
Notes
- Adjust seasonings to taste.
- Use a dehydrator for better results if available.
- Store in a cool, dry place.
- Prep Time: 15 minutes
- Cook Time: 6 hours
- Category: Snack
- Method: Baking
- Cuisine: American
Nutrition
- Serving Size: 1 ounce
- Calories: 70
- Sugar: 1 gram
- Sodium: 320 milligrams
- Fat: 1 gram
- Saturated Fat: 0.5 grams
- Unsaturated Fat: 0.5 grams
- Trans Fat: 0 grams
- Carbohydrates: 3 grams
- Fiber: 0 grams
- Protein: 12 grams
- Cholesterol: 30 milligrams
Keywords: beef jerky, dried meat, snack, protein


