I’ll never forget the first time I tried Chicken Kiev. It was at a little Ukrainian restaurant tucked away in my hometown, and the moment I cut into that golden, crispy exterior, a river of garlic butter spilled out, and I was hooked. I knew I had to recreate that magic at home. This Garlic Butter Chicken Kiev Recipe is my love letter to that unforgettable dish. It’s surprisingly simple to make, yet it feels so special—perfect for a cozy dinner or when you want to impress guests. Trust me, once you try it, you’ll understand why it’s been a classic for decades.
Why You’ll Love This Garlic Butter Chicken Kiev Recipe
This recipe checks all the boxes for me—it’s foolproof, indulgent, and always gets rave reviews. Here’s why it’ll become your go-to:
- That crispy, golden crunch: The breadcrumb coating fries up perfectly crisp or bakes golden-brown—your choice!
- The butter surprise inside: Cutting into tender chicken to find molten garlic butter? Pure joy.
- Customizable flavors: Swap parsley for chives, add lemon zest to the butter, or kick it up with red pepper flakes.
- Impresses effortlessly: Looks gourmet but comes together with basic ingredients—ideal for date nights or dinner parties.
Honestly? The hardest part is waiting for it to cool enough to eat without burning your tongue!
Ingredients for Garlic Butter Chicken Kiev Recipe
Gathering the right ingredients is half the battle with Chicken Kiev – and trust me, it’s worth getting every detail right. Here’s what you’ll need to make that garlicky, buttery magic happen:
- 4 boneless, skinless chicken breasts (about 6 oz each) – look for plump, even-sized ones so they roll beautifully
- 1/2 cup unsalted butter, softened (real butter only – no substitutes if you want that authentic richness!)
- 4 cloves garlic, minced (fresh is best – I promise the extra minute of chopping makes all the difference)
- 1 tbsp fresh parsley, chopped (dried works in a pinch, but fresh gives that bright green pop)
- 1 cup breadcrumbs (I often use panko for extra crunch – more on that later)
- 1/2 cup all-purpose flour (just regular flour for that perfect golden coating)
- 2 eggs, beaten (large eggs work best for even coating)
- 1 tsp salt (I use kosher – it seasons more evenly)
- 1/2 tsp black pepper (freshly ground adds nice warmth)
- 2 tbsp vegetable oil (for frying – or skip if baking)
Pro tip: Take your butter and eggs out about an hour before starting – room temp ingredients blend together so much smoother. And don’t skimp on the garlic – this is Kiev, after all!
How to Make Garlic Butter Chicken Kiev Recipe
Now for the fun part – turning those simple ingredients into golden, butter-filled magic! I’ll walk you through each step, just like I would if we were cooking together in my kitchen. Pay special attention to rolling technique – that’s the secret to keeping all that glorious butter inside where it belongs.
Preparing the Garlic Butter Filling
First, let’s make that irresistible garlic butter center. In a small bowl, mix together your softened butter (it should give easily when pressed), minced garlic, and chopped parsley. I like to mash it all together with a fork until it’s completely combined and speckled with green. The smell alone is heavenly!
Here’s my pro move: Scoop the mixture onto a piece of plastic wrap and shape it into a log about 1 inch thick. Twist the ends tight and pop it in the freezer for 15 minutes. This makes the butter firm enough to handle but still soft enough to melt beautifully later. Trust me – cold butter is way easier to work with when stuffing the chicken.
Stuffing and Rolling the Chicken
While the butter chills, prep your chicken. Place each breast between two pieces of plastic wrap or parchment paper and pound to an even 1/4-inch thickness. I use a meat mallet, but a rolling pin or even a heavy pan works in a pinch! The key is getting them uniformly thin so they roll easily without tearing.
Unwrap your chilled butter log and slice it into 4 equal discs. Place one in the center of each pounded chicken breast. Now for the crucial step: fold in the sides, then roll up tightly from one end like a burrito, tucking as you go. Secure with 2-3 toothpicks – go in at an angle so they hold better. Don’t worry if it’s not perfect; the breading will cover any messy edges!
Coating and Cooking
Set up your breading station: one bowl with flour, one with beaten eggs, and one with breadcrumbs. I like to season each with a pinch of salt and pepper. Roll each chicken bundle first in flour (shaking off excess), then egg (letting the excess drip off), then breadcrumbs, pressing gently to help them adhere.
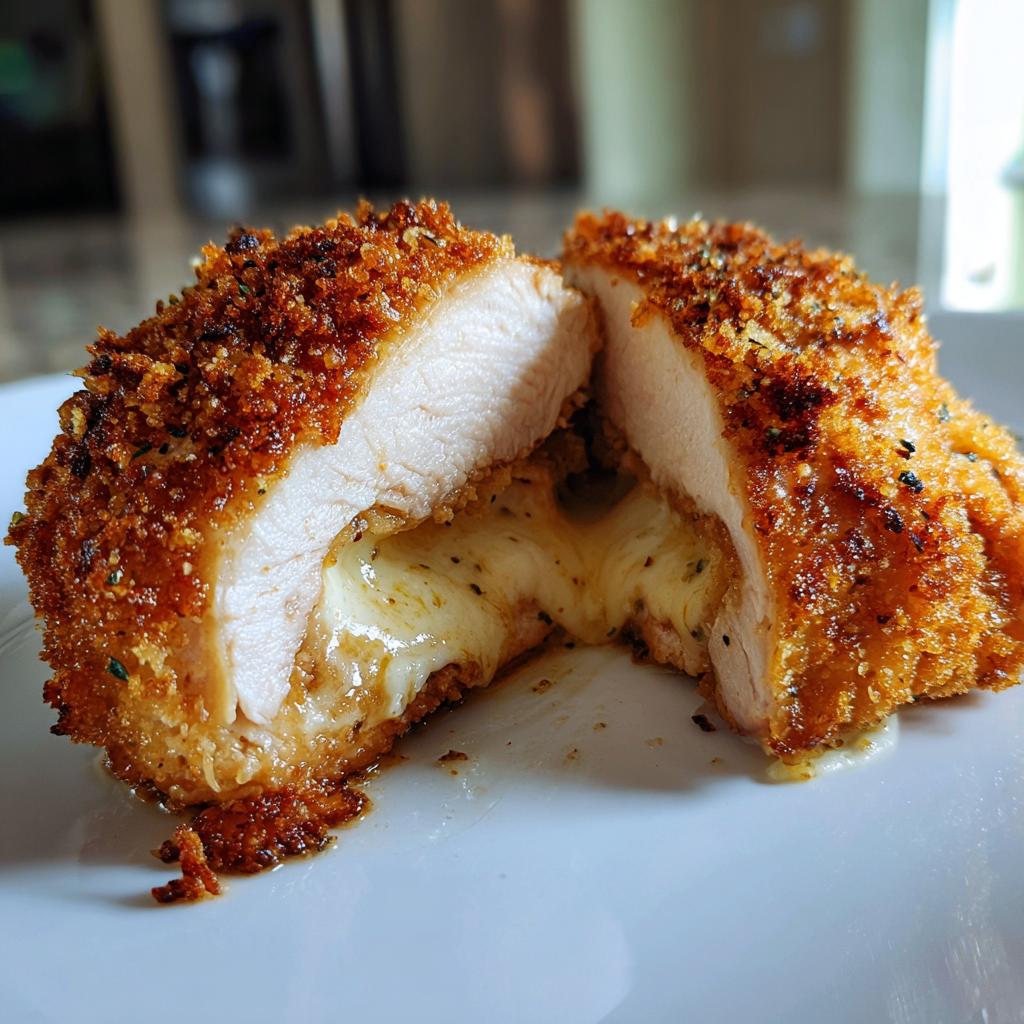
Now choose your cooking method: For frying, heat oil in a skillet over medium heat and cook for about 5-6 minutes per side until golden brown and the internal temp reaches 165°F. For baking, place on a rack over a baking sheet and bake at 375°F for 25-30 minutes. Either way, let them rest 5 minutes before removing toothpicks – that hot butter is lava waiting to escape!
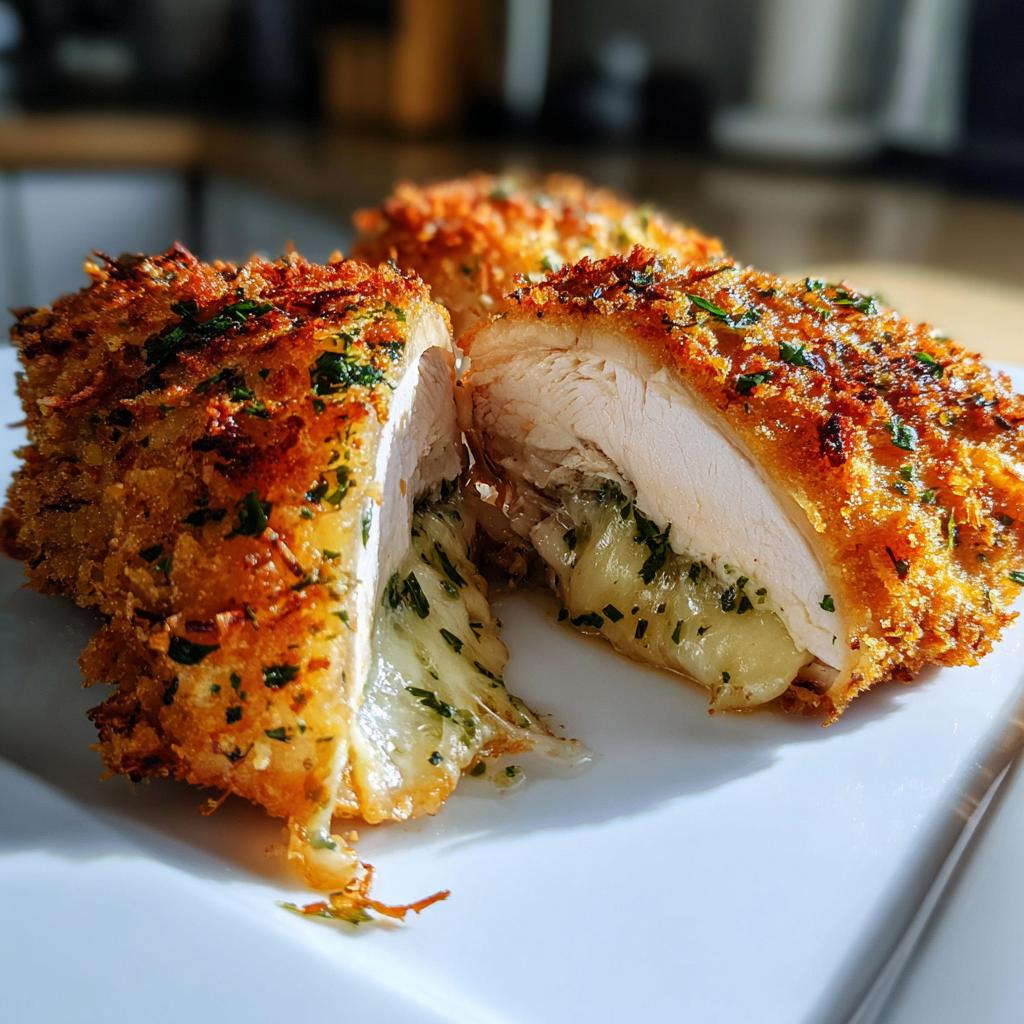
See the butter pooling as you cut in? That’s when you know you’ve nailed it. Just try not to burn your tongue diving in too fast – I speak from experience!
Expert Tips for the Best Garlic Butter Chicken Kiev Recipe
Want to take your Chicken Kiev from good to *chef’s kiss*? Here are my tried-and-true tips for perfection:
- Chill before cooking: Pop the stuffed chicken in the fridge for 30 minutes before breading. This helps it hold its shape and keeps the butter from leaking out.
- Check the temp: Use a meat thermometer to ensure the chicken hits 165°F. No guesswork means no dry chicken!
- Go for panko: Swap regular breadcrumbs for panko if you want an extra crispy, crunchy coating. It’s a game-changer.
- Secure tightly: Use toothpicks at an angle to keep those rolls snug. Fewer gaps mean less butter escaping during cooking.
Little tricks, big results—you’ll feel like a pro in no time!
Serving Suggestions for Garlic Butter Chicken Kiev
Oh, the possibilities! My favorite way to serve Chicken Kiev is with a big scoop of buttery mashed potatoes—they’re perfect for soaking up that glorious garlic butter that inevitably escapes. A simple green salad with lemon vinaigrette cuts through the richness beautifully, and roasted asparagus or green beans add a crisp contrast. For something heartier, try it with garlicky roasted potatoes or buttered egg noodles. Honestly? Even just a crusty baguette to mop up the juices makes a meal fit for royalty!
Storing and Reheating Garlic Butter Chicken Kiev
Leftovers? (As if!) But if you somehow have extra, here’s how to keep them tasty. Store cooled Chicken Kiev in an airtight container in the fridge for up to 3 days. To reheat, skip the microwave—it’ll turn your crispy coating soggy. Instead, pop them on a baking sheet in a 350°F oven for 10-15 minutes until heated through. The outside stays crisp, and the butter gets all melty again—almost like fresh! Pro tip: If you’re meal prepping, bread and cook just before serving for ultimate freshness.
Garlic Butter Chicken Kiev Recipe FAQs
I get asked these questions all the time – here’s everything you need to know to make perfect Chicken Kiev every single time:
Can I bake instead of fry?
Absolutely! Baking at 375°F gives you that golden crispiness without the splatter. Just place the breaded chicken on a rack over a baking sheet (this helps air circulate) for about 25-30 minutes. Bonus: it’s hands-off cooking!
How do I prevent butter leakage?
Three secrets: 1) Chill the stuffed chicken before cooking (30 minutes minimum), 2) Roll tightly and secure well with toothpicks, and 3) Don’t rush the cooking – medium heat lets the chicken cook through before the butter bursts out. Some leakage is normal though – that’s what makes it so delicious!
Can I make these ahead?
You bet! Prepare them up to the breading step, then refrigerate for up to 24 hours before cooking. The chilled butter actually helps them hold together better. Just add a few extra minutes to the cooking time since they’ll be fridge-cold.
What if I don’t have toothpicks?
No worries! Kitchen twine works great – just tie it like a little package. Or you can use small skewers (cut them down if needed). In a real pinch? Just be extra careful when flipping and hope for the best – the breading helps hold it together.
Is there a dairy-free version?
For sure! Use plant-based butter (the stick kind, not tub) and skip the egg wash – just brush with olive oil before breading. The texture changes slightly, but you still get that amazing garlicky flavor bursting through.
Nutritional Information
Here’s the breakdown for one serving of this glorious Garlic Butter Chicken Kiev (because yes, I actually did the math while eating my third test batch). Keep in mind these are estimates – your exact numbers will vary based on specific ingredients and brands you use. That said, each juicy, golden chicken roll contains about:
- Calories: 450
- Protein: 35g (hello, muscle fuel!)
- Carbs: 20g (mostly from that perfect crispy coating)
- Fat: 28g (14g saturated – but oh so worth it)
Fair warning: These numbers don’t include whatever you serve it with (looking at you, buttery mashed potatoes). Sometimes you just gotta live a little!
Made This Garlic Butter Chicken Kiev Recipe?
Did you nail that perfect butter explosion? I’d love to hear how it turned out! Leave a note below with your favorite tweaks or tips – your ideas might just help the next home cook master this classic. And if you snapped a photo of that golden, crispy beauty, tag me so I can drool over your creation!
Print
4 Irresistible Garlic Butter Chicken Kiev Recipe Secrets Revealed
- Total Time: 45 minutes
- Yield: 4 servings 1x
- Diet: Low Lactose
Description
A classic dish featuring tender chicken breasts stuffed with garlic butter, coated in breadcrumbs, and fried or baked until golden.
Ingredients
- 4 boneless chicken breasts
- 1/2 cup unsalted butter, softened
- 4 cloves garlic, minced
- 1 tbsp fresh parsley, chopped
- 1 cup breadcrumbs
- 1/2 cup all-purpose flour
- 2 eggs, beaten
- 1 tsp salt
- 1/2 tsp black pepper
- 2 tbsp vegetable oil (for frying)
Instructions
- Pound chicken breasts to 1/4-inch thickness.
- Mix butter, garlic, and parsley in a bowl.
- Place 1 tbsp of garlic butter in the center of each chicken breast.
- Roll chicken tightly around the butter and secure with toothpicks.
- Dredge each chicken roll in flour, then dip in beaten eggs, and coat with breadcrumbs.
- Heat oil in a pan and fry chicken until golden brown (or bake at 375°F for 25-30 minutes).
- Remove toothpicks before serving.
Notes
- Chill stuffed chicken for 30 minutes before cooking for better shape.
- Use a meat thermometer to ensure internal temperature reaches 165°F.
- Substitute breadcrumbs with panko for extra crunch.
- Prep Time: 20 minutes
- Cook Time: 25 minutes
- Category: Main Course
- Method: Frying or Baking
- Cuisine: Ukrainian
Nutrition
- Serving Size: 1 chicken breast
- Calories: 450
- Sugar: 1g
- Sodium: 700mg
- Fat: 28g
- Saturated Fat: 14g
- Unsaturated Fat: 10g
- Trans Fat: 0g
- Carbohydrates: 20g
- Fiber: 1g
- Protein: 35g
- Cholesterol: 190mg
Keywords: garlic butter chicken kiev, stuffed chicken recipe, easy chicken kiev


