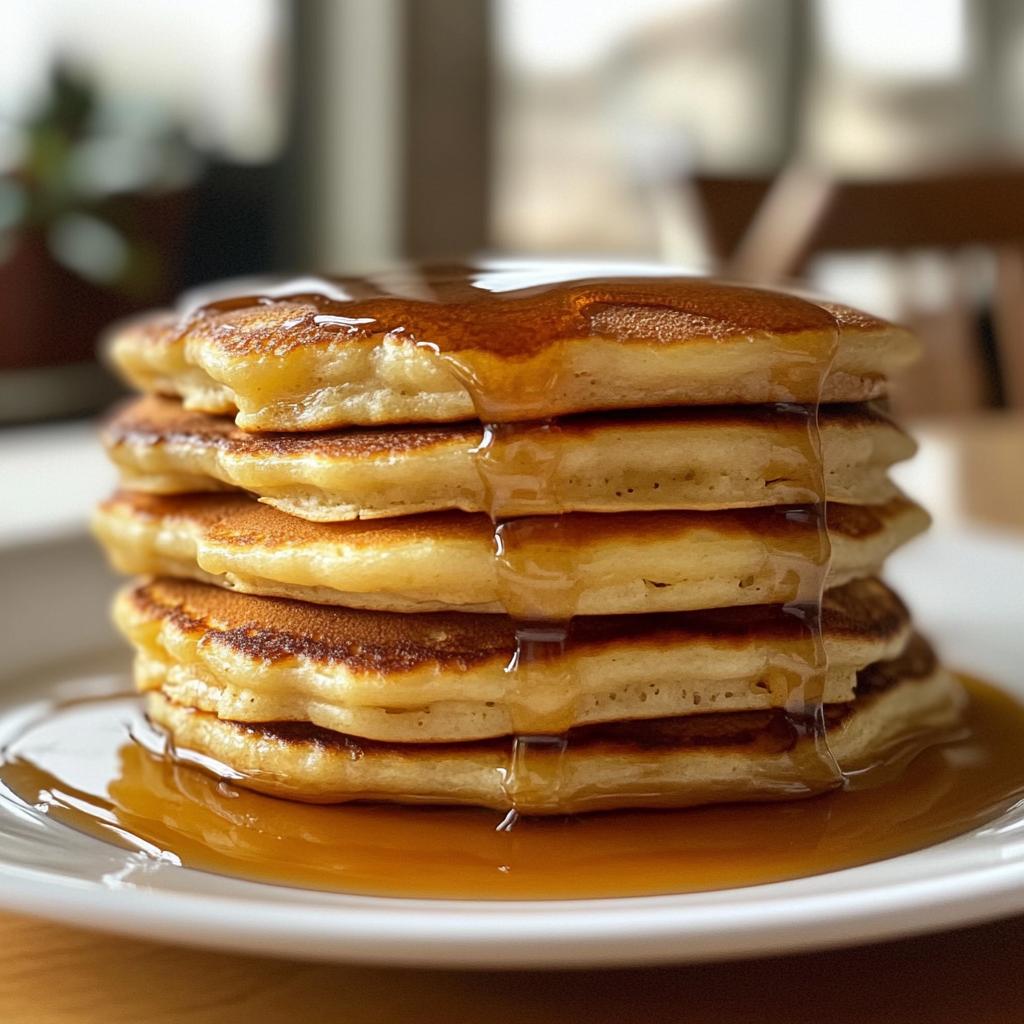
There’s nothing quite like waking up to a stack of homemade Buttermilk Pancakes with Maple Syrup. The smell alone—buttery, slightly tangy, and sweet—makes my kitchen feel like a weekend diner, no matter what day it is. I’ve been tweaking this recipe for years (yes, I might have a slight pancake obsession), and I can confidently say these are the fluffiest, most flavorful pancakes you’ll ever make. The secret? Real buttermilk and just the right amount of baking soda to give them that perfect rise. Whether it’s a slow Sunday morning or a rushed weekday breakfast, this recipe never fails to bring everyone to the table with a smile.
Ingredients for Buttermilk Pancakes with Maple Syrup
Gathering the right ingredients makes all the difference with pancakes—I learned that the hard way after one too many flat, rubbery breakfast disasters! Here’s what you’ll need for perfect stacks every time:
- 1 1/2 cups all-purpose flour (spooned and leveled—no packing!)
- 2 tablespoons granulated sugar (trust me, this little bit makes them sing)
- 1 teaspoon baking powder (check the date—old powder won’t give you that lift)
- 1/2 teaspoon baking soda (the buttermilk’s perfect partner)
- 1/2 teaspoon fine sea salt (balances all the sweetness)
- 1 1/4 cups buttermilk, room temperature (cold buttermilk makes the batter seize up)
- 1 large egg, lightly beaten (room temp eggs mix in smoother)
- 2 tablespoons unsalted butter, melted and slightly cooled (real butter only—no substitutes!)
- 1/2 teaspoon vanilla extract (my secret flavor booster)
- Pure maple syrup, for serving (the real stuff—your pancakes deserve it)
See that buttermilk measurement? That extra 1/4 cup is my grandma’s trick—it makes the batter just thin enough to pour beautifully without being runny. And don’t skip warming your buttermilk and eggs to room temp; it helps everything blend together like a dream.
How to Make Buttermilk Pancakes with Maple Syrup
Now for the fun part—turning those simple ingredients into golden, fluffy stacks of joy! I promise it’s easier than you think, especially once you get the rhythm down. Just follow these steps, and you’ll be flipping pancakes like a diner chef in no time.
Mixing the Dry and Wet Ingredients
First, grab two bowls—a medium one for dry ingredients (about 2-quart size) and a slightly larger one for wet ingredients. Trust me, keeping them separate at first makes all the difference! Whisk together the flour, sugar, baking powder, baking soda, and salt in your medium bowl. Don’t just dump and stir—really whisk it to make sure those leaveners are evenly distributed.
In your larger bowl, combine the buttermilk, egg, melted butter, and vanilla. Here’s where things get exciting—pour the wet ingredients into the dry ingredients and stir with a wooden spoon or rubber spatula. And when I say stir, I mean just until the flour disappears! Those lumps you see? Leave them be. Overmixing is the enemy of fluffy pancakes—it makes them tough. The batter should look thick and slightly lumpy, like cottage cheese with flour specks.
Cooking the Pancakes
Heat your griddle or large skillet over medium heat—this is crucial. Too hot, and they’ll burn; too low, and they won’t puff up properly. Test the heat by flicking a few drops of water on the surface—they should dance and evaporate quickly. Lightly grease the surface with butter or oil (I use a paper towel to wipe most of it off—you just want a whisper of grease).
Now, pour about 1/4 cup of batter for each pancake. Watch for little bubbles to form on the surface—that’s your cue! After about 2-3 minutes, when the edges look set and those bubbles pop and stay open, slide your spatula underneath. The flip should be confident but gentle—no pancake tossing acrobatics needed! Cook for another 1-2 minutes until golden brown on the second side.
Pro tip: Keep finished pancakes warm in a 200°F oven while you cook the rest. That way, everyone gets hot pancakes at the same time—no more cold first pancakes while waiting for the last batch!
Why You’ll Love These Buttermilk Pancakes
Okay, let me count the ways these pancakes will become your new breakfast obsession—because once you try them, there’s no going back to boxed mixes! Here’s why everyone in my house (including the picky 6-year-old) goes crazy for them:
- Fluffy perfection: That buttermilk and baking soda combo gives them an almost cloud-like texture—light yet satisfying, with just the right amount of spring when you press down with your fork.
- Ready in 25 minutes: From bowl to plate faster than you can say “Buttermilk Pancakes with Maple Syrup”—perfect for sleepy weekend mornings or even sneaking in a special weekday breakfast.
- Kid-approved magic: My niece calls them “happy pancakes” because they’re never tough or rubbery like some diner versions. The slight tang from buttermilk makes them interesting without being weird for little taste buds.
- Endless topping possibilities: Sure, maple syrup is classic, but we’ve done everything from lemon zest and powdered sugar to peanut butter and banana slices. Last week, my husband even crumbled bacon right into the batter—don’t tell Grandma!
- Smells like home: There’s something about that buttery, vanilla-scented aroma filling the kitchen that makes everyone wander in, still in pajamas, asking “Are they ready yet?”
Honestly? The best part might be watching people take that first bite—eyes closed, syrup dripping, with that contented sigh that says “Oh yeah, these are the good ones.” That’s when I know I’ve nailed it again.
Tips for Perfect Buttermilk Pancakes
After burning my fair share of pancakes and serving some questionable hockey pucks over the years, I’ve picked up a few foolproof tricks that’ll make your stacks restaurant-quality every time. These aren’t just tips—they’re pancake game-changers!
Let the batter rest for 5 minutes: This is non-negotiable in my kitchen! After mixing, walk away (okay, maybe just stir the coffee) while the baking powder and soda work their magic. You’ll see tiny bubbles forming—that’s your batter getting lighter and fluffier before your eyes. Grandma called this “letting the batter get happy,” and she was absolutely right.
Use an ice cream scoop for perfect portions: Forget pouring from the bowl—a #16 scoop (that’s about 1/4 cup) gives you identical pancakes that cook evenly. Bonus? No more weird-shaped “first pancake” that cooks differently from the rest. My stacks finally stopped looking like a pancake family with very different genetics!
Adjust the heat as you go: Medium heat is just the starting point. If your pancakes are browning too fast outside while staying raw inside, dial it down. No more “burnt offerings” (my husband’s term for my early attempts). And if they’re taking forever? Crank it up slightly. The perfect pancake cooks through just as the exterior turns golden—about 2-3 minutes per side.
Taste test one pancake first: Before committing to a whole batch, cook a single “test pancake.” This mini pancake lets you check sweetness (add a pinch more sugar if needed), thickness (thin with a splash of buttermilk if too doughy), and cooking time. Consider it your edible quality control inspector!
Keep a damp towel over finished pancakes: That “keep warm in the oven” tip from earlier? Upgrade it by covering the plate with a barely damp kitchen towel. The slight steam prevents dryness without making them soggy—crucial when you’re cooking for a crowd. Just don’t soak the towel; we’re going for “morning dew,” not “swimming pool.”
Ingredient Substitutions & Notes
Listen, I’m all about using the real-deal ingredients for these Buttermilk Pancakes with Maple Syrup—but life happens! Here’s how to adapt when your fridge isn’t cooperating, plus some handy notes I’ve picked up over years of pancake flipping:
When You’re Out of Buttermilk
That tangy buttermilk flavor is irreplaceable, but in a pinch? Mix 1 cup milk with 1 tablespoon lemon juice or white vinegar and let it sit for 5 minutes until slightly curdled. Works like a charm! Plain yogurt thinned with milk (about 3/4 cup yogurt + 1/2 cup milk) also does the trick—just whisk until smooth.
Maple Syrup Alternatives
Pure maple syrup is worth every penny, but if you’re in a bind, try:
- Honey (warm it slightly so it pours easily)
- Brown sugar syrup (simmer 1 cup brown sugar with 1/2 cup water until dissolved)
- Fruit compote (my favorite is mashed berries warmed with a splash of orange juice)
Dietary Tweaks
For gluten-free pancakes, swap the all-purpose flour for a 1:1 gluten-free blend—just add an extra tablespoon of buttermilk since GF flours tend to absorb more liquid. Vegan? Flax eggs (1 tbsp ground flax + 3 tbsp water) work surprisingly well, and coconut oil can replace butter. The pancakes won’t be exactly the same, but they’ll still be delicious!
Ingredient Notes
A few quick pro tips:
- Egg size matters: Large eggs only—extra large will make the batter too wet.
- Butter temperature: Melted but cooled slightly—hot butter can cook the egg when mixed in.
- Fresh leaveners: Baking powder and soda lose potency fast—replace every 6 months.
- Measuring flour: Spoon it into the cup and level off—no packing or tapping!
Remember: The best pancakes come from the heart, not perfection. Even my “substitution specials” have turned into happy accidents—like the time I used cinnamon applesauce instead of butter and created our now-famous Apple Spice Pancakes. Cooking should be fun, not stressful!
Serving Suggestions for Buttermilk Pancakes
Now, let’s talk about the best part—loading up those golden buttermilk pancakes with all the good stuff! Sure, maple syrup is classic (and always my first love), but over the years I’ve discovered some knockout combos that turn breakfast into a celebration. Here are my go-to ways to serve them:
The Classics
You can never go wrong with these timeless pairings:
- Fresh berries: Strawberries, blueberries, or raspberries add juicy brightness. In winter, I use thawed frozen berries—their syrup makes its own sauce!
- Whipped cream: A fluffy cloud on top takes pancakes from “nice” to “whoa!” I add a splash of vanilla to mine.
- Crispy bacon: That salty-sweet combo is magic. Pro tip: Drizzle syrup right over the bacon—life-changing.
Fun Twists
When we’re feeling fancy or hosting brunch, these always impress:
- Lemon & sugar: My British friend taught me this—a squeeze of lemon juice and a sprinkle of sugar makes the pancakes sing.
- Peanut butter & banana: Elvis was onto something. Warm peanut butter melts into the nooks and crannies beautifully.
- Apple compote & cinnamon: Just simmer chopped apples with butter, brown sugar, and cinnamon until jammy.
For the Kids (or Kids at Heart)
These make Saturday mornings feel like a party:
- Chocolate chip smiley faces: Press chips into hot pancakes to make eyes and mouths. Guaranteed giggles.
- Rainbow sprinkles: Fold them right into the batter or scatter on top with whipped cream.
- Mini pancake stacks: Use a tablespoon of batter per pancake, then let kids build their own towers.
My personal favorite? A stack with warm maple syrup, crispy bacon on the side, and a big cup of strong coffee. Simple, satisfying, and absolutely perfect. But honestly? However you top them, these buttermilk pancakes will make any morning feel special. Just don’t skimp on the syrup—I’ve learned that lesson the hard way!
Storing and Reheating Buttermilk Pancakes
Let’s be real—leftover pancakes are basically breakfast gold when you’re rushing out the door on busy mornings. But only if you store them right! After years of trial and error (and a few sad, soggy pancake casualties), here’s exactly how I keep my Buttermilk Pancakes with Maple Syrup tasting fresh-off-the-griddle amazing.
Refrigerating Pancakes
Got extras? Let them cool completely first—no stacking hot pancakes unless you want a steamy pancake brick! Then layer them between sheets of parchment or wax paper in an airtight container. They’ll stay perfect for up to 3 days in the fridge. Pro tip: Write the date on the container because, trust me, pancake archaeology is no one’s idea of fun.
Freezing for Future Feasts
This is my secret weapon for instant happy mornings! Freeze pancakes in single portions (I do stacks of 2-3) with parchment between each. Slide them into freezer bags, squeeze out all the air, and label with the date. They’ll keep for a month—though mine never last that long! The parchment trick means you can grab just what you need without defrosting the whole batch.
Reheating Like a Pro
Skip the microwave unless you enjoy rubbery pancakes (said from bitter experience). Instead, toss them on a dry skillet over medium heat for about 1 minute per side—the edges will crisp up beautifully while the middle stays tender. For frozen pancakes, no need to thaw first—just add an extra 30 seconds per side. Feeling fancy? A quick brush of melted butter right before serving makes them taste freshly made.
Bonus hack: I sometimes reheat pancakes in the toaster for single servings—just use a low setting and watch closely. It works shockingly well, especially for those thinner pancakes from the edge of the batch. Just don’t tell my skillet I said that!
Buttermilk Pancakes with Maple Syrup FAQs
After years of making these pancakes (and fielding countless texts from friends mid-flip), I’ve heard every question under the sun. Here are the ones that come up most often—along with my hard-earned pancake wisdom!
Can I make the batter ahead of time?
Technically yes, but I don’t recommend it. That baking soda starts working the minute it hits the buttermilk—if you let the batter sit too long, you’ll lose that magical fluffiness. That said, if you must prep ahead, mix the dry and wet ingredients separately the night before, then combine them in the morning. Even then, try to cook within 30 minutes of mixing. Trust me—fresh batter makes all the difference between “good” and “oh-my-gosh” pancakes!
Why buttermilk instead of regular milk?
Oh, let me count the ways! Buttermilk’s slight tang balances the sweetness perfectly, and its thick consistency gives pancakes that tender crumb we all love. The acidity also reacts with baking soda to create those gorgeous air pockets that make them so light. Regular milk pancakes just taste… flat (literally and figuratively). Once you go buttermilk, you never go back—my sister still hasn’t forgiven me for ruining box-mix pancakes for her!
How do I prevent sticking without greasing the pan too much?
This was my biggest struggle when I started! The trick is to use just enough fat—I rub a thin layer of butter or oil on the hot griddle with a folded paper towel (careful, it’s hot!). You want the surface shiny but not pooled. If your first pancake sticks, don’t panic—adjust the heat slightly lower and add another whisper of grease. Pro tip: Wait until you see those little bubbles forming before attempting the flip—pancakes release best when they’re ready, not when we’re impatient!
Got more questions? Slide into my DMs anytime—I could talk pancakes all day! Nothing makes me happier than helping someone nail their first perfect stack.
Nutritional Information
Okay, let’s talk numbers—because let’s be real, when something tastes this good, you want to know what you’re diving into! Keep in mind these are estimates (your exact measurements and ingredients might tweak things slightly), but here’s the scoop per serving (that’s 2 glorious pancakes):
- Calories: About 250 – Consider it fuel for conquering your day!
- Carbohydrates: 40g – Mostly from that lovely flour and just a touch of sugar
- Protein: 6g – Thanks to the egg and buttermilk
- Fat: 6g (3.5g saturated) – The butter does its magic here
- Sodium: 400mg – That baking soda and salt working together
- Sugar: 10g – Mostly from the maple syrup drizzle, because life’s too short to skimp!
Remember: These numbers don’t account for any extra toppings (no judgment if you go heavy on the whipped cream—I certainly do!). The beauty of homemade is you control what goes in, whether you’re keeping it classic or getting creative. Now go enjoy every fluffy, syrup-drenched bite!
Try This Recipe and Share Your Stack with #ButtermilkPancakes!
Alright, pancake lovers—it’s your turn to work that griddle magic! I can’t wait to see your towering stacks of golden buttermilk goodness. Snap a pic of those syrup-drizzled masterpieces (extra credit for creative toppings!) and tag them with #ButtermilkPancakes so we can all admire your handiwork. Whether it’s your first flip or your hundredth, every stack tells a story. And hey, if you discover a brilliant new trick or topping combo, share that too—we pancake enthusiasts gotta stick together! Now grab that whisk and get cooking. Your perfect breakfast awaits…
Print
Fluffy Buttermilk Pancakes with Maple Syrup in 25 Minutes
- Total Time: 25 minutes
- Yield: 8 pancakes 1x
- Diet: Vegetarian
Description
Fluffy buttermilk pancakes drizzled with maple syrup, perfect for a hearty breakfast.
Ingredients
- 1 1/2 cups all-purpose flour
- 2 tablespoons sugar
- 1 teaspoon baking powder
- 1/2 teaspoon baking soda
- 1/2 teaspoon salt
- 1 1/4 cups buttermilk
- 1 large egg
- 2 tablespoons melted butter
- 1/2 teaspoon vanilla extract
- Maple syrup for serving
Instructions
- Whisk flour, sugar, baking powder, baking soda, and salt in a bowl.
- In another bowl, mix buttermilk, egg, melted butter, and vanilla extract.
- Pour wet ingredients into dry ingredients and stir until just combined.
- Heat a griddle or pan over medium heat and lightly grease it.
- Pour 1/4 cup batter for each pancake and cook until bubbles form on top.
- Flip and cook until golden brown.
- Serve warm with maple syrup.
Notes
- Do not overmix the batter for fluffier pancakes.
- Adjust heat if pancakes brown too quickly.
- Use fresh buttermilk for best results.
- Prep Time: 10 minutes
- Cook Time: 15 minutes
- Category: Breakfast
- Method: Stovetop
- Cuisine: American
Nutrition
- Serving Size: 2 pancakes
- Calories: 250
- Sugar: 10g
- Sodium: 400mg
- Fat: 6g
- Saturated Fat: 3.5g
- Unsaturated Fat: 2g
- Trans Fat: 0g
- Carbohydrates: 40g
- Fiber: 1g
- Protein: 6g
- Cholesterol: 55mg
Keywords: buttermilk pancakes, maple syrup, breakfast recipe, easy pancakes


