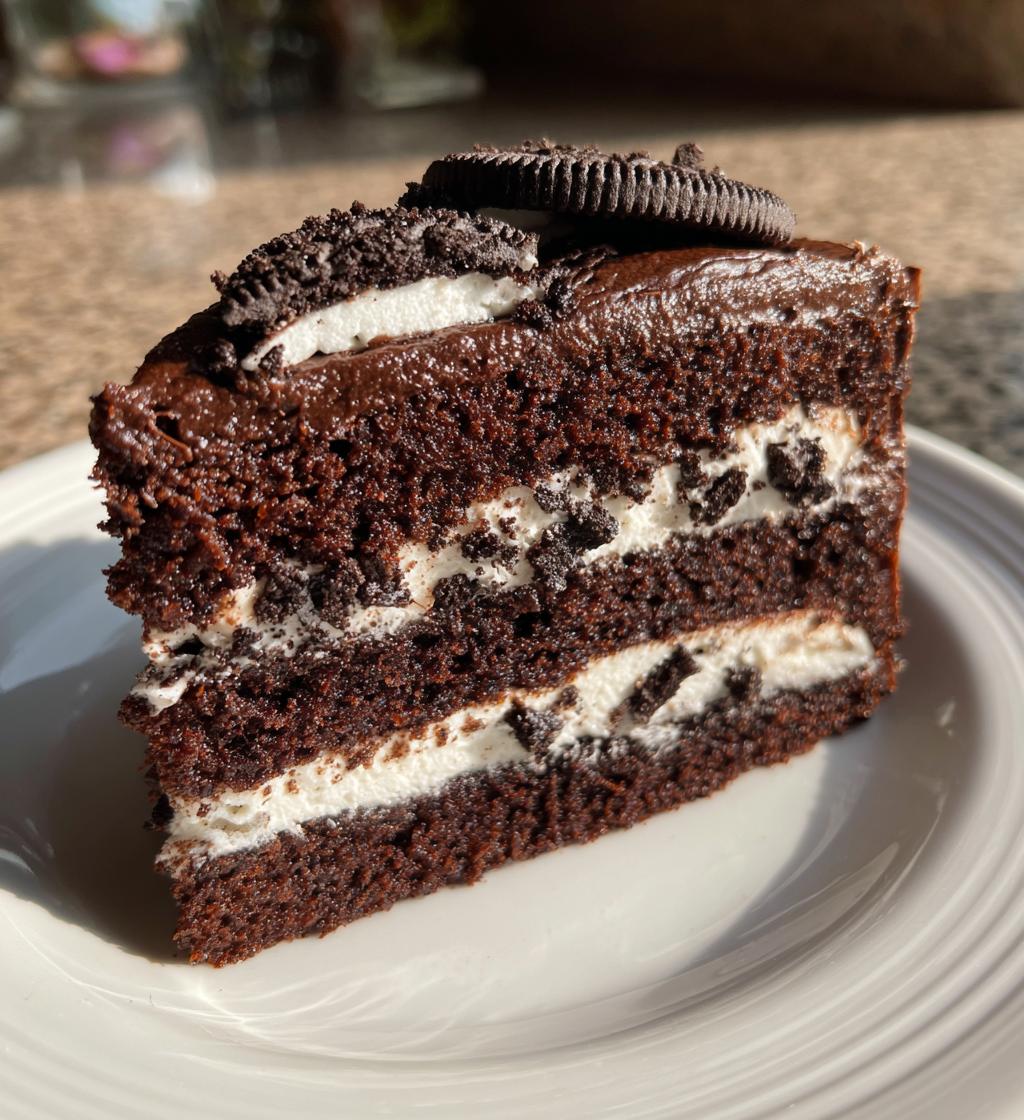
There’s something magical about combining Oreos and cake—it’s like a match made in dessert heaven. This Oreo cake is my go-to when I need a crowd-pleaser that’s both easy to make and utterly irresistible. I first baked it for my niece’s birthday, and let me tell you, it was a hit! Kids and adults alike couldn’t get enough of the rich chocolate layers studded with crushed Oreos and the creamy filling that ties it all together. What I love most is how simple it is—no fancy techniques, just straightforward baking that delivers big on flavor. Trust me, once you try this Oreo cake, it’ll become a staple in your dessert rotation too!
Ingredients List
Here’s everything you’ll need to make this dreamy Oreo cake. I like to measure everything out before I start—it makes the process so much smoother. Trust me, you don’t want to be scrambling for ingredients mid-batter!
- 2 cups all-purpose flour
- 1 cup granulated sugar
- 1/2 cup cocoa powder (I use unsweetened for that rich chocolate flavor)
- 1 teaspoon baking powder
- 1/2 teaspoon baking soda
- 1/2 teaspoon salt
- 1 cup milk (whole milk works best, but any kind will do)
- 1/2 cup vegetable oil
- 2 large eggs, at room temperature
- 2 teaspoons vanilla extract
- 1 cup hot water (this helps bloom the cocoa powder)
- 20 Oreo cookies, finely crushed (save a few for topping!)
- 1 cup heavy cream
- 1/2 cup powdered sugar (for sweetening the whipped cream)
That’s it! Simple, right? Now let’s get baking!
Equipment List
You won’t need anything fancy for this Oreo cake – just the basics from your kitchen. Here’s what I grab every time I make it:
- Two 8-inch round cake pans (or one 9×13 if you prefer sheet cake)
- Mixing bowls (one large, one medium)
- Whisk and rubber spatula
- Electric mixer (hand or stand – either works!)
- Measuring cups and spoons
- Parchment paper (for lining pans – makes cleanup a breeze)
- Cooling rack
That’s it! Now let’s get to the fun part – making the cake!
How to Make Oreo Cake
Okay, let’s dive into making this glorious Oreo cake! I promise it’s easier than you think – just follow these steps and you’ll have a showstopper dessert in no time. The secret is taking it one step at a time and not rushing the process. Ready? Let’s go!
Preparing the Batter
First things first – preheat that oven to 350°F (175°C). While it’s heating up, let’s make the batter. In your large mixing bowl, whisk together all the dry ingredients – flour, sugar, cocoa powder, baking powder, baking soda, and salt. Get them nice and combined.
Now for the wet ingredients! In another bowl, mix the milk, vegetable oil, eggs, and vanilla extract until smooth. Here’s my trick: pour the wet mixture into the dry ingredients gradually while mixing on low speed. Don’t overmix! Just get it combined – a few lumps are totally fine.
The batter will look thin when you add the hot water – that’s normal! The Oreos are coming next. Fold in half of your crushed Oreos gently with a spatula. The batter should be pourable but with those delicious cookie bits throughout.
Baking the Cake Layers
Divide the batter evenly between your prepared pans. I like to tap the pans gently on the counter to remove any air bubbles. Pop them in the oven and set your timer for 30 minutes.
Here’s how you’ll know it’s done: the edges should pull away slightly from the pans, and a toothpick inserted in the center should come out with just a few moist crumbs (not wet batter). If it needs more time, check every 2-3 minutes – overbaking is the enemy of moist cake!
Let the cakes cool in their pans for about 10 minutes, then transfer to a wire rack to cool completely. This is crucial – if you try to assemble with warm cakes, your whipped cream will melt everywhere!
Assembling the Oreo Cake
Time for the fun part! Whip your heavy cream and powdered sugar until stiff peaks form – this takes about 3-4 minutes with an electric mixer. Be careful not to overwhip or you’ll get butter!
Place one cake layer on your serving plate and spread about 2/3 of the whipped cream on top. Sprinkle generously with the remaining crushed Oreos. Carefully place the second layer on top and spread the remaining cream over it. I like to leave the sides bare to show off those Oreo bits peeking through!
Finish with a sprinkle of reserved Oreo crumbs on top. Chill for at least an hour before serving – this lets everything set up beautifully. Trust me, the wait is worth it!
Tips for Perfect Oreo Cake
After making this Oreo cake dozens of times, I’ve learned a few tricks that make all the difference! First, crush those Oreos finely – I pulse them in a food processor until they’re like coarse sand. Big chunks make slicing messy. Second, don’t skip chilling the cake before serving – that hour in the fridge lets the whipped cream set so each slice holds its shape beautifully.
My secret weapon? A sprinkle of instant coffee in the batter – just a teaspoon enhances the chocolate flavor without tasting like coffee. And if you want extra decadence, swap half the whipped cream for chocolate ganache between layers. Oh, and always use room temperature eggs – they incorporate better into the batter for a lighter crumb!
Variations of Oreo Cake
One of the best things about this Oreo cake is how easy it is to customize! If you’re feeling fancy, swap the whipped cream for a rich chocolate ganache—just melt equal parts chocolate and heavy cream for a silky filling. Love mint? Use mint Oreos instead of the classic ones for a refreshing twist. You can even try golden Oreos for a vanilla-based cake with a caramel-like flavor. Feeling adventurous? Add a layer of peanut butter frosting or sprinkle in some chopped Reese’s cups. The possibilities are endless, so have fun and make it your own!
Serving Suggestions
This Oreo cake is fantastic on its own, but here’s how I love to serve it for maximum wow factor! A scoop of vanilla ice cream on the side makes it feel extra special—the cold creaminess against the soft cake is heaven. For adults, try pairing slices with strong coffee to balance the sweetness. At summer parties, I’ll add fresh raspberries on top for a pop of color and tartness. And if you’re feeling indulgent? Drizzle each plate with warm chocolate sauce before plating—your guests will lose their minds!
Storage & Reheating Instructions
Here’s the deal with storing this Oreo cake – it’s best kept in the fridge because of that whipped cream filling. Just cover it loosely with plastic wrap or pop it in an airtight container, and it’ll stay fresh for about 3 days. If you want to enjoy a slice at room temperature, let it sit out for 15 minutes before serving. I don’t recommend freezing it – the whipped cream gets weird when thawed. Trust me, leftovers rarely last more than a day in my house anyway!
Nutritional Information
Just a quick note – the nutritional info for this Oreo cake is an estimate and can vary based on the specific ingredients and brands you use. A single slice has about 420 calories, 18g of fat, and 60g of carbs. It’s definitely a treat, but hey, life’s too short not to enjoy dessert sometimes!
FAQ Section
Can I use Oreo crumbs instead of whole cookies?
Absolutely! I’ve done this when I’m in a pinch – just use about 1.5 cups of pre-crushed Oreo crumbs. But here’s my tip: give them a quick pulse in a food processor anyway, because store-bought crumbs are often too fine. You want some texture in your Oreo cake for that satisfying crunch!
How long does the cake stay fresh?
With the whipped cream filling, I recommend enjoying it within 3 days – keep it refrigerated and covered. The cake actually gets more moist and flavorful on day two! If you need to make it ahead, bake the layers and freeze them (wrapped tightly) for up to a month. Just thaw and assemble with fresh whipped cream the day you’re serving.
Can I make this into cupcakes?
Yes! This Oreo cake batter makes fantastic cupcakes. Fill lined muffin tins 2/3 full and bake at the same temperature for 18-22 minutes. Let them cool completely before topping with whipped cream and Oreo crumbs. They’re perfect for parties – just plan to eat them the same day since the whipped cream doesn’t hold as well on individual portions.
Why is the batter so thin?
Don’t panic! The hot water makes the batter seem too liquidy at first, but this is what gives our Oreo cake that incredibly moist texture. The cookies and flour will absorb the liquid as it bakes. Just trust the process – I’ve made this dozens of times and it always turns out perfectly.
Irresistible Oreo Cake Recipe with 20 Crushed Cookies
- Total Time: 1 hour 55 minutes
- Yield: 8 servings 1x
- Diet: Vegetarian
Description
A delicious and easy-to-make Oreo cake that combines the rich flavor of Oreo cookies with a creamy filling and soft cake layers.
Ingredients
- 2 cups all-purpose flour
- 1 cup sugar
- 1/2 cup cocoa powder
- 1 tsp baking powder
- 1/2 tsp baking soda
- 1/2 tsp salt
- 1 cup milk
- 1/2 cup vegetable oil
- 2 eggs
- 2 tsp vanilla extract
- 1 cup hot water
- 20 Oreo cookies, crushed
- 1 cup heavy cream
- 1/2 cup powdered sugar
Instructions
- Preheat oven to 350°F (175°C). Grease and line two 8-inch cake pans.
- In a bowl, mix flour, sugar, cocoa powder, baking powder, baking soda, and salt.
- Add milk, vegetable oil, eggs, and vanilla extract. Mix until smooth.
- Slowly add hot water and mix until combined. The batter will be thin.
- Fold in half of the crushed Oreo cookies.
- Pour batter into prepared pans. Bake for 30-35 minutes or until a toothpick comes out clean.
- Let cakes cool completely.
- Whip heavy cream with powdered sugar until stiff peaks form.
- Spread whipped cream over one cake layer, sprinkle with remaining crushed Oreos, and top with the second layer.
- Chill for 1 hour before serving.
Notes
- Crush Oreos finely for a smoother texture.
- For extra richness, add a layer of chocolate ganache.
- Store leftovers in the refrigerator.
- Prep Time: 20 minutes
- Cook Time: 35 minutes
- Category: Dessert
- Method: Baking
- Cuisine: American
Nutrition
- Serving Size: 1 slice
- Calories: 420
- Sugar: 28g
- Sodium: 320mg
- Fat: 18g
- Saturated Fat: 6g
- Unsaturated Fat: 10g
- Trans Fat: 0g
- Carbohydrates: 60g
- Fiber: 2g
- Protein: 6g
- Cholesterol: 55mg
Keywords: Oreo cake, chocolate cake, easy dessert, Oreo dessert


