Oh, hummus—where do I even begin? This creamy, dreamy dip has been my go-to snack since my first bite at a tiny Middle Eastern café years ago. I remember thinking, “Wait, this is just chickpeas? How is it so good?” Now, after countless batches (and many happy taste-testers), I’m sharing my favorite hummus recipe that’s ridiculously simple yet tastes like magic. Five minutes, a handful of pantry staples, and boom—you’ve got silky-smooth perfection ready to dunk, spread, or devour by the spoonful. Trust me, once you try homemade, there’s no going back to store-bought!
Why You’ll Love This Hummus Recipe
This hummus recipe is my kitchen MVP—it’s the dip that never lets me down. Here’s why it’ll become your favorite too:
Quick and Easy
Five minutes—that’s all you need! I’ve made this while my toast was toasting. Just toss everything in the food processor (no fancy techniques) and blend. Even my most kitchen-averse friends nail this recipe on their first try.
Creamy and Delicious
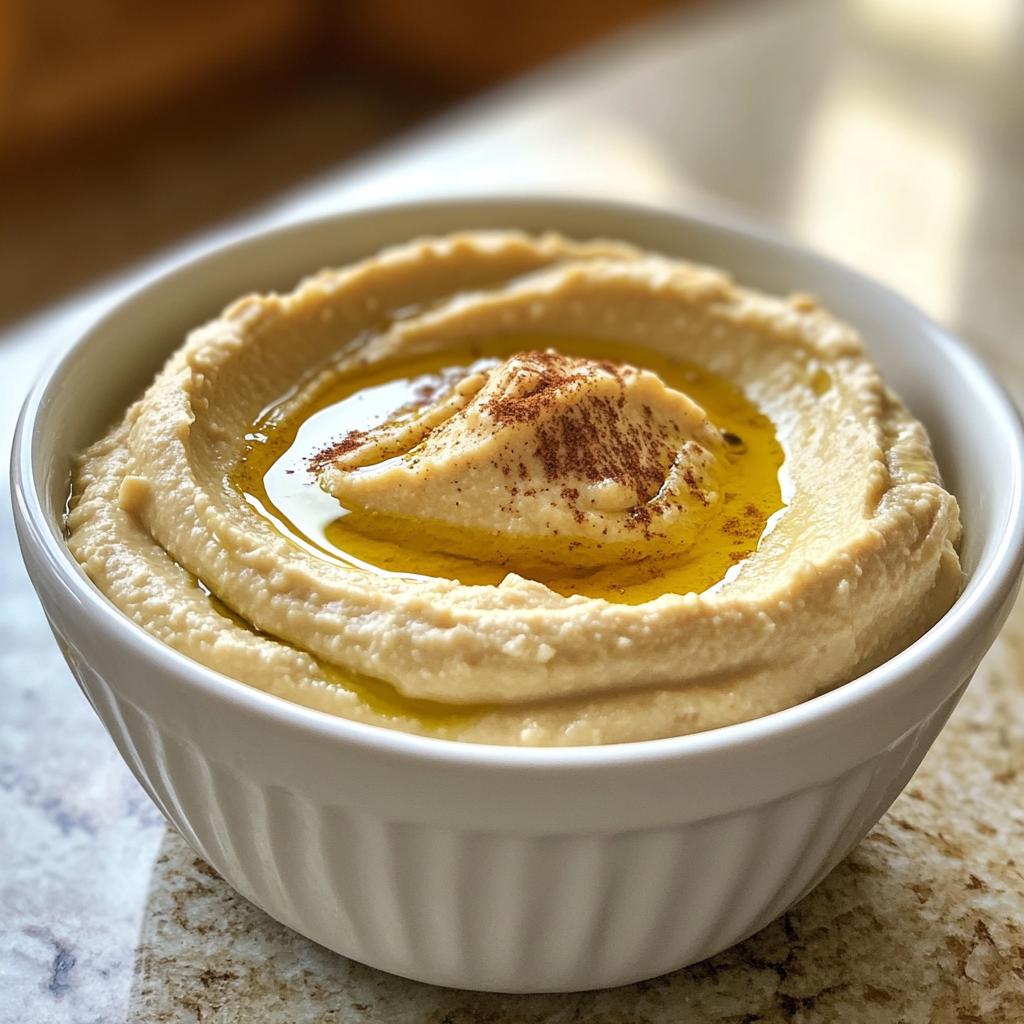
The texture? Like velvet. The flavor? Rich, garlicky, with just the right lemony zing. That tahini does something magical—it turns humble chickpeas into this luxuriously smooth spread that’s downright addictive. Pro tip: Lick the spatula. I always do.
Ingredients for the Best Hummus Recipe
Here’s everything you’ll need to make hummus that’ll put store-bought versions to shame. I’m a stickler for measurements – eyeballing it just won’t give you that perfect texture. Trust me, I learned that the hard way!
- 1 can (15 oz) chickpeas – drained (save that liquid though – we’ll talk about it later!)
- 1/4 cup tahini – the good stuff, stirred well before measuring
- 2 tbsp lemon juice – fresh squeezed, none of that bottled nonsense
- 2 cloves garlic – or 3 if you’re feeling bold
- 1/2 tsp salt – I use kosher, but any will do
- 2 tbsp olive oil – extra virgin for that fruity kick
- 1/4 cup water – ice cold works best
Ingredient Notes
Tahini is that magical sesame paste that gives hummus its signature nutty richness. Look for jars where the oil isn’t separated (or give it a good stir if it is). In a pinch? Greek yogurt makes a decent stand-in, though the flavor will be milder.
About those chickpeas – yes, you really do want to drain them (that goopy liquid makes hummus bitter). But don’t toss that aquafaba! It makes a great vegan egg substitute in baking. The chickpeas themselves? Canned work perfectly fine, but if you’re using dried, you’ll need about 1.5 cups cooked.
And the garlic – raw gives that classic punch, but roasted garlic makes a mellower, sweeter hummus. Your call depending on mood (and who you’re kissing later).
How to Make Hummus Recipe
Alright, let’s get blending! This is where the magic happens – turning those simple ingredients into creamy perfection. I’ve made this so many times I could probably do it in my sleep, but I’ll walk you through each step so your hummus turns out silky smooth every time.
Step 1: Blend the Base
First things first – grab your trusty food processor (a blender works in a pinch, but you’ll need to scrape down the sides more). Toss in your drained chickpeas, tahini, garlic cloves, lemon juice, and salt. Now here’s my secret: pulse about 10 times first to break everything down before you let it rip. This prevents those rogue whole chickpeas from bouncing around!
Once everything’s looking roughly chopped, let the processor run for a good minute. You want it to look like coarse sand at this point – don’t worry if it seems too thick or crumbly. That’s exactly what we want before adding liquids. Scrape down the sides with a spatula – those sneaky bits of garlic love to hide in the corners.
Step 2: Adjust Consistency
Now for the transformation! With the processor running, slowly drizzle in your olive oil through the feed tube. I mean slow – like counting to 10 as you pour. This emulsifies the mixture, making it creamy rather than greasy. Next comes the cold water – same slow drizzle technique.
Here’s where you play texture detective: Let it blend for another full minute after adding liquids. The hummus should be smooth enough to hold its shape when you scoop it, but soft enough to slowly settle back down. Too thick? Add water 1 tablespoon at a time. Too thin? Oops – add a spoonful more tahini to thicken it up.
Pro tip: If your hummus is warm from blending (it happens), pop it in the fridge for 30 minutes. The flavors meld beautifully and it firms up to that perfect dippable consistency. But let’s be real – I’ve eaten it warm with a spoon straight from the food processor more times than I can count!
Tips for the Perfect Hummus Recipe
After making more hummus than I’d care to admit (my food processor deserves a medal), I’ve picked up some game-changing tricks that’ll take your dip from good to “where have you been all my life?” good:
- Ice-cold water is your secret weapon – It helps emulsify everything into that dreamy, creamy texture we all crave. I keep a glass of water with ice cubes next to my food processor just for this!
- Let it chill – I know it’s tempting to dive right in, but letting your hummus rest in the fridge for at least an hour does wonders. The flavors get cozy with each other, and the texture firms up perfectly.
- Peel those chickpeas – Okay, this one’s extra, but hear me out: popping the skins off your chickpeas makes the smoothest hummus imaginable. I do this when I’m feeling fancy or need to impress guests (or just myself).
- Tahini temperature matters – If your tahini’s been sitting in the fridge, let it come to room temp before using. Cold tahini can make your hummus seize up weirdly – learned that one the hard way!
- Garlic hack – If raw garlic’s too punchy for you, microwave the cloves for 10 seconds first. Takes the edge off while keeping that delicious garlic flavor.
- The spoon test – Dip a spoon in your finished hummus. If it coats the back evenly without running right off, you’ve nailed the consistency!
Remember – hummus is forgiving! Too thick? Add water. Too thin? More tahini. Bland? Extra lemon or salt. You really can’t mess it up (though my first attempt that tasted like garlic paste begs to differ…).
Serving Suggestions
Oh, the possibilities with this hummus are endless! Here’s how I love to serve it (though let’s be real – eating it straight with a spoon is totally acceptable too):
Classic dippers: Warm pita bread (torn into chunks, not those sad little triangles!), crisp cucumber rounds, or colorful bell pepper strips. My personal favorite? Radish slices – their peppery crunch is magic with the creamy hummus.
Sandwich game-changer: Spread it thick on sourdough with roasted veggies, or swap mayo for hummus in your next turkey wrap. It makes even boring desk lunches feel fancy.
Breakfast hack: Swirl a spoonful into scrambled eggs or top avocado toast with it. You’re welcome.
Party trick: Make a well in the center of your hummus and drizzle with olive oil, za’atar, and toasted pine nuts. Watch it disappear faster than you can say “more pita!”
Storage and Reheating
Here’s the beautiful thing about this hummus recipe – it actually gets better after a day in the fridge! But let me walk you through how to keep it fresh and tasty for when those snack attacks hit.
Fridge storage: Pop your hummus in an airtight container (I’m partial to mason jars because I can see the goodness inside) and it’ll stay perfect for up to 5 days. Press a piece of plastic wrap directly on the surface before sealing to prevent that weird dried-out skin from forming. No one wants crusty hummus!
Freezing for later: Yes, you can freeze hummus! I always make a double batch just for this. Scoop it into freezer-safe containers leaving about an inch of space (it expands slightly). It keeps beautifully for about 3 months. Thaw overnight in the fridge when the craving strikes.
Reviving thawed hummus: After freezing, your hummus might look a bit grainy or separated – no panic needed! Just give it a good stir (I like using a whisk for this), and if needed, blend in a teaspoon of water or lemon juice to bring back that creamy texture. The flavor will be just as amazing as when you first made it.
Quick tip: If your fridge hummus seems a little thick after a few days, stir in a splash of water or olive oil to loosen it up. I’ve also been known to microwave cold hummus for 15 seconds when I’m impatient – just enough to take the chill off without cooking it!
Hummus Recipe Variations
Now that you’ve mastered classic hummus, let’s get creative! Some of my favorite kitchen experiments started with “Hmm, what if I added…” to my hummus recipe. Here are the variations that actually made the regular rotation in my house:
- Roasted Garlic Hummus: Swap raw garlic for a whole head of roasted garlic (you’ll thank me later). Just slice off the top of a garlic bulb, drizzle with olive oil, wrap in foil, and roast at 375°F until golden and fragrant – about 45 minutes. Squeeze out the sweet, caramelized cloves into your hummus instead of raw garlic. Game changer!
- Spicy Harissa Hummus: For when you need some heat! Blend in 1-2 tablespoons of harissa paste (start with 1 if you’re spice-shy). Top with extra drizzle of harissa oil and smoked paprika for that Instagram-worthy look.
- Beet Hummus: Adds gorgeous color and earthy sweetness. Roast or boil 1 medium beet until tender, peel, and blend with your chickpeas. Warning: It stains everything pink – including surprised dinner guests’ teeth!
- Sun-Dried Tomato Hummus: My Italian-inspired twist! Add 1/4 cup oil-packed sun-dried tomatoes (drained) and a handful of fresh basil leaves. Perfect for bruschetta-style appetizers.
- Everything Bagel Hummus: Because why not? After blending, stir in 2 tablespoons of everything bagel seasoning. Serve with pretzel chips for maximum crunch.
- Avocado Hummus: Creaminess overload! Blend in 1 ripe avocado (add lime juice to prevent browning). Doesn’t keep as long but disappears too fast to matter.
The beauty of hummus? It’s basically a blank canvas for flavors. My fridge has seen hummus phases featuring roasted red peppers, curry powder, even leftover pesto! Once you’ve got the basic technique down, the sky’s the limit. Just remember – start with small amounts of add-ins and taste as you go. Some of my “bold experiments” have been… well, let’s just say they weren’t all winners!
Nutritional Information
Let’s talk numbers – because knowing how good this hummus is for you makes eating it by the spoonful feel totally justified! Here’s the breakdown per 1/4 cup serving (though let’s be real, who stops at just one serving?):
- Calories: About 100 – perfect for guilt-free snacking
- Protein: 3g – chickpeas pack a plant-based punch
- Fiber: 2g – keeps you full and happy
- Healthy fats: 5g from that magical tahini and olive oil combo
- Sugar: Just 1g naturally occurring – no weird additives here
Now, a little reality check: These values are estimates and can vary based on your specific ingredients and brands. That tahini you bought at the fancy Mediterranean market? Might have slightly different numbers than my supermarket brand. And if you go wild with the olive oil drizzle (no judgment), those fat grams will creep up – but hey, it’s the good kind of fat!
What really matters is that this hummus recipe is packed with wholesome ingredients that actually nourish you. It’s vegan, gluten-free, and full of protein and fiber to keep you energized. Much better than most processed snacks, if you ask me. So dip away, my friend – your body will thank you!
Frequently Asked Questions
Over the years, I’ve gotten all sorts of hummus questions from friends and family (and okay, maybe a few panicked texts from first-timers). Here are the answers to the stuff people ask me most – consider this your hummus hotline!
Can I Use Dried Chickpeas?
Absolutely! I actually prefer dried chickpeas when I have the time. Here’s my no-fail method: Soak 3/4 cup dried chickpeas in plenty of water overnight (they’ll plump up to about 1.5 cups). Next day, drain and simmer them in fresh water for about an hour until they’re super tender – like “smush easily between your fingers” tender. Bonus: The cooking liquid makes amazing aquafaba for vegan baking!
Pro tip: If you’re really serious about smooth hummus, add 1/2 tsp baking soda to the soaking water. It helps break down the skins for extra creaminess. Just don’t tell my grandma I shared that trick.
How Do I Fix Grainy Hummus?
Oh honey, we’ve all been there! Grainy hummus usually means two things: not enough liquid or not enough blending time. First, try adding 1 tbsp ice water while blending for another full minute. Still grainy? Your chickpeas might need some spa treatment – warm them in the microwave with a splash of water for 30 seconds before blending. The heat helps them break down smoother.
If all else fails, channel your inner chef and peel those chickpea skins (yes, it’s tedious, but so worth it for baby-bottom-smooth hummus). Or, my lazy fix: strain the hummus through a fine mesh sieve. Works like a charm!
Can I Make Hummus Without Tahini?
Look, tahini makes hummus magical, but I get it – sometimes you’re out. My best substitutes: 2 tbsp Greek yogurt + 1 tbsp sesame oil (for that nutty flavor), or 3 tbsp natural peanut butter (sounds weird, tastes surprisingly good!). Just know it won’t be traditional, but it’ll still be delicious.
Why Does My Hummus Taste Bitter?
First, check your tahini – rancid tahini is the usual bitter culprit. Give it a sniff; it should smell nutty, not sharp. Second, raw garlic can get bitter if over-blended. Try the 10-second microwave trick I mentioned earlier, or roast your garlic. Last resort? A pinch of sugar or honey balances bitterness beautifully.
How Can I Make My Hummus Fluffier?
Here’s my little secret: After blending, whip it with a spoon for a full minute like you’re mad at it. This incorporates air for that light, cloud-like texture. Some Middle Eastern restaurants even use ice cubes in the blend – the cold makes the tahini fluff up like crazy!
Print
5-Minute Hummus Recipe That Tastes Like Magic
- Total Time: 5 mins
- Yield: 2 cups 1x
- Diet: Vegan
Description
A simple and delicious hummus recipe you can make at home.
Ingredients
- 1 can (15 oz) chickpeas, drained
- 1/4 cup tahini
- 2 tbsp lemon juice
- 2 cloves garlic
- 1/2 tsp salt
- 2 tbsp olive oil
- 1/4 cup water
Instructions
- Add chickpeas, tahini, lemon juice, garlic, and salt to a food processor.
- Blend until smooth.
- Slowly add olive oil and water while blending.
- Adjust seasoning to taste.
- Serve with a drizzle of olive oil.
Notes
- Store in an airtight container in the fridge for up to 5 days.
- Add more water for a thinner consistency.
- Prep Time: 5 mins
- Cook Time: 0 mins
- Category: Dip
- Method: No Cook
- Cuisine: Middle Eastern
Nutrition
- Serving Size: 1/4 cup
- Calories: 100
- Sugar: 1g
- Sodium: 150mg
- Fat: 6g
- Saturated Fat: 1g
- Unsaturated Fat: 5g
- Trans Fat: 0g
- Carbohydrates: 8g
- Fiber: 2g
- Protein: 3g
- Cholesterol: 0mg
Keywords: hummus, chickpea dip, vegan recipe


