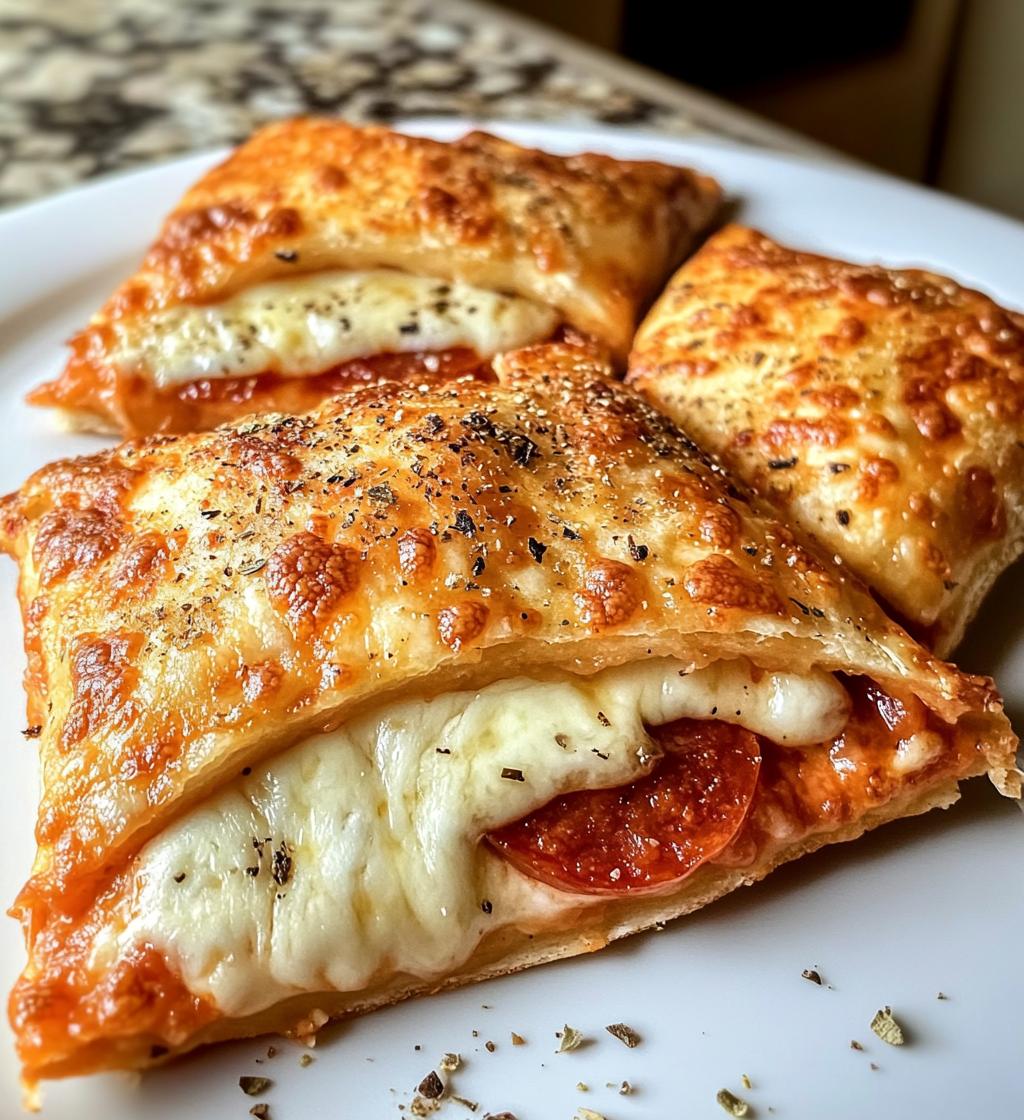
Oh my gosh, you have to try these Easy Cheesy Pizza Pockets—they’re my family’s go-to snack that disappeared faster than I could make them the first time! I stumbled upon this recipe when my kids were begging for pizza but I needed something quicker than delivery. These little pockets are a game-changer—packed with melty mozzarella, zesty sauce, and your favorite toppings, all wrapped in fluffy biscuit dough. The best part? You probably have all the ingredients in your fridge right now. They’re perfect for after-school snacks, game day bites, or even busy weeknight dinners when you need something delicious in under 30 minutes!
Why You’ll Love This Easy Cheesy Pizza Pockets Recipe
Listen, I know you’re going to adore these pizza pockets as much as we do—here’s why:
- Faster than delivery: From fridge to table in under 30 minutes (even my 7-year-old can time this!)
- Kid-approved magic: My picky eaters gobble these up without spotting a single “suspicious” veggie
- Customizable cravings: Swap pepperoni for mushrooms, add pineapple (don’t @ me), or go full meat-lover’s style
- Party superstar: Last game night, I made a double batch—gone before halftime
- No fancy skills needed: If you can fold a piece of paper, you can make these perfectly
- Leftover dream: They reheat like a charm for next-day snacks (if they even last that long)
Seriously, these little pockets have saved my sanity on more “I forgot to plan dinner” nights than I care to admit. The melted cheese pull alone is worth it!
Ingredients for Easy Cheesy Pizza Pockets
Here’s the beautiful part – you likely have most of these ingredients sitting in your kitchen right now! I always grab:
- 1 can (16 oz) refrigerated biscuit dough – the flaky kind works best (trust me, I’ve tested them all)
- 1/2 cup pizza sauce – store-bought for speed or homemade if you’re feeling fancy
- 1 cup shredded mozzarella cheese – packed tightly (because more cheese is always better)
- 1/4 cup pepperoni slices – quarter the big ones so they fit nicely
- 1 tbsp olive oil – for that golden, crispy finish
- 1 tsp Italian seasoning – my secret flavor booster
See? Nothing complicated – just simple, delicious ingredients ready to transform into pizza magic!
How to Make Easy Cheesy Pizza Pockets
Okay, let’s get to the fun part—making these little pockets of joy! I promise, it’s so easy you’ll be wondering why you ever ordered delivery. Just follow these steps, and you’ll have golden, cheesy perfection in no time.
Step 1: Prep the Dough and Fillings
First, preheat your oven to 375°F—this is key for that perfect golden crust. While it’s heating up, grab your biscuit dough and roll each one out into a 5-inch circle. I like to use a rolling pin, but honestly, you can just press them flat with your hands if you’re in a hurry. Next, spoon about a tablespoon of pizza sauce onto one half of each circle. Don’t go overboard here—too much sauce, and you’ll risk a leaky pocket (been there, done that). Sprinkle a generous amount of mozzarella cheese over the sauce and add a few pepperoni slices. If you’re feeling fancy, this is where you can toss in some extra toppings!
Step 2: Assemble the Pizza Pockets
Now comes the fun part—folding! Fold the dough over the filling to create a half-moon shape. Use your fingers to press the edges together, then seal them tight with a fork. This step is super important—if you don’t seal them well, you’ll end up with a cheesy mess in your oven (trust me, I’ve learned the hard way). Once they’re sealed, brush the tops with a little olive oil and sprinkle on some Italian seasoning for that extra flavor boost.
Step 3: Bake to Perfection
Pop those beauties onto a baking sheet (I line mine with parchment paper for easy cleanup) and bake for 12-15 minutes. You’ll know they’re done when the tops are golden brown and the cheese is oozing out just a little (the best part, right?). Let them cool for a couple of minutes before digging in—they’re molten lava hot straight out of the oven!
And there you have it—Easy Cheesy Pizza Pockets ready to devour. Seriously, the hardest part is waiting for them to cool enough to eat!
Tips for Perfect Easy Cheesy Pizza Pockets
After making these pizza pockets more times than I can count, I’ve picked up some tricks to guarantee perfection every single time:
- Don’t overstuff! That tablespoon of sauce measurement isn’t a suggestion – overfilled pockets burst open like little cheese volcanoes (delicious but messy).
- Flour is your friend when rolling the dough. If your biscuits get sticky, dust your surface lightly – it makes sealing so much easier.
- Air fryer magic: For extra crispiness, air fry at 370°F for 6-8 minutes. They come out golden and perfect!
- Seal tight: Really press those edges together – I run my finger dipped in water along the edge before sealing for extra insurance.
- Rotate halfway: If your oven has hot spots, turn the baking sheet at the 7-minute mark for even browning.
These little tweaks make all the difference between good pizza pockets and “oh my gosh I need the whole batch for myself” pizza pockets!
Customize Your Easy Cheesy Pizza Pockets
One of my favorite things about this recipe? It’s like a blank canvas for your pizza dreams! Swap the pepperoni for sautéed mushrooms and bell peppers for a veggie-packed version (my kids actually eat them this way—shh!). BBQ chicken lovers, mix shredded rotisserie chicken with your favorite sauce instead of pizza sauce. Got dietary needs? No problem—gluten-free biscuit dough works beautifully. And for my cheese fanatics? Try blending mozzarella with cheddar or gouda for next-level gooeyness. The possibilities are endless!
Serving and Storing Easy Cheesy Pizza Pockets
Oh, you’ll want to eat these straight from the oven—that first bite of crispy dough and molten cheese is pure bliss! Let them rest just 2 minutes (I know, torture) so you don’t burn your tongue. For leftovers (if you’re lucky enough to have any), toss them in an airtight container—they’ll stay delicious for 3 days. Reheat in the toaster or oven at 350°F for 5 minutes to bring back that fresh-baked magic. Pro tip: They freeze beautifully too—just pop them in the oven straight from frozen for 10 minutes!
Nutrition Information
Just so you know, these Easy Cheesy Pizza Pockets come in at about 180 calories each—not bad for such a satisfying little snack! Keep in mind these are rough estimates (I’m no dietitian, just a pizza-loving home cook). Your exact count might vary based on how generously you stuff them with cheese (no judgment here!). Each pocket gives you a nice little protein boost too, thanks to all that melty mozzarella. Perfect for when you need a quick, comforting bite without the guilt!
FAQs About Easy Cheesy Pizza Pockets
Got questions? I’ve got answers! Here are the most common ones I hear about these little pockets of joy:
- Can I freeze them? Absolutely! Freeze them before baking—just assemble, seal, and pop them on a baking sheet in the freezer until firm. Then transfer to a freezer bag. When you’re ready, bake straight from frozen, adding a couple extra minutes. Perfect for last-minute snacks!
- Can I use homemade dough? Of course! Homemade pizza dough works great—just roll it out a bit thinner than the biscuit dough so it bakes evenly. Bonus: it adds that extra homemade touch!
- What’s the best dipping sauce? Oh, you can’t go wrong with classic marinara, but ranch dressing is my secret favorite. My kids love garlic butter for dipping too—so indulgent!
- Can I make these ahead of time? Yes! Assemble them up to a day in advance, cover tightly, and refrigerate. Just bake when you’re ready—they’ll still be perfect!
See? These pizza pockets are as flexible as they are delicious!
Share Your Easy Cheesy Pizza Pockets!
I’d love to hear how your pizza pockets turned out! Did you add a crazy topping combo? Find a genius sealing trick? Drop a comment below—your tweaks might just become someone else’s new favorite version. Happy baking, friends!
Print
25Minute Easy Cheesy Pizza Pockets: Irresistibly Delicious
- Total Time: 25 mins
- Yield: 8 pizza pockets 1x
- Diet: Vegetarian
Description
Make quick and delicious cheesy pizza pockets with simple ingredients. Perfect for snacks or meals.
Ingredients
- 1 can refrigerated biscuit dough
- 1/2 cup pizza sauce
- 1 cup shredded mozzarella cheese
- 1/4 cup pepperoni slices
- 1 tbsp olive oil
- 1 tsp Italian seasoning
Instructions
- Preheat oven to 375°F.
- Roll out each biscuit into a small circle.
- Spread pizza sauce on half of each circle.
- Sprinkle cheese and add pepperoni.
- Fold dough over filling and seal edges.
- Brush with olive oil and sprinkle seasoning.
- Bake for 12-15 minutes or until golden.
Notes
- Use pre-shredded cheese for convenience.
- Customize with veggies or other toppings.
- Store leftovers in an airtight container.
- Prep Time: 10 mins
- Cook Time: 15 mins
- Category: Snack
- Method: Baked
- Cuisine: Italian-American
Nutrition
- Serving Size: 1 pizza pocket
- Calories: 180
- Sugar: 3g
- Sodium: 420mg
- Fat: 9g
- Saturated Fat: 3g
- Unsaturated Fat: 5g
- Trans Fat: 0g
- Carbohydrates: 18g
- Fiber: 1g
- Protein: 6g
- Cholesterol: 15mg
Keywords: easy pizza pockets, cheesy snack, quick pizza recipe


