Oh, let me tell you about my absolute favorite Sunday dinner – this dutch oven chuck roast that fills the whole house with the most incredible aromas. It’s the kind of meal that makes everyone gather in the kitchen, peeking under the lid to see if it’s done yet. I learned this recipe from my dad, who swore by his trusty old dutch oven for turning tough cuts into melt-in-your-mouth magic.
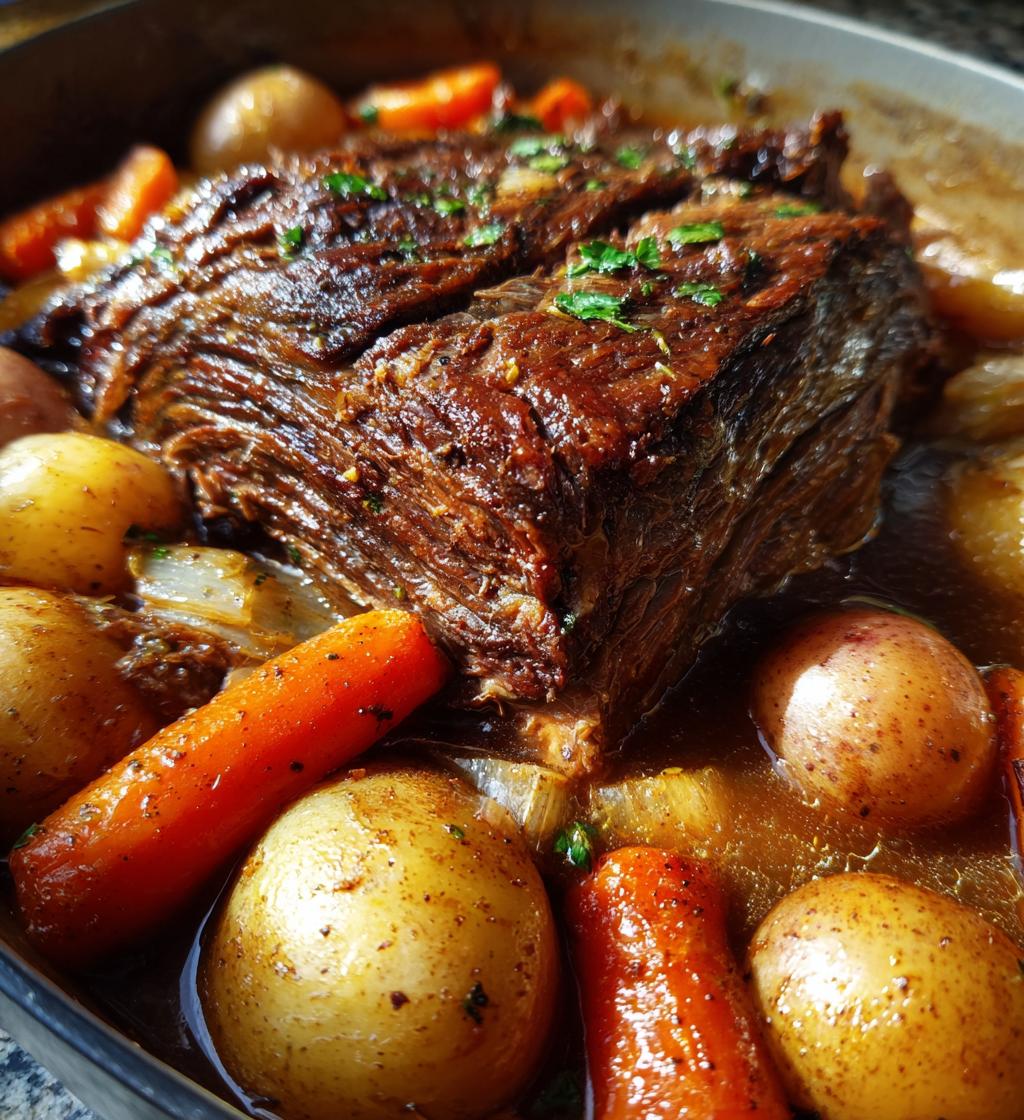
What I love most is how simple it really is – just a few minutes of prep, then the oven does all the work while you relax. That chuck roast transforms into something extraordinary, surrounded by carrots and potatoes soaking up all those rich juices. It’s comfort food at its finest, perfect for chilly evenings or when you need to feed a crowd without stress.
The secret? That beautiful sear you get from the dutch oven creates layers of flavor you just can’t achieve any other way. And when the meat finally pulls apart with just a fork? Pure bliss. This recipe has gotten me through everything from hectic weeknights to holiday gatherings – it’s always the first to disappear from the table.
Why You’ll Love This Dutch Oven Chuck Roast
Trust me, once you try this chuck roast, you’ll wonder how you ever lived without it. Here’s why it’s become my go-to comfort meal:
- Tender doesn’t even begin to describe it – we’re talking fall-apart-with-a-fork perfection after those slow hours in the oven
- One-pot wonder means less cleanup (my favorite kind of cooking!)
- Rich, deep flavors from that gorgeous sear and all those juices mingling together
- Minimal hands-on time – just sear, pop it in the oven, and forget about it
- Feeds a crowd effortlessly – I’ve served this at everything from family dinners to holiday parties
The best part? Your kitchen will smell like a five-star restaurant while it cooks. Honestly, half the enjoyment is just breathing in those incredible aromas as it bubbles away in the oven.
Dutch Oven Chuck Roast Ingredients
Here’s everything you’ll need to make this magical chuck roast happen – simple ingredients that work together beautifully:
- 3 lbs chuck roast (look for good marbling – those little white fat streaks mean flavor!)
- 2 tbsp olive oil (or avocado oil if you prefer)
- 1 large onion, chopped (yellow or white works great)
- 4 carrots, chopped into 2-inch chunks (no need to peel if you scrub them well)
- 4 potatoes, chopped (I like Yukon Golds for their creamy texture)
- 3 cloves garlic, minced (or 1 tbsp pre-minced if you’re short on time)
- 2 cups beef broth (low-sodium lets you control the salt better)
- 1 tsp salt (I use kosher – it distributes better)
- 1 tsp black pepper (freshly cracked if you’ve got it)
- 1 tsp thyme (dried works fine, but fresh is amazing if you have it)
Ingredient Notes & Substitutions
Don’t stress if you need to swap things out – cooking should be flexible!
- Chuck roast: This cut is perfect for slow cooking, but a bottom round or brisket would work too (just adjust cooking time)
- Beef broth: Bone broth adds extra richness, or use 1 beef bouillon cube + 2 cups water in a pinch
- Vegetables: Feel free to add parsnips, turnips, or mushrooms – they all soak up those delicious juices
- Herbs: Rosemary or oregano make great additions if you want extra flavor layers
See? Nothing fancy – just good, honest ingredients that transform into something extraordinary together.
How to Make Dutch Oven Chuck Roast
Alright, let’s get cooking! This is where the magic happens. I promise it’s easier than you think – just follow these simple steps and you’ll have the most incredible chuck roast that’ll make you feel like a kitchen rockstar.
Step 1: Prep and Season the Roast
First things first – preheat that oven to 325°F. While it’s heating up, take your chuck roast out of the fridge and let it sit for about 15 minutes. This helps it cook more evenly (trust me, it makes a difference!).
Now, pat that beautiful hunk of meat dry with paper towels – this helps get that perfect sear. Sprinkle both sides generously with salt and pepper, rubbing it in like you’re giving the roast a little massage. Don’t be shy with the seasoning – this is your flavor foundation!
Step 2: Sear the Meat
Heat your dutch oven over medium-high heat and add the olive oil. When it’s shimmering (you can test it by flicking a tiny bit of water – if it sizzles, you’re good), carefully add the roast. Listen to that glorious sizzle!
Here’s the key – don’t touch it for a good 4-5 minutes per side. I know it’s tempting to peek, but resist! You want that deep, caramelized crust that’ll make all the difference in flavor. Sear all sides, including the edges if you can manage it. When it’s beautifully browned all over, remove it to a plate.
Step 3: Cook Vegetables and Braise
In that same glorious pot (with all those tasty browned bits), toss in your onions, carrots, and garlic. Stir them around for about 3 minutes – just until the onions start to soften and smell amazing. This is when my kitchen starts smelling like heaven!
Now, return the seared roast to the pot, nestling it right on top of those veggies. Pour in the beef broth and sprinkle the thyme over everything. The liquid should come about halfway up the sides of the meat – if it doesn’t, add a splash more broth or water. Cover with the lid – this is when the real magic starts!
Step 4: Bake and Rest
Slide that covered dutch oven into your preheated oven and let it work its magic for 3 hours. After that time, carefully remove it (hot!) and add your potatoes, pushing them down into the liquid. Back in the oven it goes for another hour.
When the timer goes off, resist the urge to dive right in! Let the roast rest for at least 10 minutes before slicing. This lets all those incredible juices redistribute through the meat instead of running out all over your cutting board. I know it’s hard to wait, but it’s so worth it!
And there you have it – the most tender, flavorful chuck roast you’ve ever tasted. The meat should practically fall apart when you touch it with a fork, and those veggies will be infused with all that rich, meaty goodness. Get ready for some serious compliments!
Tips for the Best Dutch Oven Chuck Roast
After making this chuck roast more times than I can count, I’ve picked up some game-changing tricks that’ll take yours from good to “oh-my-gosh-what’s-your-secret” amazing:
- Choose the right cut – Look for chuck roast with lots of marbling (those pretty white streaks of fat). That fat melts during cooking, basting the meat from the inside out for unbelievable tenderness.
- Never skip the sear – Those browned bits aren’t just for looks! They create deep, complex flavors you just can’t get otherwise. I like to call it “flavor insurance” – a few extra minutes here pays off big time.
- Keep the lid on – I know it’s tempting to peek, but every time you lift that lid, heat escapes and adds to your cooking time. Set a timer and walk away – trust the process!
- Let it rest – I used to dig right in (impatience runs in my family), but waiting those 10 minutes makes all the difference. The juices redistribute instead of running out, leaving you with perfectly moist meat.
- Use leftovers wisely – Shred any extra meat for killer sandwiches, tacos, or my personal favorite – chuck roast hash with fried eggs for breakfast. The flavor only gets better the next day!
One bonus tip from my dad (who learned the hard way): If your roast seems tough after the cooking time, just pop it back in for another 30 minutes. Some cuts need more time, and patience always wins with chuck roast!
Serving Suggestions for Dutch Oven Chuck Roast
Now that you’ve got this glorious chuck roast ready, let’s talk about how to serve it up right! Here are my favorite ways to turn this already-amazing meal into a full-on feast:
- Crusty bread – Perfect for sopping up all those incredible juices (my family fights over who gets the last piece!)
- Creamy mashed potatoes – They make the ultimate bed for that tender meat and rich gravy
- Simple green beans – A bright, crisp contrast to the hearty roast
- Buttered egg noodles – So comforting with shreds of meat mixed in
- Roasted Brussels sprouts – Their slight bitterness balances the richness beautifully
My personal favorite? A big scoop of horseradish cream sauce on the side – that little kick takes everything to the next level. And don’t forget a nice glass of red wine if you’re feeling fancy!
Honestly though? This chuck roast is so flavorful it could stand alone with just a fork. But where’s the fun in that? Go wild and make it a meal to remember!
Storing and Reheating Dutch Oven Chuck Roast
Okay, let’s be real – leftovers rarely happen with this chuck roast in my house. But when they do (miracle of miracles!), here’s how to keep them tasting just as amazing as day one:
Refrigerating: Let the roast cool slightly, then transfer everything – meat, veggies, and all that glorious juice – into an airtight container. It’ll keep beautifully in the fridge for 3-4 days. Pro tip: Store the meat whole instead of slicing it – stays way more moist that way!
Freezing: This chuck roast freezes like a dream! Portion it out with some of the cooking liquid (acts as a protective ice blanket), and it’ll be good for 2-3 months. Thaw overnight in the fridge when ready to use.
Reheating: My two favorite methods:
- Oven method: Place in an oven-safe dish with a splash of broth, cover with foil, and warm at 325°F for about 20 minutes. Perfect for bringing back that fresh-from-the-oven feel.
- Stovetop method: Gently simmer in a saucepan with a bit of extra broth, stirring occasionally. Takes about 10 minutes and works great for smaller portions.
Word to the wise: Microwaving tends to dry it out, so I only recommend that as a last resort (we’ve all been there!). And whatever you do, don’t toss that delicious cooking liquid – it makes the best gravy or soup base later!
Dutch Oven Chuck Roast FAQs
I get asked about this chuck roast recipe all the time – here are the answers to the questions that pop up most often in my kitchen (and my inbox!):
Can I make this in a slow cooker instead?
Absolutely! Sear the roast first (don’t skip this step!), then transfer everything to your slow cooker. Cook on low for 8 hours or high for 5-6 hours. The texture will be slightly different, but still delicious.
Why is my chuck roast dry?
Usually means it didn’t cook long enough – chuck roast needs time for all that connective tissue to break down. Next time, check with a fork – if it doesn’t pull apart easily, give it another 30 minutes. Also, make sure there’s enough liquid (about halfway up the roast).
Can I use a different cut of beef?
Chuck roast is ideal, but bottom round or brisket can work too. Just know they might need adjusted cooking times. Avoid lean cuts like sirloin – they’ll dry out during the long cook.
How do I know when it’s done?
The meat should pull apart easily with a fork – no knife needed! If you’re unsure, an instant-read thermometer should read around 200°F for perfect tenderness.
Can I freeze leftovers?
Oh yes, and you should! Portion it with some of the cooking liquid, and it’ll keep beautifully for 2-3 months. Thaw overnight in the fridge before reheating gently.
Nutritional Information
Just so you know what you’re diving into (not that you’ll care once you taste it!), here’s the nutritional breakdown per serving. Keep in mind these are estimates – actual values can vary based on your specific ingredients and portion sizes.
- Calories: 450
- Fat: 25g (9g saturated)
- Protein: 35g
- Carbohydrates: 20g
- Fiber: 3g
- Sugar: 5g
- Sodium: 600mg
Not bad for such a satisfying meal, right? And remember – those marbled fats in the chuck roast are what make it so melt-in-your-mouth tender. Worth every delicious bite!
If you try this dutch oven chuck roast, I’d love to hear how it turned out for you! Leave a rating or share your experience in the comments. Happy cooking!
Print
Perfectly Tender Dutch Oven Chuck Roast in 4 Hours
- Total Time: 4 hours 20 mins
- Yield: 6 servings 1x
- Diet: Low Lactose
Description
A hearty and flavorful chuck roast cooked in a dutch oven for tender, juicy results.
Ingredients
- 3 lbs chuck roast
- 2 tbsp olive oil
- 1 large onion, chopped
- 4 carrots, chopped
- 4 potatoes, chopped
- 3 cloves garlic, minced
- 2 cups beef broth
- 1 tsp salt
- 1 tsp black pepper
- 1 tsp thyme
Instructions
- Preheat oven to 325°F.
- Season chuck roast with salt and pepper.
- Heat olive oil in a dutch oven over medium-high heat.
- Sear the roast on all sides until browned.
- Remove roast and sauté onions, carrots, and garlic for 3 minutes.
- Return roast to the pot and add beef broth and thyme.
- Cover and bake for 3 hours.
- Add potatoes and bake for another hour.
- Let rest for 10 minutes before serving.
Notes
- Use a well-marbled chuck roast for best results.
- Browning the roast adds depth of flavor.
- Adjust seasoning to taste.
- Prep Time: 20 mins
- Cook Time: 4 hours
- Category: Main Dish
- Method: Braising
- Cuisine: American
Nutrition
- Serving Size: 1 serving
- Calories: 450
- Sugar: 5g
- Sodium: 600mg
- Fat: 25g
- Saturated Fat: 9g
- Unsaturated Fat: 12g
- Trans Fat: 0g
- Carbohydrates: 20g
- Fiber: 3g
- Protein: 35g
- Cholesterol: 100mg
Keywords: dutch oven chuck roast, beef roast, pot roast


