Oh my goodness, where do I even begin with this Ding Dong Chocolate Cake? Picture this: It’s my birthday last year, and I’m elbow-deep in flour, determined to recreate that childhood favorite – you know, those little snack cakes with the creamy center? After three failed attempts (let’s not talk about the frosting disaster), I finally nailed it. The moment that rich chocolate aroma hit my kitchen, I knew I’d struck gold.
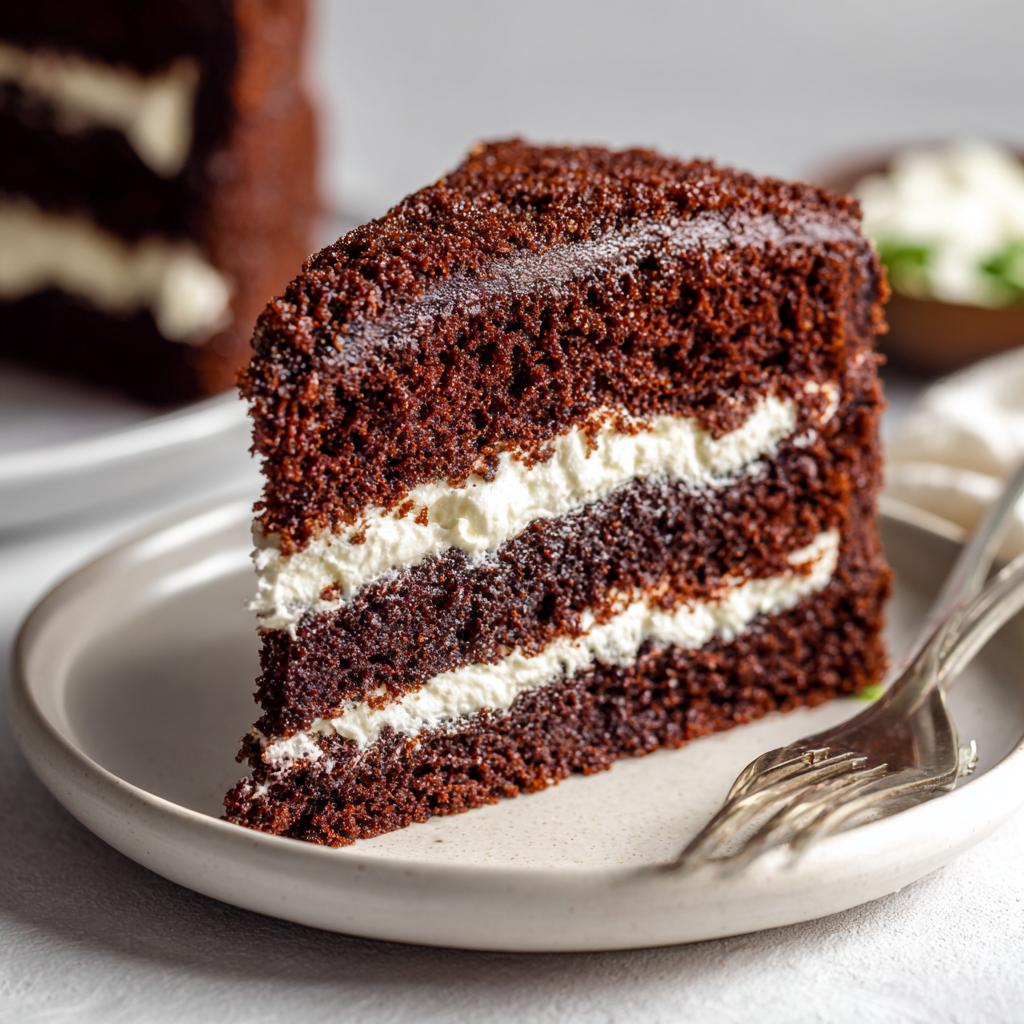
This cake is everything – moist, decadent chocolate layers hugging a cloud of sweet vanilla cream. What makes it special? That magical combination of boiling water in the batter (trust me, it works wonders) and whipped cream so light it practically floats between the layers. I’ve baked hundreds of cakes in my time, but this Ding Dong Chocolate Cake recipe? It’s the one my friends beg me to bring to every potluck.
The best part? It’s surprisingly simple to make. No fancy techniques, just good old-fashioned mixing and baking. Whether you’re craving nostalgia or just want to impress your book club, this cake delivers every single time. Just warning you now – one slice won’t be enough!
Why You’ll Love This Ding Dong Chocolate Cake
Oh, let me count the ways this cake will steal your heart! After dozens of test batches (and happy taste-testers), here’s why this recipe is my go-to:
- That nostalgic taste – One bite transports you back to lunchbox days, but homemade means way better quality. Real chocolate flavor shines through without that weird waxy aftertake store-bought ones sometimes have.
- Creamy surprise center – The whipped filling is lighter than traditional frosting, making each slice feel indulgent but not heavy. Pro tip: Make extra filling – you’ll want to eat it by the spoonful!
- Foolproof method – No fancy skills needed. If you can boil water (seriously, that’s the secret ingredient!), you can make this cake. My 12-year-old niece mastered it on her first try.
- Always a crowd-pleaser – I’ve served this at everything from backyard BBQs to fancy dinner parties. The empty plate club never fails.
Trust me – once you taste that moist crumb against the cool cream filling, you’ll understand why this recipe stays in my “forever favorites” folder!
Ingredients for Ding Dong Chocolate Cake
Okay, let’s raid the pantry! Here’s everything you’ll need to make magic happen. I’ve learned through trial and error (mostly error) that quality ingredients make all the difference with this cake. Don’t skip the boiling water – I know it sounds weird, but it’s the secret to that ultra-moist texture!
For the Cake:
- 2 cups all-purpose flour – Spoon and level it, don’t scoop! Packed flour = dense cake
- 2 cups granulated sugar – Yes, it’s a lot. No, we’re not apologizing
- 3/4 cup unsweetened cocoa powder – My favorite is Dutch-processed for extra richness
- 2 tsp baking powder – Make sure it’s fresh – test it if it’s been in your cupboard forever
- 1 1/2 tsp baking soda
- 1 tsp salt – Just regular table salt works fine
- 1 cup whole milk – 2% works in a pinch, but whole milk gives better texture
- 1/2 cup vegetable oil – Can sub melted coconut oil if you prefer
- 2 large eggs – Room temperature! Cold eggs don’t incorporate as well
- 2 tsp pure vanilla extract – The good stuff makes a difference
- 1 cup boiling water – This is the game-changer, promise!
For the Cream Filling:
- 1 cup heavy whipping cream – Must be cold, straight from the fridge
- 1/2 cup powdered sugar – Sift it to avoid lumps
- 1 tsp vanilla extract – Or try almond extract for fun variation
See? Nothing too crazy! Just pantry staples that come together to create something magical. Now grab your mixing bowls – let’s get baking!
Equipment Needed for Ding Dong Chocolate Cake
Before we dive in, let’s gather our baking squad! These are the trusty tools that’ll help you nail this cake. Don’t stress if you don’t have fancy equipment – my first successful attempt was with a whisk and elbow grease!
- Two 9-inch round cake pans – Light-colored metal works best for even baking
- Mixing bowls – One large, one medium. Glass or stainless steel are my go-tos
- Electric mixer – Stand or hand mixer saves your arms, but a whisk works in a pinch
- Wire cooling rack – Essential for preventing soggy bottoms
- Spatula – For scraping every last bit of that delicious batter
- Measuring cups and spoons – No eyeballing – baking’s a science!
- Cake tester or toothpicks – Your doneness detectives
- Parchment paper – Optional but helpful for easy release
That’s it! See? Nothing too crazy. Now let’s make some cake magic happen.
How to Make Ding Dong Chocolate Cake
Alright, let’s get to the fun part! I’ve made this cake so many times I could do it in my sleep, but I’ll walk you through every step to ensure your first try turns out as perfect as my hundredth. Just follow along and resist the urge to eat all the batter – I speak from experience!
Preparing the Cake Batter
First things first – preheat that oven to 350°F (175°C). While it’s warming up, let’s make some magic happen in the mixing bowl:
- Whisk together dry ingredients – In your largest bowl, combine flour, sugar, cocoa powder, baking powder, baking soda, and salt. Get them nice and friendly with each other.
- Add the wet team – Pour in milk, oil, eggs, and vanilla. Now, here’s where the magic starts! Mix on medium speed for a solid 2 minutes. The batter will look glossy and gorgeous.
- The secret weapon – Here comes the boiling water! I know it seems strange, but trust me – this creates the moistest chocolate cake you’ll ever taste. Pour it in slowly while mixing on low. Don’t panic when the batter gets thin – that’s exactly what we want!
Pro tip: Set a kettle to boil when you start mixing so the water’s ready right when you need it. Nothing worse than waiting for water to boil when you’re in the baking zone!
Baking and Cooling the Cake
Now for the transformation from batter to beautiful cake:
- Divide and conquer – Pour that luscious batter evenly between your prepared pans. A kitchen scale helps for precision, but eyeballing works too.
- Bake with love – Pop them in the oven for 30-35 minutes. Resist opening the door before 25 minutes – we don’t want any cake collapses!
- The toothpick test – When the timer dings, stick a toothpick in the center. It should come out with moist crumbs, not wet batter. The cakes should also pull slightly from the pan edges.
- Cooling is crucial – Let cakes rest in pans for 10 minutes (set a timer!), then carefully flip onto wire racks to cool completely. Rushing this step leads to crumbly disasters – learned that the hard way!
Making the Cream Filling
While your cakes cool, let’s whip up that dreamy center:
- Chill everything – Make sure your bowl and beaters are cold. I sometimes pop them in the freezer for 10 minutes first.
- Whip it good – Beat the heavy cream on medium-high until soft peaks form. Add powdered sugar and vanilla, then keep beating until stiff peaks form. You’ll know it’s ready when the cream holds its shape when you lift the beater.
- Don’t overdo it! – Watch carefully toward the end – one second it’s perfect, the next it’s turning to butter. (Yes, I’ve made accidental butter. Still tasty, but not what we want here!)
There you have it – the keys to Ding Dong Chocolate Cake success! Now let’s assemble this beauty…
Tips for the Perfect Ding Dong Chocolate Cake
After burning through more chocolate cake experiments than I care to admit (let’s just say my smoke detector and I are well acquainted), I’ve picked up some foolproof tricks to guarantee Ding Dong perfection every time. These are the little things that take your cake from “pretty good” to “oh-my-gosh-can-I-have-the-recipe” status!
Temperature matters – a lot
Here’s the deal – cold ingredients don’t play nice together. I always set my eggs and milk out about an hour before baking. Room temp eggs incorporate better into the batter, giving you that perfect velvety texture. But for the cream filling? Opposite rule – keep everything ice cold or it won’t whip up properly!
Sift your dry ingredients
I know, I know – it’s an extra step. But trust me, taking two minutes to sift the cocoa powder and flour makes all the difference. You’ll avoid those annoying little lumps in your batter, and the cake bakes more evenly. My grandma taught me this trick decades ago, and I still use her old wire mesh strainer for the job!
Level those cake layers
Nothing ruins the beauty of a layered cake like a lopsided top. Once your cakes are fully cooled, use a serrated knife or cake leveler to gently slice off any domed tops. Bonus? You get to snack on the trimmings! Pro tip: Save those scraps – they make amazing cake pops or trifle layers later.
The boiling water trick
I know it seems weird to add boiling water to cake batter, but here’s why it works: The hot water “blooms” the cocoa powder, intensifying the chocolate flavor. Plus, it creates steam pockets during baking that make the crumb extra tender. Just pour slowly and mix gently – the batter will look too thin at first, but it bakes up perfectly every time!
Don’t rush the cooling
I get it – you want to dive into that cake immediately. But patience pays off! If you try to fill or frost a warm cake, the cream will melt into a sad puddle (ask me how I know). Wait until the cakes are completely cool to the touch – about 2 hours usually does it. Set them on a wire rack so air circulates underneath and prevents soggy bottoms.
Follow these tips, and you’ll be the Ding Dong Chocolate Cake hero at your next gathering. Just don’t be surprised when everyone starts requesting it for every birthday and potluck – you’ve been warned!
Serving and Storing Ding Dong Chocolate Cake
Okay, the hard part’s over – now for the best part: eating! But before you dive in, here’s everything you need to know about serving and keeping your Ding Dong Chocolate Cake at its absolute best. I’ve learned these tricks through many happy (and a few tragic) cake experiences over the years!
The perfect serving temperature
This cake truly shines when served slightly chilled. About 30 minutes out of the fridge lets the flavors bloom while keeping that creamy filling perfectly firm. Use a sharp knife dipped in hot water for clean slices – the filling won’t squish out if you saw gently back and forth.
Want to get fancy? Dust the top with cocoa powder or shaved chocolate right before serving. A scoop of vanilla ice cream on the side takes it over the top – not that this cake needs any help stealing the show!
Storage tips from a cake addict
Because this beauty has whipped cream filling, it needs refrigeration. Here’s how I keep mine fresh:
- Cover it right – Press plastic wrap directly onto cut surfaces to prevent drying. For the whole cake, I use a cake dome or large inverted bowl.
- Fridge life – It’ll stay delicious for 3 days max. After that, the cake starts soaking up fridge smells (no one wants pickle-flavored chocolate cake!).
- Freezing option – You can freeze the unfilled cake layers for up to 2 months wrapped tightly in plastic and foil. Thaw overnight in the fridge before filling.
Reviving leftovers (if you have any!)
If your cake has been in the fridge, let it sit at room temperature for about 15 minutes before serving. The chocolate flavor actually deepens overnight – bonus! For a special treat, microwave a slice for 10 seconds to make it slightly warm – the filling stays cool while the cake gets all fudgy. Just don’t overdo it or that beautiful cream will melt away!
One warning though – this cake has a way of disappearing fast. I once left it out at a party for 20 minutes and came back to nothing but crumbs. Consider yourself warned!
Ding Dong Chocolate Cake Variations
Listen, I’ll never mess with the original recipe – it’s too perfect as is. But sometimes it’s fun to play around with flavors! Here are my favorite twists on the classic Ding Dong Chocolate Cake that still keep that soul-satisfying essence. These are all variations I’ve personally tested (and devoured) over the years.
For the coffee lovers
Try adding 1-2 teaspoons of instant espresso powder to your dry ingredients. It won’t make your cake taste like coffee – just deepens that chocolate flavor beautifully. My friend Sarah swore she hated coffee but devoured three slices of this version before I could tell her my secret!
Filling switcheroos
That whipped cream filling is heavenly, but sometimes I mix it up:
- Chocolate ganache center – Replace the vanilla filling with a simple ganache (heat 1/2 cup heavy cream, pour over 1 cup chocolate chips, stir until smooth, then cool to spreadable consistency)
- Peanut butter dream – Fold 1/4 cup creamy peanut butter into the whipped cream filling (just trust me on this one)
- Minty fresh – Swap vanilla extract for peppermint in the filling – perfect for the holidays!
Flour power alternatives
For my gluten-free friends: Substitute the all-purpose flour with a 1:1 gluten-free blend (I like the one with xanthan gum already added). The texture comes out slightly denser but still totally delicious. My celiac cousin said it was the best GF cake she’s ever had!
Frosting options
While I usually keep it simple with just the cream filling, sometimes I go all out:
- Classic chocolate frosting – Cover the whole cake in a rich chocolate buttercream for special occasions
- Naked cake style – Do a thin crumb coat of the whipped cream over the whole cake for a rustic look
- Drizzle effect – Melt some chocolate chips with a splash of cream and artfully drip it down the sides
The beauty of this recipe? It’s like your favorite little black dress – perfect as is, but so easy to accessorize! Just remember – no matter how you tweak it, that boiling water in the batter stays non-negotiable. Some things just shouldn’t be messed with!
Ding Dong Chocolate Cake FAQs
After sharing this recipe with dozens of friends (and fielding countless texts with “Help! My cake…” questions), I’ve rounded up the most common Ding Dong Chocolate Cake mysteries. Save yourself the panicked Google searches – I’ve got you covered with all the answers from my own messy kitchen experiments!
Can I use buttermilk instead of regular milk?
Absolutely! Buttermilk makes an even more tender crumb. Just reduce the baking soda to 1 teaspoon and add an extra 1/2 teaspoon baking powder. The slight tang plays beautifully with the chocolate. I did a side-by-side taste test last Thanksgiving, and the buttermilk version disappeared first!
How do I prevent a dry cake?
Three golden rules: 1) Don’t overbake – pull it when moist crumbs stick to the toothpick, 2) That boiling water isn’t optional – it’s your moisture insurance, and 3) Let cakes cool completely before filling. My neighbor learned this the hard way when her warm cake turned the filling into soup!
Can I make this cake ahead of time?
You bet! Bake the layers up to 2 days in advance – wrap them tightly in plastic once cooled. Make the filling day-of for best texture. Assembled cake keeps beautifully refrigerated for 3 days (if it lasts that long!). Pro tip: Write “HANDS OFF” on the container unless you want mysteriously shrinking cake…
Why did my cream filling turn grainy?
Ah, the heartbreak of overwhipped cream! Once it starts looking like cottage cheese, there’s no going back. Always use chilled bowls and stop beating as soon as stiff peaks form. If disaster strikes, fold in 2 tablespoons cold milk and gently whisk – sometimes you can save it!
Can I freeze the assembled cake?
Honestly? I don’t recommend it. The whipped cream filling gets weirdly icy. Instead, freeze the unfrosted layers separately for up to 2 months. Thaw overnight in the fridge, then fill and serve. Your future self will thank you when a cake emergency strikes!
Still stumped? Drop your question in the comments – I check them daily and love troubleshooting baking adventures. After all, every cake disaster is just a funny story waiting to happen!
Nutritional Information
Okay, let’s be real – we’re not eating Ding Dong Chocolate Cake for its health benefits! But since everyone asks, here’s the nutritional breakdown per slice (based on 12 servings). Remember, these are estimates – your actual numbers might vary depending on specific ingredients and how generous your slices are (no judgment here!).
- Calories: 380 (Worth every single one!)
- Total Fat: 18g (That’s where the magic happens)
- Saturated Fat: 5g
- Carbohydrates: 52g (Mostly from that dreamy chocolate goodness)
- Fiber: 3g (Cocoa powder to the rescue!)
- Sugar: 32g (It’s dessert, people!)
- Protein: 5g (Bonus nutrients from eggs and milk)
- Sodium: 420mg
Nutritional values are estimates and vary based on ingredients used. Now stop worrying about numbers and go enjoy that slice – life’s too short not to savor homemade chocolate cake!
Try this recipe and share your results in the comments! Did yours turn out as dreamy as mine? Any fun variations you tried? I’d love to hear about your baking adventures!
Print
3 Irresistible Ding Dong Chocolate Cake Secrets Revealed
- Total Time: 55 minutes
- Yield: 12 servings 1x
- Diet: Vegetarian
Description
A rich and moist chocolate cake with a creamy filling, perfect for any occasion.
Ingredients
- 2 cups all-purpose flour
- 2 cups sugar
- 3/4 cup unsweetened cocoa powder
- 2 tsp baking powder
- 1 1/2 tsp baking soda
- 1 tsp salt
- 1 cup milk
- 1/2 cup vegetable oil
- 2 large eggs
- 2 tsp vanilla extract
- 1 cup boiling water
- 1 cup heavy cream
- 1/2 cup powdered sugar
- 1 tsp vanilla extract
Instructions
- Preheat oven to 350°F (175°C). Grease and flour two 9-inch round cake pans.
- In a large bowl, mix flour, sugar, cocoa powder, baking powder, baking soda, and salt.
- Add milk, vegetable oil, eggs, and vanilla extract. Beat on medium speed for 2 minutes.
- Stir in boiling water. The batter will be thin.
- Pour batter evenly into prepared pans. Bake for 30-35 minutes or until a toothpick inserted comes out clean.
- Cool cakes in pans for 10 minutes, then transfer to a wire rack to cool completely.
- For the filling, whip heavy cream, powdered sugar, and vanilla extract until stiff peaks form.
- Spread filling between cake layers. Frost the top and sides with chocolate frosting if desired.
Notes
- Store cake in the refrigerator for up to 3 days.
- For a richer flavor, use dark cocoa powder.
- Ensure cakes are completely cool before filling.
- Prep Time: 20 minutes
- Cook Time: 35 minutes
- Category: Dessert
- Method: Baking
- Cuisine: American
Nutrition
- Serving Size: 1 slice
- Calories: 380
- Sugar: 32g
- Sodium: 420mg
- Fat: 18g
- Saturated Fat: 5g
- Unsaturated Fat: 10g
- Trans Fat: 0g
- Carbohydrates: 52g
- Fiber: 3g
- Protein: 5g
- Cholesterol: 45mg
Keywords: chocolate cake, ding dong cake, dessert, homemade cake


