Oh my goodness, you have got to try these crispy chicken cutlets with ranch dip – they’re my go-to when I need something quick, delicious, and downright addictive. I swear, the moment I pull these golden beauties out of the oven, my family materializes in the kitchen like magic. The best part? They’re just as perfect for game night as they are for a speedy weeknight dinner. That crunch? Absolute perfection. And that ranch dip? Creamy, herby, and just tangy enough to make every bite sing. Trust me, once you try this combo, you’ll be hooked.
I stumbled onto this recipe years ago when I needed something fuss-free for a last-minute potluck. Now? It’s my secret weapon. The chicken stays juicy inside, the coating gets gloriously crisp (no frying required!), and that dip—oh, that dip!—elevates everything. Whether you serve these as an appetizer with toothpicks or pile them high for a main dish, they’ll disappear fast. Just warning you: you might want to double the batch.
Ingredients for Crispy Chicken Cutlets with Ranch Dip
Okay, let’s gather our cast of characters! I like to separate everything into two groups – the chicken cutlet team and the ranch dip squad. This way, nothing gets mixed up, and you can see at a glance what goes where. I promise, every single ingredient here plays a crucial role in creating that perfect crunch and creamy dip we’re after.
For the Chicken Cutlets
- 2 boneless, skinless chicken breasts (slice them thin – about 1/4 inch thick – for maximum crispiness)
- 1 cup breadcrumbs (I love panko for extra crunch, but regular works great too)
- 1/2 cup grated Parmesan cheese (the powdery kind sticks best)
- 1 tsp garlic powder (trust me, don’t skip this!)
- 1 tsp paprika (for that beautiful golden color)
- 1/2 tsp salt
- 1/4 tsp black pepper (freshly ground if you’ve got it)
- 2 eggs (they’re our glue for the breading)
- 1/4 cup milk (any kind works – I’ve even used almond milk in a pinch)
- 1/2 cup all-purpose flour (the first step in our breading trifecta)
For the Ranch Dip
- 1/2 cup mayonnaise (full-fat gives the best flavor, but light works too)
- 1/4 cup sour cream (Greek yogurt makes a great substitute if you want it lighter)
- 1 tbsp dried dill (the star of the ranch show)
- 1 tsp onion powder
- 1/2 tsp garlic powder
- 1/4 tsp salt
- 1/4 tsp black pepper
See? Nothing too fancy, just simple ingredients that come together to make something truly special. Now let’s get to the fun part – putting it all together!
How to Make Crispy Chicken Cutlets with Ranch Dip
Alright, let’s get cooking! I promise this is way easier than it looks – just follow these simple steps and you’ll have restaurant-quality chicken cutlets in no time. The key is setting up your breading station first (I call it my “assembly line of deliciousness”) and working methodically. Don’t worry if your fingers get messy – that’s half the fun!
Preheat and Prep
First things first – heat that oven! Crank it up to 400°F (that’s 200°C for my metric friends) and grab a baking sheet. Line it with parchment paper – this little trick prevents sticking and makes cleanup a breeze. Now take your chicken breasts and slice them horizontally into cutlets about 1/4 inch thick. Pro tip: if they’re slightly frozen, they’re actually easier to slice thinly!
Breading the Chicken
Here’s where the magic happens. Set up three shallow bowls (I use pie plates when I’m feeling fancy):
- Flour in the first bowl (this helps the egg stick)
- Eggs and milk whisked together in the second
- All those glorious breadcrumbs, Parmesan, and spices mixed in the third
Now the dance begins! Take each cutlet and:
- Dredge in flour (shake off excess)
- Dip in egg (let excess drip off)
- Coat with breadcrumb mixture (press gently to make sure it sticks)
Place each breaded cutlet on your prepared baking sheet – don’t let them touch! This ensures they’ll get evenly crispy all around.
Baking the Cutlets
Pop that tray in the oven and set your timer for 20 minutes. About halfway through, I like to peek and rotate the pan for even browning. You’ll know they’re done when they’re golden brown and the internal temperature hits 165°F (a meat thermometer is your best friend here). The smell at this point? Absolutely intoxicating.
Making the Ranch Dip
While those beauties bake, let’s whip up the dip – it couldn’t be simpler! Just combine all the ranch ingredients in a bowl and whisk until smooth. I like to let mine chill in the fridge while the chicken cooks – the flavors meld together beautifully. Give it a stir right before serving, and voila! Creamy, herby perfection ready to dunk those golden cutlets into.
Now comes the hardest part – waiting those last few minutes while the chicken finishes baking. But trust me, it’ll be worth it when you hear that first satisfying crunch!
Tips for Perfect Crispy Chicken Cutlets with Ranch Dip
After making these cutlets more times than I can count (seriously, my family demands them weekly!), I’ve picked up some foolproof tricks to guarantee crispy success every single time. These little nuggets of wisdom will take your chicken from good to “oh-my-gosh-can-I-have-the-recipe” amazing.
- Panko is your crispy best friend – Those Japanese-style breadcrumbs make all the difference with their light, airy texture. They create this incredible shattering crispness that regular breadcrumbs just can’t match. If you’re out, try crushing cornflakes for a similar effect!
- Give your cutlets breathing room – I learned this the hard way after one sad, soggy batch. Don’t crowd your baking sheet! Leaving space between each cutlet lets hot air circulate, ensuring even crisping on all sides. If needed, use two pans or bake in batches.
- Patience makes perfect – As tempting as it is to dive right in, let those cutlets rest for 5 minutes after baking. This lets the crust set properly so it stays crispy when you cut into it. Plus, it gives the juices time to redistribute – no dry chicken here!
- Season at every step – I add a pinch of salt and pepper to the flour, egg wash, AND breadcrumb mixture. This builds layers of flavor so every bite sings. Just taste as you go – some Parmesan brands are saltier than others.
- The press-and-seal technique – When coating your chicken, gently press the breadcrumbs into the meat. This helps them adhere better during baking so you don’t end up with a crumbly mess. No need to pound – just firm, loving pressure.
There you have it – my tried-and-true secrets for cutlets that stay gloriously crisp from first bite to last. Now go forth and create some chicken magic! Just don’t blame me when everyone starts begging you to make these on repeat.
Variations for Crispy Chicken Cutlets with Ranch Dip
Oh, the possibilities! One of my favorite things about this recipe is how easily you can tweak it to suit any craving or dietary need. I’ve probably made a dozen versions of these cutlets over the years – here are the tastiest twists that have earned permanent spots in my rotation.
Spice It Up
My brother loves it when I add 1/4 tsp cayenne pepper to the breadcrumb mix – just enough to give it a nice warmth without being overwhelming. For serious heat lovers, a teaspoon of your favorite hot sauce whisked into the egg wash does wonders. Sometimes I’ll mix in some smoked paprika instead of regular for that deep, woodsy flavor that pairs perfectly with the cool ranch.
Gluten-Free Goodness
When my gluten-free friend comes over, I swap the flour for almond flour (works like a charm!) and use gluten-free panko. Crushed pork rinds make an amazingly crispy coating too – just add extra seasonings since they’re pretty neutral on their own. For the dip, check that your spices are certified gluten-free if that’s a concern.
Dip Alternatives
While the ranch is classic, honey mustard makes a fabulous alternative. Just mix equal parts mayo and mustard with a drizzle of honey. My husband goes wild when I make a Buffalo version – stir some hot sauce into the ranch dip and drizzle extra over the baked cutlets. For something lighter, try tzatziki sauce – the cool cucumber cuts through the richness beautifully.
Cheese Please!
Sometimes I’ll mix shredded cheddar into the breadcrumbs for extra cheesiness (reduce the Parmesan a bit to balance the flavors). A sprinkle of everything bagel seasoning on top before baking adds fantastic texture and flavor. And if you really want to go over the top, tuck a slice of provolone between two thin cutlets before breading – hello, chicken Parmesan pockets!
The beauty of this recipe is how forgiving it is – don’t be afraid to play around with flavors you love. Just keep the basic breading technique the same, and you really can’t go wrong. What variations have you tried? I’m always looking for new ideas to test out!
Serving Suggestions for Crispy Chicken Cutlets with Ranch Dip
Now that you’ve got these gorgeous golden cutlets ready to go, let’s talk about how to make them the star of the show! I love how versatile these are – they can dress up or down depending on what you serve them with. Here are my all-time favorite pairings that turn this simple dish into a complete meal your family will rave about.
The Classic Dinner Plate
For a cozy weeknight meal, I go for mashed potatoes (extra buttery, of course!) and roasted green beans or broccoli. The creamy potatoes balance that perfect crunch of the chicken, and the veggies add a fresh contrast. Sometimes I’ll do sweet potato fries instead – their natural sweetness plays so nicely with the savory ranch.
Light and Fresh Options
When I want something lighter, a big crisp salad is my go-to. Toss some romaine with cherry tomatoes, cucumbers, and red onion – then chop up the chicken and add it right on top! The ranch dressing pulls double duty as both the dip and salad dressing. In summer, I love serving these with a cool watermelon feta salad – the sweet-salty combo is unreal.
Party-Perfect Presentations
For game day or parties, I slice the cutlets into strips and serve them with the ranch dip right in the center of a big platter. Surround them with celery sticks, carrot chips, and warm dinner rolls for dipping. My friends go nuts for this setup – it disappears faster than I can refill it! Toothpicks on the side make for easy grabbing.
Kid-Friendly Twists
Here’s my secret for getting my picky nephew to eat his veggies: I make “chicken nugget” plates! Cut the chicken into bite-sized pieces before breading, then serve with ranch dip and an assortment of raw veggie sticks. He thinks he’s getting a treat, and my sister thinks I’m a genius for sneaking in nutrients. Win-win!
Really, the possibilities are endless – that’s what makes this recipe such a keeper in my book. Whether you’re going for fancy or casual, healthy or indulgent, these crispy cutlets will shine. Just be sure to make extra ranch dip… because someone always wants to lick the bowl clean!
Storing and Reheating Crispy Chicken Cutlets with Ranch Dip
Let’s be real – these cutlets rarely last long enough to need storing in my house! But when they do (or when I’m smart enough to make extra), here’s how I keep them tasting just-as-good-as-fresh. The key is preserving that glorious crunch while keeping the chicken juicy – because soggy breading is just plain sad.
Storing Leftovers Like a Pro
First rule: let your cutlets cool completely before storing – trapping steam leads to sogginess. I arrange them in a single layer in an airtight container with parchment paper between layers if stacking. The ranch dip gets its own container and goes in the fridge – it’ll stay fresh for about 3 days. Pro tip: press plastic wrap directly onto the dip’s surface before sealing to prevent that weird skin from forming!
The Magic of Reheating
Microwaving is tempting, but resist! That’s how you end up with rubbery chicken and sad, soft breading. Instead, I use one of these methods:
- Oven method: Preheat to 375°F, place cutlets on a wire rack over a baking sheet, and heat for 10-15 minutes until crispy and warmed through.
- Air fryer magic: 350°F for 3-5 minutes makes them taste freshly baked – just don’t overcrowd the basket!
- Skillet revival: A quick fry in a bit of oil over medium heat brings back that golden crispness in minutes.
The dip just needs a good stir after chilling – sometimes I’ll add a splash of milk if it thickens up too much. And here’s my favorite leftover hack: chop up the chicken and toss it into a salad or wrap the next day! The ranch dressing pulls double duty, and the crispy bits add amazing texture. Just promise me you’ll never microwave these beauties – your future self will thank you.
Nutritional Information for Crispy Chicken Cutlets with Ranch Dip
Okay, let’s chat numbers – but don’t worry, I won’t make this boring! Here’s the scoop on what you’re getting in each delicious serving (that’s one crispy cutlet with about 2 tablespoons of ranch dip). Remember, these are estimates – your exact numbers might vary based on the brands you use or if you tweak the recipe (no judgment here!).
- Calories: Around 350 per serving – totally worth every single one if you ask me!
- Fat: 18g (4g saturated) – but hey, that’s where all the flavor lives
- Protein: A solid 25g from that beautiful chicken – great for staying full
- Carbs: About 20g (mostly from the breading and dip)
- Sodium: Approximately 500mg – easy to reduce if you use low-sodium ingredients
Now, full disclosure – I’m no nutritionist, just a home cook who occasionally checks labels. If you’re watching specific macros or have dietary needs, definitely adjust ingredients to fit. My sister makes a lighter version with almond flour and Greek yogurt that cuts the calories nearly in half – still crazy delicious! The main thing? Enjoy every crispy, creamy bite without stress. Life’s too short not to savor good food.
FAQs About Crispy Chicken Cutlets with Ranch Dip
I get asked about these crispy chicken cutlets all the time – so here are answers to the most common questions that pop up in my kitchen! These tips will help you troubleshoot like a pro and customize the recipe to your heart’s content.
Can I Use Chicken Thighs Instead of Breasts?
Absolutely! Thighs work wonderfully – their richer flavor actually makes for an even juicier cutlet. Just be sure to trim any excess fat and pound them slightly thinner since thighs are usually thicker. You might need to add 3-5 extra minutes to the baking time. I actually prefer thighs when making chicken Parmesan with this method!
Can I Make the Dip Ahead?
Oh yes, and it gets better with time! The ranch dip can be made up to 3 days in advance – the flavors really meld together beautifully. Just store it in an airtight container in the fridge. Give it a good stir before serving, and if it thickens up too much, whisk in a teaspoon of milk or buttermilk to loosen it back up.
Can I Fry Instead of Bake?
You bet! While I love the ease (and slightly lighter touch) of baking, pan-frying gives an incredible golden crust. Heat about 1/4 inch of oil in a skillet over medium heat and fry for 3-4 minutes per side until golden brown and cooked through. Drain on paper towels – they’ll be extra crispy this way!
How Long Do Leftovers Last?
The chicken keeps beautifully for 3 days in the fridge when stored properly (in an airtight container with parchment between layers). The dip lasts about the same. For longer storage, you can freeze the baked cutlets for up to 2 months – just reheat in the oven or air fryer to bring back that crispiness.
Can I Make These Gluten-Free?
Easily! Swap the flour for almond flour or gluten-free all-purpose blend, and use gluten-free breadcrumbs (or crushed gluten-free crackers). Double-check that your spices and Parmesan are gluten-free too. The dip is naturally gluten-free as long as your ingredients are!
There you have it – all my crispy chicken cutlet wisdom in one place! Now I’d love to hear from you – try this recipe and tell me how it turns out. Any brilliant twists you discovered? Kitchen disasters that turned into happy accidents? Share your results with me – I’m always looking for new ideas to try!
Print
Crispy Chicken Cutlets with Ranch Dip – 2 Secret Tricks for Perfect Crunch
- Total Time: 35 minutes
- Yield: 4 servings 1x
- Diet: Low Lactose
Description
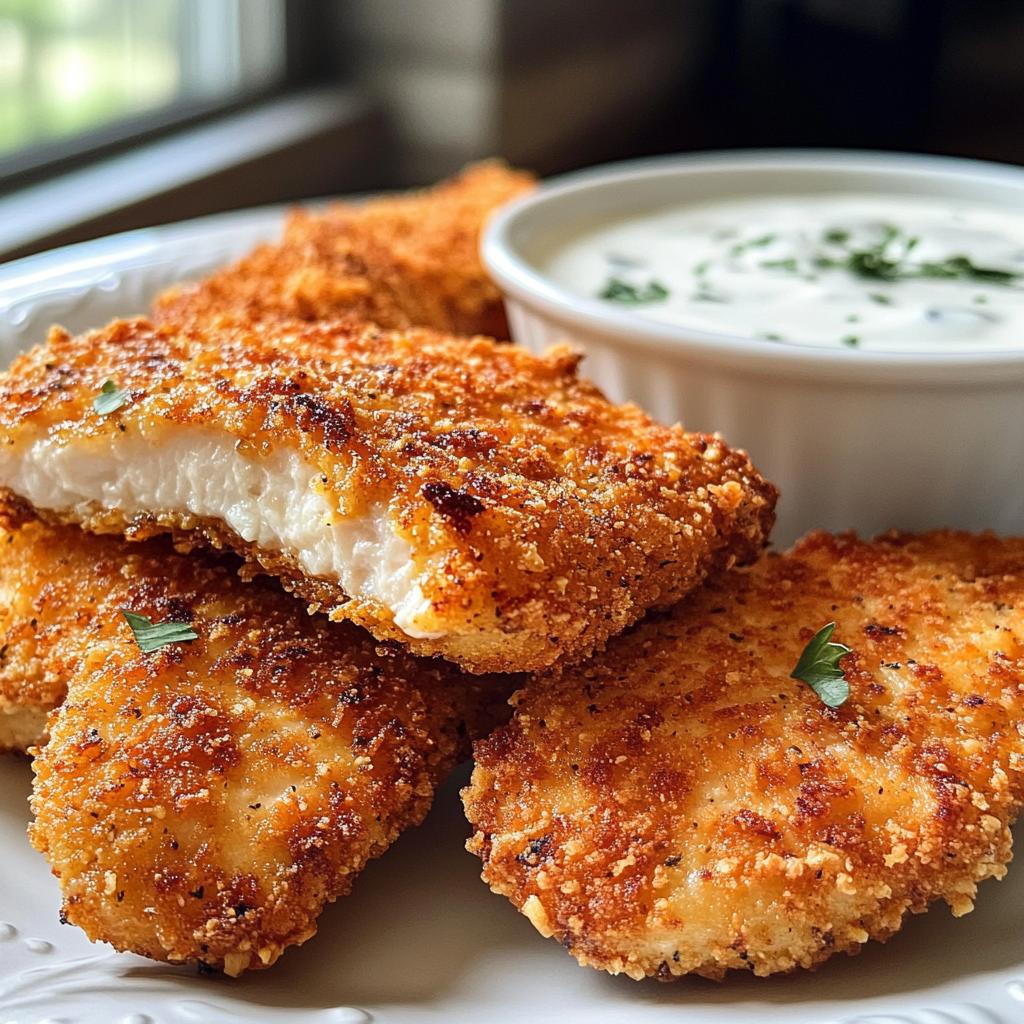
Crispy chicken cutlets served with a creamy ranch dip. Perfect for a quick meal or appetizer.
Ingredients
- 2 boneless, skinless chicken breasts
- 1 cup breadcrumbs
- 1/2 cup grated Parmesan cheese
- 1 tsp garlic powder
- 1 tsp paprika
- 1/2 tsp salt
- 1/4 tsp black pepper
- 2 eggs
- 1/4 cup milk
- 1/2 cup flour
- 1/2 cup mayonnaise
- 1/4 cup sour cream
- 1 tbsp dried dill
- 1 tsp onion powder
- 1/2 tsp garlic powder
- 1/4 tsp salt
- 1/4 tsp black pepper
Instructions
- Preheat oven to 400°F (200°C). Line a baking sheet with parchment paper.
- Slice chicken breasts into thin cutlets.
- In a shallow bowl, mix breadcrumbs, Parmesan cheese, garlic powder, paprika, salt, and pepper.
- In another bowl, whisk eggs and milk.
- Place flour in a third bowl.
- Dredge each chicken cutlet in flour, dip in egg mixture, then coat with breadcrumb mixture.
- Place cutlets on the baking sheet and bake for 20 minutes or until golden and crispy.
- For the ranch dip, mix mayonnaise, sour cream, dill, onion powder, garlic powder, salt, and pepper in a bowl.
- Serve crispy chicken cutlets with ranch dip.
Notes
- Use panko breadcrumbs for extra crispiness.
- Adjust seasoning to taste.
- For a lighter version, use Greek yogurt instead of sour cream.
- Prep Time: 15 minutes
- Cook Time: 20 minutes
- Category: Main Dish
- Method: Baking
- Cuisine: American
Nutrition
- Serving Size: 1 cutlet with dip
- Calories: 350
- Sugar: 2g
- Sodium: 500mg
- Fat: 18g
- Saturated Fat: 4g
- Unsaturated Fat: 12g
- Trans Fat: 0g
- Carbohydrates: 20g
- Fiber: 1g
- Protein: 25g
- Cholesterol: 120mg
Keywords: crispy chicken cutlets, ranch dip, baked chicken, easy dinner


