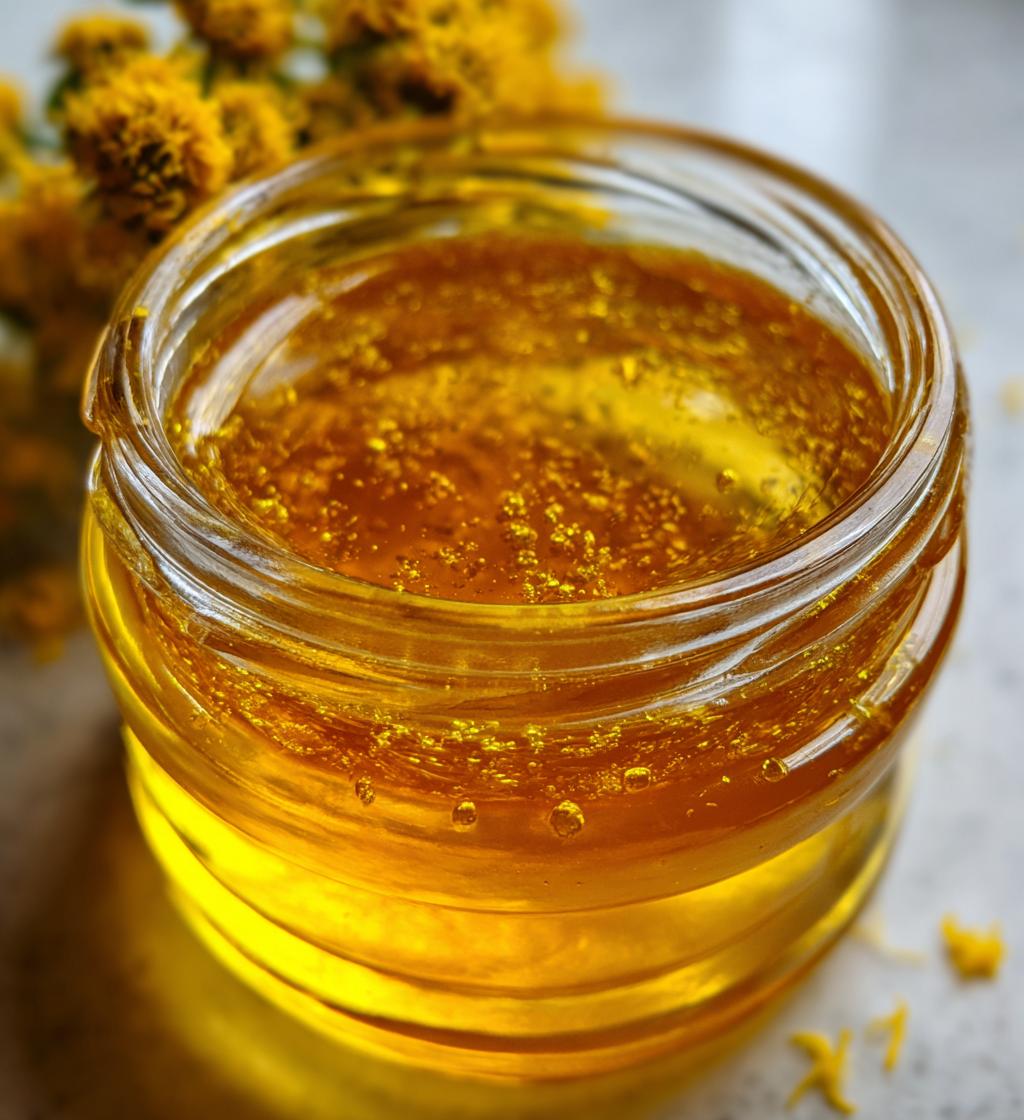
Oh, let me tell you, making dandelion jelly is like capturing sunshine in a jar! This delightful treat is not just unique but incredibly simple to whip up. Imagine transforming those vibrant yellow blooms, often seen as pesky weeds, into a sweet and aromatic jelly that brings a hint of spring to your breakfast table. Plus, this dandelion jelly recipe skips the pectin, which means fewer ingredients and a more natural flavor profile. Trust me, you won’t miss it!
Making jelly without pectin might sound daunting, but I promise it’s easier than it seems. The magic lies in the natural pectin found in the dandelion petals themselves, allowing you to create a beautifully set jelly without any store-bought additives. This method leaves you with a cherished homemade preserve that’s bursting with floral notes and just the right amount of sweetness. Perfect for slathering on toast or drizzling over desserts, this jelly is not just a treat; it’s a celebration of foraging and utilizing what nature provides. So, roll up your sleeves, and let’s dive into this delightful adventure of making dandelion jelly together!
Ingredients for Dandelion Jelly Recipe No Pectin
Gathering the right ingredients is key to making this delightful dandelion jelly! Here’s what you’ll need:
- 2 cups yellow dandelion petals, washed thoroughly to remove any dirt or insects
- 4 cups water, fresh and clean for boiling
- 1/4 cup lemon juice, preferably fresh for that bright zing
- 1/2 teaspoon butter, which helps reduce foaming during cooking
- 4 cups granulated sugar, because we want our jelly sweet!
Make sure to only use the yellow petals, as the green parts can make your jelly bitter. And don’t forget to sterilize your jars before pouring in that beautiful, golden jelly! You’ll want everything prepped and ready to go for the best results. Happy foraging!
How to Prepare Dandelion Jelly Recipe No Pectin
Alright, let’s get into the fun part—making your dandelion jelly! Follow these simple steps, and you’ll have a jar of sunshine in no time. Just remember, it’s all about timing and attention to detail, so let’s take it one step at a time!
Step 1: Wash the Dandelion Petals
Start by washing those lovely yellow dandelion petals. It’s super important to rinse them thoroughly under cold running water. This step is key to getting rid of any dirt or little critters that might be hitching a ride. You want only the petals, so be sure to separate them from any green parts, as they can make the jelly taste bitter. A good rinse ensures your jelly has that pure, floral flavor we’re after!
Step 2: Boil the Petals
Now it’s time to bring those petals to life! In a pot, combine the washed dandelion petals with 4 cups of fresh water. Bring it to a boil and let it simmer for about 10 minutes. You’ll notice the water turning a beautiful golden yellow as the petals release their essence. Just keep an eye on it to avoid any overboiling—if it starts to froth, lower the heat a little. You want to capture that vibrant color and flavor without making a mess!
Step 3: Strain the Liquid
Once your petals have boiled, it’s straining time! Pour the mixture through a fine mesh strainer or cheesecloth into a bowl. This separates the liquid from the petals. You should end up with about 4 cups of bright, fragrant dandelion tea. It should be clear and free of any petal bits. This liquid is what will become your jelly, so savor the smell—it’s like spring in a bowl!
Step 4: Add Lemon Juice and Butter
Next, stir in 1/4 cup of fresh lemon juice and 1/2 teaspoon of butter to the strained liquid. The lemon juice adds a lovely tartness that balances the sweetness, while the butter helps reduce foaming during cooking. This is where the flavor magic happens! You’re creating a perfect base for your jelly.
Step 5: Stir in the Sugar
Now comes the sweet part! Gradually stir in 4 cups of granulated sugar into your dandelion mixture. It’ll look like a lot, but trust me, it’s necessary for that delightful jelly texture. Bring the mixture back to a rolling boil and keep it boiling for about 10 minutes. Stir occasionally, and watch for that lovely bubbling action. This is when the natural pectin from the dandelion petals kicks in!
Step 6: Check for Set
After your mixture has boiled, it’s time to check if it’s ready to set. Grab a cold plate from the freezer and drop a spoonful of your jelly mixture onto it. Let it sit for a minute, then run your finger through it. If it holds its shape and doesn’t run back together, you’re good to go! If it’s still too runny, boil it for another minute or two and test again.
Step 7: Jar the Jelly
Finally, it’s jarring time! Make sure your jars are sterilized—this is crucial for keeping your jelly fresh. Pour the hot dandelion jelly into the jars, leaving a little space at the top. Seal them tightly while the jelly is still hot, which creates that perfect vacuum seal. Let them cool completely at room temperature, and voilà! You’ve just made a delicious batch of dandelion jelly, ready to enjoy!
Why You’ll Love This Recipe
- No need for pectin: This recipe relies on the natural pectin in dandelion petals, making it a simpler and more natural option.
- Easy to make: With just a few steps and common ingredients, you’ll have a delightful jelly in no time!
- Unique flavor: Dandelion jelly offers a delicate floral taste that’s unlike anything you’ll find in stores—perfect for adventurous eaters!
- Uses foraging skills: This recipe encourages you to connect with nature by foraging for dandelions, turning a common weed into a gourmet treat.
- Great for any occasion: Whether it’s breakfast on toast, a topping for desserts, or a thoughtful homemade gift, this jelly fits right in.
Tips for Success with Dandelion Jelly Recipe No Pectin
To ensure your dandelion jelly turns out perfectly every time, here are some tried-and-true tips that I’ve learned along the way:
- Choose the Right Dandelions: Go for dandelions that are in full bloom and free from pesticides. The best time to pick them is on a sunny day when the flowers are fully open. Avoid any that are wilting or turning brown.
- Wash Thoroughly: Don’t skimp on the washing! Rinse those petals under cold water to remove any dirt or bugs. It makes a big difference in flavor and cleanliness.
- Use Fresh Ingredients: Fresh lemon juice is key! It brightens the flavor and helps with the setting process. Don’t use bottled juice if you can avoid it.
- Monitor Boiling Time: Keep an eye on your mixture as it boils. If it starts to foam too much, lower the heat to maintain a gentle boil. This will prevent any messy overflows!
- Test for Set with Care: When checking for set, be patient. If it doesn’t pass the cold plate test, don’t worry. Just boil for a minute longer and try again!
- Label Your Jars: Once your jelly is jarred, make sure to label them with the date. This helps you keep track of freshness and ensures you enjoy them at their best!
With these tips in your back pocket, you’re well on your way to creating a delicious and beautiful dandelion jelly that you can be proud of. Happy jarring!
Nutritional Information Disclaimer
Just a quick note before you dive into making your dandelion jelly! The nutritional information can vary quite a bit based on the specific ingredients you use, and even the brands of those ingredients. Factors like the type of sugar or the freshness of your dandelion petals can influence the final product. So, while I can’t provide exact values, I encourage you to enjoy this jelly as a delightful addition to your meals without worrying too much about the numbers. Remember, it’s all about savoring the unique flavors and the joy of homemade preserves!
FAQ About Dandelion Jelly Recipe No Pectin
Can I use other parts of the dandelion plant?
While the dandelion petals are the star of this jelly, you can certainly use other parts of the plant in different recipes! The leaves can be used in salads or sautéed as a nutritious side dish, and the roots can be roasted for a coffee substitute. However, I’d recommend sticking to the petals for this jelly, as the green parts can introduce a bitter flavor that might not be pleasant in your sweet preserve. So, save those leaves and roots for other culinary adventures!
How do I store the jelly?
Storing your dandelion jelly is super easy! Once your jars are sealed and cooled, keep them in a cool, dark place like a pantry or cupboard. If you’ve made a big batch, they should last for about a year unopened. Once you open a jar, store it in the fridge, where it’ll stay fresh for several weeks. Just remember to use a clean spoon each time to avoid contamination—this keeps your jelly in tip-top shape!
What can I use dandelion jelly for?
Dandelion jelly is incredibly versatile and can be used in so many delightful ways! Spread it over toast or bagels for a sweet breakfast treat, or use it as a topping for pancakes and waffles. It’s also fantastic as a filling for pastries or drizzled over dessert like cheesecake or yogurt. Feeling adventurous? Try it in savory dishes too—mix it into a glaze for roasted meats or as a unique addition to salad dressings. The possibilities are endless!
Is dandelion jelly safe for everyone?
Generally, dandelion jelly is safe for most people, but there are a few considerations. If you’re allergic to ragweed or other similar plants, you might want to be cautious, as dandelions are part of that family. Also, since this jelly is high in sugar, those monitoring their sugar intake should enjoy it in moderation. Always check with a healthcare provider if you have specific dietary concerns or allergies. Enjoying dandelion jelly is a wonderful treat, but it’s always best to be informed!
Call to Action
Now that you’ve made your very own dandelion jelly, I’d love to hear all about your experience! Did you enjoy the process? What creative ways are you using your jelly? Please leave a comment below to share your thoughts, tips, or any fun stories from your dandelion foraging adventures!
If you found this recipe helpful, why not give it a rating? Your feedback means the world to me and helps other home cooks discover this unique treat. And don’t forget to share your delicious creations on social media—tag me so I can see your beautiful jars of sunshine! Let’s spread the joy of homemade preserves together!
Print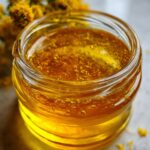
Dandelion Jelly Recipe No Pectin: 7 Steps to Pure Delight
- Total Time: 50 minutes
- Yield: 4 cups 1x
- Diet: Vegetarian
Description
A simple dandelion jelly recipe that uses no pectin.
Ingredients
- 2 cups dandelion petals
- 4 cups water
- 1/4 cup lemon juice
- 1/2 teaspoon butter
- 4 cups granulated sugar
Instructions
- Wash dandelion petals thoroughly.
- Boil petals in water for 10 minutes.
- Strain liquid into a bowl.
- Add lemon juice and butter to liquid.
- Stir in sugar and boil for 10 minutes.
- Check for set by placing a spoonful on a cold plate.
- Pour into sterilized jars and seal immediately.
Notes
- Use only the yellow petals, avoiding green parts.
- Make sure jars are sterilized before use.
- Store jelly in a cool, dark place.
- Prep Time: 30 minutes
- Cook Time: 20 minutes
- Category: Preserves
- Method: Boiling
- Cuisine: American
Nutrition
- Serving Size: 1 tablespoon
- Calories: 50
- Sugar: 12g
- Sodium: 0mg
- Fat: 0g
- Saturated Fat: 0g
- Unsaturated Fat: 0g
- Trans Fat: 0g
- Carbohydrates: 13g
- Fiber: 0g
- Protein: 0g
- Cholesterol: 0mg
Keywords: dandelion jelly, no pectin, jelly recipe


