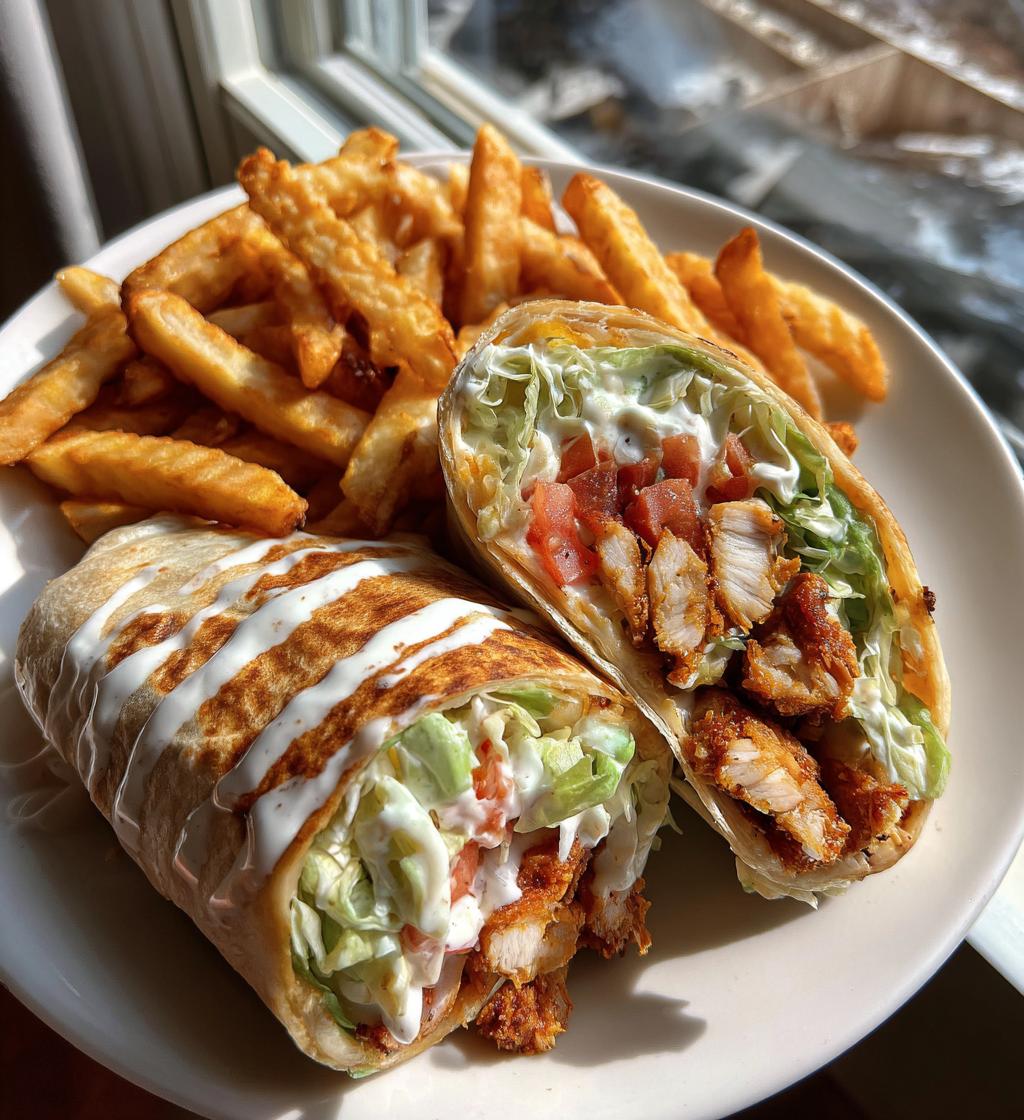
There’s something magical about the crunch of golden-brown chicken tucked into a soft tortilla with cool, crisp veggies and that punchy homemade garlic sauce, isn’t there? My family goes absolutely wild for these Crispy Chicken Wraps with Garlic Sauce and Fries – it’s become our go-to “cheat day” meal that feels indulgent but comes together in no time. I’ll never forget the first time I made these for my picky nephew, who normally turns his nose up at anything involving vegetables. He devoured two wraps in record time and still asks for them every time he visits. The secret’s in that garlic sauce (just wait till you try it) and those perfectly crisp fries on the side – simple comfort food at its best.
Why You’ll Love These Crispy Chicken Wraps with Garlic Sauce and Fries
Trust me, once you try these wraps, they’ll become a regular in your meal rotation. Here’s why:
- That irresistible crunch: The panko-coated chicken stays crazy crispy even when wrapped up – no sad, soggy breading here!
- Garlic sauce that packs a punch: My 3-ingredient sauce takes 2 minutes to whip up but tastes like it came from your favorite takeout spot.
- Perfect weeknight win: From fridge to table in 40 minutes flat, with minimal cleanup (my kind of cooking).
- The ultimate combo: Warm, crispy chicken wrapped up with cool veggies and fries on the side? Pure comfort food magic.
Ingredients for Crispy Chicken Wraps with Garlic Sauce and Fries
Gathering everything before you start makes this recipe fly by – I learned that the hard way after one too many frantic fridge searches mid-cooking! Here’s exactly what you’ll need:
- For the crispy chicken:
- 2 boneless, skinless chicken breasts (sliced into 1/2-inch strips – this size cooks evenly)
- 1 cup all-purpose flour (for that first crispy layer)
- 1 tsp paprika (smoked or regular – both work great)
- 1 tsp garlic powder (my secret for extra flavor in the breading)
- 1 tsp salt (I use kosher)
- 1/2 tsp black pepper (freshly ground if you have it)
- 1 egg, beaten (this is your “glue” for the breadcrumbs)
- 1/2 cup milk (whole milk makes the egg wash extra rich)
- 2 cups panko breadcrumbs (trust me, the Japanese-style crumbs make all the difference)
- Vegetable oil for frying (about 1/2 inch in your pan – I use canola)
- For assembling:
- 4 large flour tortillas (the burrito-size ones hold everything perfectly)
- 1 cup shredded lettuce (iceberg gives that awesome crunch)
- 1/2 cup diced tomatoes (remove the seeds if you want less moisture)
- For the garlic sauce:
- 1/2 cup mayonnaise (full-fat makes the creamiest sauce)
- 2 cloves garlic, minced (more if you’re a garlic fiend like me!)
- 1 tbsp lemon juice (fresh squeezed tastes brightest)
- For serving:
- 2 cups frozen fries (or make your own if you’re feeling ambitious)
Pro tip: Measure everything out in little bowls like you’re on a cooking show – it makes the process so much smoother and you’ll feel like a kitchen rockstar!
Equipment You’ll Need
Don’t worry – you won’t need any fancy gadgets for these crispy chicken wraps! Just grab these basic kitchen tools (chances are you already have most of them):
- 3 shallow dishes (I use pie plates – perfect for the breading station)
- Large frying pan (cast iron gives the best crisp, but any heavy-bottomed pan works)
- Baking sheet (for those golden fries – line it with foil for easy cleanup)
- Small mixing bowl (for whisking up that addictive garlic sauce)
- Tongs (trust me, you’ll want these for flipping the chicken safely)
- Paper towel-lined plate (for draining the fried chicken – this keeps it crispy)
- Whisk (or just use a fork for the egg wash if you’re lazy like me sometimes)
That’s it! No special equipment needed – just good old-fashioned kitchen basics. Now let’s get cooking!
How to Make Crispy Chicken Wraps with Garlic Sauce and Fries
Okay, let’s get down to business! I’ve made these wraps so many times I could probably do it in my sleep, but don’t worry – I’ll walk you through each step like I’m right there in the kitchen with you. The key is working in an assembly line to keep everything moving smoothly.
Preparing the Fries
First things first – let’s get those fries going since they’ll need the most time. Preheat your oven to 425°F (220°C) – no need to wait for it to fully heat before putting them in if you’re using frozen. Spread your fries out in a single layer on a baking sheet (crowding makes them steam instead of crisp up). Bake according to the package directions, usually about 15-20 minutes, flipping halfway through. If you’re using an air fryer (lucky you!), they’ll cook even faster – just shake the basket a couple times during cooking.
Breading and Frying the Chicken
Now for the star of the show! Set up your breading station with three shallow dishes: flour with spices mixed in, egg wash (just beat the egg and milk together), and panko breadcrumbs. Working with one piece at a time, coat each chicken strip in flour (shake off excess), dip in egg wash (let the extra drip off), then press firmly into the panko to coat. Here’s my pro tip: for extra crunch, do a second dip in the egg and breadcrumbs! Let them rest on a plate for 5 minutes – this helps the coating stick better.
Heat about 1/2 inch of oil in your pan over medium heat (you’ll know it’s ready when a breadcrumb sizzles immediately). Carefully add your chicken (don’t overcrowd – cook in batches if needed) and fry for 4-5 minutes per side until beautifully golden brown. Transfer to a paper towel-lined plate to drain – this keeps them crisp while you finish cooking.
Making the Garlic Sauce
While everything cooks, whip up that magical sauce. Just mix the mayonnaise, minced garlic, and lemon juice in a small bowl. Taste and adjust – want more garlic? Add another clove! Like it tangier? Squeeze in more lemon. I usually make a double batch because my family loves dipping their fries in it too. Let it sit for at least 5 minutes before using – this lets the garlic flavor really develop.
Assembling the Crispy Chicken Wraps
Final stretch! Warm your tortillas for about 10 seconds in the microwave or a dry pan – this makes them more pliable. Layer each with a handful of lettuce, some tomatoes, 3-4 chicken strips (cut them in half if they’re too long), and a generous drizzle of that garlic sauce. Fold the bottom up first, then the sides in to create a neat little package that holds everything inside (this took me a few tries to master, so don’t stress if your first wrap isn’t restaurant-perfect!). Serve immediately with those hot, crispy fries on the side and extra sauce for dipping – because let’s be honest, you can never have enough.
Tips for Perfect Crispy Chicken Wraps with Garlic Sauce and Fries
After making these wraps more times than I can count (and learning from plenty of mistakes!), I’ve picked up some foolproof tricks to guarantee restaurant-quality results every time:
Double-coating is your crispy secret weapon
That extra dip in egg and breadcrumbs makes all the difference! After the first coating, let the chicken sit for a minute before going back for round two. This creates an extra-thick, crunchy layer that stays crispy even when wrapped up. My nephew calls it “chicken armor” – and trust me, it’s worth the few extra minutes.
Oil temperature matters more than you think
Too hot and your breading burns before the chicken cooks through; too cool and you’ll end up with greasy, soggy coating. I test mine by dropping in a breadcrumb – if it sizzles immediately but doesn’t smoke, you’re golden (literally). Keep adjusting the heat as you go – the first batch is always my tester!
Make that garlic sauce your own
The beauty of this sauce is how customizable it is! Too thick? Add a splash of water or milk. Want it zingier? Extra lemon juice. Garlic too strong? Let it mellow for 10 minutes before serving. I’ve even stirred in a pinch of smoked paprika for a smoky twist. Taste as you go – your perfect sauce might be different from mine!
Keep components separate until assembly
Here’s my biggest rookie mistake: assembling wraps too early. The steam from hot chicken makes tortillas soggy fast. I now keep everything ready to go but separate until the last minute – warm tortillas in one stack, crispy chicken on a rack (not piled up!), veggies chilled, and sauce on standby. Assemble right before serving for maximum crunch.
Variations for Crispy Chicken Wraps
One of my favorite things about this recipe is how easily you can mix it up – sometimes I swap ingredients just to keep my family guessing! Here are my go-to twists when I’m feeling adventurous:
Spice it up with different sauces
That garlic sauce is delicious, but don’t stop there! Try mixing sriracha into the mayo for a spicy kick, or blend in some chipotle peppers for a smoky heat. My brother loves when I make a quick honey mustard version with Dijon and a squeeze of honey. The sauce possibilities are endless!
Cheese, please!
Everything’s better with cheese, right? I’ll sometimes add a handful of shredded cheddar or pepper jack to the wraps before rolling them up. For serious cheese lovers, melt a slice on the chicken right after frying – that gooey goodness takes these wraps to another level.
Switch up your protein
While the crispy chicken is heavenly, you can absolutely use this same method with turkey cutlets or even thin pork chops (just adjust cooking time). When I’m craving something lighter, I’ll grill the chicken instead of frying – still delicious with all the same toppings!
Get creative with toppings
Beyond lettuce and tomatoes, try adding pickles for crunch, avocado for creaminess, or even some quick-pickled onions for tang. I’ve used coleslaw mix instead of plain lettuce when I’m feeling lazy – the crunch and flavor are amazing. The tortilla is your canvas – paint it with whatever flavors you love!
Honestly, once you master the basic version, have fun playing around – some of our favorite family creations have come from last-minute “what if we try this?” moments in the kitchen!
Serving Suggestions
Okay, let’s talk about making this meal feel like a real event! While these wraps and fries are fantastic on their own, a few simple sides can turn dinner into something special. My golden rule? Serve everything immediately – that first glorious bite of still-warm, extra-crispy chicken is what dreams are made of.
We love pairing these wraps with a simple, tangy coleslaw – the cool crunch is the perfect contrast to the warm, savory chicken. A handful of dill pickle spears on the side is non-negotiable in our house (my husband would revolt without them!). If you’re feeling fancy, a light side salad with a zesty vinaigrette cuts through the richness beautifully. And don’t forget extra garlic sauce for dipping those fries – I always make extra because someone (usually me) ends up drinking it straight from the bowl!
Storing and Reheating Crispy Chicken Wraps
Let’s be real – these wraps are always best fresh, but I’ve learned a few tricks to keep leftovers tasty (because who actually stops at just one wrap?). The key is storing everything separately – trust me, I learned this the hard way after one too many soggy tortilla disasters!
For the chicken, let it cool completely before popping it in an airtight container in the fridge (it’ll keep for 3-4 days). When reheating, skip the microwave unless you like rubbery chicken! Instead, spread the pieces on a baking sheet and crisp them back up in a 375°F (190°C) oven for about 10 minutes. That panko coating magically revives itself!
The garlic sauce will stay fresh in a sealed container for up to a week – just give it a good stir before using. As for the fries… well, we all know fries are really only good fresh. If you must reheat them, the air fryer is your best bet for bringing back some crispiness (3-4 minutes at 400°F/200°C usually does the trick).
Pro tip: Assemble leftover wraps right before eating with your reheated components – the tortillas take literally 10 seconds to warm up in the microwave. And if you’re meal prepping, keep the lettuce and tomatoes chilled separately so everything stays crisp and fresh!
Nutritional Information
Now, I’m no dietitian, but I know some folks like to keep track of what they’re eating (unlike my Uncle Joe, who insists calories don’t count on weekends!). These numbers are estimates based on standard ingredients – your actual values might vary depending on exact amounts and brands. Here’s the scoop per serving (that’s one loaded wrap with fries):
- Calories: About 650 (worth every single one!)
- Fat: 32g (14g unsaturated – hello, healthy oils!)
- Saturated Fat: 6g (blame the mayo and cheese if you added it)
- Protein: 30g (thanks to that generous chicken portion)
- Carbohydrates: 65g (mostly from the tortilla and fries)
- Fiber: 4g (those veggies count for something!)
- Sugar: 4g (natural from the tomatoes)
- Sodium: 900mg (go easy on extra salt if you’re watching this)
Want to lighten it up? Try baking the chicken instead of frying (cuts about 150 calories) or using an air fryer for the fries. But between us? Sometimes you just need that crispy fried goodness – life’s too short to skip the delicious stuff!
Frequently Asked Questions
I get so many questions about this recipe from friends and family – turns out I’m not the only one obsessed with these wraps! Here are the answers to the things people ask me most often.
Can I bake the chicken instead of frying it?
Absolutely! For a lighter version, arrange your breaded chicken strips on a wire rack set over a baking sheet and spray lightly with oil. Bake at 400°F (200°C) for 15-20 minutes, flipping halfway through. They won’t get quite as crazy crispy as the fried version, but they’re still delicious and way less messy!
How long does the homemade garlic sauce last?
It keeps surprisingly well! Stored in an airtight container in the fridge, it’ll stay fresh for up to a week. The garlic flavor actually gets better after a few hours. Just give it a good stir before you use it – sometimes it separates a tiny bit, but that’s totally normal.
What can I use if I don’t have panko breadcrumbs?
Regular breadcrumbs will work in a pinch, but they give a denser, sandier crust instead of panko’s amazing light crunch. If you’re in a real bind, crush up some plain cornflakes or even unsalted pretzels – both make a fantastic crispy coating with great texture!
Can I make these wraps ahead of time?
I don’t recommend assembling them ahead – the tortillas get soggy fast. But you can totally prep the components! Bread the chicken strips and keep them layered between parchment paper in the fridge for a few hours. Make the sauce and chop the veggies ahead too. Then just fry and assemble when you’re ready to eat for maximum freshness.
My chicken coating keeps falling off – what am I doing wrong?
Oh, I’ve been there! The two biggest tricks are: 1) Make sure you shake off the excess flour after the first coating, and 2) Let the breaded chicken rest for 5 minutes before frying. This lets the egg wash set up and really glue that panko on there. Also, don’t overcrowd the pan – that causes the temperature to drop and makes the coating slip right off.
Did you try this recipe? I’d love to hear how it turned out for you! Leave a rating below or tag me in your photos on social media – nothing makes me happier than seeing your crispy chicken wrap creations!
Print
Irresistible Crispy Chicken Wraps with Garlic Sauce in 40 Minutes
- Total Time: 40 minutes
- Yield: 4 wraps 1x
- Diet: Low Lactose
Description
A simple and delicious meal featuring crispy chicken wraps with homemade garlic sauce and fries. Perfect for a quick lunch or dinner.
Ingredients
- 2 boneless, skinless chicken breasts, sliced into strips
- 1 cup all-purpose flour
- 1 tsp paprika
- 1 tsp garlic powder
- 1 tsp salt
- 1/2 tsp black pepper
- 1 egg, beaten
- 1/2 cup milk
- 2 cups panko breadcrumbs
- 4 large flour tortillas
- 1 cup shredded lettuce
- 1/2 cup diced tomatoes
- 1/2 cup mayonnaise
- 2 cloves garlic, minced
- 1 tbsp lemon juice
- 2 cups frozen fries
- Vegetable oil for frying
Instructions
- Preheat oven to 425°F (220°C) and bake fries according to package instructions.
- Mix flour, paprika, garlic powder, salt, and pepper in a shallow dish.
- In another dish, whisk egg and milk.
- Place panko breadcrumbs in a third dish.
- Coat chicken strips in flour, dip in egg mixture, then coat with breadcrumbs.
- Heat oil in a pan over medium heat and fry chicken until golden and crispy, about 4-5 minutes per side.
- For garlic sauce, mix mayonnaise, minced garlic, and lemon juice in a small bowl.
- Warm tortillas in a dry pan or microwave for 10 seconds.
- Assemble wraps by placing chicken, lettuce, and tomatoes on tortillas. Drizzle with garlic sauce.
- Serve with fries.
Notes
- For extra crispiness, double-coat the chicken in breadcrumbs.
- Adjust garlic sauce to taste by adding more or less garlic.
- Use an air fryer for a lower-fat version of the fries.
- Prep Time: 20 minutes
- Cook Time: 20 minutes
- Category: Main Dish
- Method: Frying, Baking
- Cuisine: American
Nutrition
- Serving Size: 1 wrap with fries
- Calories: 650
- Sugar: 4g
- Sodium: 900mg
- Fat: 32g
- Saturated Fat: 6g
- Unsaturated Fat: 14g
- Trans Fat: 0g
- Carbohydrates: 65g
- Fiber: 4g
- Protein: 30g
- Cholesterol: 95mg
Keywords: crispy chicken, wraps, garlic sauce, fries, easy meal


