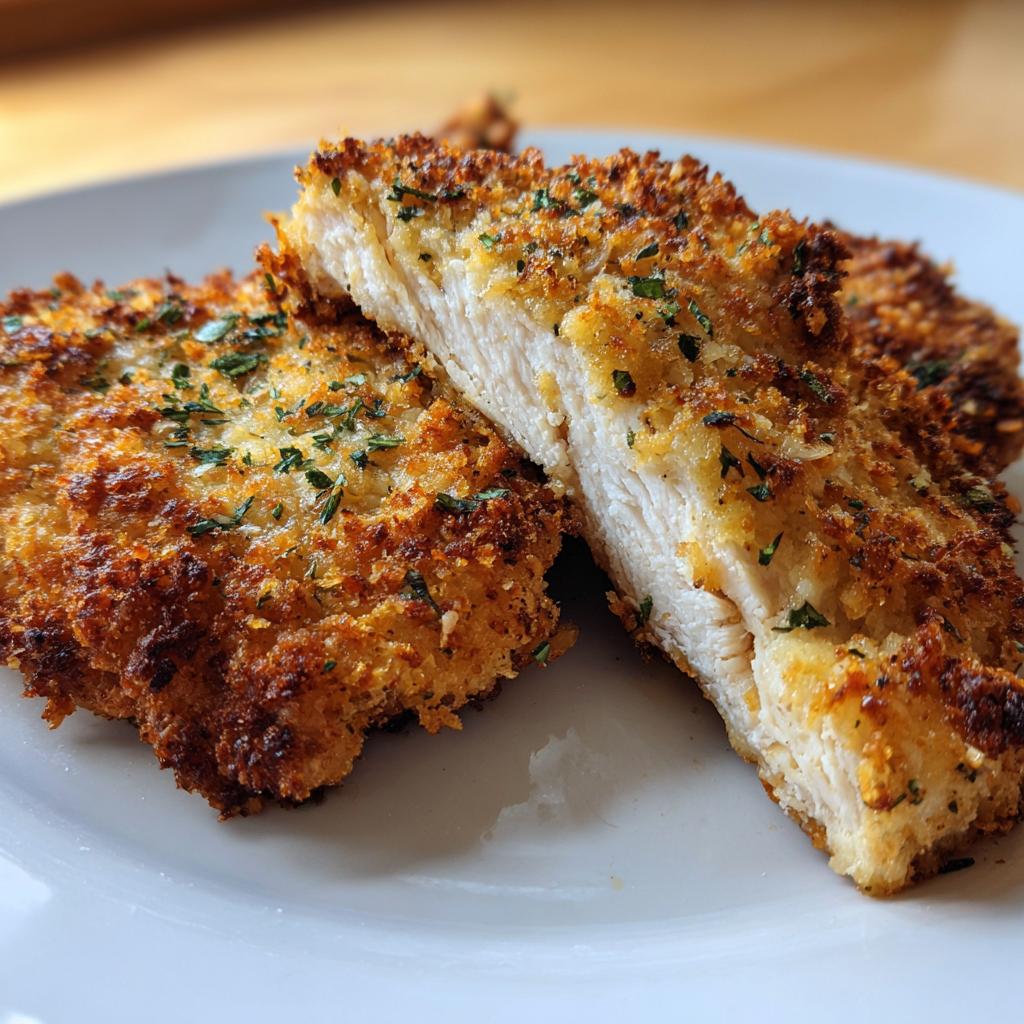
Let me tell you about my absolute favorite weeknight hero – crispy baked chicken breast parmesan garlic. This dish has saved me from countless “what’s for dinner?” meltdowns with its perfect combo of juicy chicken, crunchy coating, and that irresistible garlic-parmesan punch. The best part? It comes together with ingredients I always have on hand, and that golden-brown crust? Pure magic.
I’ll never forget the first time I made this for my picky nephew – one bite and he declared it “better than chicken nuggets” (high praise from a 7-year-old). Now it’s our go-to when we need something quick but special. The smell alone will have everyone gathered in the kitchen before the timer goes off!
Why You’ll Love This Crispy Baked Chicken Breast Parmesan Garlic
Let me count the ways this recipe will become your new kitchen superstar:
- That unbeatable crunch – Panko breadcrumbs and parmesan create the perfect golden crust without deep frying
- Ready in a flash – From fridge to table in under 40 minutes (even faster if you’re like me and prep while the oven heats!)
- Simple pantry ingredients – No fancy shopping trips needed, just basics you probably already have
- Kid-approved magic – My toughest little critics gobble this up like it’s chicken-shaped candy
Trust me, once you smell that garlic and parmesan wafting through your kitchen, you’ll understand why this is my most-requested recipe.
Ingredients for Crispy Baked Chicken Breast Parmesan Garlic
Here’s everything you’ll need to make this crispy chicken magic happen – I promise it’s all simple stuff! Just a quick note: the quality of your parmesan makes a huge difference here. I learned that the hard way when I tried using the green canister stuff once (never again!).
- 4 boneless, skinless chicken breasts (about 6 oz each) – try to get them similar thickness so they cook evenly
- 1 cup panko breadcrumbs – these give the best crunch, but regular breadcrumbs work in a pinch
- 1/2 cup freshly grated parmesan cheese – please grate it yourself, the pre-shredded stuff just doesn’t melt right
- 2 cloves garlic, minced – or 3 if you’re feeling extra garlicky like me!
- 1 tsp dried Italian seasoning – my secret is to rub it between my fingers first to wake up the flavors
- 1/2 tsp salt – kosher salt is my go-to
- 1/4 tsp black pepper – freshly cracked makes all the difference
- 1/4 cup olive oil – drizzle this right before baking for that perfect golden crust
- 1 large egg, beaten – this is our “glue” for that crispy coating
See? Nothing fancy – just good ingredients treated right. Now let’s get cooking!
How to Make Crispy Baked Chicken Breast Parmesan Garlic
Okay, let’s get down to business! This is where the magic happens. I’ve made this recipe more times than I can count, and I’ve learned a few tricks along the way to get that perfect golden crunch every single time.
Step 1: Prepare the Coating
First things first – preheat that oven to 400°F (200°C) so it’s nice and hot when we’re ready. Now grab your biggest mixing bowl – trust me, you’ll want the space to really mix everything well. Toss in the panko, that gorgeous freshly grated parmesan (can you smell that already?), minced garlic, Italian seasoning, salt, and pepper.
Here’s my pro tip: use your fingers to mix everything together. You’ll feel when it’s perfectly combined – no clumps of seasoning, no cheese hiding in corners. It should look like little golden flecks of deliciousness just waiting to crisp up.
Step 2: Coat the Chicken
Pat those chicken breasts dry with paper towels – this is crucial for the coating to stick! Set up your assembly line: beaten egg in one shallow dish, coating mix in another, and a clean plate for the coated chicken.
Dip each breast in the egg first, letting the excess drip off (too much egg = soggy coating, and we don’t want that!). Then press it firmly into the breadcrumb mix. I like to use one hand for wet ingredients and one for dry to avoid breadcrumb fingers. Flip and press to coat all sides evenly – don’t be shy!
Step 3: Bake to Perfection
Line your baking sheet with parchment (easier cleanup!) and arrange the chicken with some breathing room. Here comes the golden touch – drizzle that olive oil evenly over each piece. It’ll help the coating get that beautiful, deep golden color we’re after.
Bake on the middle rack for 20-25 minutes. You’ll know it’s ready when the coating is crisp and the chicken reaches 165°F inside (instant-read thermometer for the win!). Let it rest 5 minutes – I know it’s hard to wait, but this keeps all those juices where they belong!
Tips for the Crispiest Baked Chicken Breast Parmesan Garlic
After making this recipe more times than I can count, I’ve picked up some tricks that make all the difference between good chicken and oh-my-goodness chicken:
- Dry chicken = crispy chicken – Always pat those breasts dry with paper towels before coating (wet chicken equals sad, soggy breadcrumbs)
- Give them space – Crowding the baking sheet steams the coating instead of crisping it – leave at least an inch between each piece
- Panko power – Those Japanese-style breadcrumbs create an airier, crispier crust than regular breadcrumbs – worth the extra trip to the international aisle!
- The golden drizzle – Don’t skip that olive oil shower before baking – it’s the secret to that perfect golden-brown color
Follow these simple tricks, and you’ll have chicken so crispy your family will think you fried it!
Serving Suggestions for Crispy Baked Chicken Breast Parmesan Garlic
Now for the fun part – what to serve with this golden beauty! Here are my go-to pairings that turn this chicken into a complete meal:
- Pasta perfection – Toss some spaghetti with olive oil, garlic, and extra parmesan (because you can never have too much!)
- Roasted veggies – My favorite quick side: asparagus or broccoli tossed with olive oil and roasted alongside the chicken
- Fresh salad – A simple arugula salad with lemon dressing cuts through the richness perfectly
- Garlic bread – Because when you’re already going garlicky, why stop now?
Honestly? This chicken is so flavorful it’s great straight off the baking sheet too – no judgment if you eat it standing over the stove!
Storing and Reheating
Leftovers? (As if!) But if you do somehow have extra crispy baked chicken breast parmesan garlic, here’s how to keep that crunch: store it in an airtight container in the fridge for up to 3 days. When reheating, skip the microwave – it turns that beautiful crust soggy. Instead, pop it in a 350°F oven or air fryer for about 5 minutes until heated through and crispy again. Pro tip: place it on a wire rack while reheating so the bottom stays crisp too!
Crispy Baked Chicken Breast Parmesan Garlic Variations
One of my favorite things about this recipe is how easily you can make it your own! Here are my go-to twists when I’m feeling creative:
- Gluten-free? Swap in your favorite GF breadcrumbs – they work just as well for that perfect crunch
- Herb lover? Toss in some fresh chopped rosemary or thyme with the Italian seasoning
- Extra cheesy? Add a sprinkle of mozzarella during the last 2 minutes of baking for melty goodness
- Spice it up! A pinch of red pepper flakes gives it a nice little kick
The basic recipe is foolproof, so don’t be afraid to play around – that’s half the fun of cooking!
FAQ About Crispy Baked Chicken Breast Parmesan Garlic
I get asked about this recipe all the time – here are the questions that pop up most often in my kitchen (and my honest answers!):
- Can I use chicken thighs instead? Absolutely! Just increase baking time to 25-30 minutes since they’re thicker. The crispy coating works beautifully on dark meat too.
- How do I prevent soggy coating? Two words: wire rack. Baking the chicken on a rack over the sheet pan lets air circulate for maximum crispiness all around.
- Can I make this ahead? You can prep the coated chicken up to 4 hours ahead – just keep it refrigerated until baking. The coating might get slightly softer, but still delicious!
- Why is my coating falling off? Did you pat the chicken dry first? Moisture is the enemy of crispy coatings! Also, press the crumbs firmly onto each piece.
- Can I freeze leftovers? You bet! Freeze baked chicken in a single layer first, then transfer to bags. Reheat frozen in a 375°F oven for 15-20 minutes.
Still have questions? Drop them in the comments – I’m happy to help troubleshoot your crispy chicken adventures!
Nutritional Information
Just so you know what you’re enjoying (because we all like to keep it real!), here’s the nutritional breakdown per serving. Remember, these are estimates that can vary based on your specific ingredients – I use a nutrition calculator to get these numbers.
One perfectly crispy chicken breast gives you about:
- 320 calories – Perfect for a satisfying meal
- 32g protein – Great for keeping you full
- 16g fat (only 4g saturated) – That olive oil does its job
- 12g carbs – Mostly from that golden breadcrumb coating
Not too shabby for something that tastes this indulgent, right? Now go enjoy every crispy, garlicky bite!
I’d love to see your crispy chicken creations – tag me @[yourhandle] on Instagram so I can cheer you on! (And if you loved it as much as we do, a quick rating below makes my day!)
Print
Crispy Baked Chicken Breast Parmesan Garlic in 40 Minutes Flat
- Total Time: 35 minutes
- Yield: 4 servings 1x
- Diet: Low Carb
Description
Crispy baked chicken breast parmesan garlic is a flavorful and easy-to-make dish. It combines tender chicken with a crunchy coating and savory garlic parmesan flavors.
Ingredients
- 4 boneless, skinless chicken breasts
- 1 cup breadcrumbs
- 1/2 cup grated parmesan cheese
- 2 cloves garlic, minced
- 1 tsp dried Italian seasoning
- 1/2 tsp salt
- 1/4 tsp black pepper
- 1/4 cup olive oil
- 1 egg, beaten
Instructions
- Preheat oven to 400°F (200°C).
- In a bowl, mix breadcrumbs, parmesan cheese, garlic, Italian seasoning, salt, and pepper.
- Dip each chicken breast in the beaten egg, then coat with the breadcrumb mixture.
- Place chicken on a baking sheet lined with parchment paper.
- Drizzle olive oil over the chicken.
- Bake for 20-25 minutes until golden and cooked through.
- Let rest for 5 minutes before serving.
Notes
- Use panko breadcrumbs for extra crispiness.
- Check internal temperature of chicken reaches 165°F (74°C).
- Serve with pasta or a fresh salad.
- Prep Time: 10 minutes
- Cook Time: 25 minutes
- Category: Main Dish
- Method: Baking
- Cuisine: Italian-American
Nutrition
- Serving Size: 1 chicken breast
- Calories: 320
- Sugar: 1g
- Sodium: 520mg
- Fat: 16g
- Saturated Fat: 4g
- Unsaturated Fat: 10g
- Trans Fat: 0g
- Carbohydrates: 12g
- Fiber: 1g
- Protein: 32g
- Cholesterol: 125mg
Keywords: crispy chicken, baked chicken, parmesan garlic chicken, easy chicken recipe


