Ever had one of those days when you’re craving something indulgent but don’t want to turn on the oven? That’s exactly how my love affair with these creamy tiramisu dessert cups began. I remember the first time I whipped them up for a last-minute dinner party – the oohs and aahs from my guests made me realize I’d stumbled onto something special. These little cups pack all the luxurious flavor of classic tiramisu (that dreamy mascarpone! that coffee-kissed ladyfinger crunch!) without any fuss. No baking, no fancy equipment – just layers of happiness that come together in minutes but taste like you spent hours in the kitchen.
Why You’ll Love These Creamy Tiramisu Dessert Cups
Oh, where do I even begin? These little cups of joy have stolen my heart (and my dessert rotation) for so many reasons. Let me count the ways you’ll adore them:
- No-bake magic: When my kitchen feels like a sauna in summer, these are my go-to. No oven required means you stay cool while making something impossibly fancy.
- Portion perfection: No more fighting over who got more mascarpone cream! Each cup is its own perfect little world of coffee-soaked goodness.
- Endless customizing: I’ve made these with everything from orange zest in the cream to a sprinkle of cinnamon – they’re like a blank canvas for your dessert dreams.
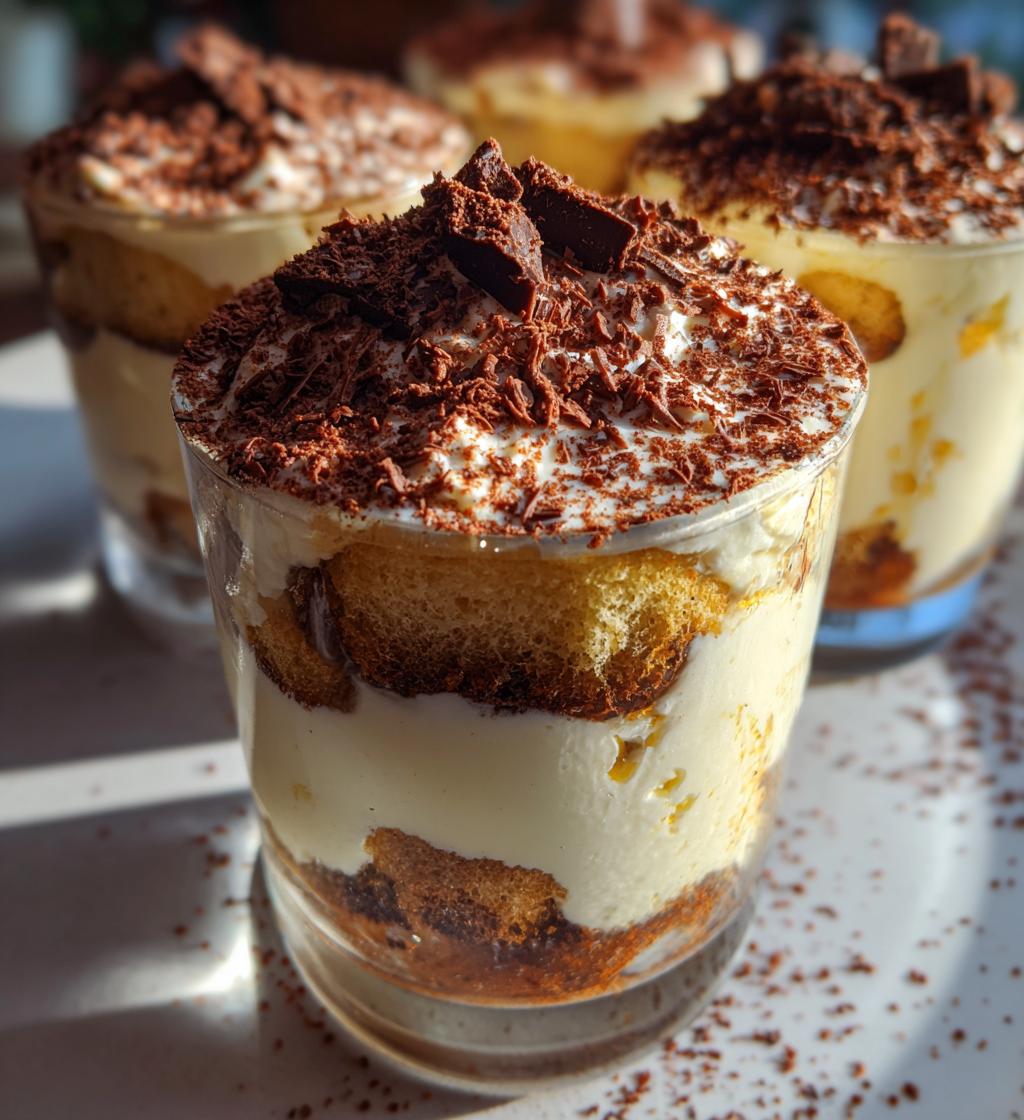
- Instant elegance: That cocoa powder dusting? The layered stripes visible through glass cups? I’m not above admitting I’ve gotten compliments like “Did you get these from a bakery?” Nope – just my chaotic kitchen!
- Make-ahead lifesaver: The best part? They actually taste BETTER after chilling. I always make extra because they disappear faster than I can say “tiramisu.”
Trust me, once you try these, you’ll be finding excuses to make them weekly – book club, date night, “I survived Tuesday” celebrations… all worthy occasions!
Ingredients for Creamy Tiramisu Dessert Cups
Here’s everything you’ll need to create these heavenly little cups. I’ve learned the hard way that ingredient prep makes ALL the difference, so pay attention to those temperature notes – they’re the secret to that perfect creamy texture we’re after!
- 1 cup mascarpone cheese (must be at room temperature – take it out 30 minutes before starting. Cold mascarpone will give you lumpy grief!)
- 1/2 cup heavy cream (straight from the fridge – cold cream whips up better)
- 1/4 cup granulated sugar (I use regular white sugar, but superfine works too)
- 1 tsp vanilla extract (the real stuff, please – no imitations for our tiramisu!)
- 1 cup strong brewed coffee, cooled to room temp (I use espresso when I’m feeling fancy)
- 2 tbsp coffee liqueur (optional but oh-so-good. Kahlúa is my go-to)
- 24 crisp ladyfinger cookies (the dry, crunchy kind – not soft sponge fingers)
- 2 tbsp cocoa powder for dusting (Dutch-processed gives that rich color)
- 1 oz dark chocolate, grated (optional but makes it look extra special)
Pro tip from my many tiramisu experiments: measure your coffee liqueur into the cooled coffee before you start assembling. That way you won’t accidentally double-dip cookies in plain coffee (been there, had sad tiramisu). And don’t skimp on letting that mascarpone soften – lumpy cream filling is nobody’s friend!
How to Make Creamy Tiramisu Dessert Cups
Okay, friends – here’s where the magic happens! I’ve made these enough times to know every little trick that turns good tiramisu cups into GREAT ones. Follow these steps, and you’ll have dessert perfection in no time.
Step 1: Prepare the Mascarpone Cream
First, grab that softened mascarpone and give it a good stir with a rubber spatula to loosen it up. Now, in a large bowl, combine it with the cold heavy cream, sugar, and vanilla. Here’s my secret weapon: use an electric mixer on medium speed and beat just until soft peaks form – about 2 minutes. You want it billowy and smooth, like clouds you could eat. Overbeat, and it’ll get grainy (trust me, I’ve cried over curdled mascarpone before). The perfect consistency should hold its shape when you lift the beaters but still look silky.
Step 2: Assemble the Layers
Time for the fun part! Mix your cooled coffee and liqueur in a shallow dish – I use a pie plate because it’s the perfect size. Now, here’s the golden rule: dip each ladyfinger for exactly 1-2 seconds per side. Any longer, and they’ll turn to mush (learned that the hard way at my first attempt!). Place 2-3 dipped cookies in each cup, breaking them to fit if needed. Spoon a generous layer of mascarpone cream over the cookies – I do about 2 tablespoons per layer. Repeat: another quick-dipped cookie layer, another cream layer. Finish with cream on top because, let’s be honest, that’s the best part!
Step 3: Chill and Serve
Now comes the hardest part – waiting! Cover your cups with plastic wrap and refrigerate for at least 4 hours, though overnight is even better. This chill time lets the flavors marry and the cookies soften just right. Right before serving, dust with cocoa powder through a fine mesh sieve (no clumps!) and sprinkle with grated chocolate if you’re feeling fancy. The first spoonful should give you that perfect contrast – creamy top, coffee-infused middle, and just-set bottom layers. Pure bliss!
Tips for Perfect Creamy Tiramisu Dessert Cups
After making these more times than I can count (and yes, a few hilarious fails along the way), I’ve picked up some game-changing tricks that’ll take your tiramisu cups from “pretty good” to “where have you been all my life?” Here are my absolute must-know tips:
- Kid-friendly swap: Making these for little ones? Use decaf coffee – they’ll get all the fun flavor without the caffeine zoomies. I learned this after my niece bounced off the walls at a family gathering! You can even use chocolate milk for dipping if you’re feeling playful.
- Cocoa dusting magic: Always, always sift your cocoa powder. I keep a tiny sieve just for this – it gives that gorgeous, even snow-like dusting instead of clumpy patches. Pro move: hold a spoon between the sieve and cups to create pretty patterns!
- Cream stability secret: If your kitchen’s warm (or you’re paranoid about the cream going flat like I am), add 1/4 tsp of cornstarch to the sugar before mixing. It’s my little insurance policy for picture-perfect layers that hold their shape.
- Texture control: Those ladyfingers can be sneaky – if your coffee mixture is too warm, they’ll soak up liquid like sponges. I test the temp by dipping just one corner first. If it turns translucent immediately, let your coffee cool another 15 minutes.
Oh, and one bonus tip from my last dinner party disaster – don’t assemble these while distracted by wine and gossip! I once accidentally reversed the layers (cream first, then cookies) and created tiramisu soup. Delicious soup, but not exactly the elegant cups I’d promised!
Ingredient Substitutions & Variations
One of the best things about these creamy tiramisu dessert cups is how easily you can mix things up! Over the years, I’ve played with so many variations – some out of necessity (who forgets to buy mascarpone? This girl!), others just for fun. Here are my tried-and-true swaps that still deliver that luscious tiramisu magic:
- No alcohol? No problem! Simply swap the coffee liqueur for an extra tablespoon of strong coffee or a splash of vanilla syrup. My friend’s kids love when I use chocolate syrup instead – it makes the cups taste like mocha!
- Gluten-free friends welcome: Those crispy gluten-free ladyfingers from the health food aisle work beautifully. Just check that they’re the dry type (not cakey) and dip them even quicker – they tend to absorb liquid faster.
- Mascarpone escape plan: In a pinch, blend equal parts cream cheese and heavy whipping cream as a substitute. It’s not quite as luxurious, but it’ll do in an emergency (like when your dessert craving strikes at 10 PM!).
- Flavor adventures: Try adding 1/2 teaspoon of almond extract to the cream, or mix orange zest into the coffee dip. My wildcard? A sprinkle of instant espresso powder in the cream mixture for serious coffee lovers!
- Dairy-free dreams: Coconut cream can replace heavy cream (chill the can overnight first), and there are some surprisingly good vegan mascarpone alternatives now. Just know the texture will be slightly different.
Remember my golden rule of substitutions: change just one element at a time until you know how it affects the final product. That said, some of my happiest accidents have become permanent variations – like the time I ran out of cocoa powder and used cinnamon instead. Not traditional, but oh-so-cozy!
Serving and Storing Creamy Tiramisu Dessert Cups
Now let’s talk about the best part – enjoying your beautiful creations! I’ve learned a few tricks over the years to keep these tiramisu cups looking and tasting their absolute best from first bite to last (if they last that long!).
Garnishing like a pro: Always dust with cocoa powder and add any chocolate shavings right before serving. I made the mistake of decorating them hours ahead once, and the moisture turned my beautiful dusting into brown splotches – not the elegant look I was going for!
Storage secrets: These cups actually improve with a little time in the fridge, but you’ll want to store them properly. Cover each cup tightly with plastic wrap or transfer to an airtight container. They’ll keep beautifully for up to 3 days (though in my house, they never last that long!).
Freezer warning: I know the temptation is real to freeze extras, but resist it! The texture turns icy and the layers get mushy upon thawing. Learned this the hard way when I tried to stockpile them for a party – ended up with tiramisu soup instead of those perfect layered cups.
One more serving tip from my entertaining fails: if you’re transporting these to a gathering, place the cups in a muffin tin to keep them upright. The first time I brought them to book club, they tipped over in my carrier, and let’s just say my “deconstructed tiramisu” wasn’t quite the hit I’d hoped for!
Nutritional Information
Okay, let’s be real – we’re not eating tiramisu for its health benefits! But because I know some of you like to keep track (or need to for dietary reasons), here’s the scoop on what’s in these dreamy dessert cups. Remember, these numbers are estimates – your exact counts might vary slightly depending on brands and how generous you are with that mascarpone layer (no judgment here!).
- Calories: 320 per serving (worth every single one!)
- Fat: 22g (that’s where all the creamy goodness comes from)
- Saturated Fat: 13g (blame the mascarpone and cream – delicious culprits)
- Carbohydrates: 25g (mostly from those coffee-kissed ladyfingers)
- Sugar: 18g (it is dessert, after all)
- Protein: 5g (surprising little protein boost from the cheese)
- Sodium: 45mg (pretty low for such an indulgent treat)
- Cholesterol: 120mg (eggs and dairy doing their thing)
Now, if you’re watching certain nutrients, here are my “lightened up but still tasty” tricks: swap in low-fat mascarpone (it exists!), use half the sugar, or go easy on the chocolate garnish. But between us? Sometimes you just need the full-fat, full-flavor experience – life’s too short for sad tiramisu!
FAQs About Creamy Tiramisu Dessert Cups
After making these countless times (and fielding just as many questions from curious friends), I’ve rounded up the most common things people wonder about these little cups of joy. Consider this your tiramisu troubleshooting guide from someone who’s made every mistake so you don’t have to!
Can I make these ahead of time?
Absolutely! In fact, they taste even better after 24 hours in the fridge. The flavors meld together beautifully, and the texture becomes perfectly creamy. Just hold off on the cocoa dusting until right before serving – it tends to “melt” into the cream if applied too early (speaking from messy experience!).
How do I prevent watery tiramisu?
Ah, the dreaded soup situation! Three key things: 1) Don’t over-dip those ladyfingers – 1-2 seconds per side max! 2) Make sure your mascarpone cream is thick enough to hold soft peaks. 3) Always use room temp mascarpone – cold cheese can separate and release liquid. If you do end up with excess liquid, just spoon it off before serving (I won’t tell!).
Can I use something besides coffee?
You bet! For a fun twist, I’ve used chai tea, hot chocolate, or even orange juice (with a splash of vanilla). Just keep the liquid amount the same. My niece loves when I make “breakfast tiramisu” with cold milk and cinnamon-dusted cream – not traditional, but delicious!
Why did my cream turn lumpy?
Oh honey, I’ve been there! Usually it’s one of three things: 1) Your mascarpone was too cold (let it soften!), 2) You overmixed (stop at soft peaks), or 3) The cream wasn’t cold enough. If it happens, try whisking in a tablespoon of warm milk – sometimes you can save it!
Can I make one big tiramisu instead of individual cups?
Of course! Use a 9×9 dish and follow the same layering method. Just know it’ll need longer to set – I’d give it at least 6 hours in the fridge. The cups are my go-to because they’re so cute and portion-controlled (though let’s be real, I’ve been known to eat two!).
Alright, my fellow dessert lovers – the ball’s in your court now! I’ve given you all my hard-earned tiramisu wisdom (including a few embarrassing kitchen fails along the way). Now it’s your turn to grab that mascarpone and get layering! These creamy tiramisu dessert cups are just begging for your personal touch – maybe a sprinkle of sea salt on top? A dash of cardamom in the cream? The possibilities are endless, and I want to hear all about your creations. So go ahead – whisk, dip, and chill your way to dessert heaven, then come back and tell me how yours turned out in the comments below. Who knows? Your twist might just become my new favorite version!
Print
Irresistible 4-Layer Creamy Tiramisu Dessert Cups
- Total Time: 4 hrs 20 mins
- Yield: 6 servings 1x
- Diet: Vegetarian
Description
Creamy tiramisu dessert cups are a delightful twist on the classic Italian dessert. These individual servings are easy to make and perfect for any occasion.
Ingredients
- 1 cup mascarpone cheese
- 1/2 cup heavy cream
- 1/4 cup sugar
- 1 tsp vanilla extract
- 1 cup strong brewed coffee, cooled
- 2 tbsp coffee liqueur (optional)
- 24 ladyfinger cookies
- 2 tbsp cocoa powder
- 1 oz dark chocolate, grated (optional)
Instructions
- In a bowl, whisk mascarpone, heavy cream, sugar, and vanilla until smooth and creamy.
- In a shallow dish, mix coffee and coffee liqueur.
- Dip each ladyfinger into the coffee mixture for 1-2 seconds, then place in dessert cups.
- Layer the soaked ladyfingers with the mascarpone cream mixture.
- Repeat layers, finishing with a cream layer.
- Dust the top with cocoa powder and grated chocolate.
- Refrigerate for at least 4 hours before serving.
Notes
- For a non-alcoholic version, omit the coffee liqueur.
- Use decaf coffee if preferred.
- Chill for best texture.
- Prep Time: 20 mins
- Cook Time: 0 mins
- Category: Dessert
- Method: No-Bake
- Cuisine: Italian
Nutrition
- Serving Size: 1 cup
- Calories: 320
- Sugar: 18g
- Sodium: 45mg
- Fat: 22g
- Saturated Fat: 13g
- Unsaturated Fat: 7g
- Trans Fat: 0g
- Carbohydrates: 25g
- Fiber: 1g
- Protein: 5g
- Cholesterol: 120mg
Keywords: tiramisu, dessert cups, creamy, easy, Italian


