Oh my goodness, have you ever made *clay desserts*? It’s like stepping into a creative wonderland! Seriously, there’s something magical about mixing simple ingredients together to create colorful, edible clay that can turn any occasion into a fun-filled celebration. Whether you’re planning a birthday party, a rainy day activity with the kids, or just a whimsical evening at home, these clay desserts are a fantastic way to get everyone involved. Trust me, the joy of kneading and shaping your own clay creations is an experience you won’t want to miss!
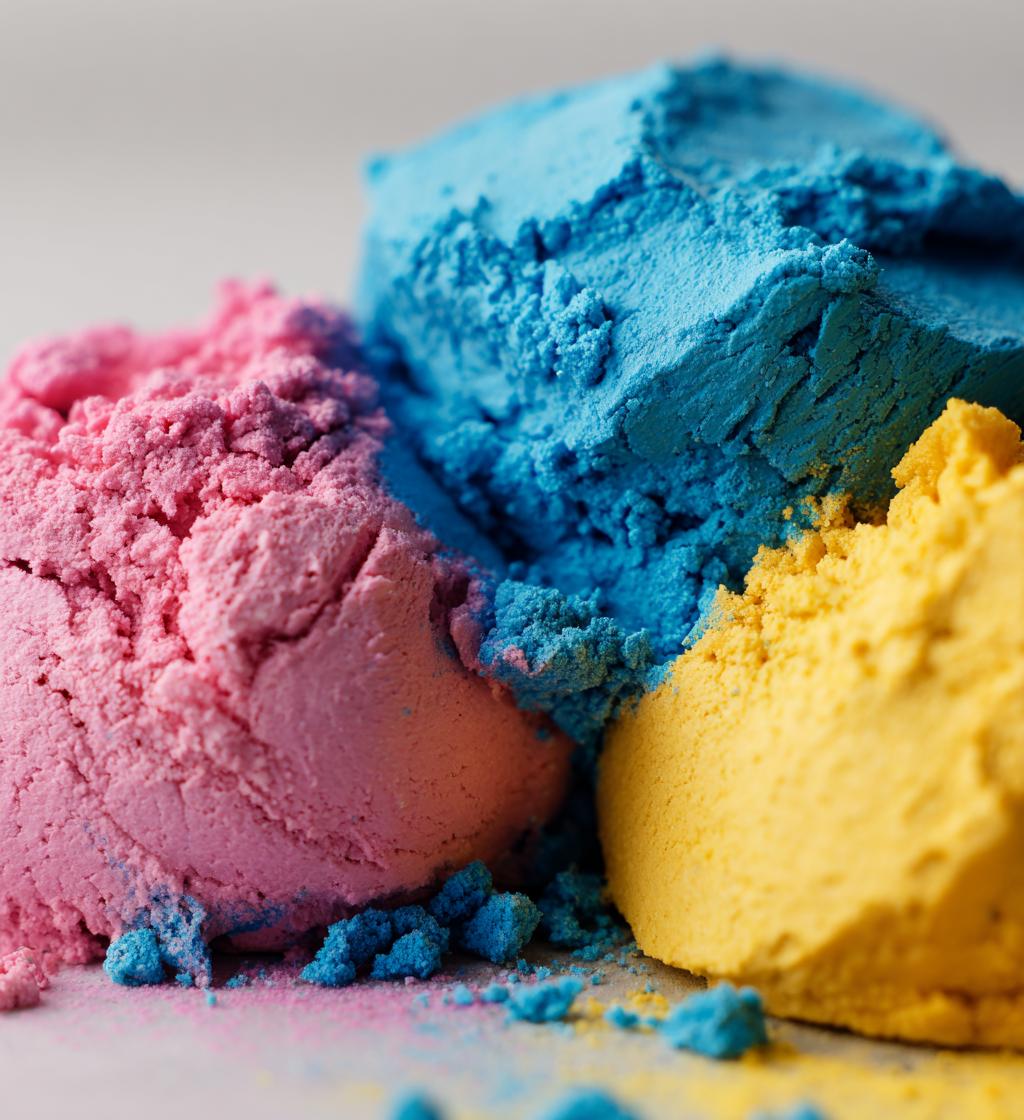
The best part? You can customize these clay desserts however you like! Want bright pink dough for a princess-themed party? Go for it! How about earthy green for a nature-inspired gathering? Yes, please! With just a few basic ingredients, you can whip up delightful edible clay that not only looks great but is also a hit with everyone. So, let’s dive in and start making some delicious memories with clay desserts!
Ingredients List
Before we get our hands messy, let’s gather everything we need to create these delightful clay desserts! Here’s what you’ll need:
- 2 cups of flour: This is your base ingredient, so make sure it’s all-purpose flour for the best texture.
- 1 cup of salt: Regular table salt works just fine. It’s what gives the clay its structure!
- 2 tablespoons of cream of tartar: This is the secret ingredient that helps keep the clay smooth and pliable. Don’t skip it!
- 2 cups of water: It’s essential for binding everything together. Use room temperature water for best results.
- 2 tablespoons of vegetable oil: This adds a nice sheen and helps keep the clay from drying out too quickly.
- Food coloring (optional): If you want to get creative, grab some food coloring to make your clay as vibrant as your imagination!
Once you have all the ingredients ready, you’re just a few steps away from creating your own clay desserts. So, let’s roll up those sleeves and get started!
How to Prepare Clay Desserts
Alright, let’s get to the fun part! Making clay desserts is super simple, but I want to make sure you’re comfortable every step of the way. Follow these instructions closely, and you’ll be on your way to crafting your very own edible creations in no time!
Step-by-Step Instructions
- Mix the dry ingredients: In a medium-sized pot, combine the 2 cups of flour, 1 cup of salt, and 2 tablespoons of cream of tartar. Make sure to stir them together until they’re well blended. This is where the magic starts!
- Add the wet ingredients: Next, pour in the 2 cups of water and 2 tablespoons of vegetable oil. Give it a good stir until everything is combined. You want a smooth mixture, so take your time with this part.
- Cook the mixture: Now, put the pot on the stove over medium heat. Keep stirring continuously for about 3-5 minutes. You’ll notice the mixture starting to thicken. It’s like watching a science experiment unfold!
- Add color (if desired): If you want to add some pizzazz to your clay, this is the time! Drizzle in your food coloring and mix it in until you achieve the desired shade. Don’t be shy—be bold with those colors!
- Knead the dough: Once the mixture pulls away from the sides of the pot and forms a soft ball, remove it from the heat. Let it cool for a few minutes until it’s safe to touch. Then, knead the dough on a clean surface until it’s smooth and pliable. This is my favorite part—you’ll feel like a real artist!
- Cool it down: Lastly, let your clay cool completely before using it for your delightful dessert creations. This will ensure it’s just right for molding and shaping. Patience is key, but I promise it’ll be worth it!
And there you have it! You’re now ready to create all sorts of fun and imaginative clay desserts. Just remember, it’s all about enjoying the process, so don’t stress too much about perfection. Have fun and let your creativity shine!
Why You’ll Love Clay Desserts
Making clay desserts isn’t just a fun activity; it comes with a bunch of awesome benefits! Here’s why you’re going to fall head over heels for these delightful creations:
- Creative Expression: Clay desserts let you unleash your inner artist! You can mold, shape, and color them in any way you like, making each piece uniquely yours.
- Fun for All Ages: Whether you’re a kid or just a kid at heart, everyone can join in the fun. It’s a great way to bond with family and friends while getting a little messy!
- Quick and Easy: With just a handful of ingredients and minimal cooking time, you can whip up these clay desserts in no time. Perfect for those last-minute gatherings or rainy days!
- Perfect for Any Occasion: Birthday parties, holidays, or just a cozy night in—clay desserts fit right in. They’re a great way to add a special touch to any event!
- Safe and Edible: Unlike regular play dough, these clay desserts are completely safe to eat. You can indulge in your creative treats without any worries!
So, what are you waiting for? Dive into the world of clay desserts and discover just how much fun you can have while creating delicious, edible art!
Tips for Success
Before you dive into the wonderful world of clay desserts, let me share some handy tips that will help you achieve the best results and make your experience even more enjoyable!
- Measure Accurately: Be precise with your measurements, especially when it comes to flour and salt. Too much or too little can affect the texture of your clay. I always use a kitchen scale for accuracy – it makes a difference!
- Stir Constantly: While cooking the mixture, keep stirring! This prevents lumps and ensures even cooking. If you step away for even a second, you might end up with a sticky mess. Trust me, I’ve learned this the hard way!
- Cool Properly: Let the dough cool completely before handling it. If you rush this step, you might burn your hands! A little patience goes a long way in ensuring a smooth kneading process.
- Experiment with Colors: Don’t be afraid to mix different food colorings to create unique shades. You can even combine colors for a marbled effect! Just remember to add the color gradually until you get your desired hue.
- Keep It Moist: If your clay starts to dry out, add a tiny bit of vegetable oil while kneading. This will help bring it back to life and keep it pliable for all your creative projects.
- Use Parchment Paper: When rolling out your clay, placing it between two sheets of parchment paper can prevent sticking and make cleanup a breeze. It’s a simple trick that saves you time and frustration!
- Have Fun! Most importantly, remember that this is all about creativity and having a good time. Don’t stress over perfect shapes or designs. Embrace the process, and let your imagination run wild!
With these tips in your back pocket, you’re all set to create some amazing clay desserts that will impress everyone. Enjoy the journey and let your creativity shine!
Variations on Clay Desserts
The beauty of clay desserts is that they’re incredibly versatile! You can take this basic recipe and tweak it in so many fun ways. Here are some exciting variations to inspire your creativity:
- Color Combinations: Experiment with blending different food colorings to create unique shades. How about a soft pastel palette for a spring-themed gathering or bold primary colors for a fun party? You can even create marbled effects by swirling two or more colors together!
- Shaped Creations: Think beyond traditional shapes! Use cookie cutters to create fun shapes like stars, hearts, or even animals. You can also make 3D structures by rolling out your clay into sheets and cutting out pieces to assemble. The sky’s the limit!
- Texture Play: Add texture to your clay desserts by incorporating fun elements like dried herbs or edible glitter. Just a sprinkle of glitter can make your creations sparkle, while herbs can add an unexpected twist in both look and aroma!
- Flavor Infusions: Though they’re already delightful, you can add a hint of flavor by mixing in some powdered drink mix or flavored extracts (like vanilla or almond) into your dough. It’ll take your clay desserts from just looking good to tasting good, too!
- Seasonal Themes: Tailor your clay desserts to fit the seasons! In fall, you might create pumpkins or leaves, while winter could inspire snowflakes and holiday-themed shapes. Let your imagination run wild with seasonal motifs!
- Combining Ingredients: If you’re feeling adventurous, try adding a bit of cocoa powder to create a chocolate clay! Just substitute a small amount of flour with cocoa powder to achieve a rich, chocolatey hue and flavor.
With these variations, you can make each batch of clay desserts a new and exciting experience. So gather your ingredients, let your imagination soar, and have a blast creating unique edible art!
Storage & Reheating Instructions
Now that you’ve created your fabulous clay desserts, let’s talk about how to keep them fresh and ready for your next creative session! Proper storage is key to ensuring your clay remains pliable and enjoyable for as long as possible.
First off, if you have any unused clay left over, make sure to store it in an airtight container. I like to use a resealable plastic bag or a sturdy Tupperware. Just squeeze out as much air as possible before sealing it up. This helps prevent it from drying out. Trust me, dry clay is no fun!
For longer storage, you can keep the container in the fridge. It’ll stay fresh for a couple of weeks this way. Just remember to let it come back to room temperature before using it again. Cold clay can be a bit stiff, and you want it to be nice and soft for shaping!
If you find that your clay has dried out a bit, don’t worry! You can often revive it by adding a tiny bit of vegetable oil while kneading. Just a drop or two will help bring it back to life and make it pliable again.
As for reheating, there’s no need to put your clay in the oven or microwave. Just knead it well, and it should become workable again. If you need to warm it up a bit, you can hold it in your hands for a minute or two. Your body heat does wonders!
And there you have it! With the right storage and a few simple tricks, your clay desserts will be ready for more fun and creativity whenever you are. Enjoy molding and shaping your edible masterpieces!
Nutritional Information
Let’s talk about the numbers behind these fun clay desserts! While we’re all here for the joy of creating and enjoying, it’s nice to have an idea of what we’re working with nutritionally. Here’s a rough estimate of the typical values you can expect per serving (about 1/4 cup):
- Calories: 100
- Fat: 2g
- Saturated Fat: 0g
- Unsaturated Fat: 1g
- Trans Fat: 0g
- Carbohydrates: 22g
- Fiber: 1g
- Protein: 3g
- Sodium: 500mg
- Cholesterol: 0mg
- Sugar: 0g
Keep in mind these values are estimates and can vary based on the specific ingredients you use and how you customize your clay desserts. But hey, the main goal here is to have fun and enjoy the process of creating something delicious and unique!
FAQ Section
Got questions about clay desserts? Don’t worry; I’ve got you covered! Here are some common queries I’ve encountered, along with my answers to help you on your creative journey:
- Q1: Can I eat clay desserts?
Absolutely! The best part about these clay desserts is that they’re completely edible. Made from simple ingredients like flour, salt, and water, you can enjoy your creations without any worries. - Q2: How long do clay desserts last?
When stored properly in an airtight container, your clay can last for a couple of weeks in the fridge. Just remember to let it come back to room temperature before using it again! - Q3: Can I use other types of flour?
While all-purpose flour is my go-to for the best texture, you can experiment with other flours like whole wheat or gluten-free options. Just keep in mind that this may affect the final consistency of your clay. - Q4: Is it okay to use food coloring?
Of course! Food coloring is a fantastic way to add vibrancy to your clay desserts. Just remember to add it gradually and mix well until you achieve your desired shade. Have fun with it! - Q5: What if my clay dries out?
If your clay starts to dry out, don’t panic! You can often revive it by kneading in a tiny bit of vegetable oil. This will help bring it back to life and make it pliable once more.
If you have more questions or need additional tips, feel free to reach out! I’m always here to help you create amazing clay desserts that spark joy and creativity.
Print
Clay Desserts: 5 Magical Ways to Create Edible Art
- Total Time: 15 minutes
- Yield: Approximately 2 cups of clay 1x
- Diet: Vegetarian
Description
Delicious and easy-to-make clay desserts that are perfect for any occasion.
Ingredients
- 2 cups of flour
- 1 cup of salt
- 2 tablespoons of cream of tartar
- 2 cups of water
- 2 tablespoons of vegetable oil
- Food coloring (optional)
Instructions
- In a pot, mix flour, salt, and cream of tartar.
- Add water and vegetable oil to the dry ingredients.
- Stir the mixture over medium heat until it thickens.
- Add food coloring if desired and mix well.
- Knead the dough until smooth and pliable.
- Let it cool before using for your clay dessert creations.
Notes
- Store unused clay in an airtight container.
- Use parchment paper to prevent sticking when rolling out the clay.
- Experiment with different colors for unique designs.
- Prep Time: 10 minutes
- Cook Time: 5 minutes
- Category: Dessert
- Method: Stovetop
- Cuisine: American
Nutrition
- Serving Size: 1/4 cup
- Calories: 100
- Sugar: 0g
- Sodium: 500mg
- Fat: 2g
- Saturated Fat: 0g
- Unsaturated Fat: 1g
- Trans Fat: 0g
- Carbohydrates: 22g
- Fiber: 1g
- Protein: 3g
- Cholesterol: 0mg
Keywords: clay desserts, homemade clay, edible clay


