Nothing says Christmas like the smell of freshly baked treats filling the kitchen—and these adorable Christmas Tree Cream Puffs have become my family’s favorite holiday tradition. I still remember the first time I attempted them years ago, piping wobbly little trees that looked more like abstract art than festive evergreens. But trust me, with a few tricks I’ve learned along the way (and a star-shaped piping tip), you’ll be turning out picture-perfect edible trees that’ll wow everyone at your holiday table.
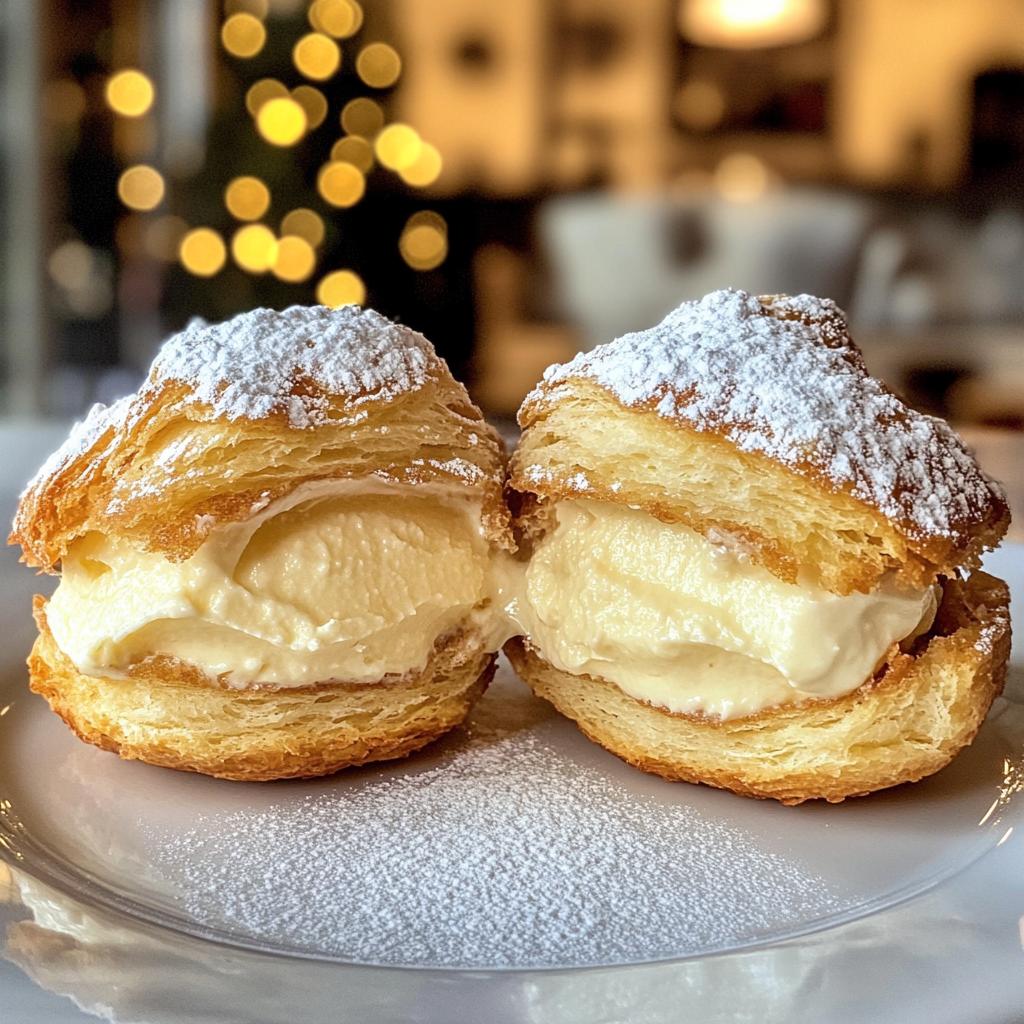
The magic happens when that simple dough puffs up golden in the oven, creating these light-as-air shells just begging to be filled with clouds of sweetened whipped cream. Dust them with powdered sugar “snow” and suddenly you’ve got the most festive dessert that tastes as good as it looks. My kids now demand we make them every Christmas Eve—they love decorating their own little edible trees almost as much as eating them!
Why You’ll Love These Christmas Tree Cream Puffs
These adorable treats have become my go-to holiday dessert for so many reasons:
- Instant holiday magic: One bite of these festive trees and you’re instantly transported to Christmas morning – they’re almost too cute to eat (but trust me, you’ll want to!)
- Surprisingly simple: Don’t let the fancy look fool you – the dough comes together in minutes with basic pantry ingredients
- Endlessly customizable: Go classic with vanilla cream, get fancy with chocolate filling, or let kids decorate with colorful sprinkles
- Crowd-pleasing perfection: Whether it’s cookie exchanges or Christmas dinner, these disappear faster than you can say “ho ho ho”
Ingredients for Christmas Tree Cream Puffs
Gathering these simple ingredients is the first step to creating your edible Christmas forest. I’ve learned through trial and error that quality matters here – especially with the butter and eggs. Don’t skimp!
- 1 cup water – Just plain tap water works fine, no need for anything fancy
- 1/2 cup unsalted butter – Cut into chunks so it melts evenly (and yes, it must be real butter!)
- 1 cup all-purpose flour – Spoon it lightly into your measuring cup and level it off
- 4 large eggs – Room temperature eggs incorporate better into the dough
- 1 cup heavy cream – The higher the fat content, the fluffier your filling will be
- 2 tbsp powdered sugar – For sweetening the whipped cream filling
- 1 tsp vanilla extract – Pure vanilla makes all the difference in flavor
- Green food coloring (optional) – A few drops give your trees that festive evergreen hue
- Extra powdered sugar – For that magical snowy dusting at the end
Equipment Needed for Christmas Tree Cream Puffs
You won’t need any fancy gadgets for these festive treats, but a few key tools will make all the difference in creating picture-perfect Christmas trees:
- Heavy-bottomed saucepan – For cooking the dough evenly without scorching
- Wooden spoon – My trusty tool for stirring the dough to the perfect consistency
- Piping bag – Essential for shaping those adorable tree forms
- Star-shaped piping tip – Creates those signature tree branch textures
- Baking sheet – Lined with parchment paper for easy removal
- Electric mixer – Makes whipping the cream filling a breeze
That’s it! With just these basics, you’re ready to create your edible Christmas forest.
How to Make Christmas Tree Cream Puffs
Now for the fun part – turning those simple ingredients into edible Christmas magic! Don’t let the fancy look intimidate you – I’ll walk you through each step with all the tips I’ve learned from my many batches (and yes, a few early disasters).
Preparing the Dough
Start by bringing your water and butter chunks to a rolling boil in that heavy saucepan. The moment it’s bubbling, dump in all your flour at once and start stirring like crazy with that wooden spoon. You’ll know it’s ready when the dough pulls away from the sides and forms a smooth ball. Take it off the heat and let it cool just slightly – about 2 minutes – before adding your eggs one at a time. This is where the magic happens! The dough will look curdled at first but keep stirring – it’ll come together into this gorgeous glossy paste. Want green trees? Now’s the time to add a few drops of food coloring until you get that perfect evergreen shade.
Piping and Baking
Here’s where that star tip earns its keep! Load your piping bag (no fancy techniques needed – just spoon it in) and pipe little trees onto your parchment-lined sheet. Start with a wider base and taper up to a point – don’t stress about perfection, even my “abstract” trees get devoured. Space them about 2 inches apart because they’ll puff up beautifully in the oven. Bake until they’re golden and sound hollow when tapped – about 20-25 minutes. Resist the urge to open the oven early or they might collapse!
Filling the Cream Puffs
While your trees cool completely (this is crucial – warm puffs melt the filling), whip up that heavenly cream. Beat the heavy cream, powdered sugar and vanilla until stiff peaks form – but stop before it turns grainy. Now for my favorite part: gently slice each puff horizontally (a serrated knife works wonders) and pipe or spoon in that fluffy cloud of cream. The final touch? A generous dusting of powdered sugar “snow” that makes them look straight out of a winter wonderland.
Tips for Perfect Christmas Tree Cream Puffs
After piping dozens of these little trees (and eating my fair share of “practice” batches), I’ve picked up some foolproof tricks for Christmas cream puff perfection:
- Chill before filling – Let your baked puffs cool completely, then pop them in the fridge for 30 minutes. Cold shells are sturdier and won’t collapse when you pipe in that luscious cream.
- Star tip magic – That ridged piping tip isn’t just for looks – it creates nooks for the powdered sugar to cling to, making your trees extra snowy and festive.
- Bake until golden – Don’t pull them out too early! That rich color means they’ll hold their shape. If they start browning too fast, just tent with foil.
- Store smart – Unfilled puffs keep beautifully in an airtight container for 2 days – just refresh them in a 300°F oven for 5 minutes before serving.
- Dust last minute – Wait to add that snowy powdered sugar topping until right before serving so it stays picture-perfect.
Variations for Christmas Tree Cream Puffs
The beauty of these little edible trees? You can dress them up however your holiday heart desires! Here are some of my favorite twists that keep things festive:
- Chocolate lovers’ dream: Swap half the whipped cream with chocolate pastry cream – just melt some chocolate chips into cooled custard
- Peppermint party: Fold crushed candy canes into the cream filling for a minty fresh surprise
- Nutty delight: Sprinkle chopped toasted almonds between the cream layers for crunch
- Festive sparkle: Dip the tips in melted white chocolate and roll in colored sprinkles before assembling
- Eggnog twist: Add a pinch of nutmeg and a splash of rum extract to the cream
The possibilities are endless – let your holiday spirit guide you!
Serving and Storing Christmas Tree Cream Puffs
For the prettiest presentation, dust your Christmas Tree Cream Puffs with powdered sugar just before serving – it’s like snowfall on your edible evergreens! If you’ve got leftovers (though in my house, that’s rare), store them in an airtight container in the fridge for up to 2 days. The puffs will soften slightly but still taste delicious. Pro tip: Keep unfilled baked shells at room temperature for up to 3 days and fill them fresh when needed – they’ll stay crisp this way.
Nutritional Information for Christmas Tree Cream Puffs
Each festive cream puff contains about 180 calories. Remember, these are just estimates – your actual nutrition may vary slightly depending on ingredients and brands used. As my grandma always said, “holiday treats are for enjoying, not counting!”
Frequently Asked Questions About Christmas Tree Cream Puffs
Over the years, I’ve gotten so many great questions about these festive treats – here are answers to the ones that pop up most often:
Can I make the puffs ahead of time?
Absolutely! The unfilled baked shells stay crisp at room temperature for up to 3 days in an airtight container. I often bake a batch on December 23rd so they’re ready for Christmas Eve assembly. Just refresh them in a 300°F oven for 5 minutes before filling if they’ve softened.
What if I don’t have a piping tip?
No worries! You can use a zip-top bag with the corner snipped off – your trees will be more abstract but just as delicious. Or pipe simple mounds and call them “snowy hills” – the powdered sugar covers a multitude of piping sins!
Can I use a different filling?
Of course! These are wonderful with chocolate or vanilla pudding, lemon curd, or even ice cream (though serve those immediately). My neighbor swears by peppermint mascarpone filling. The only rule? Make it something you love!
Why did my puffs collapse?
Usually means they needed more baking time or the oven door was opened too soon. They should sound hollow when tapped. If this happens, don’t panic – just call them “snow-covered stumps” and pile on extra powdered sugar!
Can I freeze them?
Yes! Freeze unfilled baked shells for up to a month. Thaw at room temperature, then crisp in a 300°F oven for 5 minutes before filling. The cream filling should always be made fresh though.
Share Your Christmas Tree Cream Puffs
I’d love to see your edible Christmas forest creations! Snap a photo of your cream puff masterpieces and tag me – nothing makes me happier than seeing these festive treats on your holiday tables. Happy baking!
Print
25 Magical Christmas Tree Cream Puffs Your Family Will Adore
- Total Time: 45 minutes
- Yield: 12 cream puffs 1x
- Diet: Vegetarian
Description
Light and fluffy cream puffs shaped like Christmas trees, filled with rich pastry cream and dusted with powdered sugar for a festive treat.
Ingredients
- 1 cup water
- 1/2 cup unsalted butter
- 1 cup all-purpose flour
- 4 large eggs
- 1 cup heavy cream
- 2 tbsp powdered sugar
- 1 tsp vanilla extract
- Green food coloring (optional)
- Extra powdered sugar for dusting
Instructions
- Preheat oven to 400°F (200°C). Line a baking sheet with parchment paper.
- In a saucepan, bring water and butter to a boil over medium heat.
- Add flour all at once and stir until a smooth dough forms. Remove from heat.
- Beat in eggs one at a time until fully incorporated. Add green food coloring if desired.
- Pipe dough into small tree shapes on the prepared baking sheet.
- Bake for 20-25 minutes until golden and puffed. Let cool completely.
- Whip heavy cream, powdered sugar, and vanilla until stiff peaks form.
- Slice puffs in half and fill with whipped cream. Dust with powdered sugar before serving.
Notes
- Use a star-shaped piping tip for better tree definition.
- Chill the puffs before filling for easier handling.
- Store unfilled puffs in an airtight container for up to 2 days.
- Prep Time: 20 minutes
- Cook Time: 25 minutes
- Category: Dessert
- Method: Baking
- Cuisine: French
Nutrition
- Serving Size: 1 cream puff
- Calories: 180
- Sugar: 5g
- Sodium: 35mg
- Fat: 12g
- Saturated Fat: 7g
- Unsaturated Fat: 4g
- Trans Fat: 0g
- Carbohydrates: 15g
- Fiber: 0.5g
- Protein: 4g
- Cholesterol: 85mg
Keywords: Christmas dessert, holiday baking, cream puffs, festive treats


