Oh, the magic of Christmas candy! There’s something truly special about making your own treats at home during the holidays. Trust me, this Christmas candy easy recipe will have your kitchen filled with delightful aromas and sweet anticipation. You can whip up a batch of this candy in no time, and it makes for perfect gifts for friends and family or a special treat for your holiday gatherings.
Growing up, I remember the excitement of making candy with my family. We’d gather around the stovetop, my mom guiding us through the bubbling mixture, and I would watch in wonder as sugar transformed into something magical. It’s those moments that remind me of the warmth and joy of the season. Making Christmas candy at home isn’t just about the sweet treats; it’s about creating memories that last a lifetime.
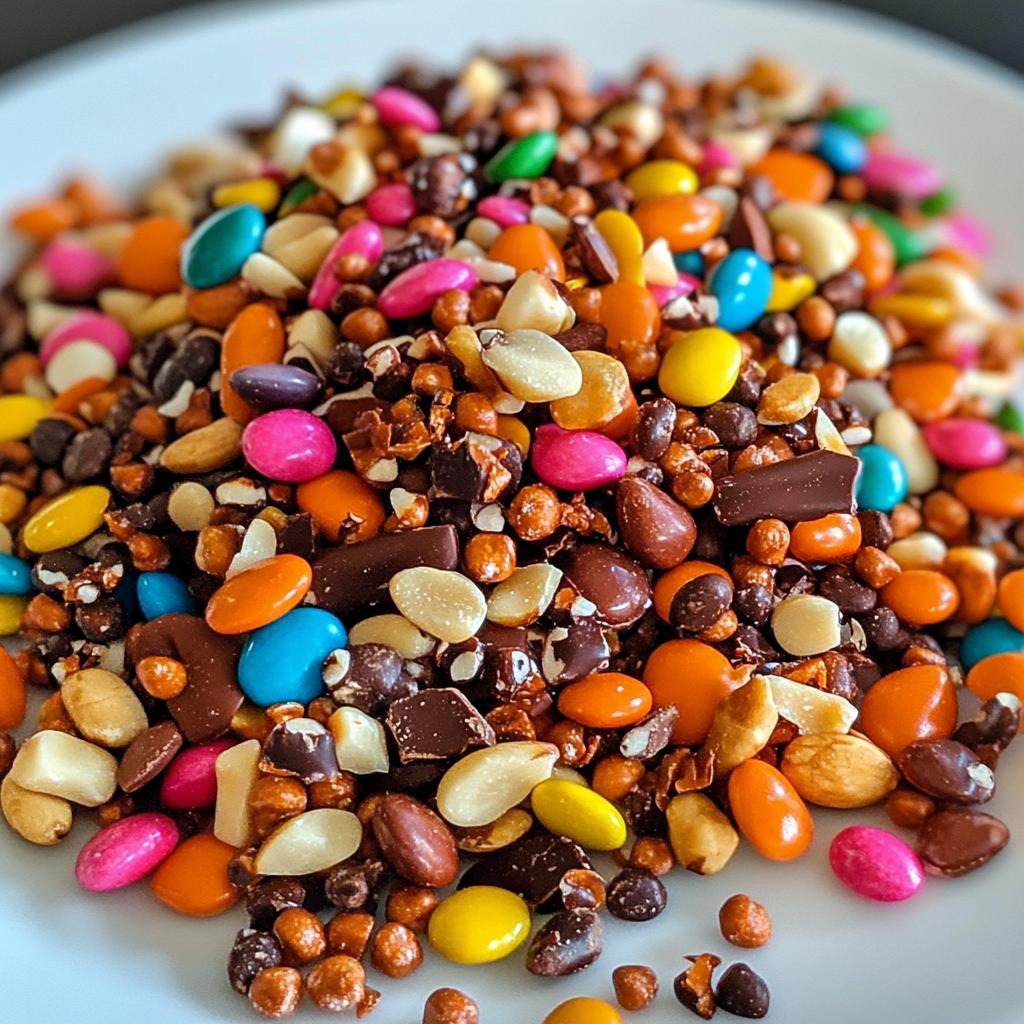
This recipe is not only simple but also versatile. You can easily customize it with your favorite nuts or flavorings. So, let’s dive in and get started on this delicious journey together!
Ingredients List
- 2 cups granulated sugar
- 1 cup light corn syrup
- 1 cup water
- 1 teaspoon pure vanilla extract
- 1/2 cup chopped nuts (your choice)
- 1 cup semi-sweet chocolate chips
How to Prepare Christmas Candy Easy
Step-by-Step Instructions
Alright, let’s get that candy bubbling! Follow these steps, and you’ll have delicious Christmas candy in no time.
- First, grab a large saucepan and combine 2 cups of granulated sugar, 1 cup of light corn syrup, and 1 cup of water. Give it a good stir until everything’s mixed nicely.
- Now, place the saucepan over medium heat and keep stirring until the sugar completely dissolves. You want to make sure there are no granules left hanging around. This usually takes a few minutes, so don’t rush it!
- Once the sugar is all melted, bring the mixture to a boil. Here’s the trick: don’t stir it anymore! Let it boil until it reaches 300°F, which is the hard crack stage. If you have a candy thermometer, this is your time to shine! If you don’t have one, just keep an eye on it until it turns a gorgeous golden color.
- When it hits that magical temperature, carefully remove the saucepan from heat. Be cautious, as the mixture will be super hot! Now, stir in 1 teaspoon of pure vanilla extract and 1/2 cup of your favorite chopped nuts. This is where the flavor really starts to come alive!
- Next, pour the candy mixture onto a greased baking sheet. Spread it evenly so it cools down uniformly. You can use a spatula, but be careful – it’s hot!
- Now, let the candy cool completely. Once it’s set and cool to the touch, break it into pieces. I love using my hands for this part; it feels so satisfying!
- Finally, melt 1 cup of semi-sweet chocolate chips in a microwave or on the stovetop. Once melted, dip those candy pieces in the chocolate to coat them, and place them back on the sheet to set. Oh boy, I can already taste the deliciousness!
And there you have it! Easy peasy Christmas candy that’ll bring smiles all around. Enjoy making this festive treat!
Why You’ll Love This Recipe
- Quick Preparation: You can whip this candy up in just 25 minutes! It’s perfect for those busy holiday schedules when you need a quick treat.
- Ease of Making: This recipe is super straightforward, even for beginner cooks! Just follow the simple steps, and you’ll be a candy-making pro in no time.
- Delicious Flavors: The combination of vanilla and nuts, along with the chocolate coating, creates a mouthwatering treat that everyone will adore.
- Festive Appeal: There’s something about homemade candy that brings a festive spirit to the table. It makes for a wonderful addition to holiday gatherings or as gifts for loved ones!
- Customizable: Want to switch things up? You can easily add different nuts, dried fruits, or flavorings to suit your taste. The possibilities are endless!
Tips for Success
Want to make sure your Christmas candy turns out perfectly every time? Here are some pro tips that I swear by!
Use a Candy Thermometer
This is a game changer! A candy thermometer takes the guesswork out of cooking sugar. When you reach that 300°F mark, you’ll know you’re in the sweet spot for hard crack stage. Trust me, it’s worth the investment!
Keep an Eye on Your Sugar Mixture
While your mixture is boiling, resist the urge to stir. Once it starts bubbling, just let it do its thing! Stirring can cause crystallization, and we want that smooth candy texture. So, be patient and watch for that beautiful golden hue!
Grease Your Baking Sheet Well
Before pouring the candy mixture, make sure your baking sheet is well-greased. This helps in easy removal later. You can even line it with parchment paper for extra protection against sticking. You’ll thank yourself later when it comes time to break it apart!
Cool Completely Before Breaking
Let the candy cool completely in the pan before you start breaking it into pieces. If you rush this step, the candy might not set properly and can end up being too sticky. Patience is key here, my friends!
Experiment with Toppings
Once you’ve coated your candy pieces with chocolate, consider sprinkling them with sea salt, crushed peppermint, or even festive sprinkles before the chocolate sets. These little touches can elevate your candy and make it extra special for the holidays!
With these tips in your back pocket, you’ll be well on your way to creating the most delightful Christmas candy that everyone will love. Happy candy-making!
Variations
One of the best things about this Christmas candy easy recipe is how adaptable it is! You can truly make it your own by trying out different ingredients. Here are some fun variations to spark your creativity:
- Nutty Delights: Switch things up by using different nuts. Instead of just the usual chopped walnuts or pecans, try almonds, hazelnuts, or even pistachios for a unique twist. Each nut adds its own flavor and crunch!
- Dried Fruit Additions: For a fruity kick, consider adding dried fruits like cranberries, apricots, or raisins. Just chop them up and mix them in with the nuts. The sweetness and chewiness of the fruits will complement the candy beautifully.
- Flavor Infusions: Want to give your candy an extra flavor boost? You can experiment with different extracts! Almond extract or even a hint of orange or peppermint extract can elevate the taste and make it more festive.
- Chocolate Variations: While semi-sweet chocolate is delicious, don’t be afraid to mix it up with dark chocolate, white chocolate, or even milk chocolate. You could even swirl together different types of chocolate for a stunning look!
- Spiced Up Treats: Add a sprinkle of cinnamon, nutmeg, or even cayenne pepper for a spicy twist. This unexpected flavor adds depth and warmth, perfect for the holiday season.
- Decorative Touches: After coating your candy with chocolate, you can get creative with toppings! Think crushed candy canes, colorful sprinkles, or a drizzle of contrasting chocolate to make them even more festive.
These variations are just the beginning! Feel free to experiment and let your imagination run wild. It’s all about creating a candy that not only tastes incredible but also reflects your personal touch. Happy experimenting!
Storage & Reheating Instructions
Once you’ve made your delicious Christmas candy, you’ll want to keep it fresh and tasty for as long as possible. Storing it properly is key, so here’s how to do it right!
First off, make sure your candy is completely cool before you store it. Once it’s set, place the pieces in an airtight container. This helps to keep that delightful crunch and prevents moisture from sneaking in. I always recommend using a container that fits the candy snugly, so there’s minimal movement and breakage.
When it comes to storing, keep your candy in a cool, dry place. A kitchen cabinet or pantry works great, but avoid leaving it out in the open where it could be exposed to heat or humidity. It’ll stay fresh for about 1 to 2 weeks, but trust me, it’s so good, it might not last that long!
If you find yourself with leftovers (lucky you!), you can even freeze the pieces for longer storage. Just make sure to layer them between parchment paper and seal them well in a freezer-safe container or bag. They should last up to 2 months in the freezer. When you’re ready to enjoy them, simply take them out and let them thaw at room temperature for a bit – no need to reheat!
Now, if you ever find yourself wanting to bring that delicious candy back to life, you can gently reheat it. Pop your chocolate-coated pieces in the microwave for a few seconds, just enough to soften the chocolate slightly. Be careful not to overheat, as you don’t want to lose that delightful texture!
With these storage and reheating tips, you’ll always have your Christmas candy ready to go whenever the craving hits! Enjoy every sweet bite!
Nutritional Information
As with any sweet treat, it’s good to know what you’re indulging in. Here’s the estimated nutritional breakdown for one piece of this delightful Christmas candy:
- Calories: 150
- Fat: 7g
- Saturated Fat: 3g
- Unsaturated Fat: 4g
- Trans Fat: 0g
- Carbohydrates: 20g
- Sugar: 20g
- Fiber: 1g
- Protein: 2g
- Sodium: 5mg
- Cholesterol: 0mg
Keep in mind that these values are approximate and can vary based on the specific ingredients you use, especially if you decide to mix in different nuts or fruits. It’s always nice to enjoy something sweet, but moderation is key when it comes to holiday treats. Happy indulging!
FAQ Section
Q1. How should I store my Christmas candy?
To keep your candy fresh, store it in an airtight container once it’s completely cool. This prevents moisture from getting in and helps maintain that delightful crunch. A cool, dry place like a pantry or kitchen cabinet is perfect for storage.
Q2. Can I use different types of nuts in this recipe?
Absolutely! This recipe is super versatile. You can swap in any nuts you love, like almonds, hazelnuts, or even pistachios for a fun twist. Just chop them up and mix them in with the other ingredients. Each nut brings its own unique flavor!
Q3. How long does this Christmas candy last?
When stored properly in an airtight container, your Christmas candy should stay fresh for about 1 to 2 weeks. But let’s be honest, it’s so delicious that it might not last that long! If you have leftovers, you can freeze the candy for up to 2 months.
Q4. Can I add dried fruits to the candy?
Yes, you can! Dried fruits like cranberries, apricots, or raisins make a delightful addition. Just chop them up and mix them in with the nuts before pouring the candy onto the baking sheet. The sweetness and chewiness of the fruits will be a fantastic contrast to the crunchy candy!
Q5. What if my candy turns out too sticky?
If your candy is too sticky, it might not have reached the hard crack stage (300°F) during cooking. Make sure to use a candy thermometer next time to ensure you hit that perfect temperature. If it’s already made and sticky, you can try refrigerating it for a bit to firm it up before breaking it into pieces.
Q6. Is it possible to make this candy without a candy thermometer?
While a candy thermometer is super helpful, you can still make the candy without one! Just keep a close eye on the mixture as it boils, watching for that beautiful golden color. You can also do the “cold water test” by dropping a small amount of the syrup into cold water; if it forms a hard ball, you’re ready to go!

Christmas Candy Easy: 5 Sweet Steps to Holiday Joy
- Total Time: 25 minutes
- Yield: 24 pieces 1x
- Diet: Vegetarian
Description
A simple recipe for making Christmas candy at home.
Ingredients
- 2 cups sugar
- 1 cup corn syrup
- 1 cup water
- 1 teaspoon vanilla extract
- 1/2 cup chopped nuts
- 1 cup chocolate chips
Instructions
- In a large saucepan, combine sugar, corn syrup, and water.
- Cook over medium heat, stirring until sugar dissolves.
- Bring to a boil without stirring until it reaches 300°F (hard crack stage).
- Remove from heat and stir in vanilla and nuts.
- Pour onto a greased baking sheet and spread evenly.
- Once cool, break into pieces and coat with chocolate.
Notes
- Make sure to use a candy thermometer.
- Store in an airtight container.
- Try adding different nuts or dried fruits.
- Prep Time: 15 minutes
- Cook Time: 10 minutes
- Category: Candy
- Method: Stovetop
- Cuisine: American
Nutrition
- Serving Size: 1 piece
- Calories: 150
- Sugar: 20g
- Sodium: 5mg
- Fat: 7g
- Saturated Fat: 3g
- Unsaturated Fat: 4g
- Trans Fat: 0g
- Carbohydrates: 20g
- Fiber: 1g
- Protein: 2g
- Cholesterol: 0mg
Keywords: christmas candy easy


