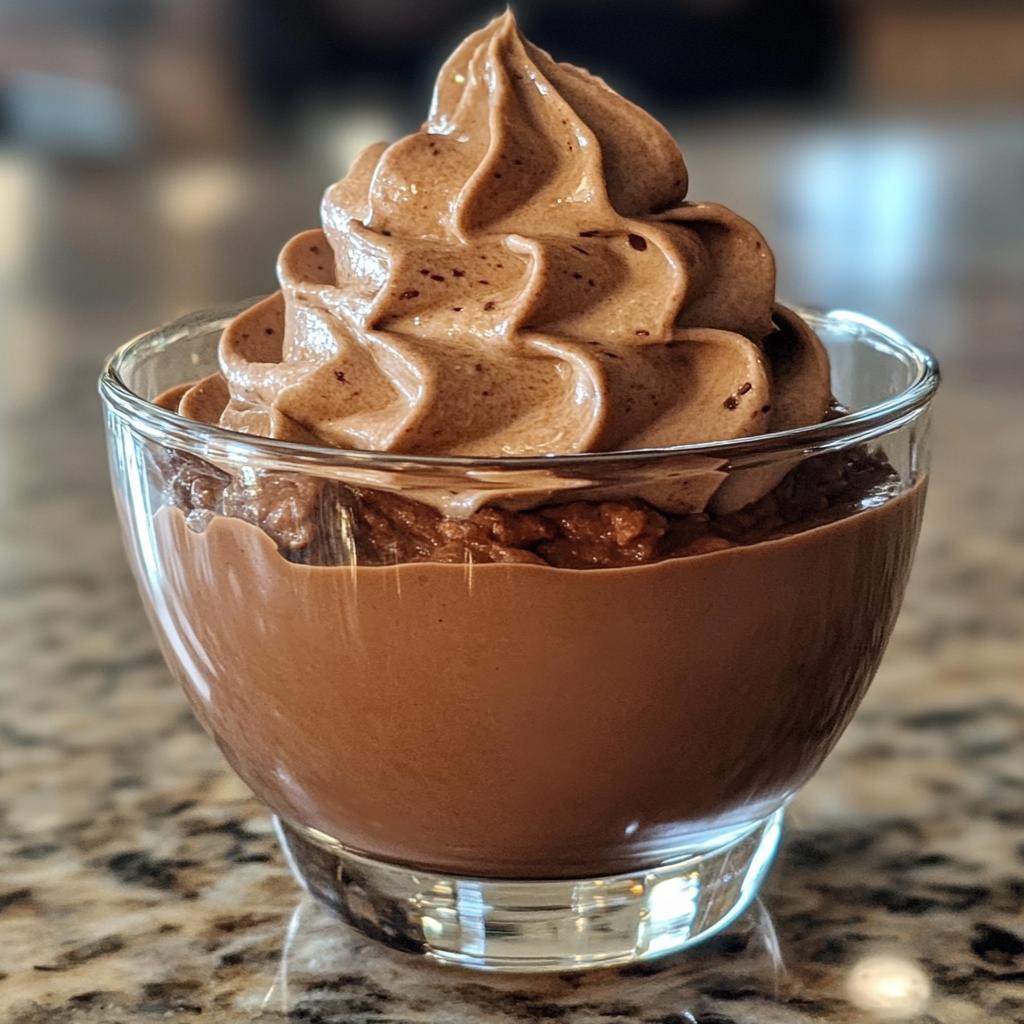
I’ll never forget the first time I tasted real chocolate mousse at my cousin’s wedding in Paris. That spoonful of airy, rich chocolate heaven made me realize why this dessert is the star of every celebration. Now, my Chocolate Mousse Celebration Cups have become a must-have at all our family gatherings – they’re that good. What I love most? They look fancy but are surprisingly simple to make. Just a few quality ingredients and some patience while they chill transforms into pure magic. The best part? You get to skip the oven entirely – perfect for hot summer parties when you’d rather not heat up the kitchen!
Why You’ll Love These Chocolate Mousse Celebration Cups
Trust me, once you try these, you’ll never go back to store-bought mousse again. Here’s why:
- No oven required – perfect for hot days or tiny kitchens
- Foolproof elegance – looks like you spent hours (but takes just 20 minutes active time)
- Rich yet light – that magical balance between decadent and airy
- Customizable – serve in fancy glasses, mason jars, or even espresso cups
- Crowd-pleaser – works for date nights, dinner parties, or just treating yourself
My favorite part? Watching people’s eyes light up when they take that first spoonful!
Ingredients for Chocolate Mousse Celebration Cups
Here’s the beautiful thing – you only need six simple ingredients to create magic. But quality matters here, especially with the chocolate. I learned this the hard way when I once tried using bargain chocolate chips – never again!
- 200g dark chocolate (60-70% cocoa) – chopped roughly so it melts evenly
- 4 large eggs – separated (save those yolks!) and at room temperature
- 50g granulated sugar – divided for yolks and whites
- 200ml heavy cream – chilled is best for whipping
- 1 tsp pure vanilla extract – or scrape a vanilla bean if you’re feeling fancy
- Pinch of fine sea salt – just enough to balance the sweetness
Pro tip: Measure everything before starting – this recipe moves fast once you begin!
Equipment You’ll Need
Don’t worry – you probably have most of this in your kitchen already! Here’s what you’ll need to whip up these dreamy Chocolate Mousse Celebration Cups:
- Heatproof bowl – for melting chocolate without disasters
- Electric mixer – hand or stand, your arms will thank you
- Rubber spatula – for gentle folding (no deflating our fluffy mousse!)
- 6 individual serving cups – I use vintage teacups for charm, but mason jars work great too
That’s it! No fancy gadgets required – just good old-fashioned whisking and folding magic.
How to Make Chocolate Mousse Celebration Cups
Now for the fun part – turning these simple ingredients into silky, cloud-like mousse! Follow these steps carefully, and you’ll have perfect results every time. I’ve made this recipe dozens of times (okay, maybe hundreds), and these are the secrets I’ve learned along the way.
Melting the Chocolate
First things first – let’s melt that chocolate properly. I always use a double boiler (just a heatproof bowl over simmering water) because it’s gentler than microwaving. Chop your chocolate roughly so it melts evenly – no one wants chocolate lumps in their mousse! Stir occasionally until it’s about 75% melted, then take it off the heat. The residual heat will finish the job as you stir. Let it cool slightly – you don’t want scrambled eggs when we add the yolks!
Preparing the Egg Mixtures
Here’s where things get science-y! Separate those eggs carefully – even a speck of yolk in the whites can ruin everything. Beat the yolks with half the sugar until they’re pale and ribbon-like – about 3 minutes. Now for the whites: start beating them with clean beaters until foamy, then gradually add the remaining sugar. Keep going until you get stiff peaks that hold their shape when you lift the beater. Whip the cream separately to soft peaks with the vanilla – don’t overdo it or you’ll get butter!
Combining the Ingredients
This is the make-or-break step! Fold the melted chocolate into the yolk mixture first – it should look like chocolate pudding. Then gently fold in the whipped cream (I do this in two additions). Now the magic touch: fold in the egg whites in three batches using a rubber spatula. Go slow and scrape from the bottom – we want to keep all that precious air in the mixture. Stop as soon as no white streaks remain, even if it looks a bit marbled.
Chilling and Serving
Spoon the mousse into your chosen cups, leaving room for toppings if you like. Here’s my secret – I always smooth the tops with the back of a spoon dipped in hot water for that perfect cafe-style finish. Now the hardest part – waiting! Chill for at least 4 hours, though overnight is even better. The mousse sets beautifully and the flavors deepen. Serve chilled with whatever toppings make your heart sing – berries, shaved chocolate, or just a dollop of extra whipped cream!
Tips for Perfect Chocolate Mousse Celebration Cups
After years of trial and error (and a few chocolate disasters), here are my foolproof tips for mousse success:
- Room temp eggs whip better – take them out 30 minutes before starting
- Watch that cream – stop whipping when it forms soft peaks that barely hold their shape
- Fold gently – treat the egg whites like fragile clouds to keep that airy texture
- Chill your bowl – cold equipment helps cream whip faster
- Patience pays – don’t rush the chilling time or you’ll get soup instead of mousse!
My biggest lesson? Good chocolate makes all the difference – splurge on the best you can afford!
Ingredient Substitutions & Notes
Life happens, and sometimes you need to improvise! Here are my tested swaps that still deliver delicious results:
- Milk chocolate lovers? Use 180g milk chocolate + 20g cocoa powder for balance
- Dairy-free? Coconut cream whips beautifully instead of heavy cream
- Out of vanilla? A tablespoon of strong coffee or orange liqueur adds depth
- Egg-free version? Whip aquafaba (chickpea liquid) instead of egg whites – same technique!
One rule I never break? Always use real chocolate – chips contain stabilizers that can ruin the texture!
Serving Suggestions for Chocolate Mousse Celebration Cups
Oh, the fun part – dressing up these beauties! I love topping mine with fresh raspberries (their tartness cuts the richness perfectly) and a dusting of cocoa powder. For dinner parties, I’ll add a dollop of barely-sweetened whipped cream and chocolate shavings – so elegant! If you’re feeling fancy, serve with tiny spoons and espresso shots for dipping. Honestly? They’re dreamy all on their own too – sometimes simplicity wins.
Storage & Reheating
These little cups of joy keep beautifully in the fridge for up to 3 days – just cover them with plastic wrap touching the surface to prevent skin from forming. And reheating? Don’t even think about it! The magic is in that chilled, cloud-like texture. I’ve tried sneaking one straight from the fridge at midnight more times than I’d care to admit – no shame in my game!
Nutritional Information
Each Chocolate Mousse Celebration Cup contains approximately 320 calories. Remember – these values are estimates and will vary based on your specific ingredients and portion sizes. If you’re counting macros, always check your product labels!
Frequently Asked Questions
Q1. Can I make these chocolate mousse cups ahead of time?
Absolutely! In fact, they taste even better after chilling overnight. The flavors deepen beautifully. Just cover them well with plastic wrap (press it right against the surface to prevent drying) and they’ll keep perfectly for up to 3 days in the fridge.
Q2. Why did my mousse collapse or turn grainy?
This usually happens from overmixing the egg whites or not folding gently enough. Treat those fluffy whites like delicate clouds! Another culprit could be chocolate that was too hot when added to the yolks – let it cool slightly first. And always use freshly whipped cream – if it starts to separate, your mousse will too.
Q3. Can I freeze chocolate mousse celebration cups?
I don’t recommend it. While technically possible, freezing changes the texture dramatically. The whipped elements lose their airiness and can become grainy when thawed. These are best enjoyed fresh from the fridge within a few days of making them.
Q4. Is it safe to eat raw eggs in mousse?
If you’re concerned, use pasteurized eggs (available at most grocery stores) or heat the yolks gently with a bit of the sugar to 160°F first. Personally, I’ve used fresh farm eggs for years without issue, but do what makes you comfortable! The risk is very low with quality eggs.
Q5. Can I make one big bowl instead of individual cups?
Of course! Just use a large serving bowl instead of individual cups. The chilling time might need an extra hour or two to set properly in the center. I sometimes do this for family gatherings – it’s fun to let everyone scoop their own portion!
Share Your Experience
I’d love to see your Chocolate Mousse Celebration Cups! Tag me @[YourHandle] on Instagram or leave a comment below – nothing makes me happier than seeing your creations (and midnight snack confessions!).
Print
Decadent Chocolate Mousse Celebration Cups in Just 20 Minutes
- Total Time: 4 hours 30 mins
- Yield: 6 servings 1x
- Diet: Vegetarian
Description
Rich and creamy chocolate mousse served in individual cups for a festive dessert.
Ingredients
- 200g dark chocolate
- 4 eggs, separated
- 50g sugar
- 200ml heavy cream
- 1 tsp vanilla extract
- Pinch of salt
Instructions
- Melt the dark chocolate in a heatproof bowl over simmering water. Let it cool slightly.
- Beat the egg yolks with half the sugar until pale and thick.
- Whip the heavy cream with vanilla extract until soft peaks form.
- In a clean bowl, beat the egg whites with a pinch of salt until foamy. Gradually add the remaining sugar and beat until stiff peaks form.
- Fold the melted chocolate into the egg yolk mixture, then gently fold in the whipped cream.
- Carefully fold in the egg whites until fully combined.
- Spoon the mousse into individual cups and refrigerate for at least 4 hours before serving.
Notes
- Use high-quality chocolate for best results.
- Ensure no egg yolk gets into the whites for proper whipping.
- Chill the mixing bowl and beaters before whipping cream.
- Prep Time: 20 mins
- Cook Time: 10 mins
- Category: Dessert
- Method: No-bake
- Cuisine: French
Nutrition
- Serving Size: 1 cup
- Calories: 320
- Sugar: 22g
- Sodium: 45mg
- Fat: 24g
- Saturated Fat: 14g
- Unsaturated Fat: 8g
- Trans Fat: 0g
- Carbohydrates: 25g
- Fiber: 3g
- Protein: 6g
- Cholesterol: 150mg
Keywords: chocolate mousse, dessert, no-bake, party, French


