Oh, let me tell you about the magic of homemade chili crisp! This spicy condiment is like a burst of flavor that can elevate any meal from ordinary to extraordinary in seconds. Trust me, once you’ve made this chili crisp recipe, you’ll find yourself reaching for it on everything from steaming bowls of noodles to grilled vegetables. It’s crunchy, it’s spicy, and it’s totally addictive!
The beauty of this recipe lies in its simplicity and versatility. You’ll be amazed at how just a handful of ingredients can transform your dishes into something truly special. With crispy garlic and onion mingling with fiery chili flakes, you’ll create a delightful texture that adds dimension to all your favorite foods. Plus, it’s vegan-friendly, making it the perfect addition for everyone at your table. I often whip up a batch on the weekend, and it lasts all week, making every dinner feel like a gourmet experience. So, if you’re ready to spice up your meals with this scrumptious homemade chili crisp, let’s dive in!
Ingredients for Chili Crisp Recipe
Now, let’s talk about the ingredients that come together to create this delicious chili crisp! Each component plays a crucial role in building that irresistible flavor and texture. Here’s what you’ll need:
Main Ingredients
- 1 cup vegetable oil: This is the base of your chili crisp. It helps to fry the garlic and onion, creating that beautiful crunch that elevates every bite. Feel free to use canola or peanut oil for a different flavor twist!
- 1/2 cup dried red chili flakes: The star of the show! These flakes give your chili crisp its signature heat. You can adjust the quantity to suit your spice tolerance—more flakes mean more fire!
- 1/4 cup minced garlic: Fresh garlic adds a warm, aromatic flavor. When cooked until golden, it becomes crispy and nutty, bringing a delightful crunch to the mix.
- 1/4 cup minced onion: Similar to the garlic, the onion will caramelize and add a sweet depth of flavor that complements the spiciness of the chili flakes beautifully.
- 2 tablespoons soy sauce: This provides a touch of umami and saltiness that rounds out all the flavors. You can use tamari if you’re looking for a gluten-free option!
- 1 tablespoon sesame seeds: These little gems add a nice crunch and a slight nuttiness. Plus, they look gorgeous sprinkled on top of your finished chili crisp!
- 1 teaspoon sugar: Just a pinch of sugar helps balance the heat and enhances the overall flavor profile. It’s a small but mighty ingredient!
Optional Ingredients
While the main ingredients create a fantastic chili crisp, there are a few optional additions you can consider to customize it further:
- Scallions: Adding finely chopped scallions can introduce a fresh, oniony flavor and a pop of color to your chili crisp.
- Peanuts or cashews: For an extra crunch, toss in some chopped nuts. They add texture and a delightful richness!
- Spices: Feel free to experiment with additional spices like ground ginger or a hint of paprika for different flavor profiles.
- Chili oil: If you want an even deeper chili flavor, add a couple of tablespoons of chili oil to the mix. Just be careful about the spice level!
These optional ingredients can take your chili crisp to new heights, so don’t hesitate to get creative! Mix and match according to your taste, and make this recipe your own!
How to Prepare the Chili Crisp Recipe
Now that we’ve got our ingredients ready, it’s time to bring this chili crisp to life! Don’t worry; it’s super simple, and I promise you’ll feel like a pro in your kitchen as you whip this up. Just follow these easy steps, and you’ll have a spicy, crunchy condiment that packs a punch!
Step-by-Step Instructions
- Heat the oil: Start by pouring 1 cup of vegetable oil into a saucepan. Place it over medium heat and let it warm up. You want it hot enough to sizzle but not smoking. This step is crucial because you’ll want to fry those aromatics to perfection!
- Add garlic and onion: Once the oil is shimmering, carefully add the 1/4 cup of minced garlic and 1/4 cup of minced onion. Stir them gently and keep an eye on them. You’re looking for a lovely golden color—this should take about 3-5 minutes. The aroma will be heavenly, trust me!
- In with the chili flakes: Now, it’s time to bring the heat! Stir in 1/2 cup of dried red chili flakes into the pan. This is where the magic happens! Cook for another 2 minutes, stirring constantly to prevent burning. You’ll see the vibrant red color deepen, and the spices will release their fragrance.
- Remove from heat: Take the saucepan off the heat and let it cool slightly for a few minutes. This is essential because you don’t want to add the soy sauce just yet—it could create a splatter if the oil is too hot!
- Mix in the finishing touches: After a brief cooling period, add 2 tablespoons of soy sauce, 1 tablespoon of sesame seeds, and 1 teaspoon of sugar to the mixture. Stir well to combine all those delicious flavors. It’s like a flavor explosion!
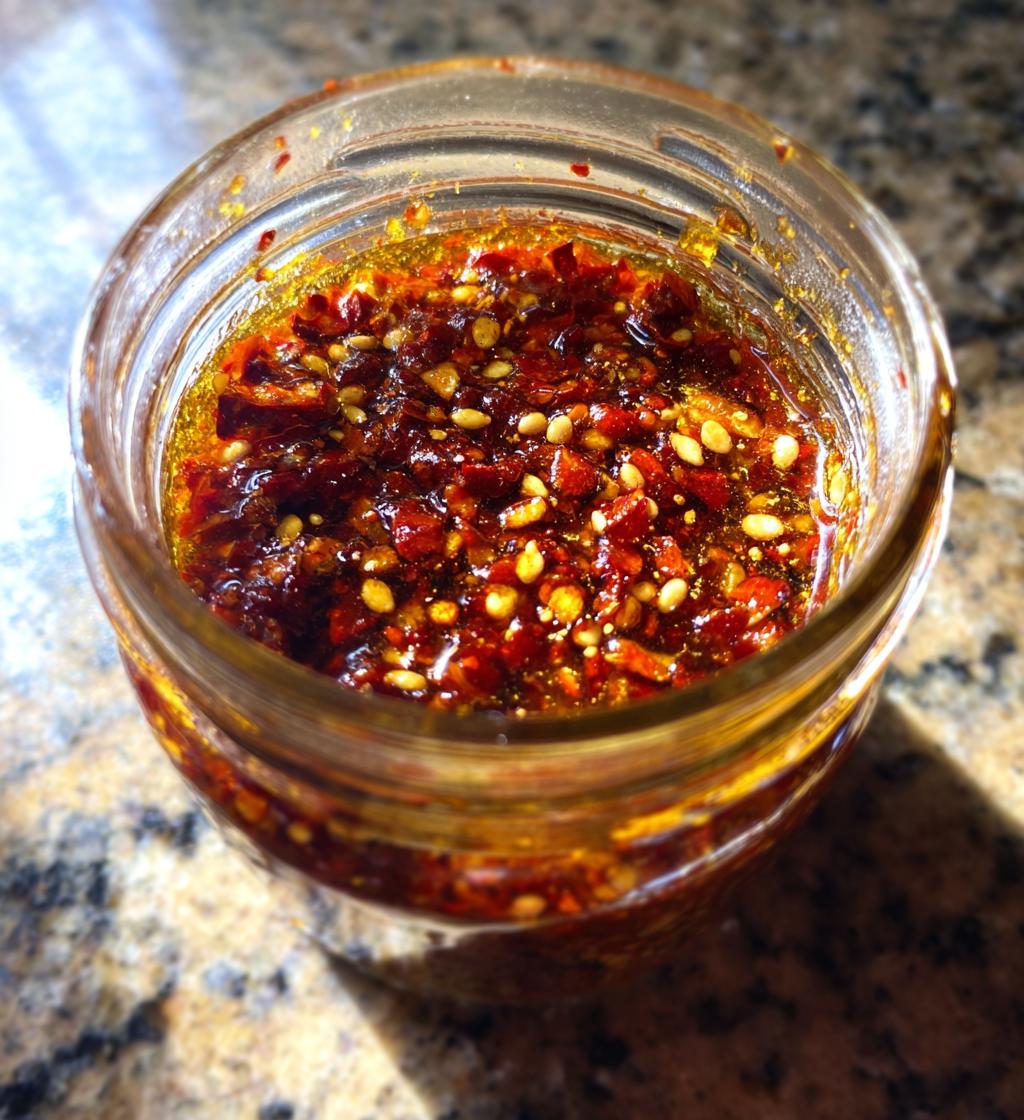
- Transfer to a jar: Finally, pour your chili crisp into a clean jar. Let it cool completely before sealing it. This will ensure that it stays fresh for longer and allows the flavors to meld beautifully.
And just like that, you’ve made your very own chili crisp! How easy was that? Now you can enjoy this crunchy delight on everything you can think of. Get ready to take your meals to the next level!
Why You’ll Love This Recipe
If you’re looking for a way to elevate your meals without spending hours in the kitchen, this chili crisp recipe is your answer! Making it at home is not just satisfying but also a total game-changer for your everyday cooking. You’ll find that once you have a jar of this spicy goodness on hand, your culinary creativity will soar!
Quick and Easy
Honestly, I can’t emphasize enough how quick and easy this recipe is! With just a few simple steps, you can whip up a batch in about 20 minutes. There’s no complicated technique involved—just heat, stir, and mix! Plus, the ingredients are likely things you already have in your pantry. It’s the perfect weekend project that yields a tasty condiment you can enjoy all week long!
Flavorful Addition
The flavor profile of this chili crisp is nothing short of incredible. Imagine the rich, nutty crunch of garlic and onion paired with the bold heat of chili flakes, all harmonized with a touch of umami from the soy sauce. Each spoonful delivers a satisfying crunch and a kick that transforms bland dishes into something exciting. You’ll be amazed at how this little jar can add depth and zest to everything from rice and noodles to roasted veggies!
Versatile Usage
Now let’s talk versatility! This chili crisp isn’t just limited to one type of cuisine; it’s like a passport for your taste buds! Drizzle it over Asian-inspired dishes like dumplings or fried rice, or use it as a topping for tacos or grilled meats. You can even mix it into salad dressings for an unexpected twist. The possibilities are endless, and I promise you’ll find yourself reaching for it again and again!
Tips for Success
Making the perfect chili crisp is all about attention to detail and a dash of personal flair! Here are some handy tips to ensure you get the best results each time you whip up this spicy delight.
Adjusting Spice Levels
One of the best parts about this chili crisp recipe is that you can easily tailor the heat to suit your palate. If you prefer a milder version, simply reduce the amount of dried red chili flakes. Start with 1/4 cup instead of 1/2 cup, and you can always add more later if you want extra kick! On the flip side, if you’re a spice aficionado, feel free to toss in some extra chili flakes or even a pinch of cayenne pepper for that fiery burst. Trust me, it’s all about finding your sweet spot with heat!
Storage Recommendations
To keep your chili crisp tasting fresh and delicious, store it in a clean, airtight jar in a cool, dark place. It’ll last for about 2-3 weeks on your pantry shelf. But if you want to extend its lifespan, consider keeping it in the fridge. Just make sure to let it come to room temperature before using it, as the oil may solidify a bit. Remember to always use a clean utensil when scooping it out to avoid any contamination. This way, you can enjoy that spicy crunch whenever the craving hits!
Nutritional Information
When it comes to the nutritional values of this chili crisp recipe, keep in mind that they can vary widely based on the specific ingredients and brands you use. The calculations provided here are estimates, so I encourage you to check your own ingredients for the most accurate values!
For a serving size of 1 tablespoon, here’s a general breakdown:
- Calories: 120
- Sugar: 1g
- Sodium: 200mg
- Fat: 14g
- Saturated Fat: 1.5g
- Unsaturated Fat: 12g
- Trans Fat: 0g
- Carbohydrates: 2g
- Fiber: 0g
- Protein: 0g
- Cholesterol: 0mg
Feel free to adjust the ingredients according to your dietary preferences or needs, and enjoy this flavorful addition to your meals without worry!
FAQ Section
How long can I store the chili crisp?
You’ll be happy to know that your homemade chili crisp can last for about 2-3 weeks when stored in a cool, dark place in an airtight jar. If you want to extend its life, pop it in the fridge! Just keep in mind that the oil may solidify a bit when cold, so let it warm up to room temperature before using it. Always use a clean spoon to scoop it out to keep it fresh and delicious for longer!
Can I use different oils?
Absolutely! While vegetable oil is my go-to for this chili crisp recipe, you can experiment with other oils too. Canola oil or peanut oil are great alternatives that offer different flavor profiles. If you want a more robust taste, try using sesame oil. Just be careful with that one; it’s quite flavorful, so you might want to mix it with a lighter oil to keep the balance. Each oil brings its unique character, so feel free to get creative!
Is this recipe gluten-free?
What can I serve with chili crisp?
The beauty of chili crisp is its versatility! You can drizzle it over a steaming bowl of noodles or rice, sprinkle it on top of dumplings, or mix it into stir-fries for an extra kick. It also pairs wonderfully with grilled meats, roasted vegetables, or even as a zesty topping for tacos. Get creative with it—the options are endless, and you’ll find yourself reaching for this spicy delight time and time again!
So, what are you waiting for? Dive into this chili crisp recipe and experience the explosion of flavor for yourself! I can’t wait for you to try it out and see how it transforms your meals. Once you whip up your first batch, don’t forget to come back and share your thoughts—did you love it? How did you use it in your dishes? I’m always eager to hear your stories and see how you’ve made this recipe your own!
Feel free to experiment with the spice levels or add your favorite twists—cooking is all about creativity! If you snap a photo of your chili crisp masterpiece, share it with me! Let’s keep this delicious conversation going, and together we’ll inspire each other to spice up our kitchens one jar at a time!
Print
Chili crisp recipe: 7 Irresistible Reasons to Make Your Own
- Total Time: 20 minutes
- Yield: 1 cup 1x
- Diet: Vegan
Description
This chili crisp recipe adds a spicy crunch to your meals.
Ingredients
- 1 cup vegetable oil
- 1/2 cup dried red chili flakes
- 1/4 cup minced garlic
- 1/4 cup minced onion
- 2 tablespoons soy sauce
- 1 tablespoon sesame seeds
- 1 teaspoon sugar
Instructions
- Heat the vegetable oil in a saucepan over medium heat.
- Add the minced garlic and onion, cooking until golden.
- Stir in the chili flakes and cook for another 2 minutes.
- Remove from heat and let it cool slightly.
- Add soy sauce, sesame seeds, and sugar. Mix well.
- Transfer to a jar and let it cool completely before sealing.
Notes
- Store in a cool, dark place.
- Adjust chili flakes to your spice preference.
- Use it as a topping for noodles, rice, or vegetables.
- Prep Time: 10 minutes
- Cook Time: 10 minutes
- Category: Condiment
- Method: Stovetop
- Cuisine: Asian
Nutrition
- Serving Size: 1 tablespoon
- Calories: 120
- Sugar: 1g
- Sodium: 200mg
- Fat: 14g
- Saturated Fat: 1.5g
- Unsaturated Fat: 12g
- Trans Fat: 0g
- Carbohydrates: 2g
- Fiber: 0g
- Protein: 0g
- Cholesterol: 0mg
Keywords: chili crisp recipe, spicy condiment, Asian cooking


