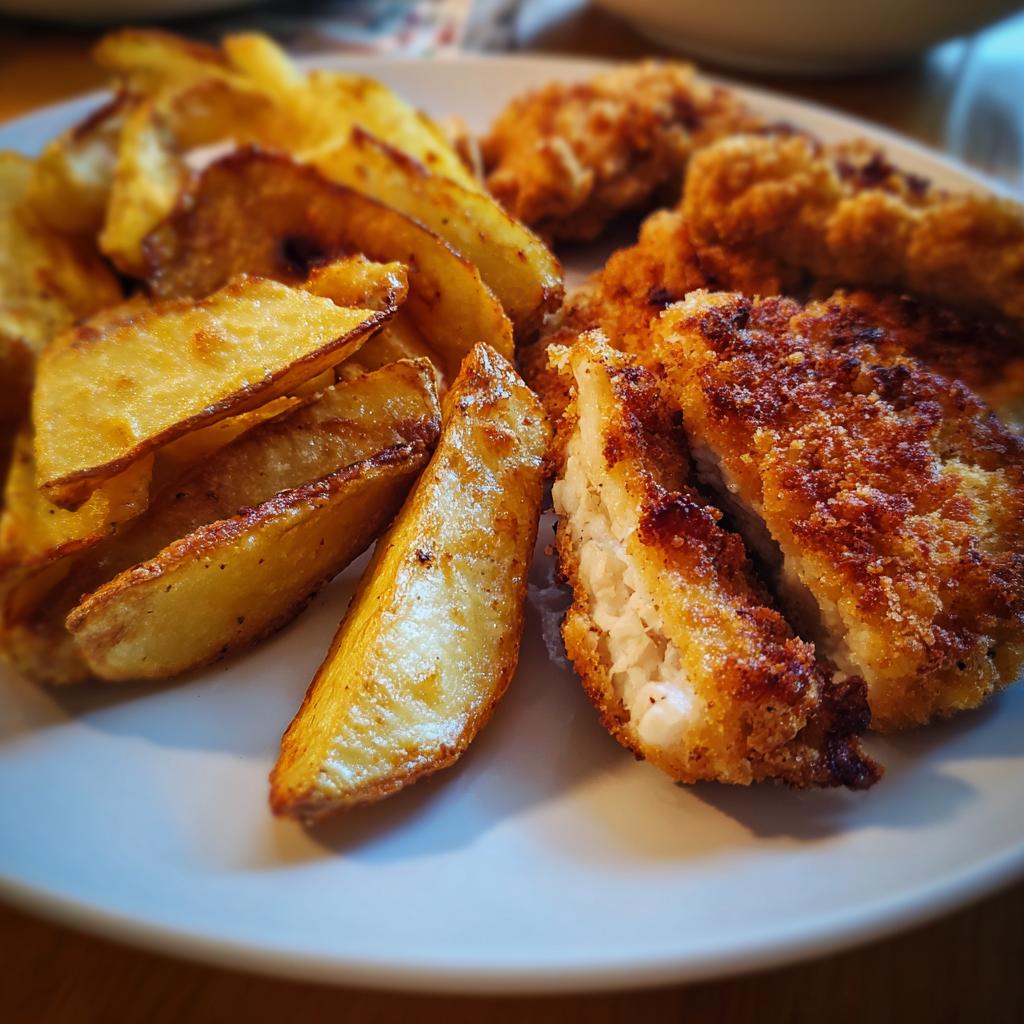
There’s something magical about the tradition of raising chicken fingers served with fried potatoes that takes me right back to childhood. That perfect crunch of golden-brown chicken strips paired with crispy potato wedges? Pure comfort food heaven. I remember begging my mom to make this for dinner after school – the smell alone would make my stomach growl!
What makes this dish so special is how simple ingredients transform into something extraordinary. The chicken stays juicy inside its crispy coating, while the potatoes get that irresistible golden crust. It’s the kind of meal that disappears fast – whether you’re feeding hungry kids or hosting a casual get-together with friends. And the best part? You probably have everything you need in your pantry right now.
Why You’ll Love the Tradition of Raising Chicken Fingers Served with Fried Potatoes
Listen, I know you’re going to adore this dish as much as I do – here’s why:
- That perfect crunch – The crispy breadcrumb coating on tender chicken and those golden potato wedges? Pure texture heaven!
- So simple to make – No fancy skills needed, just basic breading and baking. Even kids can help!
- Always a crowd-pleaser – Whether it’s family dinner or game night with friends, this combo disappears fast.
- Endless customization – Switch up the spices, try different breadcrumbs, or add your favorite dipping sauces.
- Comfort food magic – One bite and you’ll be transported back to those childhood dinners we all loved.
Ingredients for the Tradition of Raising Chicken Fingers Served with Fried Potatoes
Let me tell you about the simple but mighty ingredients that make this dish sing. I’ve tested this recipe countless times, and these exact measurements create that perfect balance of crispy and tender every time.
- 500g chicken breast – Cut into finger-sized strips (about 1-inch wide). Pro tip: slightly frozen chicken is easier to slice evenly!
- 1 cup all-purpose flour – This gives our coating its first crispy layer
- 2 large eggs – Beaten with a fork until smooth – this is our “glue”
- 1 cup breadcrumbs – Packed! I prefer Panko for extra crunch, but regular works too
- 1 tsp each salt & black pepper – The dynamic flavor duo
- 1 tsp paprika – For that gorgeous golden color and subtle smokiness
- 4 medium russet potatoes – Cut into wedges (leave the skin on for texture!)
- 2 tbsp vegetable oil – Divided – for frying chicken and coating potatoes
See? Nothing fancy, just real ingredients that work magic together. Now let’s get cooking!
Equipment You’ll Need
Don’t worry – you won’t need any fancy gadgets for this! Here’s what I always grab from my kitchen:
- Large frying pan – For those golden chicken fingers
- Baking tray – To crisp up the potato wedges
- 3 shallow bowls – For the flour, eggs, and breadcrumbs
- Tongs – To flip the chicken without losing your breading
- Cutting board & sharp knife – For prepping the chicken and potatoes
That’s it! Now let’s make some magic happen.
How to Prepare the Tradition of Raising Chicken Fingers Served with Fried Potatoes
Alright, let’s get cooking! I promise this is easier than it looks – just follow these steps and you’ll have golden, crispy perfection in no time. The secret is taking it one step at a time and not rushing the process.
Preparing the Chicken Fingers
First, set up your breading station – this is where the magic happens! I always line up three shallow bowls in this exact order:
- Flour mixture: Combine the flour with salt, pepper, and paprika in your first bowl. Give it a good whisk to blend those flavors.
- Egg wash: Crack those eggs into the second bowl and beat them until smooth – no streaks of white left!
- Breadcrumbs: Pour your breadcrumbs into the last bowl. Spread them out so you’ve got plenty of room to work.
Now for the fun part! Take each chicken strip and:
- Dredge in flour (shake off excess)
- Dip in eggs (let the extra drip off)
- Coat with breadcrumbs (press gently to help them stick)
Heat oil in your pan over medium heat – you’ll know it’s ready when a breadcrumb sizzles immediately. Cook the chicken in batches (don’t crowd the pan!) for 3-4 minutes per side until golden brown and crispy. Transfer to a paper towel-lined plate to drain.
Cooking the Fried Potatoes
While the chicken cooks, let’s get those potatoes going! Here’s my foolproof method:
- Preheat your oven to 200°C (400°F) – this is crucial for crispy results!
- Toss potato wedges with oil and a good pinch of salt. Arrange them in a single layer on your baking tray – no overlapping!
- Bake for 15 minutes, then flip each wedge. This ensures even browning.
- Continue baking another 10-15 minutes until they’re golden and crispy on the edges.
See? Simple as that! Now just plate everything up while it’s hot – the sizzle and smell will have everyone running to the table.
Tips for Perfect Chicken Fingers and Fried Potatoes
Here are my tried-and-true secrets for taking this dish from good to “wow!” – learned through many happy (and a few crispy-disaster) dinners:
- Panko power: Swap regular breadcrumbs for Panko – those Japanese-style flakes give an incredible crunch that stays crispy longer. I keep a bag in my pantry just for this recipe!
- Double-fry magic: For extra-crispy potatoes, try this trick – bake as directed, then give them a quick 2-minute broil at the end for ultimate crunch.
- Season smarter: Add garlic powder or smoked paprika to your breadcrumb mix for extra flavor dimension. My secret? A pinch of cayenne for subtle heat!
- Dry chicken = crispy chicken: Pat your chicken strips super dry with paper towels before breading – moisture is the enemy of crunch!
- Hot oil test: Toss in a breadcrumb before adding chicken – if it sizzles immediately, you’re golden (literally!).
Serving Suggestions for the Tradition of Raising Chicken Fingers
Oh, the fun part! These crispy chicken fingers and golden potatoes deserve the perfect partners. I always set out an assortment of dipping sauces – my family fights over the honey mustard (just mix mayo, mustard, and honey to taste). A simple green salad cuts through the richness beautifully. For game nights? Pile everything on a big platter with bowls of ketchup, ranch, and BBQ sauce – let everyone dig in family-style!
Storage and Reheating Instructions
Here’s how to keep your chicken fingers and potatoes tasting fresh and crispy – because let’s face it, leftovers are half the joy of this meal! Store them separately in airtight containers in the fridge for up to 3 days. When reheating, skip the microwave (it makes everything soggy) and use your oven at 180°C (350°F) for about 10 minutes. The potatoes might need a quick toss under the broiler at the end to revive their crunch. Trust me, it’s worth the extra step!
Nutritional Information
Now, I’m no nutritionist, but I do like knowing what’s going into my favorite comfort foods! Keep in mind these numbers can vary based on your exact ingredients and portion sizes. This is just a general guide from all my times making this dish.
For one serving (about 3-4 chicken fingers with a generous portion of potatoes), you’re looking at:
- Calories: Around 550
- Protein: A solid 35g (thanks, chicken!)
- Carbs: About 55g
- Fat: 22g (mostly from the oil we use for frying)
- Fiber: 5g (those potato skins help!)
Remember – this is comfort food, not health food! The numbers will change if you use different breadcrumbs, more or less oil, or swap sweet potatoes for regular. My philosophy? Enjoy every crispy, golden bite and maybe balance it with a salad tomorrow!
Frequently Asked Questions
Over the years, I’ve gotten so many questions about this recipe – here are the ones that pop up most often from friends and family (and my honest answers!):
Can I air-fry the chicken fingers instead of pan-frying?
Absolutely! My air fryer has become my best friend for this recipe. Just spray the breaded chicken with a bit of oil and cook at 200°C (400°F) for about 10 minutes, flipping halfway. They come out crazy crispy with way less oil – though I admit, sometimes I still crave that classic fried taste!
What’s the best potato substitute if I don’t have russets?
Sweet potatoes make an amazing alternative – just cut them slightly thinner since they take longer to cook. Yukon Golds are my second choice for their buttery texture. Honestly? I’ve even used carrot sticks when I was desperate – not traditional, but roasted with oil and salt? Delicious!
How do I keep the breading from falling off?
Three secrets: 1) Pat your chicken DRY before breading, 2) Let the breaded strips rest 5 minutes before frying (helps the coating set), and 3) Don’t move them around too much in the pan – let that first side get golden before flipping!
Can I prep this ahead of time?
You bet! I often bread the chicken strips and keep them in the fridge up to 4 hours before cooking. For the potatoes, cut them and soak in cold water (this prevents browning) until you’re ready to bake. Just dry them thoroughly before tossing with oil!

3 Secrets to Perfect Chicken Fingers and Fried Potatoes at Home
- Total Time: 45 minutes
- Yield: 4 servings 1x
- Diet: Low Lactose
Description
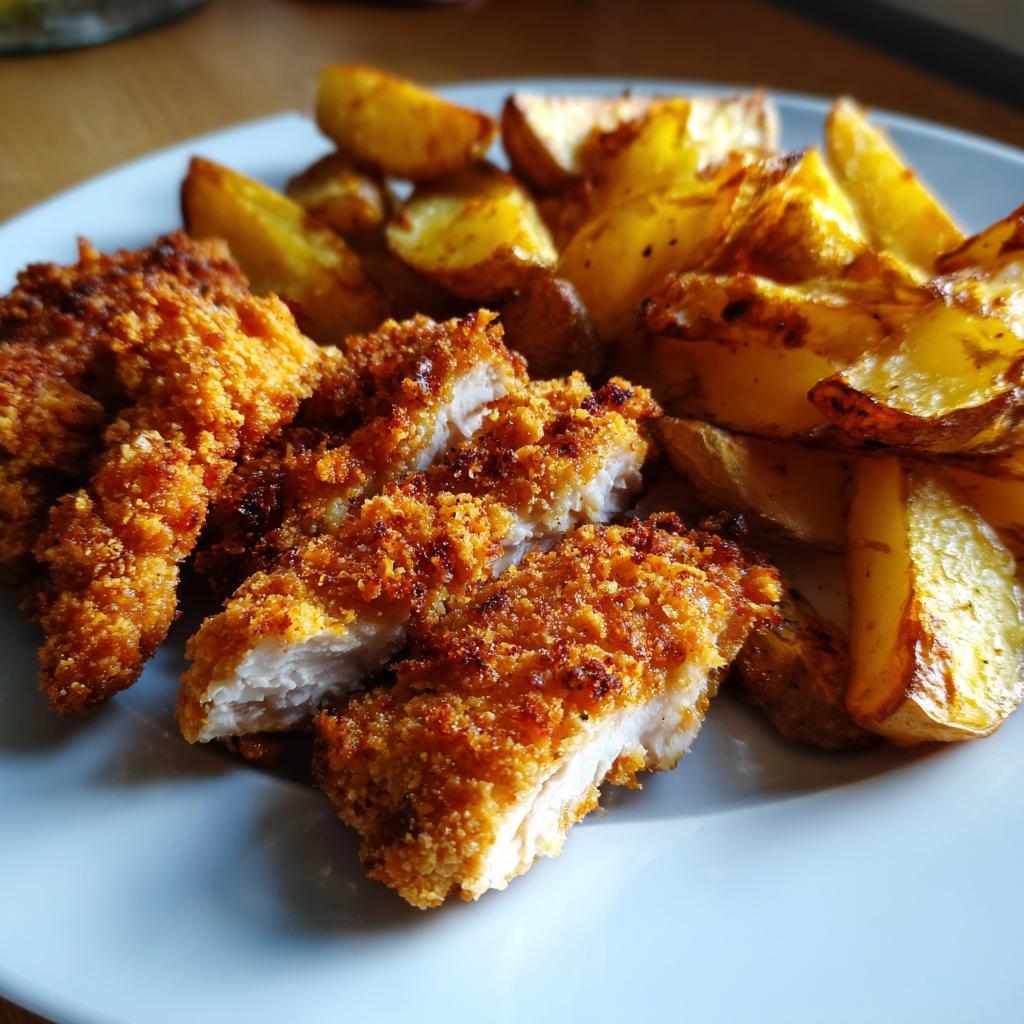
Chicken fingers served with fried potatoes is a classic comfort dish. Crispy chicken strips paired with golden fried potatoes make a satisfying meal.
Ingredients
- 500g chicken breast, cut into strips
- 1 cup all-purpose flour
- 2 eggs, beaten
- 1 cup breadcrumbs
- 1 tsp salt
- 1 tsp black pepper
- 1 tsp paprika
- 4 medium potatoes, cut into wedges
- 2 tbsp vegetable oil
Instructions
- Preheat oven to 200°C (400°F).
- Season chicken strips with salt, pepper, and paprika.
- Coat chicken in flour, dip in beaten eggs, then roll in breadcrumbs.
- Heat oil in a pan over medium heat. Fry chicken until golden brown, about 3-4 minutes per side.
- Place potato wedges on a baking tray. Drizzle with oil and season with salt.
- Bake potatoes for 25-30 minutes until crispy.
- Serve chicken fingers with fried potatoes.
Notes
- Use panko breadcrumbs for extra crispiness.
- Double-fry potatoes for extra crunch.
- Serve with your favorite dipping sauce.
- Prep Time: 15 minutes
- Cook Time: 30 minutes
- Category: Main Course
- Method: Frying, Baking
- Cuisine: American
Nutrition
- Serving Size: 1 serving
- Calories: 550
- Sugar: 3g
- Sodium: 800mg
- Fat: 22g
- Saturated Fat: 4g
- Unsaturated Fat: 15g
- Trans Fat: 0g
- Carbohydrates: 55g
- Fiber: 5g
- Protein: 35g
- Cholesterol: 150mg
Keywords: chicken fingers, fried potatoes, comfort food


