There’s nothing quite like waking up to the smell of warm cinnamon rolls baking in the oven. I still remember my mom pulling a pan of these out on Sunday mornings—the way the sweet cinnamon scent would drift through the whole house, pulling us all into the kitchen before they’d even cooled. That’s the magic of homemade cinnamon rolls.
After years of tweaking recipes (and plenty of trial and error!), I’ve perfected what I truly believe are the best homemade cinnamon rolls you’ll ever make. They’re soft and fluffy, with just the right amount of gooey cinnamon filling, and that creamy glaze dripping down the sides…oh my goodness. What makes them special? The dough rises like a dream, and that combination of brown sugar and cinnamon? Absolute perfection.
These aren’t just any cinnamon rolls—they’re the kind that disappear before they’ve barely left the oven. Trust me, once you try this recipe, you’ll understand why my family begs me to make them every holiday (and honestly, most weekends too).
Why You’ll Love These Best Homemade Cinnamon Rolls
Let me tell you why these cinnamon rolls have become legendary in my kitchen (and why they’ll be in yours too!):
- That perfect fluffy texture – The dough rises like a dream, giving you soft, pillowy rolls that practically melt in your mouth
- The rich glaze – Not too thick, not too thin, just the right amount of sweet vanilla goodness dripping down the sides
- Easy enough for beginners – No fancy techniques here, just simple steps anyone can follow
- That irresistible cinnamon-sugar filling – The brown sugar caramelizes slightly while baking, creating little pockets of gooey perfection
- They make any morning special – Whether it’s Christmas breakfast or just because it’s Tuesday, these rolls turn ordinary days into celebrations
Seriously, one bite and you’ll understand why my family starts hovering around the oven the second they smell these baking!
Ingredients for the Best Homemade Cinnamon Rolls
Here’s everything you’ll need to make these heavenly rolls – and trust me, using the right ingredients makes all the difference! I’ve grouped them so you can prep efficiently:
For the Dough:
- 4 cups all-purpose flour (plus extra for dusting)
- 1/4 cup granulated sugar – this helps activate the yeast
- 1 teaspoon salt – don’t skip this flavor booster!
- 1 packet (2 1/4 teaspoons) active dry yeast – check the expiration date!
- 1 cup warm milk – about 110°F (think warm bath temperature)
- 1/4 cup melted butter, cooled slightly (you don’t want to kill the yeast)
- 1 large egg – room temperature blends better
For That Irresistible Filling:
- 1/2 cup packed brown sugar – dark brown sugar gives deeper flavor
- 2 tablespoons ground cinnamon – use fresh, fragrant cinnamon
- 1/4 cup softened butter – softened but not melted, for easy spreading
For the Perfect Glaze:
- 1 cup powdered sugar – sifted if you’re fancy
- 2 tablespoons milk – whole milk makes it creamier
- 1/2 teaspoon vanilla extract – pure vanilla makes all the difference
See? Nothing too fancy – just good, quality ingredients that work together beautifully. Now let’s get mixing!
Equipment You’ll Need
Don’t worry—you don’t need anything fancy for these cinnamon rolls! Just grab:
- A large mixing bowl (or your trusty stand mixer if you have one)
- A rolling pin for that perfect rectangle
- A 9×13 inch baking dish (or any similar-sized pan)
- A sharp knife or piece of dental floss for clean cuts
- A measuring cups and spoons—because eyeballing cinnamon never works!
That’s it! Now let’s make some magic.
How to Make the Best Homemade Cinnamon Rolls
Alright, let’s get to the fun part! Making these cinnamon rolls is like a little kitchen ballet – each step flows into the next, and before you know it, you’ll have a pan of golden, gooey perfection. Follow along, and I’ll walk you through every detail that makes these truly special.
Preparing the Dough
First things first – let’s wake up that yeast! In your large mixing bowl, whisk together the flour, sugar, salt, and yeast. Make a little well in the center and pour in your warm milk (test it on your wrist – it should feel comfortably warm, not hot). Add the melted butter and egg, then stir everything together until it forms a shaggy dough.
Now comes the therapeutic part – kneading! Turn the dough out onto a lightly floured surface (go easy on the flour – too much makes tough rolls) and knead for about 5 minutes. You’ll know it’s ready when the dough springs back when you poke it lightly. Pop it back in the bowl, cover with a clean towel, and let it rise in a warm spot for 1 hour. It should double in size – I like to put mine near the oven (turned off!) with the light on for that perfect cozy environment.
Assembling the Filling
While your dough is rising, mix together your brown sugar and cinnamon in a small bowl – this is when my kitchen starts smelling amazing! Once your dough has risen, punch it down (so satisfying) and roll it out on a lightly floured surface into a rectangle about 16×12 inches. Here’s my pro tip: use your hands to gently stretch the edges if they keep shrinking back.
Spread the softened butter evenly over the dough, leaving about a half-inch border around the edges. Then sprinkle your cinnamon-sugar mixture over the butter like you’re frosting a cake – get every inch covered! I like to gently press the mixture into the butter with my hands so it doesn’t all fall out when we roll it up.
Rolling and Cutting the Rolls
Starting from the long side, tightly roll the dough into a log. If the ends are messy, just tuck them in as you go. Seal the edge by pinching the dough together – this keeps all that delicious filling inside where it belongs!
Now for the fun part – slicing! Use a sharp knife (or unflavored dental floss – just slide it underneath and cross the ends to cut cleanly) to slice the log into 12 even rolls. Don’t squish them! Place them in your greased baking dish with the swirl facing up, leaving a little space between each for rising. Cover them again and let them rise for 30 minutes – they’ll get all puffy and adorable.
Baking to Perfection
Preheat your oven to 375°F (190°C) while the rolls do their final rise. When they’re ready, pop them in the oven and prepare for the best smell ever! Bake for 20-25 minutes – you’ll know they’re done when they’re golden brown on top and sound slightly hollow when tapped. The sugar will be bubbling around the edges in the most tempting way.
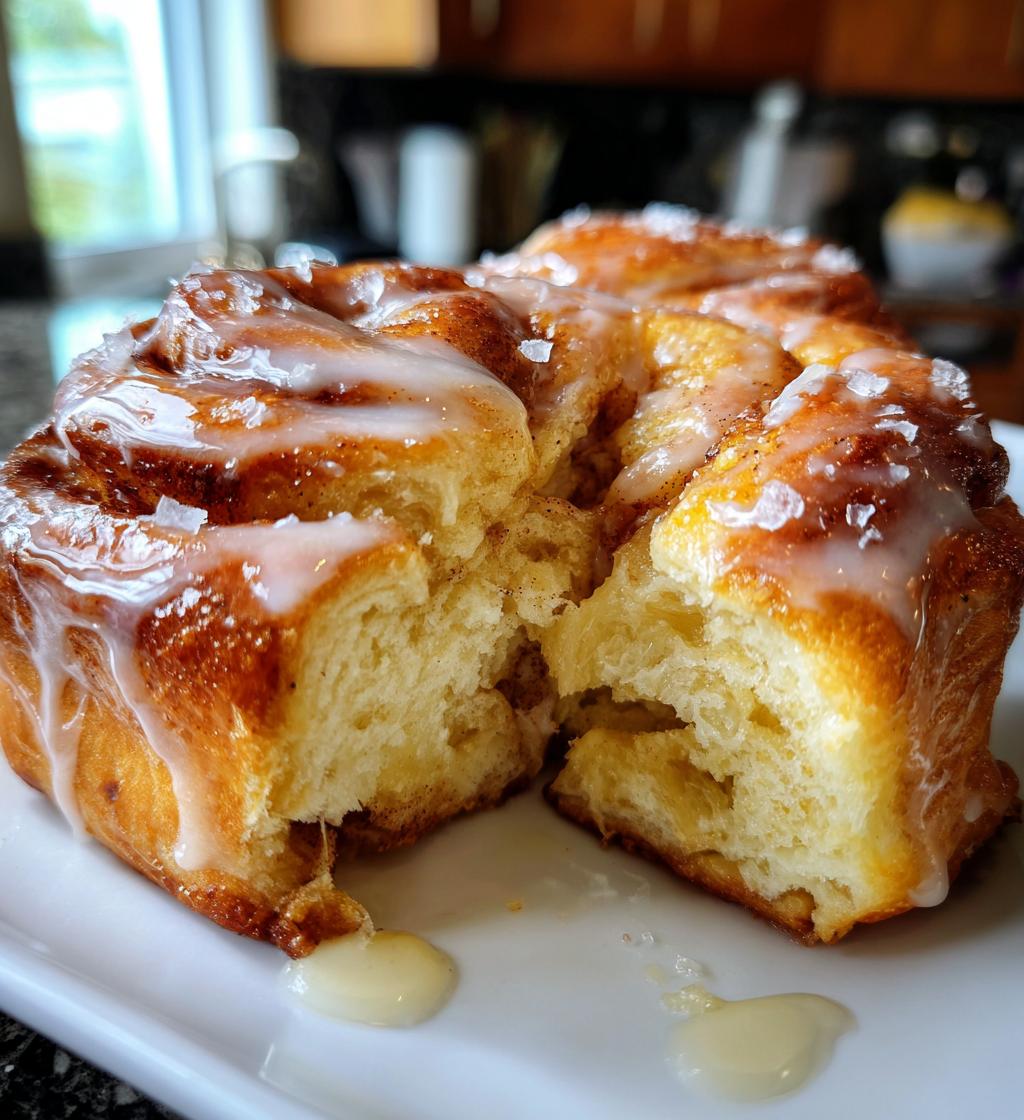
Pull them out and let them cool for just 5 minutes (good luck waiting longer!) before drizzling with that sweet vanilla glaze. The warmth helps the glaze soak in just enough while staying gloriously drippy on top. Now try not to eat the whole pan in one sitting – I dare you!
Pro Tips for the Best Homemade Cinnamon Rolls
After making these cinnamon rolls more times than I can count (and taste-testing every batch, obviously), I’ve picked up some game-changing tricks:
- Yeast check! Always test your yeast in warm milk with a pinch of sugar – if it doesn’t foam after 5 minutes, it won’t make your dough rise.
- Create a warm rising spot by placing your bowl on a heating pad set to low or in the oven with just the light on – cold kitchens are the enemy of fluffy rolls.
- Roll tightly but gently when forming your log – too loose and the filling spills, too tight and the centers pop up while baking.
- Use dental floss for clean cuts without squishing your beautiful spirals – just slide it under and pull the ends crosswise.
- Bake until golden, not dark brown – they’ll keep cooking slightly after coming out of the oven, so pull them when they look just done.
Trust me, these little tricks make all the difference between good rolls and knock-your-socks-off amazing ones!
Serving Suggestions
Oh, the possibilities! These cinnamon rolls shine brightest when they’re still warm from the oven – that’s when the glaze melts into all the nooks and crannies. My family loves them with a steaming cup of strong coffee (the perfect balance to all that sweetness). For special occasions, I’ll whip up a quick cream cheese frosting instead of the glaze – just beat together 4 oz softened cream cheese, 1/4 cup butter, 1 cup powdered sugar, and a splash of vanilla. Absolute heaven!
Storing and Reheating
These cinnamon rolls disappear fast at my house, but if by some miracle you have leftovers (good for you!), here’s how to keep them perfect. Store cooled rolls in an airtight container at room temperature for up to 2 days. To reheat, pop them in the microwave for 15-20 seconds or warm them in a 300°F oven for 5 minutes – just enough to bring back that fresh-from-the-oven magic.
Nutritional Information
Now, let’s be real – we’re not eating cinnamon rolls for their nutritional value, but I know some of you like to keep track (or need to justify that second roll!). Here’s the breakdown per cinnamon roll, but remember – these are estimates and can vary based on your specific ingredients and brands:
- Calories: 280
- Sugar: 18g
- Sodium: 200mg
- Fat: 8g (5g saturated)
- Carbohydrates: 48g
- Fiber: 2g
- Protein: 5g
- Cholesterol: 30mg
My philosophy? Everything in moderation – except maybe these cinnamon rolls when they’re fresh out of the oven. Then all bets are off! If you’re looking to lighten them up slightly, you can try using half whole wheat flour or reducing the sugar in the filling by a tablespoon or two. But honestly? Sometimes you just need to enjoy the real deal.
FAQs About the Best Homemade Cinnamon Rolls
I get so many questions about these cinnamon rolls – here are the ones that come up most often! These tips will help you make them perfectly every time.
Can I make these cinnamon rolls ahead?
Absolutely! Prepare them up to the second rise, then cover tightly and refrigerate overnight. In the morning, let them sit at room temperature for 30 minutes while your oven preheats, then bake as usual. The slow rise in the fridge actually develops more flavor!
Can I freeze homemade cinnamon rolls?
Yes! Freeze baked rolls (with or without glaze) in an airtight container for up to 3 months. Thaw at room temperature, then warm in a 300°F oven for 5 minutes. You can also freeze the unbaked rolls after shaping – just thaw overnight in the fridge before their final rise.
Why didn’t my dough rise properly?
Usually it’s one of three things: old yeast (always check the expiration date!), milk that was too hot (it should feel warm, not hot, on your wrist), or a drafty rising spot. Try placing your bowl in the oven with just the light on next time – it creates the perfect cozy environment.
Can I use instant yeast instead of active dry?
You sure can! Use the same amount but mix it right into your dry ingredients – no need to proof it in warm liquid first. The rising times will be slightly shorter, so keep an eye on your dough.
My filling always leaks out – help!
Two tricks: first, leave that half-inch border when spreading butter. Second, after sprinkling the cinnamon-sugar, gently press it into the butter with your hands. This helps it stick better when rolling. And don’t overfill – that 1/2 cup brown sugar measurement is perfect!
Best Homemade Cinnamon Rolls: 12 Perfectly Fluffy Bites
- Total Time: 1 hour 55 minutes
- Yield: 12 rolls 1x
- Diet: Vegetarian
Description
Fluffy, sweet cinnamon rolls with a rich glaze, perfect for breakfast or dessert.
Ingredients
- 4 cups all-purpose flour
- 1/4 cup granulated sugar
- 1 tsp salt
- 1 packet active dry yeast
- 1 cup warm milk
- 1/4 cup melted butter
- 1 large egg
- 1/2 cup brown sugar
- 2 tbsp ground cinnamon
- 1/4 cup softened butter (for filling)
- 1 cup powdered sugar (for glaze)
- 2 tbsp milk (for glaze)
- 1/2 tsp vanilla extract (for glaze)
Instructions
- Mix flour, sugar, salt, and yeast in a bowl.
- Add warm milk, melted butter, and egg. Stir until dough forms.
- Knead dough for 5 minutes, then let it rise for 1 hour.
- Roll dough into a rectangle and spread softened butter on top.
- Sprinkle brown sugar and cinnamon evenly over the dough.
- Roll dough tightly and cut into 12 pieces.
- Place rolls in a greased baking dish and let rise for 30 minutes.
- Bake at 375°F for 20-25 minutes.
- Mix powdered sugar, milk, and vanilla for the glaze.
- Drizzle glaze over warm rolls before serving.
Notes
- Use fresh yeast for best results.
- Let dough rise in a warm place.
- Adjust cinnamon and sugar to your taste.
- Store leftovers in an airtight container.
- Prep Time: 1 hour 30 minutes
- Cook Time: 25 minutes
- Category: Dessert
- Method: Baking
- Cuisine: American
Nutrition
- Serving Size: 1 roll
- Calories: 280
- Sugar: 18g
- Sodium: 200mg
- Fat: 8g
- Saturated Fat: 5g
- Unsaturated Fat: 2g
- Trans Fat: 0g
- Carbohydrates: 48g
- Fiber: 2g
- Protein: 5g
- Cholesterol: 30mg
Keywords: best homemade cinnamon rolls, easy cinnamon rolls, sweet breakfast recipe


