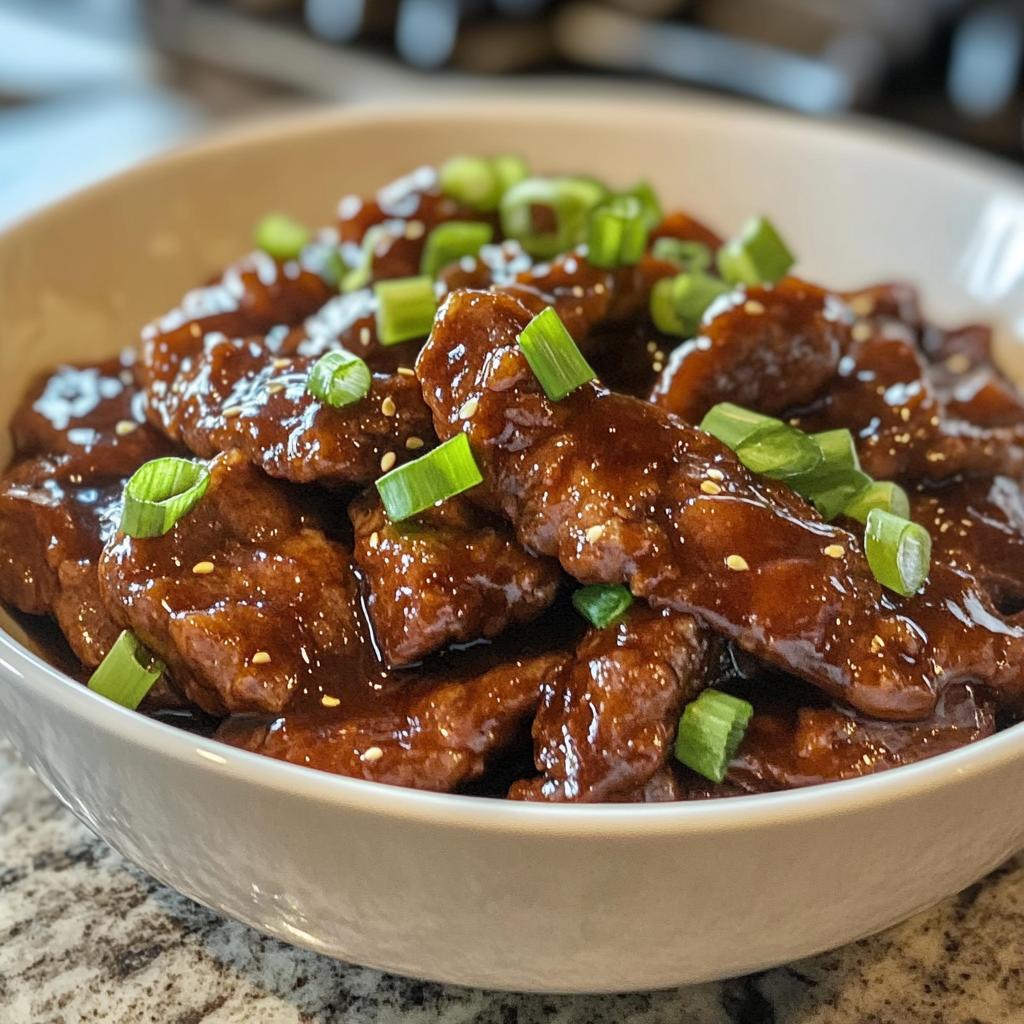
You know those nights when you’re starving but don’t want to spend hours in the kitchen? That’s when my 30-Minute Mongolian Beef swoops in to save the day! I swear by this recipe – it’s faster than waiting for takeout and tastes even better. The first time I made it, my husband thought I’d ordered in! The secret? That magical combo of crispy beef and sticky-sweet sauce that comes together in literally half an hour. Now it’s our go-to when we’re craving something indulgent but don’t have all night to cook. Trust me, once you try this, those greasy takeout menus will start collecting dust.
Why You’ll Love This 30-Minute Mongolian Beef
Let me count the ways this recipe will become your new weeknight hero! Here’s why I’m obsessed:
- Faster than takeout: Seriously – by the time you’d be waiting for delivery, you could be sitting down to eat. The whole thing comes together in the time it takes to cook rice!
- Minimal ingredients, maximum flavor: Just pantry staples like soy sauce and brown sugar transform into this rich, glossy sauce that coats every piece of beef perfectly.
- Restaurant-quality at home: That perfect balance of sweet and savory? The crispy-edged beef? You’ll swear you’re eating at your favorite Chinese spot.
- Endlessly adaptable: Too sweet? Cut back the sugar. Want heat? Add some chili flakes. I’ve even swapped in chicken when that’s what I had on hand!
Honestly, the hardest part is resisting going back for seconds (though I never manage to resist).
Ingredients for 30-Minute Mongolian Beef
Okay, let’s raid the pantry! Here’s everything you’ll need to make magic happen in 30 minutes flat. I’ve learned through trial and error (mostly error) that these exact ingredients make all the difference:
- 1 lb flank steak – Thinly sliced against the grain (this is KEY for tenderness – I’ll show you how in the next section!)
- 1/4 cup cornstarch – The secret weapon for getting that perfect crispy coating on the beef
- 2 tbsp vegetable oil – Any neutral oil works, but I swear by peanut oil when I have it
- 1/2 cup soy sauce – Regular or low-sodium (I use low-sodium because I’m heavy-handed with the sauce!)
- 1/2 cup brown sugar – Packed lightly – dark brown sugar adds extra depth if you’ve got it
- 1/4 cup water – Just plain tap water works fine here
- 3 cloves garlic – Minced (or more – I won’t judge if you double this!)
- 1 tsp fresh ginger – Grated (the jarred stuff works in a pinch, but fresh makes all the difference)
- 2 green onions – Thinly sliced for garnish (I always grab extra because they make everything prettier)
See? Nothing fancy or hard-to-find! The beauty of this recipe is how simple ingredients transform into something spectacular. Now let’s get cooking!
How to Make 30-Minute Mongolian Beef
Alright, let’s get cooking! I’ve made this recipe probably a hundred times now (not even exaggerating), and I’ve learned all the little tricks to make it perfect every time. Follow these steps, and you’ll have restaurant-worthy Mongolian beef on your table before you know it!
Step 1: Prep the Beef
First things first – that flank steak needs some love. Here’s my foolproof method:
- Chill the steak in the freezer for about 15 minutes first – it makes slicing way easier
- Find the grain (those long lines running through the meat) and slice against it – this is the secret to tender beef that doesn’t chew like shoe leather
- Cut into thin strips, about 1/4 inch thick – no need to measure exactly, just think “stir-fry thickness”
- Toss the slices in a bowl with the cornstarch until evenly coated – I use my hands to really get in there
Pro tip: Let the coated beef sit for a few minutes while you prep everything else. The cornstarch forms a better crust this way!
Step 2: Cook the Beef
Now for the fun part – that sizzle is so satisfying!
- Heat your oil in a large skillet or wok over high heat – we’re talking ripping hot here
- Cook the beef in batches – don’t overcrowd or you’ll steam it instead of browning (learned this the hard way!)
- Let each piece get a nice sear before stirring – about 1 minute per side
- Remove to a plate when browned but not fully cooked through – it’ll finish in the sauce later
Don’t worry if some cornstarch sticks to the pan – it’ll dissolve into the sauce and make it even thicker and more delicious!
Step 3: Make the Sauce
This is where the magic happens. That glossy, sticky sauce comes together in minutes:
- In the same pan (all those browned bits = flavor!), add the garlic and ginger – stir for just 30 seconds until fragrant
- Pour in the soy sauce, brown sugar, and water – the sugar will look like a lot, but trust the process
- Bring to a boil, stirring constantly until the sugar dissolves completely
- Let it bubble away for about 2 minutes – you’ll see it thicken and become glossy like a proper stir-fry sauce
- Return the beef to the pan and toss to coat – the sauce will cling to every piece beautifully
The moment you see that sauce coating the beef just right? That’s when you know you’ve nailed it! Finish with a handful of green onions and get ready to impress yourself.
Tips for Perfect 30-Minute Mongolian Beef
After making this recipe more times than I can count (my family won’t let me stop!), I’ve picked up some game-changing tricks. These are the little things that take your Mongolian beef from good to “oh my god, did you really make this?!”
- Fresh ginger is non-negotiable: I know that jar of pre-minced ginger is tempting when you’re in a hurry, but trust me – the real deal makes all the difference. That bright, zingy flavor just can’t be replicated. I keep ginger root in my freezer and grate it straight from frozen – no peeling needed and it lasts forever!
- Adjust the sugar to your taste: The first time I made this, I followed the recipe exactly and found it a tad too sweet for my liking. Now I start with 1/3 cup brown sugar and add more as needed. Taste your sauce before adding the beef – you can always stir in more sugar if it needs it, but you can’t take it out!
- Serve it immediately: This dish is at its absolute best fresh from the pan when the beef is still crispy and the sauce is glossy. If it sits too long, the cornstarch coating can get soggy. I always make sure my rice is ready and my plates are out before I start cooking the beef. Leftovers are still delicious (hello, next-day lunch!), but nothing beats that first perfect bite.
Oh, and one bonus tip I’ve learned – if your sauce gets too thick, just splash in a tablespoon or two of water to thin it out. No one will ever know you had a little kitchen oops moment!
Serving Suggestions for 30-Minute Mongolian Beef
Now that you’ve got this glorious Mongolian beef ready, let’s talk about how to serve it up right! Over the years, I’ve discovered some perfect pairings that turn this dish into a complete meal. Here are my absolute favorites:
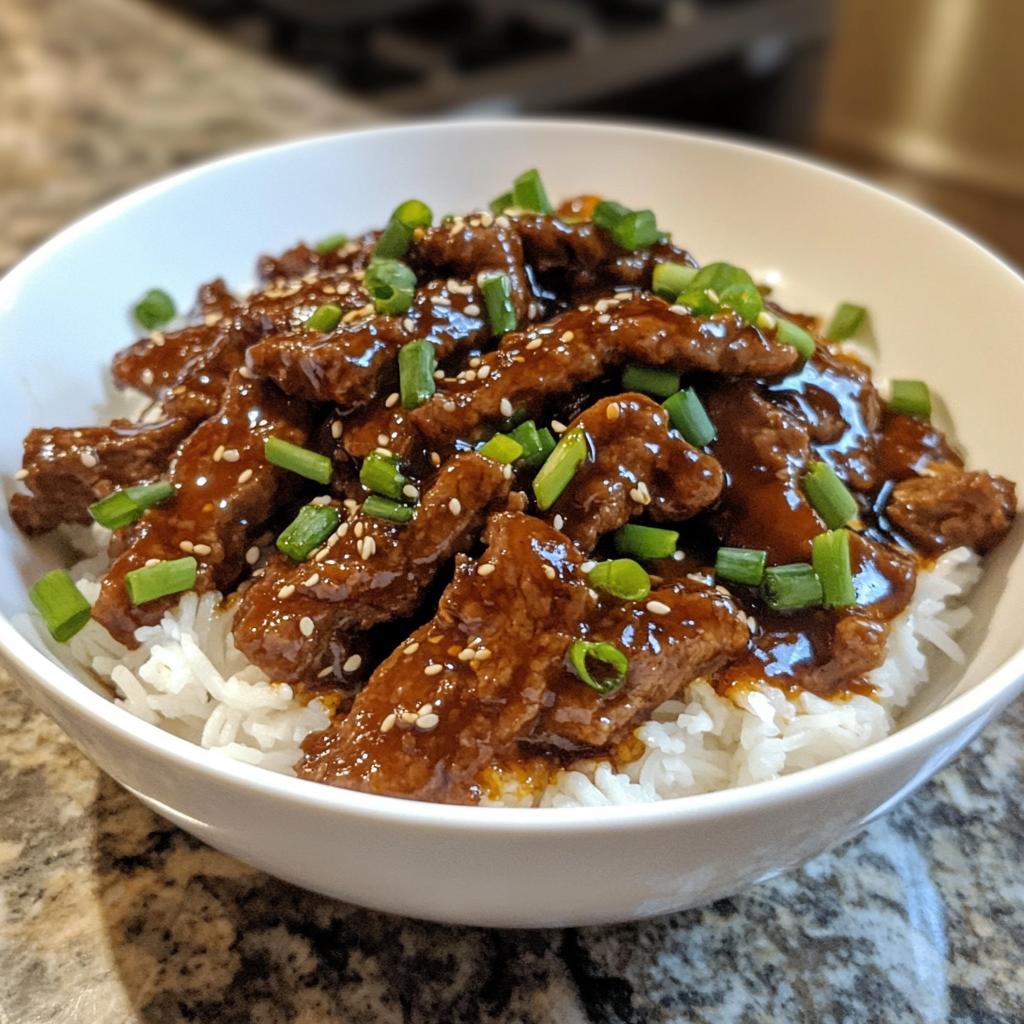
- Steamed jasmine rice: My go-to every single time. That fluffy, fragrant rice soaks up the sauce like a dream. I use a 1:1.5 rice-to-water ratio for perfect texture every time – just rinse the rice first to remove excess starch. Sometimes I’ll toss in a pandan leaf while cooking for an extra aromatic boost!
- Stir-fried veggies: For nights when I want to pretend I’m being healthy (while still devouring that beef). Broccoli, snap peas, and bell peppers work amazingly – just toss them in the pan for the last minute of cooking. The sauce coats them beautifully, and you get that perfect crunch contrast to the tender beef.
- Lo mein noodles: When I’m feeling extra indulgent, I swap the rice for chewy noodles. Cook them al dente, then toss with a bit of the sauce before piling the beef on top. The noodles get all sticky and sweet – it’s absolute perfection. My kids call this “restaurant night” at our house!
No matter how you serve it, just make sure you’ve got plenty of napkins handy. Things are about to get deliciously messy!
Storing and Reheating 30-Minute Mongolian Beef
Let’s be real – leftovers from this dish are basically gold in my house. But I’ve learned through trial and error (mostly error) how to keep that crispy beef texture magic alive for round two. Here’s the lowdown on storing and reheating like a pro:
Refrigerating: Cool any leftovers completely before storing – I usually spread them out on a plate for about 20 minutes. Then transfer to an airtight container (I swear by glass because plastic absorbs sauce smells). It’ll keep beautifully for 3 days in the fridge, though in my house it never lasts that long!
Reheating: The microwave is tempting, but it’ll make the beef soggy. Instead, warm it up in a skillet over medium heat with a splash of water to loosen the sauce. Stir frequently until heated through – about 3-4 minutes. If you’re feeling fancy, you can crisp up the beef under the broiler for 1-2 minutes first. Just watch it like a hawk – that sugar in the sauce burns fast!
One important note – the sauce will thicken up a lot in the fridge. Don’t panic! Just add a tablespoon of water at a time when reheating until it reaches your preferred consistency. And here’s a little secret – sometimes I think the flavors actually improve after a night in the fridge. The garlic and ginger really get to know each other!
Now, I’ll be honest – this isn’t a great freezer candidate. The cornstarch coating gets weirdly gummy when frozen and thawed. But with how quick this recipe is to make fresh, you probably won’t need to freeze it anyway!
Nutritional Information
Okay, let’s talk numbers – but remember, I’m a home cook, not a dietitian! These estimates are based on my exact ingredients, but your mileage may vary depending on brands and tweaks you make. Here’s the scoop per generous serving (and let’s be real, who stops at just one serving?):
- 320 calories – Not bad for something this indulgent tasting!
- 22g sugar – Yeah, I know that sounds high, but remember most comes from the brown sugar that makes the sauce so magical
- 24g protein – Thank you, beautiful flank steak!
- 12g fat – Mostly from the oil and that marbled beef goodness
- 1200mg sodium – The soy sauce packs a punch (use low-sodium if you’re watching this)
A little tip from my kitchen – if you’re counting carbs, serve it over cauliflower rice instead of regular rice. The flavors are so bold you won’t even miss the grains! And hey, we’re all about balance – maybe pair it with extra veggies to round out the meal.
Remember, these numbers are just guidelines. Cooking should be joyful, not stressful – so enjoy every saucy, beefy bite!
FAQs About 30-Minute Mongolian Beef
Over the years, I’ve gotten so many questions about this recipe – and made every possible mistake so you don’t have to! Here are the answers to the ones I hear most often:
Can I use chicken instead of beef?
Absolutely! I do this at least once a month when beef prices are crazy. Use boneless, skinless chicken thighs (they stay juicier than breasts) and slice them thin. Cook time is about the same – just make sure the chicken reaches 165°F internally. The sauce clings just as beautifully, though you’ll miss that classic beefy flavor. Pro tip: Add a splash of fish sauce with the soy sauce for extra umami!
Does this freeze well?
Honestly? Not really. I’ve tried freezing it three different ways, and each time the sauce separated into a weird, grainy mess when thawed. The cornstarch coating on the beef also turns gummy. But here’s the good news – this recipe is so quick to make fresh, you probably won’t need to freeze it! If you must, store just the cooked beef (without sauce) for up to a month, then make fresh sauce when ready to eat.
How can I make this less salty?
Oh man, I feel this – my first attempt was like eating a salt lick! Here’s how I fixed it:
- Use low-sodium soy sauce (I like Kikkoman’s version)
- Swap half the soy sauce with coconut aminos for a milder flavor
- Skip any additional salt (the soy sauce has plenty!)
- Balance with extra brown sugar or a splash of pineapple juice
The sauce will still be plenty flavorful, just without that sodium overload. My blood pressure thanks me!
Try This 30-Minute Mongolian Beef Tonight!
There you have it – my all-time favorite weeknight dinner that never fails to impress! I can’t wait for you to experience that moment when you take your first bite of crispy, saucy beef and think, “I made this?!” Remember that disastrous first time I tried making Mongolian beef? Now look at me – passing on all my hard-won secrets to you!
This recipe has saved me from so many “what’s for dinner?” meltdowns over the years. Whether it’s a busy Tuesday or you’re craving takeout flavors without the wait, this dish delivers every single time. My kids now request it for birthday dinners – that’s how much we adore it!
So what are you waiting for? Grab that flank steak and let’s get cooking! I’d love to see your masterpiece – snap a pic and tag me with your results. There’s nothing more rewarding than seeing someone fall in love with this recipe like I have. Happy cooking, friends – may your beef be crispy and your sauce perfectly sticky!
Print
30-Minute Mongolian Beef Recipe You’ll Obsess Over
- Total Time: 30 minutes
- Yield: 4 servings 1x
- Diet: Low Lactose
Description
A quick and flavorful Mongolian beef recipe ready in 30 minutes. Tender beef strips coated in a savory-sweet sauce.
Ingredients
- 1 lb flank steak, thinly sliced
- 1/4 cup cornstarch
- 2 tbsp vegetable oil
- 1/2 cup soy sauce
- 1/2 cup brown sugar
- 1/4 cup water
- 3 cloves garlic, minced
- 1 tsp ginger, grated
- 2 green onions, sliced
Instructions
- Coat beef strips in cornstarch.
- Heat oil in a pan over high heat. Cook beef until browned, then remove.
- In the same pan, add garlic and ginger. Cook for 30 seconds.
- Add soy sauce, brown sugar, and water. Stir until sugar dissolves.
- Return beef to the pan. Cook until sauce thickens.
- Garnish with green onions and serve.
Notes
- Slice beef against the grain for tenderness.
- Adjust sugar for preferred sweetness.
- Serve over rice or noodles.
- Prep Time: 10 minutes
- Cook Time: 20 minutes
- Category: Main Dish
- Method: Stir-Fry
- Cuisine: Asian
Nutrition
- Serving Size: 1 serving
- Calories: 320
- Sugar: 22g
- Sodium: 1200mg
- Fat: 12g
- Saturated Fat: 3g
- Unsaturated Fat: 8g
- Trans Fat: 0g
- Carbohydrates: 32g
- Fiber: 1g
- Protein: 24g
- Cholesterol: 60mg
Keywords: mongolian beef, quick dinner, stir-fry


