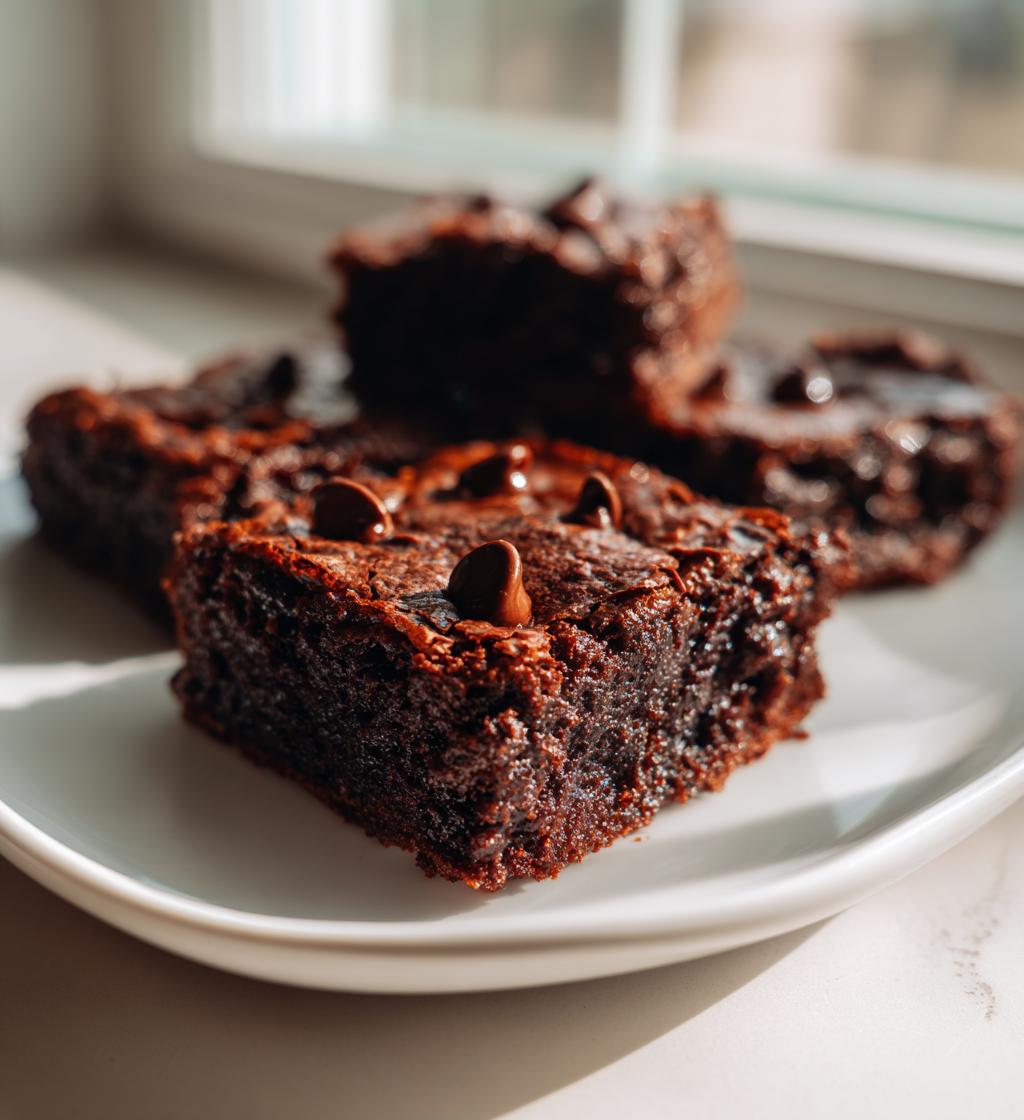
Ah, Valentine’s Day! A day filled with love, roses, and of course, the most delightful desserts! Nothing quite sets the mood like a sweet treat that speaks the language of love, and this chocolate dessert is the perfect way to celebrate. Trust me, when you bake this recipe, the *valentines vibes* will fill your kitchen with warmth and sweetness that’s hard to resist. It’s rich, fudgy, and just the right amount of indulgent – ideal for sharing (or not, I won’t judge!).
Growing up, my family always had a tradition of making something special for Valentine’s Day. I can still remember the smell of chocolate wafting through our home, bringing smiles to our faces and joy to our hearts. Now, I love recreating those moments in my own kitchen, especially when I whip up this glorious dessert. It’s not just about satisfying a sweet tooth; it’s about creating memories, sharing love, and enjoying the simple pleasures of life together. So, grab your loved ones, gather around the oven, and let’s make some magic happen in the kitchen!
Ingredients List
Here’s what you’ll need to create this delightful dessert that’s bursting with *valentines vibes*. Make sure you have all your ingredients ready before you start – it makes the process so much smoother!
- 1 cup all-purpose flour
- 1/2 cup unsweetened cocoa powder
- 1 cup sugar
- 1/2 cup unsalted butter, softened
- 2 large eggs
- 1 teaspoon vanilla extract
- 1/2 teaspoon baking powder
- 1/4 teaspoon salt
- 1 cup chocolate chips
These simple yet essential ingredients come together to create a rich, decadent treat that embodies the spirit of love and celebration. So, let’s gather them up and get ready to bake something magical!
How to Prepare Instructions
Now that we’ve got our ingredients ready, let’s dive into the step-by-step process of crafting this luscious dessert. I promise, it’s easier than it looks, and the end result is absolutely worth it!
Preheat the Oven
First up, let’s get that oven preheating! You’ll want to set it to 350°F (175°C). Preheating is super important because it ensures that your dessert cooks evenly and rises beautifully. Trust me, nothing’s worse than a dessert that doesn’t live up to its potential because the oven wasn’t hot enough! So, while the oven warms up, you can prep the other ingredients.
Mixing Dry Ingredients
In a medium bowl, grab your flour, cocoa powder, baking powder, and salt. Whisk them together until they’re well combined. This step is crucial because it helps to evenly distribute the baking powder and salt, ensuring that your dessert rises perfectly. Make sure there are no clumps – we want a smooth batter! Set this bowl aside while we tackle the wet ingredients.
Creaming Butter and Sugar
Now, it’s time to cream the butter and sugar together! In a large mixing bowl, add your softened butter and sugar. Using a hand mixer or stand mixer, beat them together until the mixture is light and fluffy – about 2-3 minutes. You’re looking for a pale, airy texture that resembles whipped honey. This step helps to incorporate air into the batter, giving your dessert that delightful fudgy texture.
Combining Ingredients
Next, it’s time to add the eggs and vanilla extract. Crack the eggs into the butter and sugar mixture, one at a time, mixing well between each addition. This ensures that they’re fully incorporated and helps create a smooth batter. Don’t forget to add that teaspoon of vanilla extract – it adds a lovely depth of flavor that’s hard to beat!
Incorporating Dry Ingredients
Now, let’s bring those dry ingredients into the mix! Gradually add the flour mixture to your wet ingredients. I like to do this in three parts, alternating with a little milk if you feel like it – but honestly, this recipe is rich enough on its own! Gently fold the mixture with a spatula or a wooden spoon until just combined. Be careful not to overmix; we want to keep that lovely texture intact!
Adding Chocolate Chips
Alright, the best part is here – let’s fold in those chocolate chips! Gently stir them into the batter, ensuring they’re evenly distributed. I always use semi-sweet chocolate chips for that perfect balance of sweetness and richness. You can even get creative and mix in some white chocolate chips or nuts if you feel adventurous!
Pouring and Baking
Now for the final steps! Grease your baking pan (an 8×8 inch pan works well) and pour the batter in, spreading it evenly. Once your oven is preheated, pop it in and bake for 25-30 minutes. The best way to check for doneness is with a toothpick – insert it into the center, and if it comes out clean or with just a few crumbs, it’s ready! Remember, it will continue to cook a bit while cooling, so don’t overbake it!
Let it cool in the pan for about 10 minutes before transferring to a wire rack. Trust me, the aroma wafting through your kitchen will be heavenly, and you’ll be counting down the moments until you can dig in!
Why You’ll Love This Recipe
This chocolate dessert is sure to become a go-to for your Valentine’s celebrations! Here are just a few reasons why you’ll adore this recipe:
- Indulgent Flavor: The rich, fudgy texture paired with chocolate chips creates a dessert that feels like a warm hug, perfect for celebrating love.
- Quick and Easy: With just a few simple steps, you can whip this up in no time! It’s ready in under an hour, making it ideal for last-minute plans.
- Perfect for Sharing: This recipe yields 12 generous servings, so it’s perfect for sharing with your loved ones, friends, or even just savoring on your own!
- Customizable: Feel free to add your favorite mix-ins like nuts or different types of chocolate to make this dessert uniquely yours.
- Festive Appeal: The warm, chocolatey aroma and delightful texture create the ultimate *valentines vibes*, making it the star of your romantic dinner or special gathering.
Baking this dessert isn’t just about treating your taste buds; it’s about creating moments that bring joy and connection to those you love. You won’t be disappointed!
Tips for Success
To make sure your chocolate dessert turns out absolutely perfect, I’ve got a few tips that I’ve picked up over the years. These little nuggets of wisdom will help you create a delectable treat that’s sure to impress!
Use Room Temperature Ingredients
For the best results, make sure your butter and eggs are at room temperature before you start mixing. This helps them blend seamlessly, creating a smooth batter that bakes evenly. Take the butter out about an hour before you start, and let the eggs sit out for about 30 minutes. You won’t regret this step!
Measure Accurately
Precision is key in baking! Use measuring cups and spoons for all your ingredients, especially when it comes to flour and cocoa powder. Too much of either can lead to a dry or dense dessert. I like to spoon flour into the measuring cup and level it off with a knife for accuracy. Trust me, it makes a difference!
Don’t Overmix
Once you combine the wet and dry ingredients, be gentle! Overmixing can develop gluten and lead to a tougher texture. Stir until just combined, and if you see a few flour streaks, that’s perfectly fine! Your dessert will be light and fudgy if you treat it kindly.
Keep an Eye on Baking Time
Ovens can vary, so keep an eye on your dessert as it bakes. Start checking around the 25-minute mark. When the edges look set and a toothpick inserted in the center comes out with a few moist crumbs, it’s ready to come out. Remember, it will continue to cook a little while cooling, so don’t leave it in for too long!
Let It Cool Completely
After baking, let your dessert cool in the pan for about 10 minutes before transferring it to a wire rack. This helps it set properly and makes it easier to cut into neat squares. You want those beautiful, clean edges when you serve it up!
By following these simple tips, you’ll create a rich and delightful chocolate dessert that’s perfect for sharing the love on Valentine’s Day. Happy baking!
Nutritional Information
As you indulge in this chocolate delight, it’s always nice to know a bit about what you’re enjoying! Here’s the estimated nutritional information for one piece of this heavenly dessert:
- Calories: 250
- Fat: 12g
- Saturated Fat: 7g
- Unsaturated Fat: 4g
- Trans Fat: 0g
- Cholesterol: 50mg
- Sodium: 150mg
- Carbohydrates: 35g
- Fiber: 3g
- Sugar: 20g
- Protein: 4g
Keep in mind, these values are estimates and can vary based on the specific ingredients used and portion sizes. Enjoy this sweet treat in moderation, and savor every bite filled with *valentines vibes*! Happy baking!
Storage & Reheating Instructions
Once you’ve indulged in this delicious chocolate dessert, you might be wondering how to store any leftovers (if there are any!). Don’t worry, I’ve got you covered with some simple storage tips to keep that *valentines vibes* alive!
To store your leftover dessert, let it cool completely in the baking pan. Once cooled, you can either cut it into squares or leave it whole. Place the pieces in an airtight container, separating layers with parchment paper to prevent sticking. If you’ve left it whole, just cover the pan tightly with plastic wrap or aluminum foil. This will keep it fresh and fudgy for up to 3-4 days at room temperature.
If you want to enjoy it a bit longer, consider refrigerating it! Just make sure it’s stored in an airtight container to prevent it from absorbing any odors from the fridge. It should last about a week this way. When you’re ready to enjoy a piece, simply pull it out and let it sit at room temperature for a few minutes to regain its delightful texture.
Now, for reheating! I recommend warming individual pieces in the microwave for about 10-15 seconds. This will make them soft and gooey again, just like when they came out of the oven! If you prefer, you can also pop it in a preheated oven at 350°F (175°C) for about 5-10 minutes. Just keep an eye on it so it doesn’t overheat.
And if you’re feeling extra indulgent, serve it warm with a scoop of ice cream or a dollop of whipped cream on top. Trust me, that’s the way to keep those *valentines vibes* going strong! Enjoy your sweet treats!
FAQ Section
Got questions about this delicious chocolate dessert? I’ve got answers! Here are some common queries that pop up, especially when you’re aiming for those perfect *valentines vibes*.
Can I substitute the cocoa powder with chocolate syrup or melted chocolate?
While chocolate syrup or melted chocolate can add flavor, they won’t work as a direct substitute for cocoa powder. Cocoa powder provides structure and the right level of richness. If you’re out of cocoa powder, it’s best to stick with the original recipe for the best results!
How long can I store leftovers?
This dessert can be stored in an airtight container at room temperature for up to 3-4 days. If you want it to last longer, you can refrigerate it for about a week. Just remember to bring it back to room temperature before enjoying it for the best texture!
Can I add nuts or other mix-ins to the batter?
Absolutely! Feel free to get creative! Chopped nuts, like walnuts or pecans, can add a delightful crunch to your dessert. You can also try different types of chocolate chips, like white chocolate or dark chocolate, to customize the flavor to your liking!
What should I serve with this dessert?
This fudgy chocolate treat is fantastic on its own, but pairing it with a scoop of vanilla ice cream or a dollop of whipped cream takes it to the next level! You can also sprinkle some fresh berries on top for a pop of color and freshness. Perfect for those romantic dinners!
Can I make this recipe gluten-free?
Yes! You can easily make this dessert gluten-free by substituting the all-purpose flour with a gluten-free flour blend. Just make sure to check the blend’s instructions, as some may require adjustments to the liquid ratios. You’ll still enjoy those sweet *valentines vibes* without the gluten!
Print
Valentines Vibes: 7 Magical Dessert Ideas to Melt Hearts
- Total Time: 45 minutes
- Yield: 12 servings 1x
- Diet: Vegetarian
Description
A delightful dessert to celebrate love on Valentine’s Day.
Ingredients
- 1 cup all-purpose flour
- 1/2 cup unsweetened cocoa powder
- 1 cup sugar
- 1/2 cup unsalted butter, softened
- 2 large eggs
- 1 teaspoon vanilla extract
- 1/2 teaspoon baking powder
- 1/4 teaspoon salt
- 1 cup chocolate chips
Instructions
- Preheat your oven to 350°F (175°C).
- In a bowl, mix flour, cocoa powder, baking powder, and salt.
- In another bowl, cream butter and sugar until light.
- Add eggs one at a time, then stir in vanilla.
- Gradually mix in dry ingredients until combined.
- Fold in chocolate chips.
- Pour batter into a greased baking pan.
- Bake for 25-30 minutes or until a toothpick comes out clean.
- Let cool before serving.
Notes
- Serve warm with ice cream for extra indulgence.
- Store leftovers in an airtight container.
- You can add nuts for added crunch.
- Prep Time: 15 minutes
- Cook Time: 30 minutes
- Category: Dessert
- Method: Baking
- Cuisine: American
Nutrition
- Serving Size: 1 piece
- Calories: 250
- Sugar: 20g
- Sodium: 150mg
- Fat: 12g
- Saturated Fat: 7g
- Unsaturated Fat: 4g
- Trans Fat: 0g
- Carbohydrates: 35g
- Fiber: 3g
- Protein: 4g
- Cholesterol: 50mg
Keywords: valentines vibes, dessert, chocolate


