Ah, the magic of Valentine’s Day! It’s a time when love fills the air, and nothing says “I care” quite like a homemade dessert. I remember the first Valentine’s Day I spent with my partner; I decided to surprise him with a batch of rich, fudgy brownies. The kitchen was filled with the aroma of melting chocolate, and I was practically bouncing off the walls with excitement. When he walked in, his eyes lit up like a kid on Christmas morning. The joy on his face made all the flour dust and sticky fingers totally worth it!
There’s something incredibly special about creating *valentines desserts* for those we love. Whether it’s gooey brownies, delicate cupcakes, or a decadent chocolate cake, baking adds a personal touch that store-bought treats just can’t match. It’s all about the process—the stirring, the mixing, the anticipation as the oven does its magic. And when it comes time to share your creations, nothing beats the smiles and compliments you receive. So, grab your apron and let’s dive into a dessert that’s bound to make hearts flutter and taste buds dance!
Ingredients List
To create these delightful *valentines desserts*, you’ll need a handful of simple yet essential ingredients. Each one plays a crucial role in making your treats irresistibly delicious. Here’s what you’ll need:
- 1 cup all-purpose flour – This is the base of our dessert, giving it structure and substance.
- 1/2 cup unsweetened cocoa powder – It adds that rich chocolate flavor that makes every bite heavenly.
- 1 cup sugar – Sweetness is key, and this will help balance the chocolate’s bitterness.
- 1/2 cup butter, softened – This adds richness and moisture, ensuring a fudgy texture.
- 2 large eggs – These act as a binding agent and help create that perfect cake-like crumb.
- 1 teaspoon vanilla extract – A splash of vanilla enhances the overall flavor, making it even more delightful.
- 1/2 teaspoon baking powder – This provides the necessary lift to keep your dessert from being too dense.
- 1/4 teaspoon salt – A pinch of salt elevates the sweetness and balances the flavors beautifully.
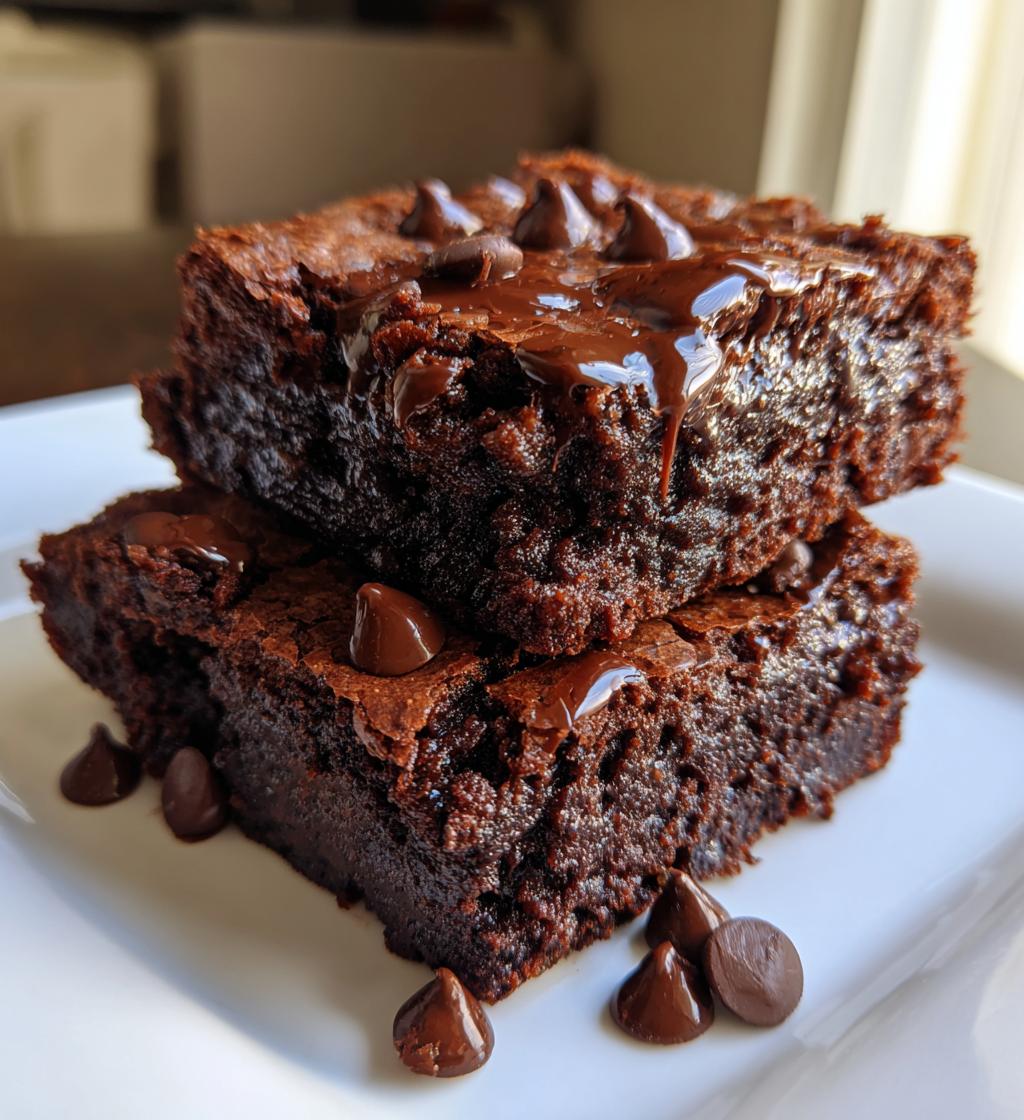
- 1 cup chocolate chips – These little gems melt into gooey pockets of chocolate that take the dessert over the top!
Make sure you have everything on hand before you start; it’ll make the process so much smoother and more enjoyable. Happy baking!
How to Prepare Instructions
Let’s get right into making these scrumptious *valentines desserts*! Follow these steps, and I promise you’ll have a delicious treat that will impress anyone special in your life.
Preheat the Oven
First things first, preheating your oven is crucial. You want to set it to 350°F (175°C) so it’s nice and hot when you pop in your dessert. This helps it cook evenly and rise beautifully. Don’t skip this step—trust me, it makes a world of difference!
Prepare the Dry Ingredients
Now, grab a mixing bowl and combine your dry ingredients. Start with 1 cup of all-purpose flour, then add 1/2 cup of unsweetened cocoa powder, 1/2 teaspoon of baking powder, and 1/4 teaspoon of salt. Whisk them together until they’re well combined—this ensures that the cocoa and baking powder are evenly distributed. It’s a simple step that sets the stage for a tender, fluffy dessert!
Cream the Butter and Sugar
Next, in a separate bowl, let’s cream together 1/2 cup of softened butter and 1 cup of sugar. Use a hand mixer or a sturdy wooden spoon to beat them together until the mixture is light and fluffy—about 2-3 minutes. You’re looking for a pale, creamy texture. This step is essential because it incorporates air, making your dessert delightfully light!
Combine Wet Ingredients
Once your butter and sugar are perfectly creamed, it’s time to add in 2 large eggs and 1 teaspoon of vanilla extract. Mix them in one at a time, blending well after each addition. This ensures everything comes together smoothly. You’ll want to see a uniform mixture before moving on!
Combine Mixtures
Now, it’s time to bring your dry ingredients into the mix. Gradually add the dry mixture to your wet ingredients, stirring gently. I like to do this in three parts—add a third, mix, then repeat until everything is just combined. Be careful not to overmix; you want to keep that tender texture! Finally, fold in 1 cup of chocolate chips. They’ll melt beautifully into the batter and create gooey pockets of chocolate goodness.
Bake the Dessert
Pour your batter into a greased baking dish, spreading it evenly. Pop it in the oven and let it bake for 25-30 minutes. To check for doneness, insert a toothpick into the center; it should come out clean or with just a few moist crumbs. If it’s still wet, give it a few extra minutes, but keep an eye on it!
Cooling and Serving
Once baked, take your dessert out and let it cool in the pan for at least 10 minutes before transferring it to a wire rack to cool completely. This cooling time is essential as it helps the dessert set and makes it easier to slice. When you’re ready to serve, consider pairing it with a dollop of whipped cream or a scoop of ice cream for that extra touch of indulgence. Enjoy every bite of your delicious creation!
Nutritional Information Section
Now, let’s talk about the nutritional info for these delectable *valentines desserts*. Keep in mind that nutrition can vary based on the specific ingredients and brands you use, so these values are approximate. Here’s what you can expect for each serving:
- Calories: 200
- Fat: 10g
- Saturated Fat: 6g
- Unsaturated Fat: 3g
- Trans Fat: 0g
- Cholesterol: 40mg
- Sodium: 150mg
- Carbohydrates: 25g
- Fiber: 2g
- Sugar: 18g
- Protein: 3g
These values can help you keep track of your indulgence, especially if you’re sharing these sweet treats with someone special. Enjoy every bite, knowing it’s made with love!
Why You’ll Love This Recipe
This recipe for *valentines desserts* is sure to steal the show, and here’s why:
- Quick and Easy: With just 15 minutes of prep time, you can whip up these delicious treats without spending all day in the kitchen!
- Decadent Flavor: Each bite is a rich explosion of chocolatey goodness thanks to the cocoa powder and chocolate chips.
- Perfect for Sharing: This recipe yields 12 servings, making it ideal for sharing with your loved ones or friends on Valentine’s Day.
- Customizable: Feel free to add your favorite mix-ins like nuts or sprinkles to give it a personal touch!
- Impressive Presentation: Serve it warm with whipped cream or ice cream, and watch your loved ones’ faces light up!
Trust me, this dessert isn’t just a treat; it’s a heartfelt gesture that your loved ones will remember!
Tips for Success
Let’s make sure your *valentines desserts* turn out perfectly every time! Here are some pro tips that I’ve gathered through my baking adventures:
- Use Room Temperature Ingredients: Make sure your butter and eggs are at room temperature before you start. This helps them blend together smoothly, creating a better texture in your dessert.
- Measure Accurately: Baking is a science, so precise measurements are key. Use a kitchen scale for the best results, especially for flour and cocoa powder!
- Don’t Overmix: When combining the dry and wet ingredients, mix until just combined. Overmixing can lead to a dense, tough dessert. Less is more, my friend!
- Check the Oven Temperature: Ovens can vary, so it’s a good idea to use an oven thermometer to ensure yours is at the right temperature. You want that perfect bake!
- Cool Before Serving: Allow your dessert to cool completely before cutting into it. This helps it set up nicely and makes for easier slicing.
- Experiment with Toppings: Don’t hesitate to get creative! Try adding a drizzle of chocolate sauce or a sprinkle of sea salt on top for an extra flavor boost.
With these tips, you’ll be well on your way to impressing your loved ones with your delicious creations. Happy baking!
Variations
Now, let’s have some fun with these *valentines desserts*! One of the best things about baking is how easy it is to customize recipes to fit your taste or to surprise your loved ones with something new. Here are a few delightful variations you can try:
- Nutty Delight: Add 1/2 cup of chopped walnuts or pecans to the batter for a lovely crunch. The nuts pair beautifully with the chocolate and add a nice texture contrast!
- Spicy Twist: Want to spice things up? Mix in 1 teaspoon of cinnamon or a pinch of cayenne pepper for a subtle kick that complements the chocolate flavor perfectly.
- Mint Chocolate: For a refreshing twist, add 1/2 teaspoon of peppermint extract instead of vanilla. You can also sprinkle crushed mint candies on top for some festive flair!
- Fruit Fusion: Toss in 1/2 cup of raspberries or chopped strawberries for a fruity surprise. The tartness of the berries balances the sweetness of the chocolate beautifully.
- Double Chocolate: If you can’t get enough chocolate (who can?), try adding an extra 1/2 cup of chocolate chips or even chunks of your favorite chocolate bar for a decadent treat.
- Caramel Swirl: Create a luscious caramel swirl by drizzling caramel sauce into the batter before baking. Swirl it gently with a knife for an irresistible gooey effect!
These variations let you get a little creative and make your *valentines desserts* even more special. Don’t be afraid to mix and match! Each time you bake, you can create a new and exciting version that keeps your loved ones guessing. Enjoy experimenting!
Storage & Reheating Instructions
Now that you’ve whipped up these delicious *valentines desserts*, you might be wondering how to store any leftovers (if there are any!). Proper storage is key to keeping your treats fresh and tasty for days to come.
First, let your brownies cool completely in the pan. Once they’re cooled, you can cut them into squares. I recommend placing them in an airtight container to keep them moist and prevent them from drying out. You can layer them with parchment paper to avoid sticking, which also makes it easier to grab a piece later on!
If you have a larger batch or want to save some for later, you can freeze them! Just wrap each piece tightly in plastic wrap and then place them in a freezer-safe bag or container. They should keep well for about 2-3 months. When you’re ready to enjoy them again, simply let them thaw in the fridge overnight or at room temperature for a couple of hours.
When it comes to reheating, I find the best method is to pop a piece in the microwave for about 10-15 seconds. This warms it up just enough to make it gooey and delicious again! You can also reheat them in a preheated oven at 350°F (175°C) for about 5-10 minutes, which helps maintain that freshly baked texture. Just be careful not to overheat; nobody wants a dry brownie!
With these storage and reheating tips, you can savor your *valentines desserts* for days, ensuring every bite is just as delightful as the first. Enjoy your sweet treats!
FAQ Section
Q1. Can I use whole wheat flour instead of all-purpose flour for these *valentines desserts*?
Absolutely! You can substitute whole wheat flour for all-purpose flour, but keep in mind it may change the texture slightly, making it denser. I recommend starting with half whole wheat and half all-purpose to see how you like it!
Q2. How do I know when my *valentines desserts* are done baking?
The best way to check for doneness is to insert a toothpick into the center of the dessert. If it comes out clean or with just a few moist crumbs, you’re good to go! If there’s wet batter on the toothpick, give it a few more minutes in the oven.
Q3. Can these brownies be made ahead of time?
Definitely! You can prepare these *valentines desserts* a day in advance. Just store them in an airtight container at room temperature, and they’ll be perfect for serving the next day. They taste even better after the flavors have had time to meld!
Q4. What’s the best way to store leftovers?
To keep your brownies fresh, let them cool completely, then store them in an airtight container. If you have any leftovers, you can also freeze them for up to 2-3 months. Just wrap them tightly in plastic wrap and place them in a freezer-safe bag!
Q5. Can I add nuts or other mix-ins to the recipe?
Of course! Feel free to get creative with your *valentines desserts*. You can add chopped nuts, dried fruit, or even some swirls of peanut butter or caramel. Just be mindful of the total volume so that the batter remains balanced!

valentines desserts that will make hearts melt and smile
- Total Time: 45 minutes
- Yield: 12 servings 1x
- Diet: Vegetarian
Description
Delicious desserts perfect for Valentine’s Day.
Ingredients
- 1 cup all-purpose flour
- 1/2 cup unsweetened cocoa powder
- 1 cup sugar
- 1/2 cup butter, softened
- 2 large eggs
- 1 teaspoon vanilla extract
- 1/2 teaspoon baking powder
- 1/4 teaspoon salt
- 1 cup chocolate chips
Instructions
- Preheat your oven to 350°F (175°C).
- In a bowl, mix flour, cocoa powder, baking powder, and salt.
- In another bowl, cream butter and sugar until smooth.
- Add eggs and vanilla to the butter mixture, and mix well.
- Gradually add the dry ingredients to the wet mixture.
- Fold in chocolate chips.
- Pour the batter into a greased baking dish.
- Bake for 25-30 minutes or until a toothpick comes out clean.
- Let cool before serving.
Notes
- Serve with whipped cream or ice cream.
- Store leftovers in an airtight container.
- Can be made a day ahead.
- Prep Time: 15 minutes
- Cook Time: 30 minutes
- Category: Dessert
- Method: Baking
- Cuisine: American
Nutrition
- Serving Size: 1 piece
- Calories: 200
- Sugar: 18g
- Sodium: 150mg
- Fat: 10g
- Saturated Fat: 6g
- Unsaturated Fat: 3g
- Trans Fat: 0g
- Carbohydrates: 25g
- Fiber: 2g
- Protein: 3g
- Cholesterol: 40mg
Keywords: valentines desserts


