Ah, Valentine’s Day! It’s the perfect time to sprinkle a little love into our kitchens, and nothing says “I care” quite like a batch of freshly baked cookies. I remember the excitement as a kid, eagerly waiting for the aroma of sweet dough wafting through the house. It brought everyone together, making the day feel extra special. When I bake *valentines day cookies*, I feel that same warmth. These cookies are not just treats; they’re little tokens of affection meant to be shared with friends, family, or that special someone.
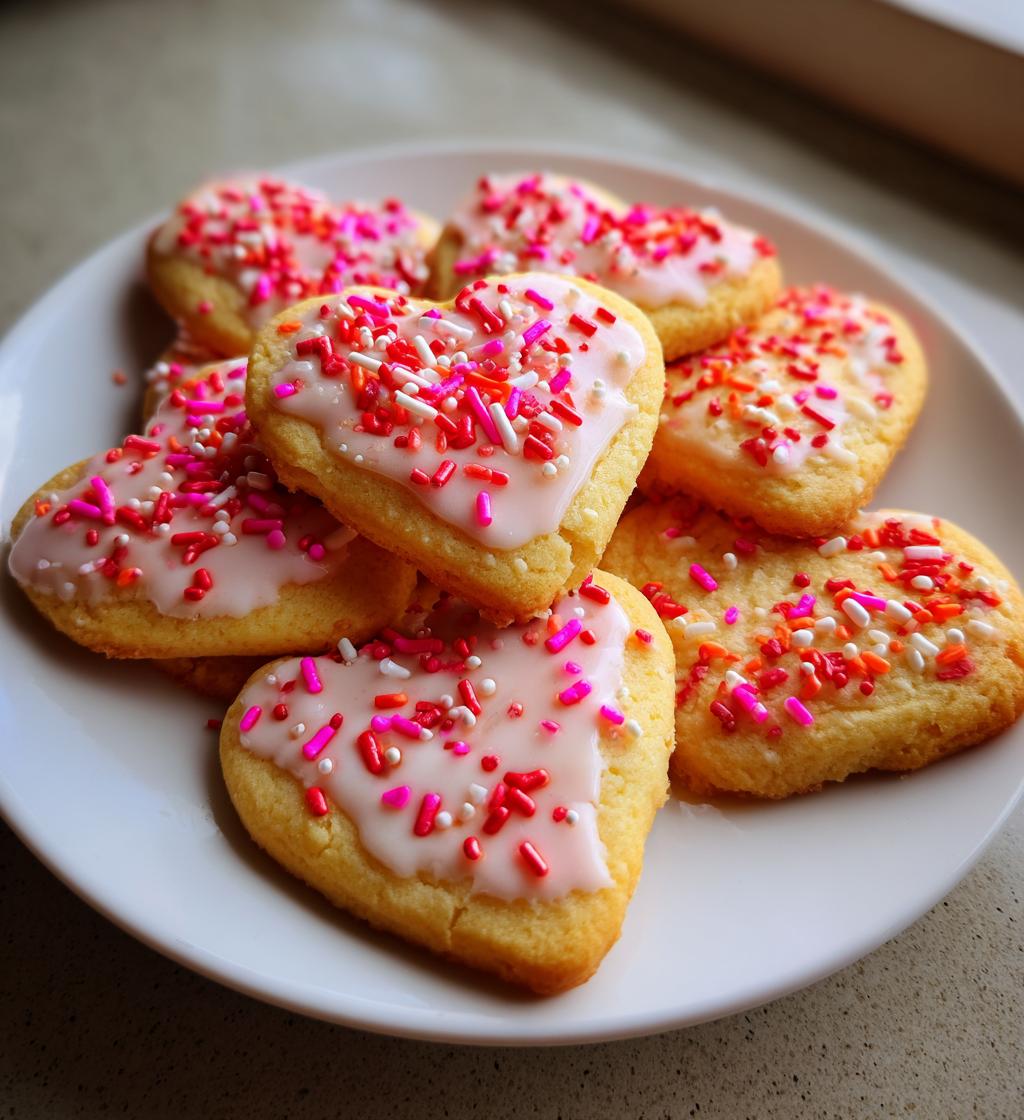
Imagine the joy on their faces when they bite into a soft, buttery cookie decorated with vibrant pink and red sprinkles. It’s like gifting a piece of your heart! Plus, the recipe is so simple that you can whip up a batch in no time. Whether you’re planning a romantic dinner or just want to brighten someone’s day, these cookies are the perfect sweet surprise. Trust me, you’ll want to make extra because they’ll disappear faster than you can say, “Happy Valentine’s Day!”
Ingredients List
Let’s gather everything you need to make these delightful *valentines day cookies*! Having your ingredients ready is like setting the stage for a beautiful performance in the kitchen. Here’s what you’ll need:
- 2 cups all-purpose flour: Make sure it’s spooned and leveled for the right texture. This will be the backbone of your cookies.
- 1 cup unsalted butter, softened: Let it sit out for about an hour before you start. You want it just soft enough to leave a small indentation when you press it with your finger.
- 1 cup granulated sugar: Use a cup packed with sugar, but don’t go overboard! This will add just the right amount of sweetness.
- 1 large egg: This should be at room temperature for easier mixing. It’ll help bind everything together.
- 1 teaspoon vanilla extract: Pure vanilla extract is the way to go. It adds a warm, fragrant note that makes these cookies irresistible.
- 1/2 teaspoon baking powder: This little helper ensures your cookies rise to fluffy perfection.
- 1/2 teaspoon salt: Just a pinch! Salt enhances all the flavors and balances the sweetness.
- 1 cup icing sugar for decoration: This will give your cookies that sweet, glossy finish when you ice them.
- 1/2 cup red and pink sprinkles: Feel free to get creative! These sprinkles add a festive touch that’s perfect for Valentine’s Day.
Now that you’ve got everything ready, let’s move on to the fun part – baking those cookies! You’re going to love how they turn out.
How to Prepare *Valentines Day Cookies*
Preheat and Prepare
Let’s kick things off by preheating your oven to 350°F (175°C). This step is super important because it ensures your cookies bake evenly and come out just right. While that’s heating up, grab a baking sheet and line it with parchment paper. This not only makes for easy cleanup but also helps prevent the cookies from sticking. Trust me, you don’t want to lose any of those precious cookies to a sticky situation!
Creaming the Butter and Sugar
Now, let’s get to the fun part! In a large mixing bowl, combine the softened butter and granulated sugar. Using a hand mixer or a sturdy wooden spoon, cream them together until the mixture is smooth and fluffy, about 2-3 minutes. You want it to look light and pale, almost like whipped cream. This step is crucial because it incorporates air into the batter, giving your cookies that delightful texture. I always say, the fluffier the better!
Combining Wet Ingredients
Once you’ve got that buttery-sugar mixture just right, it’s time to add in the egg and vanilla extract. Crack the egg directly into the bowl and pour in that sweet vanilla. Mix everything together until it’s nicely combined. You’ll want to make sure there aren’t any streaks of egg left, as this will help keep your cookies uniform and delicious. The aroma of vanilla wafting through your kitchen? Wow, it’s heavenly!
Mixing Dry Ingredients
In a separate bowl, whisk together the all-purpose flour, baking powder, and salt. This step helps distribute the baking powder evenly, ensuring that every cookie rises perfectly. Once they’re well mixed, it’s time to gradually add this dry mixture to your wet ingredients. I like to do this in three parts, mixing gently after each addition until just combined. You don’t want to overmix; a few flour streaks are totally okay!
Forming the Dough
Now that the dough is coming together, it’s time to roll it into balls. Take about a tablespoon of dough and roll it between your palms to form a nice round shape. Place the dough balls on your prepared baking sheet about 2 inches apart; they’ll spread a bit while baking. I usually make a small batch first to test the size, just to see how they turn out!
Baking the Cookies
Pop those cookies in the oven and let them bake for about 10-12 minutes. You want to look for a light golden color around the edges. Don’t worry if they seem a little soft in the middle; they’ll firm up as they cool. Once they’re done, take them out and let them sit on the baking sheet for a few minutes before transferring them to a wire rack. This helps them hold their shape while they cool down.
Decorating Your Cookies
Finally, the best part – decorating! Once your cookies are completely cool, it’s time to get creative. Use the icing sugar to make a simple glaze by mixing it with a little water or milk until it’s pourable. Drizzle or spread it over your cookies, then sprinkle them with those colorful red and pink sprinkles. Go wild! You can create hearts, swirls, or just a fun sprinkle of color. The goal is to make them as festive as possible for Valentine’s Day. Enjoy the process – it’s all about adding that personal touch!
Tips for Success
To ensure your *valentines day cookies* turn out absolutely perfect, here are some tried-and-true tips that I’ve gathered over the years:
- Use room temperature ingredients: Make sure your butter and egg are at room temperature. This helps them blend better, creating a smoother dough.
- Don’t overmix the dough: Once you add the dry ingredients, mix just until combined. Overmixing can lead to tough cookies.
- Chill the dough (if needed): If your dough feels too soft or sticky, pop it in the fridge for about 30 minutes. This helps them hold their shape while baking.
- Keep an eye on baking time: Ovens can vary, so start checking your cookies a minute or two early. You want them lightly golden but not overbaked!
- Experiment with decorations: Don’t be afraid to get creative! Try different colors of icing or unique sprinkles to make your cookies extra special.
- Store them properly: Keep your cookies in an airtight container at room temperature. This keeps them fresh and delicious for days!
Following these tips will elevate your *valentines day cookies* from good to absolutely amazing. Happy baking!
Variations
If you’re feeling adventurous or just want to switch things up with your *valentines day cookies*, I’ve got some delightful variations for you! Each one adds a fun twist while keeping that sweet, buttery goodness we all love. Here are some ideas that’ll inspire your creativity:
- Sprinkle Surprise: While red and pink sprinkles are classic, why not try mixing in some heart-shaped sprinkles or even edible glitter? It’ll give your cookies a whimsical touch that’s perfect for the occasion!
- Chocolate Chip Love: Add about a cup of semi-sweet or milk chocolate chips to the dough for a delicious chocolatey surprise in every bite. Trust me, chocolate and vanilla are a match made in cookie heaven!
- Nutty Delight: For a little crunch, consider folding in some chopped nuts, like walnuts or pecans. They not only add texture but also a lovely, earthy flavor that complements the sweetness beautifully.
- Citrus Zing: Add a teaspoon of orange or lemon zest into your dough for a refreshing citrus twist. The bright flavor will elevate your cookies and make them truly stand out!
- Frosting Fun: Instead of a simple icing, go for a full-on buttercream frosting! Pipe colorful swirls on top of your cookies for an extra indulgent treat. You can even tint your frosting in various shades of pink and red!
- Sandwich Cookies: Make your cookies a little more special by turning them into sandwich cookies. Spread a layer of frosting, jam, or even Nutella between two cookies for a decadent treat that’ll impress anyone!
These variations are just the tip of the iceberg, and I’m sure you’ll come up with your own creative twists! The beauty of baking is that it allows you to express yourself. So, don’t hesitate to play around and make these *valentines day cookies* uniquely yours!
Nutritional Information
When you’re baking up a batch of these delightful *valentines day cookies*, it’s always nice to know what you’re treating yourself to! Here’s an estimated breakdown of the nutritional information per cookie:
- Calories: 120
- Fat: 6g
- Saturated Fat: 4g
- Trans Fat: 0g
- Cholesterol: 20mg
- Sodium: 50mg
- Carbohydrates: 15g
- Fiber: 0g
- Sugar: 8g
- Protein: 1g
Keep in mind that these values are estimates and can vary based on ingredient brands and specific measurements. But hey, who’s counting when there’s love and cookies involved? Enjoy every delicious bite!
Storage & Reheating Instructions
Once you’ve baked your delightful *valentines day cookies*, it’s essential to store them properly to keep that fresh, buttery flavor intact. Here’s how to do it:
- Cool Completely: First things first, make sure your cookies are completely cool before storing them. If you pack them warm, they can create steam inside the container, leading to a soggy texture – and nobody wants that!
- Airtight Container: Place your cookies in an airtight container to keep them fresh. I love using a simple plastic or glass container with a tight-sealing lid. If you want to keep them extra safe, you can layer them between sheets of parchment paper to prevent sticking.
- Room Temperature Storage: Your cookies will stay delicious at room temperature for about a week, so feel free to enjoy them throughout the week. Just make sure to keep them in a cool, dry place away from direct sunlight.
- Freezing for Later: If you want to save some for a later date, you can freeze them! Arrange the cookies in a single layer on a baking sheet, freeze until solid, then transfer them to a freezer-safe container or a resealable plastic bag. They can last up to three months in the freezer!
- Reheating Tips: When you’re ready to enjoy those frozen cookies, there’s no need to thaw them beforehand. Just pop them in a preheated oven at 350°F (175°C) for about 5-7 minutes until they’re warmed through. This’ll bring back that fresh-baked taste and soft texture!
By following these storage and reheating tips, you’ll ensure your *valentines day cookies* stay scrumptious and ready to spread love and joy whenever the craving strikes!
FAQ Section
Got questions about making the perfect *valentines day cookies*? Don’t worry, I’ve got you covered! Here are some common queries that pop up, along with my best answers to help you out:
Q1: Can I use margarine instead of butter for these cookies?
While you can use margarine, I highly recommend sticking with unsalted butter. Butter gives the cookies a rich flavor and that classic texture we all love. If you’re in a pinch, just make sure your margarine is softened and not too cold!
Q2: How should I store my cookies after baking?
To keep your *valentines day cookies* fresh, let them cool completely and then store them in an airtight container at room temperature. They should stay delicious for about a week. If you want to keep them longer, consider freezing them!
Q3: Can I add different flavorings to the cookie dough?
Absolutely! If you’re feeling adventurous, you can add a teaspoon of almond extract for a lovely twist. Just remember to keep the total liquid content in check so the dough doesn’t get too wet.
Q4: What’s the best way to decorate my cookies?
Decorating is where you can really have fun! Once your cookies are cool, you can drizzle them with icing, dip them in chocolate, or sprinkle on those festive red and pink sprinkles. Try creating hearts or fun patterns. The more creative, the better!
Q5: Can I make these cookies gluten-free?
Yes! You can substitute all-purpose flour with a gluten-free flour blend designed for baking. Just make sure to check that your other ingredients, like baking powder, are also gluten-free. It’s a great way to share the love with everyone!
If you have any more questions or need tips, feel free to reach out. Happy baking, and enjoy those sweet moments with your *valentines day cookies*!
Why You’ll Love This Recipe
- Quick and easy to make: With just a few simple steps, you can whip up a batch of these delightful cookies in under 30 minutes!
- Perfect for sharing: Bake a double batch and spread the love! These cookies are ideal for gifting to friends, family, or that special someone.
- Deliciously sweet: The blend of butter, sugar, and vanilla creates a wonderfully sweet treat that will satisfy any sweet tooth.
- Customizable decorations: Get creative with icing and sprinkles to make each cookie uniquely yours, adding a personal touch that’s sure to impress!
- Great for all occasions: While perfect for Valentine’s Day, these cookies are suitable for any celebration or simply as an afternoon treat.
- Kid-friendly fun: Involve the little ones in decorating, making it a fun family activity that creates lasting memories.

valentines day cookies to Melt Hearts: 5 Sweet Variations
- Total Time: 27 minutes
- Yield: 24 cookies 1x
- Diet: Vegetarian
Description
Delicious cookies perfect for Valentine’s Day.
Ingredients
- 2 cups all-purpose flour
- 1 cup unsalted butter, softened
- 1 cup granulated sugar
- 1 large egg
- 1 teaspoon vanilla extract
- 1/2 teaspoon baking powder
- 1/2 teaspoon salt
- 1 cup icing sugar for decoration
- 1/2 cup red and pink sprinkles
Instructions
- Preheat your oven to 350°F (175°C).
- In a bowl, cream together the butter and sugar until smooth.
- Add the egg and vanilla, mix well.
- In a separate bowl, combine flour, baking powder, and salt.
- Gradually add the dry ingredients to the wet mixture.
- Roll the dough into balls and place them on a baking sheet.
- Bake for 10-12 minutes until lightly golden.
- Allow cookies to cool, then decorate with icing and sprinkles.
Notes
- Store cookies in an airtight container.
- Use heart-shaped cookie cutters for fun shapes.
- Let your creativity shine with different decorations.
- Prep Time: 15 minutes
- Cook Time: 12 minutes
- Category: Dessert
- Method: Baking
- Cuisine: American
Nutrition
- Serving Size: 1 cookie
- Calories: 120
- Sugar: 8g
- Sodium: 50mg
- Fat: 6g
- Saturated Fat: 4g
- Unsaturated Fat: 1g
- Trans Fat: 0g
- Carbohydrates: 15g
- Fiber: 0g
- Protein: 1g
- Cholesterol: 20mg
Keywords: valentines day cookies


