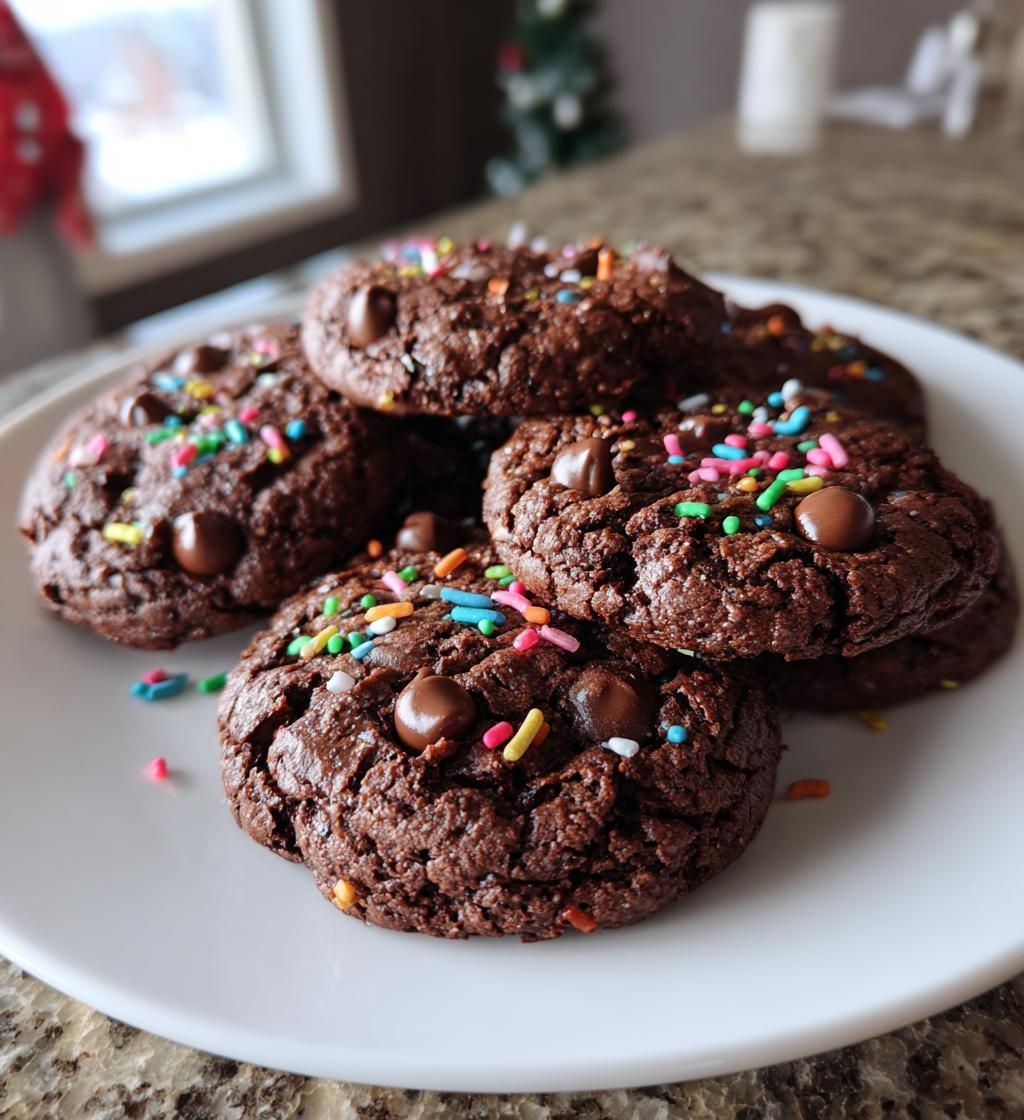
Ah, Valentine’s Day! A time when love is in the air, and what better way to celebrate than with a batch of delicious *valentines day cookies*? There’s something magical about baking cookies that brings people together. The warmth of the oven, the sweet aroma wafting through the house, and the joy of sharing them with friends, family, or that special someone—it’s pure bliss! This recipe holds a special place in my heart because it was passed down from my mom, who always made these cookies for my classmates when I was in school. I can still remember the delighted faces when I brought the freshest batch to class. The rich chocolate flavor, paired with a sprinkle of love, makes these cookies perfect for any occasion, but especially for Valentine’s Day. Trust me, once you take a bite, you’ll fall head over heels for these treats!
Ingredients List
To whip up these delightful *valentines day cookies*, here’s everything you’ll need. Make sure to gather these ingredients in advance for a smooth baking experience:
- 2 cups all-purpose flour
- 1/2 cup unsweetened cocoa powder
- 1 cup granulated sugar
- 1/2 cup butter, softened to room temperature
- 1 large egg
- 1 teaspoon vanilla extract
- 1/2 teaspoon baking powder
- 1/4 teaspoon salt
- 1 cup chocolate chips (feel free to use milk, dark, or semi-sweet!)
- Sprinkles for decoration (because who doesn’t love sprinkles?)
Having your ingredients prepped and measured can really help the process go smoothly. Plus, it’s just more fun to see everything lined up and ready to go! Happy baking!
How to Prepare Instructions
Now that you’ve got your ingredients ready, let’s dive into the fun part—baking these scrumptious *valentines day cookies*! Follow these easy steps, and you’ll have a delightful treat in no time.
Preheat the Oven
First things first—preheat your oven to 350°F (175°C). Preheating is key because it ensures your cookies bake evenly and come out perfectly soft and chewy. Trust me, there’s nothing worse than cookies that are burnt on the outside but raw on the inside. So, let that oven warm up while you get everything else ready!
Combine Dry Ingredients
In a medium bowl, whisk together the flour, cocoa powder, baking powder, and salt. Mixing these dry ingredients thoroughly is super important, as it helps distribute the leavening agents evenly, giving your cookies that nice lift. You want to avoid any clumps of cocoa powder, so be sure to break them up as you whisk. It really does make a difference!
Cream Butter and Sugar
Now, in a large bowl, cream the softened butter and granulated sugar together until the mixture is light and fluffy. This usually takes about 2-3 minutes with an electric mixer. If you’re doing it by hand, don’t worry—it just takes a little more elbow grease! You’re looking for a consistency that’s smooth and pale, like whipped honey. This step is crucial because it incorporates air into the batter, making your cookies wonderfully tender.
Mixing Wet Ingredients
Next, add the large egg and vanilla extract to the butter mixture. Mix well until everything is combined. The egg adds moisture and binds the ingredients together, while the vanilla brings a lovely aroma and flavor that’s just heavenly. Just be sure you don’t overmix—just enough to see the egg disappear!
Combine Wet and Dry Mixtures
Gradually add the dry ingredients into the wet mixture, folding them together gently. I like to do this in batches, starting and ending with the dry ingredients. This helps keep the batter from becoming tough. And don’t forget to fold in those chocolate chips at the end—they’re the star of the show! Make sure they’re evenly distributed so every bite is a chocolatey delight.
Forming the Cookies
Now it’s time to drop spoonfuls of dough onto a baking sheet lined with parchment paper. I usually use a tablespoon for this, but you can make them any size you like! Just make sure to leave enough space between each cookie, about 2 inches, as they’ll spread out a bit while baking. Trust me; you don’t want them merging into one giant cookie!
Baking the Cookies
Pop the baking sheet into the oven and let those cookies bake for 10-12 minutes. You’ll know they’re done when the edges look set, and the tops might even look slightly cracked. They’ll continue to cook a little after you take them out, so don’t worry if they seem a tad soft in the center!
Cooling and Serving
Once baked, let the cookies cool on the baking sheet for about 5 minutes before transferring them to a wire rack. This cooling time is important because it helps them firm up a bit more. After they’ve cooled completely, they’re ready to enjoy! You can serve them right away or store them in an airtight container to keep that scrumptiousness intact.
Why You’ll Love This Recipe
- Quick and Easy: These cookies come together in just about 15 minutes of prep time, making them perfect for last-minute baking!
- Rich Chocolate Flavor: With cocoa powder and chocolate chips, each bite is a chocolate lover’s dream—decadent and satisfying!
- Fun for Everyone: Baking these cookies is a great activity to do with family or friends, spreading joy and love in the kitchen!
- Perfectly Soft and Chewy: The careful mixing and baking tips ensure your cookies come out soft, chewy, and absolutely irresistible.
- Customizable: Feel free to switch up the chocolate chips for your favorite mix-ins or sprinkles to make them extra special for Valentine’s Day!
- Great for Sharing: Whether it’s for a loved one or a classroom treat, these cookies are perfect for sharing and spreading happiness!
Tips for Success
To make sure your *valentines day cookies* turn out just right, here are some pro tips that I’ve gathered over the years. Trust me; these little nuggets of wisdom can make all the difference!
- Measure Your Ingredients Accurately: Baking is a science, so it’s vital to measure your flour and cocoa powder properly. Use the spoon-and-level method—spoon the flour into your measuring cup and level it off with a knife. This prevents your cookies from being too dry or dense.
- Don’t Overmix the Batter: Once you combine the wet and dry ingredients, mix just until everything is incorporated. Overmixing can lead to tough cookies. You want that tender, melt-in-your-mouth texture!
- Keep Your Butter Soft: Make sure your butter is softened to room temperature but not melted. This ensures the butter creams properly with the sugar, creating that light and fluffy base for your cookies.
- Chill the Dough (If Needed): If you find your dough is too soft to handle, pop it in the fridge for about 30 minutes. Chilling helps the cookies maintain their shape while baking.
- Use Parchment Paper: Line your baking sheets with parchment paper to prevent sticking and to make cleanup a breeze. It also helps the cookies bake evenly!
- Check for Doneness: Every oven is different, so keep an eye on your cookies as they bake. If you’re unsure, take them out when the edges look set, and the centers appear slightly underbaked—they’ll continue to firm up on the cooling rack.
- Experiment with Mix-Ins: Feel free to get creative with your cookies! Add nuts, dried fruits, or different types of chocolate chips to customize them to your liking. Just remember, if you add too many extras, the dough may need a little extra flour to compensate.
With these tips in your back pocket, you’ll be well on your way to baking up the most delicious *valentines day cookies* that everyone will adore. Happy baking!
Variations
One of the best things about these *valentines day cookies* is how versatile they can be! You can easily switch things up and make them your own with just a few simple variations. Here are some of my favorite ideas:
- Different Chocolate Chips: Why not experiment with different types of chocolate chips? You can use white chocolate, peanut butter chips, or even flavored chips like mint or espresso for a fun twist. Each type of chip brings a unique flavor to the cookies!
- Nutty Goodness: If you love a little crunch, consider adding chopped nuts! Walnuts or pecans pair wonderfully with the chocolate. Just make sure to chop them finely so they mix well throughout the dough.
- Add Some Zest: For a refreshing twist, why not add a teaspoon of orange or lemon zest to the dough? The citrus will brighten up the chocolate flavors and give your cookies a lovely aromatic quality.
- Sprinkle Some Sea Salt: For a sweet and salty combo, sprinkle a tiny pinch of flaky sea salt on top of the cookies just before baking. It amplifies the chocolate flavor and adds a gourmet touch!
- Make Them Gluten-Free: If you need a gluten-free option, swap out the all-purpose flour for a gluten-free all-purpose blend. Just make sure it contains xanthan gum for the best texture!
- Stuffed Cookies: Want to take it up a notch? Try stuffing your cookies with something delicious! You can place a small piece of caramel or a chocolate truffle in the center of each cookie before baking for a gooey surprise!
With these fun variations, you can create a whole new cookie experience each time you bake. Let your creativity shine, and remember, the most important ingredient is the love you put into it! Happy baking!
Storage & Reheating Instructions
Once you’ve baked your delicious *valentines day cookies*, you’ll want to make sure they stay fresh and tasty! Here’s how to store them properly:
- Airtight Container: The best way to store your cookies is in an airtight container. This keeps them moist and prevents them from becoming stale. Just layer them between sheets of parchment paper if you have multiple layers to avoid sticking.
- Room Temperature: You can keep them at room temperature for up to a week. Just make sure they’re kept in a cool, dry place away from direct sunlight.
- Freezing for Later: If you want to save some for a later date (trust me, they freeze beautifully!), you can freeze the baked cookies. Place them in a freezer-safe bag or container, and they’ll last up to three months. Just remember to let them cool completely before freezing to prevent ice crystals from forming.
Now, if you want to enjoy those cookies warm, here’s how to reheat them:
- Microwave Method: For a quick warm-up, pop a cookie in the microwave for about 10-15 seconds. You want it just warm enough to soften up without melting away!
- Oven Method: If you’re reheating a batch, preheat your oven to 350°F (175°C), place the cookies on a baking sheet, and heat for about 5 minutes. This will refresh the texture and make them taste like they just came out of the oven.
With these storage and reheating tips, you can enjoy your *valentines day cookies* for days (or even weeks) to come! Happy snacking!
Nutritional Information
When it comes to enjoying these delightful *valentines day cookies*, it’s always nice to know what you’re indulging in! Here’s a typical nutritional breakdown based on the ingredients used in this recipe. Keep in mind that these values are estimates and can vary depending on the specific brands and measurements you use:
- Serving Size: 1 cookie
- Calories: 150
- Total Fat: 7g
- Saturated Fat: 4g
- Trans Fat: 0g
- Cholesterol: 20mg
- Sodium: 50mg
- Total Carbohydrates: 20g
- Dietary Fiber: 1g
- Sugars: 10g
- Protein: 2g
These cookies are a delightful treat that satisfies your sweet tooth without straying too far from moderation. Enjoy the rich chocolate flavor while sharing them with loved ones, and remember, it’s all about balance in life! Happy baking!
FAQ Section
Got questions? Don’t worry, I’ve got answers! Here are some common queries about these delightful *valentines day cookies*, along with my tips to help you out:
Can I use a different type of flour?
Absolutely! While all-purpose flour works best for this recipe, you can experiment with other types. Just keep in mind that the texture may change slightly. For example, using whole wheat flour will give you a nuttier flavor and a denser cookie. If you go this route, you might want to add an extra tablespoon of liquid to keep them moist!
How can I make these cookies gluten-free?
Making these cookies gluten-free is a breeze! Simply substitute the all-purpose flour with a gluten-free all-purpose flour blend that contains xanthan gum. This will help maintain the right texture and prevent them from crumbling. Just make sure the blend is one you enjoy baking with!
What can I do with leftover dough?
If you have leftover dough (which is rare since these cookies are so good!), you can certainly save it! Wrap it tightly in plastic wrap and refrigerate it for up to a week. When you’re ready to bake, just scoop and bake as usual. You can also freeze the dough for longer storage; it’ll keep well for up to three months. Just thaw it in the fridge overnight before use!
Can I make these cookies without eggs?
Yes, you can make these cookies egg-free! To replace one egg, you can use 1/4 cup of unsweetened applesauce or a flax egg (1 tablespoon of ground flaxseed mixed with 2.5 tablespoons of water, let it sit for a few minutes). This will help bind the ingredients together while keeping the cookies moist.
What’s the best way to decorate these cookies?
Decorating these cookies is half the fun! You can keep it simple with a sprinkle of colorful sprinkles on top before baking, or get creative with frosting after they cool. A simple buttercream or cream cheese frosting adds a lovely touch. You can even melt some chocolate and drizzle it over the top for an extra chocolatey delight!
If you have any more questions or need additional tips, feel free to drop me a message. Happy baking and enjoy every bite of your *valentines day cookies*!
Print
valentines day cookies: 5 Ways to Make Hearts Melt
- Total Time: 27 minutes
- Yield: 24 cookies 1x
- Diet: Vegetarian
Description
Delicious cookies perfect for Valentine’s Day.
Ingredients
- 2 cups all-purpose flour
- 1/2 cup unsweetened cocoa powder
- 1 cup granulated sugar
- 1/2 cup butter, softened
- 1 large egg
- 1 teaspoon vanilla extract
- 1/2 teaspoon baking powder
- 1/4 teaspoon salt
- 1 cup chocolate chips
- Sprinkles for decoration
Instructions
- Preheat your oven to 350°F (175°C).
- In a bowl, mix flour, cocoa powder, baking powder, and salt.
- In another bowl, cream butter and sugar until smooth.
- Add the egg and vanilla to the butter mixture and mix well.
- Gradually add dry ingredients to the wet mixture.
- Fold in chocolate chips.
- Drop spoonfuls of dough onto a baking sheet.
- Sprinkle with decorations.
- Bake for 10-12 minutes.
- Let cool before serving.
Notes
- Store in an airtight container.
- Can substitute chocolate chips with nuts.
- Adjust baking time for softer cookies.
- Prep Time: 15 minutes
- Cook Time: 12 minutes
- Category: Dessert
- Method: Baking
- Cuisine: American
Nutrition
- Serving Size: 1 cookie
- Calories: 150
- Sugar: 10g
- Sodium: 50mg
- Fat: 7g
- Saturated Fat: 4g
- Unsaturated Fat: 2g
- Trans Fat: 0g
- Carbohydrates: 20g
- Fiber: 1g
- Protein: 2g
- Cholesterol: 20mg
Keywords: valentines day cookies


