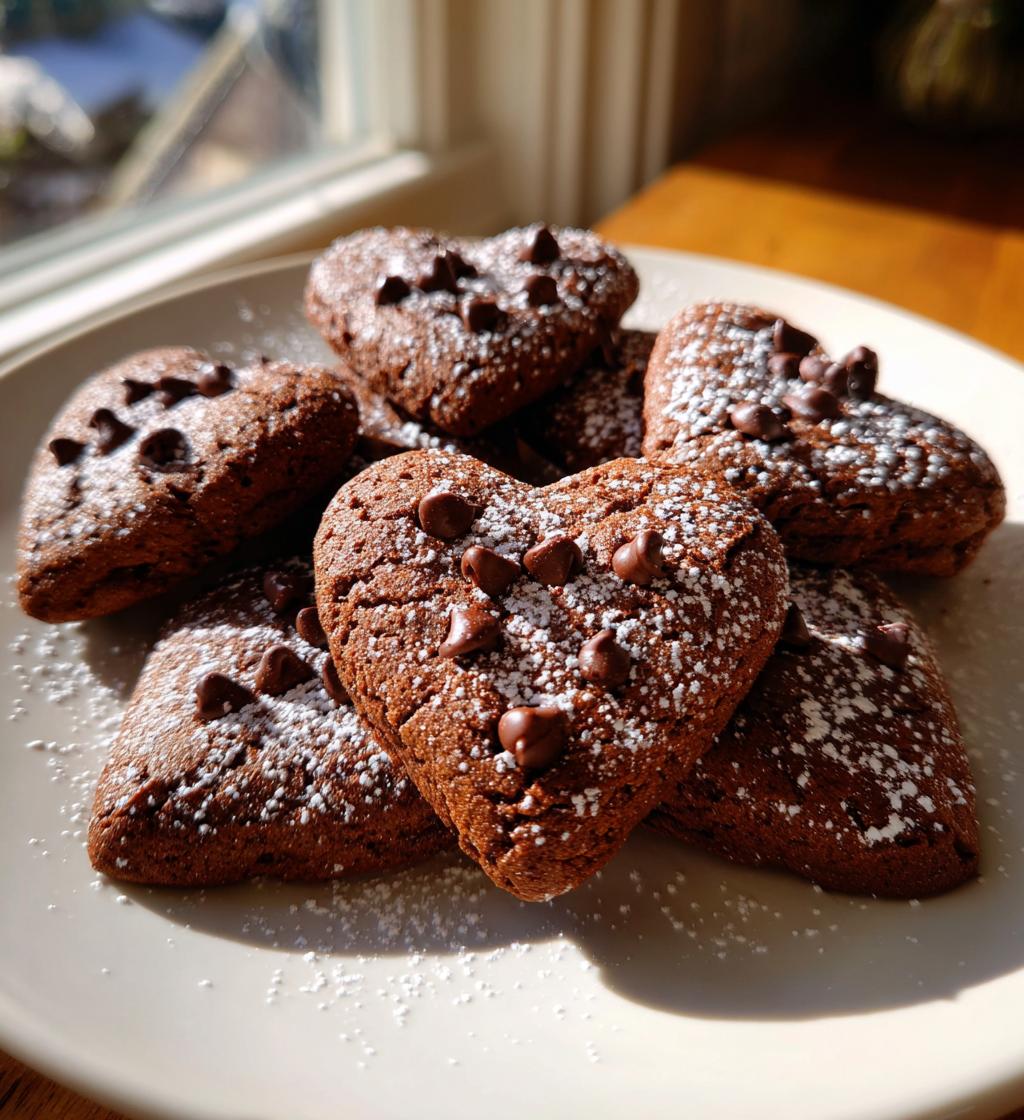
Valentine’s Day is just around the corner, and what better way to spread love than with some delightful *Valentine’s Day class treats*? These cookies are not just any ordinary sweets; they’re filled with rich chocolatey goodness that will make anyone’s heart melt. Picture this: you walk into the classroom, and the sweet aroma of freshly baked cookies wafts through the air, instantly bringing smiles to everyone’s faces. Trust me, sharing these treats with friends, family, or classmates is one of the best ways to show you care. They’re super easy to whip up and taste absolutely divine! So grab your apron, and let’s make some magic happen in the kitchen together!
Ingredients List
Here’s what you’ll need to create these scrumptious *Valentine’s Day class treats*. Gather these ingredients before you start, and you’ll be on your way to cookie bliss!
- 1 cup all-purpose flour
- 1/2 cup unsweetened cocoa powder
- 1 cup sugar
- 1/2 cup butter, softened
- 2 eggs
- 1 teaspoon vanilla extract
- 1/2 teaspoon baking powder
- 1/4 teaspoon salt
- 1 cup chocolate chips
Make sure you measure everything carefully for the best results! Each ingredient plays a crucial role in making these cookies perfectly delicious.
How to Prepare Instructions
Making these *Valentine’s Day class treats* is a delightful journey, and I’m here to guide you through each step! Let’s get started on creating these scrumptious cookies that everyone will love!
Preheat the Oven
First things first, you’ll want to preheat your oven to 350°F (175°C). This step is super important because a properly heated oven ensures your cookies bake evenly and come out perfectly fluffy. So, while you gather your ingredients, let that oven warm up!
Mix the Dry Ingredients
In a medium bowl, combine 1 cup of all-purpose flour, 1/2 cup of unsweetened cocoa powder, 1/2 teaspoon of baking powder, and 1/4 teaspoon of salt. Whisk them together until they’re well mixed and there are no lumps. This step is crucial because it helps distribute the baking powder evenly, giving your cookies that perfect rise!
Cream the Butter and Sugar
Now, in a separate bowl, cream together 1/2 cup of softened butter and 1 cup of sugar until it’s light and fluffy. I love using a hand mixer for this—it makes the process so quick! You want to beat them together for about 2-3 minutes until the mixture looks pale and airy. This step adds so much volume to your cookies!
Combine Wet Ingredients
Next, add in 2 eggs and 1 teaspoon of vanilla extract to your butter-sugar mixture. Mix well until everything is combined smoothly. You want that lovely vanilla flavor to infuse throughout the batter!
Incorporate Dry Ingredients
Now it’s time to gradually add your dry mixture to the wet one. I like to do this in thirds, mixing gently with a spatula or wooden spoon until just combined. Remember, don’t overmix! Once you see no more flour streaks, fold in 1 cup of chocolate chips. Yum!
Prepare for Baking
Using a spoon or cookie scoop, drop generous spoonfuls of the cookie mixture onto a baking sheet lined with parchment paper. Make sure to space them about 2 inches apart; they’ll spread a little while baking!
Baking Time
Pop those trays into your preheated oven and bake for 10-12 minutes. Keep an eye on them! You’ll know they’re done when the edges are set, but the centers still look a bit soft. They’ll firm up as they cool.
Cooling Before Serving
Once out of the oven, let the cookies cool on the baking sheet for about 5 minutes before transferring them to a wire rack. This step helps them hold their shape! Allow them to cool completely before serving—trust me, the aroma will make it hard to resist!
Why You’ll Love This Recipe
These *Valentine’s Day class treats* are truly special, and here’s why you’ll absolutely adore making them:
- Quick Preparation: With just 15 minutes of prep time, you can whip up a batch of these delicious cookies without any fuss. Perfect for those last-minute classroom treats!
- Delicious Taste: The rich chocolate flavor combined with gooey chocolate chips makes these cookies a hit with everyone. They’re seriously addictive!
- Fun for Kids: Involve your little ones in the baking process! They’ll love helping to mix, scoop, and decorate these treats, making it a fun family activity.
- Perfect for Sharing: With a yield of 24 cookies, there’s plenty to go around. Whether it’s a classroom party or a family gathering, these treats are ideal for sharing the love.
- Customizable: Feel free to get creative! You can add sprinkles, use different types of chocolate chips, or even mix in nuts for added texture.
Trust me, once you make these cookies, they’ll become a staple in your Valentine’s Day celebrations!
Tips for Success
To ensure your *Valentine’s Day class treats* turn out perfectly delicious, I’ve got some handy tips that will help you avoid common pitfalls and enhance your baking experience. Let’s make sure these cookies are a hit!
Measure Ingredients Accurately
Precision is key when it comes to baking! Make sure you measure your ingredients carefully, especially the flour and cocoa powder. Too much flour can lead to dry cookies, while too little can make them too gooey. I always use the spoon-and-level method for flour—spoon it into your measuring cup and level it off with a knife for accuracy!
Don’t Overmix the Batter
Once you combine the wet and dry ingredients, mix just until you see no more flour streaks. Overmixing can develop gluten, resulting in tough cookies rather than the soft, chewy texture we all love. So, be gentle when folding in those chocolate chips!
Adjust Baking Time for Your Oven
Every oven is a bit different, so keep an eye on your cookies as they bake! Start checking them around the 10-minute mark. If your cookies look a little soft in the center, that’s okay! They’ll continue to cook on the baking sheet after you take them out, ensuring they stay soft and chewy.
Cool Properly for the Best Texture
Letting your cookies cool on the baking sheet for a few minutes before transferring them to a wire rack is crucial. This helps them set and keeps them from falling apart. Plus, it gives you just a moment to enjoy that heavenly aroma filling your kitchen!
Get Creative with Mix-Ins
While chocolate chips are a must, don’t be afraid to mix things up! Add some colorful sprinkles for a festive touch or throw in some chopped nuts for crunch. The sky’s the limit, and customization makes these treats even more special!
With these tips in mind, you’ll be well on your way to baking the best *Valentine’s Day class treats* ever! Happy baking!
Nutritional Information Section
Let’s talk about the nutritional goodness of these delightful *Valentine’s Day class treats*! Each cookie is not only a sweet indulgence but also offers a little boost of energy. Here’s the estimated nutritional data for one cookie:
- Calories: 150
- Fat: 7g
- Protein: 2g
- Carbohydrates: 20g
- Sugar: 10g
- Sodium: 100mg
- Cholesterol: 20mg
Keep in mind that these values are estimates and can vary based on ingredient brands and specific measurements. But one thing’s for sure: you won’t be able to resist enjoying these tasty cookies as part of your Valentine’s Day celebrations!
FAQ Section
Can I use a different type of flour?
Absolutely! While all-purpose flour is my go-to for these *Valentine’s Day class treats*, you can experiment with other flours if you’d like. Just keep in mind that different flours absorb moisture differently. If you want to use whole wheat flour, for example, you might need to adjust the liquid slightly, or consider using a blend of whole wheat and all-purpose flour to maintain that soft texture.
How can I make these treats gluten-free?
Going gluten-free is totally doable! You can substitute the all-purpose flour with a 1:1 gluten-free baking blend, which works wonderfully in recipes like this. Brands like Bob’s Red Mill or King Arthur Flour have great options. Just make sure to check that your chocolate chips are also gluten-free, and you’ll be all set to enjoy these delicious cookies!
What can I use instead of chocolate chips?
If you’re not a fan of chocolate chips or just want to switch it up, there are plenty of tasty alternatives! You could use white chocolate chips for a fun twist, or mix in some dried fruit like cranberries or cherries for a chewy texture. Nuts like walnuts or pecans are also a great addition. Get creative with your favorite flavors!
How long do these treats last?
These *Valentine’s Day class treats* are best enjoyed fresh, but they can last about a week when stored properly. Keep them in an airtight container at room temperature to maintain their softness. If you want to keep them longer, you can freeze them for up to three months! Just make sure to separate layers with parchment paper to prevent sticking.
Can these be made ahead of time?
You bet! These cookies are perfect for making ahead of time. You can prepare the dough and store it in the fridge for up to 2 days before baking. Just remember to let it sit at room temperature for about 10-15 minutes before scooping and baking. Alternatively, you can bake them in advance and store them in an airtight container until you’re ready to share the love!
Storage & Reheating Instructions
Storing your *Valentine’s Day class treats* properly will help keep them fresh and delicious for as long as possible! Here’s how I do it:
Storing Leftovers
Once your cookies have cooled completely, place them in an airtight container. This is key to maintaining their chewy texture! You can layer them with parchment paper between each layer to prevent sticking. If you’re planning on keeping them for longer than a week, consider freezing them.
Freezing for Longer Storage
To freeze your cookies, simply place them in a freezer-safe bag or container, separating layers with parchment paper. They can last up to three months in the freezer! When you’re ready to enjoy them, just let them sit at room temperature for about 15-20 minutes to thaw, and they’ll be as good as new.
Reheating for Warmth
If you want that fresh-baked warmth again, reheating is super easy! Preheat your oven to 350°F (175°C) and place the cookies on a baking sheet. Warm them up for about 5-7 minutes. This will revive that delightful gooeyness of the chocolate chips!
Alternatively, you can pop them in the microwave for about 10-15 seconds, but be careful not to overdo it—nobody wants a rubbery cookie! A quick reheat will have those *Valentine’s Day class treats* tasting like they just came out of the oven.
With these storage and reheating tips, you can savor every last bite of your delicious cookies, whether you’re enjoying them right away or saving them for later!
Print
Valentine’s Day Class Treats: 5 Deliciously Sweet Recipes
- Total Time: 27 minutes
- Yield: 24 cookies 1x
- Diet: Vegetarian
Description
Delicious treats perfect for Valentine’s Day.
Ingredients
- 1 cup all-purpose flour
- 1/2 cup unsweetened cocoa powder
- 1 cup sugar
- 1/2 cup butter, softened
- 2 eggs
- 1 teaspoon vanilla extract
- 1/2 teaspoon baking powder
- 1/4 teaspoon salt
- 1 cup chocolate chips
Instructions
- Preheat oven to 350°F (175°C).
- In a bowl, mix flour, cocoa powder, baking powder, and salt.
- In another bowl, cream butter and sugar until fluffy.
- Add eggs and vanilla to the butter mixture and mix well.
- Gradually add the dry ingredients to the wet ingredients.
- Fold in chocolate chips.
- Drop spoonfuls of the mixture onto a baking sheet.
- Bake for 10-12 minutes until set.
- Let cool before serving.
Notes
- Store in an airtight container.
- Use heart-shaped cookie cutters for a festive look.
- Can substitute butter for margarine.
- Prep Time: 15 minutes
- Cook Time: 12 minutes
- Category: Dessert
- Method: Baking
- Cuisine: American
Nutrition
- Serving Size: 1 cookie
- Calories: 150
- Sugar: 10g
- Sodium: 100mg
- Fat: 7g
- Saturated Fat: 4g
- Unsaturated Fat: 2g
- Trans Fat: 0g
- Carbohydrates: 20g
- Fiber: 1g
- Protein: 2g
- Cholesterol: 20mg
Keywords: Valentines treats, chocolate cookies, dessert


