
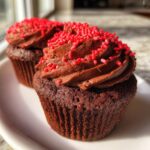
Oh my goodness, let me tell you about these *valentines cupcakes*! They’re not just any ordinary cupcakes; they’re the perfect sweet treat for sharing with loved ones on that special day. Imagine biting into a rich, chocolatey cupcake that’s soft and moist, with a delightful hint of vanilla that dances on your taste buds. They’re the kind of cupcakes that make hearts flutter, and trust me, they’ll be the highlight of your Valentine’s Day celebrations!
What I absolutely adore about these cupcakes is how simple they are to whip up. Whether you’re baking for a partner, friends, or even for yourself because you deserve a little love too, these cupcakes can easily spread joy. And let’s not forget the fun of decorating them! You can go wild with frosting, sprinkles, or even cute little heart-shaped toppers. They’re a canvas for your creativity and a delicious way to show how much you care. So roll up your sleeves and let’s get started on making these delightful *valentines cupcakes* that will surely impress anyone who gets to indulge in them!
Ingredients
To make these scrumptious *valentines cupcakes*, you’ll need the following ingredients. Make sure to have everything ready before you start baking – it makes the process so much smoother!
- 1 1/2 cups all-purpose flour
- 1 cup granulated sugar
- 1/2 cup unsweetened cocoa powder
- 1/2 cup unsalted butter, softened to room temperature
- 2 large eggs
- 1 teaspoon vanilla extract
- 1/2 cup milk
- 1 teaspoon baking powder
- 1/2 teaspoon salt
These ingredients come together to create a deliciously chocolatey base that’s perfect for any Valentine’s celebration. Make sure your butter is nice and soft – it really helps in achieving that creamy texture when you mix it with the sugar. And don’t skimp on the vanilla extract; it adds that lovely warmth that makes every bite taste even better!
How to Prepare *Valentines Cupcakes*
Now, let’s dive into the exciting part – making these delightful *valentines cupcakes*! Follow along with these simple steps, and you’ll have a batch of sweet treats ready to impress in no time.
Step 1: Preheat the Oven
First things first, preheat your oven to 350°F (175°C). This step is super important because it ensures that your cupcakes bake evenly and rise beautifully. A hot oven helps create that perfect fluffy texture, so don’t skip it! While the oven heats up, you can gather your ingredients and get ready for some mixing fun.
Step 2: Mix Dry Ingredients
In a medium bowl, combine the all-purpose flour, cocoa powder, baking powder, and salt. Whisk these dry ingredients together until they’re well blended. This step is crucial because it ensures that the baking powder and salt are evenly distributed, which helps your cupcakes rise properly and taste amazing. Plus, it helps break up any lumps in the cocoa powder, giving you a smooth batter later on.
Step 3: Cream Butter and Sugar
In a large bowl, beat the softened butter and granulated sugar together until the mixture is creamy and light in color. You’re looking for a texture that’s fluffy and almost airy. This usually takes about 2-3 minutes with a hand mixer or stand mixer. Trust me, this step is key because it introduces air into your batter, giving your cupcakes that wonderful lightness!
Step 4: Add Eggs
Now it’s time to add the eggs! Crack them in one at a time, mixing well after each addition. This helps to incorporate the eggs fully into the batter, ensuring that everything combines smoothly. You want to see that lovely glossy texture forming as you mix. It’s like magic, watching your batter transform!
Step 5: Incorporate Vanilla and Milk
Next, stir in the vanilla extract and milk. The vanilla adds a warm, inviting flavor that truly enhances the chocolatey goodness of the cupcakes. The milk brings moisture to the batter, helping to create that rich, tender crumb we all adore. Mix until everything is just combined – you don’t want to overdo it at this stage!
Step 6: Combine Dry and Wet Ingredients
Now, gradually mix in the dry ingredients you set aside earlier. I like to do this in three parts – adding some of the flour mixture, stirring until just combined, then repeating until everything is in the bowl. This ensures a smooth batter without overmixing, which can lead to tough cupcakes. Keep an eye on it; it should be velvety and luscious!
Step 7: Fill Cupcake Liners
Grab your cupcake liners and place them in a muffin tin. Fill each liner about two-thirds full with the batter. This is the sweet spot – if you fill them too much, they’ll overflow, and if you don’t fill them enough, you won’t get that delightful dome shape. A handy trick is to use a cookie scoop for even portions!
Step 8: Bake the Cupcakes
Pop your muffin tin into the preheated oven and bake for 18-20 minutes. To check for doneness, insert a toothpick into the center of a cupcake. If it comes out clean or with a few moist crumbs, they’re ready! If it’s still gooey, give them a couple more minutes. The smell wafting through your kitchen will be absolutely irresistible!
Step 9: Cool and Frost
Once your cupcakes are baked to perfection, let them cool in the pan for about 5 minutes before transferring them to a wire rack. It’s essential to let them cool completely before frosting; otherwise, the frosting will melt right off! Once they’re cool, feel free to get creative with your favorite frosting. Cream cheese frosting, chocolate ganache, or even a simple buttercream – the options are endless!
Nutritional Information
Understanding the nutritional values of these *valentines cupcakes* is super helpful, especially if you’re keeping an eye on what you’re enjoying. Here’s a breakdown of the typical nutritional values you can expect per cupcake:
- Calories: Approximately 200
- Fat: 8g
- Saturated Fat: 5g
- Unsaturated Fat: 3g
- Trans Fat: 0g
- Cholesterol: 30mg
- Sodium: 150mg
- Carbohydrates: 30g
- Fiber: 1g
- Sugar: 15g
- Protein: 3g
This gives you a good idea of the deliciousness you’re indulging in! Remember, the toppings and frosting can add a bit more, so keep that in mind when you’re decorating. Enjoy every bite, and don’t forget to share the love!
Why You’ll Love This Recipe
- Easy Preparation: These *valentines cupcakes* come together quickly with simple steps, making them perfect for both novice bakers and seasoned pros.
- Delightful Flavor: The rich chocolate flavor combined with a hint of vanilla makes every bite a delicious treat that everyone will love.
- Festive Appearance: With their beautiful dome shape and endless decorating possibilities, these cupcakes are a feast for the eyes, perfect for any Valentine’s celebration.
- Customizable: You can easily switch up the frosting or add your favorite toppings to make these cupcakes uniquely yours!
- Perfect for Sharing: Whether you’re baking for a loved one or hosting a gathering, these cupcakes are a sweet way to spread love and joy.
Tips for Success
Getting these *valentines cupcakes* just right is a breeze if you keep a few pro tips in mind. Trust me, these little nuggets of wisdom can make all the difference in your baking adventure!
- Temperature Matters: Make sure your butter is at room temperature before you start mixing. Cold butter can lead to a lumpy batter and dense cupcakes. Softened butter whips up beautifully, creating that airy texture we all crave!
- Don’t Overmix: When combining your dry and wet ingredients, mix until just combined. Overmixing can develop gluten and result in tough cupcakes. You want them light and fluffy, not dense like a brick!
- Use Fresh Ingredients: Always check the expiration dates on your baking powder and cocoa powder. Fresh ingredients make a big difference in your cupcakes’ rise and flavor. Trust me, there’s nothing worse than baking with stale ingredients!
- Keep an Eye on Baking Time: Every oven is different, so start checking your cupcakes a couple of minutes before the timer goes off. You want them perfectly baked, not overdone. Remember, they’ll continue to cook a bit while cooling!
- Let Them Cool Completely: I know it’s tempting to frost warm cupcakes, but resist the urge! Frosting on warm cupcakes can lead to a gooey mess. Let them cool on a wire rack for at least 15-20 minutes before adding your delicious frosting.
- Experiment with Toppings: Don’t be afraid to get creative with your frosting and decorations! Try adding fresh fruit, edible glitter, or themed sprinkles that fit the Valentine’s vibe. It’s a fun way to make your cupcakes stand out!
With these tips in your back pocket, you’ll be well on your way to baking the most delightful *valentines cupcakes* that everyone will love. Happy baking!
Variations
One of the best things about these *valentines cupcakes* is how easily they can be customized to suit your taste or the occasion! Here are some delightful variations to make your cupcakes even more special:
- Berry Bliss: Swap out some of the cocoa powder for freeze-dried strawberries or raspberries in the batter. It adds a fruity twist that pairs beautifully with chocolate!
- Flavor Infusions: Experiment by adding a splash of almond extract or orange zest to the batter for a unique flavor profile. It’ll give your cupcakes a lovely aromatic touch!
- Frosting Flavors: While classic buttercream is always a hit, why not try cream cheese frosting for a tangy twist? Or whip up some chocolate ganache for a rich, decadent topping. You could also go for a whipped coconut cream frosting for a lighter option!
- Fun Decorations: Let your creativity shine with festive decorations! Use heart-shaped sprinkles, edible glitter, or even drizzle melted chocolate over the top for a touch of elegance. You can also pipe out fun shapes with your frosting to make them extra special.
- Stuffed Cupcakes: For an exciting surprise, fill the center of each cupcake with a dollop of raspberry jam or Nutella before baking. Just make a small well in the batter and spoon in the filling – it’s like a sweet secret waiting to be discovered!
- Mini Cupcakes: If you’re looking for bite-sized treats, make mini versions of these cupcakes! Just reduce the baking time to about 12-15 minutes. They’re perfect for sharing and fit perfectly in your loved ones’ hands!
These variations allow you to personalize your *valentines cupcakes* and make them uniquely yours. So go ahead, mix things up and have fun while baking – your loved ones will adore whatever delicious creation you come up with!
Storage & Reheating Instructions
After all that hard work and delicious baking, you might find yourself with some leftover *valentines cupcakes*. Don’t worry, they can be stored easily so you can savor them later! Here’s how to keep them fresh:
First, let your cupcakes cool completely. This step is crucial because storing warm cupcakes can create condensation in the container, making them soggy – and we definitely don’t want that! Once they’re cool, place them in an airtight container. I like to separate layers with parchment paper to prevent them from sticking together. This way, they stay just as delightful as when they came out of the oven!
As for storage, these lovely treats can sit at room temperature for about 2-3 days. If you want to keep them for longer, pop them in the fridge, where they can last up to a week. Just remember, refrigeration can sometimes dry them out a little, so be sure to let them come back to room temperature before indulging.
If you have leftovers and want to enjoy them later, you can also freeze them! Wrap each cupcake tightly in plastic wrap and then place them in a freezer-safe bag. They’ll stay good for up to 3 months. When you’re ready to enjoy, simply take them out, let them thaw at room temperature, and they’ll be just as scrumptious as the day you made them!
For reheating, I recommend the microwave for a quick warm-up. Just pop a cupcake on a microwave-safe plate and heat it for about 10-15 seconds. Keep an eye on it – you want it warm, not hot! This little trick revives that fresh-baked flavor, making them irresistible all over again. Enjoy your sweet treats, whether fresh from the oven or warmed up later!
FAQ Section
Q1: Can I use a different type of flour for these cupcakes?
Absolutely! While all-purpose flour works perfectly, you can experiment with cake flour for a lighter texture or even gluten-free flour blends if you need to accommodate dietary restrictions. Just keep in mind that different flours may affect the rise and texture, so you might need to adjust the liquid slightly.
Q2: How can I make these cupcakes more chocolatey?
If you’re a chocolate lover like me, you can enhance the chocolate flavor by adding chocolate chips to the batter. About 1 cup of semi-sweet or dark chocolate chips will do the trick! You can also increase the cocoa powder by a couple of tablespoons for an extra rich taste.
Q3: What’s the best way to decorate my *valentines cupcakes*?
The sky’s the limit! Classic buttercream is always a hit, but you can also pipe out heart shapes or use a spatula to create beautiful swirls. Add sprinkles, edible glitter, or even fresh fruit on top for that extra festive flair. Get creative and have fun with it!
Q4: Can I make these cupcakes ahead of time?
Definitely! You can bake the cupcakes a day or two in advance. Just store them in an airtight container after they’ve cooled completely. If you want to frost them later, wait until just before serving to ensure the frosting stays fresh and doesn’t melt.
Q5: How do I know when my cupcakes are done baking?
Great question! The best way is to do the toothpick test: insert a toothpick into the center of a cupcake; if it comes out clean or with a few moist crumbs, they’re ready! Also, look for a slight dome shape and a gentle spring back when you press the tops. Trust me, you’ll get the hang of it!
valentines cupcakes: 7 Sweet Variations for Your Loved Ones
- Total Time: 40 minutes
- Yield: 12 cupcakes 1x
- Diet: Vegetarian
Description
Delicious cupcakes perfect for Valentine’s Day.
Ingredients
- 1 1/2 cups all-purpose flour
- 1 cup granulated sugar
- 1/2 cup unsweetened cocoa powder
- 1/2 cup unsalted butter, softened
- 2 large eggs
- 1 teaspoon vanilla extract
- 1/2 cup milk
- 1 teaspoon baking powder
- 1/2 teaspoon salt
Instructions
- Preheat your oven to 350°F (175°C).
- In a bowl, mix flour, cocoa powder, baking powder, and salt.
- In another bowl, beat butter and sugar until creamy.
- Add eggs one at a time, mixing well after each.
- Stir in vanilla extract and milk.
- Gradually mix in the dry ingredients.
- Fill cupcake liners with the batter.
- Bake for 18-20 minutes or until a toothpick comes out clean.
- Let cool before frosting.
Notes
- Store cupcakes in an airtight container.
- Use your favorite frosting for decoration.
- Add sprinkles for a festive touch.
- Prep Time: 20 minutes
- Cook Time: 20 minutes
- Category: Dessert
- Method: Baking
- Cuisine: American
Nutrition
- Serving Size: 1 cupcake
- Calories: 200
- Sugar: 15g
- Sodium: 150mg
- Fat: 8g
- Saturated Fat: 5g
- Unsaturated Fat: 3g
- Trans Fat: 0g
- Carbohydrates: 30g
- Fiber: 1g
- Protein: 3g
- Cholesterol: 30mg
Keywords: valentines cupcakes


