There’s something truly magical about baking for the ones you love, especially around Valentine’s Day. The heartwarming aromas wafting from the oven, the joy of creating delightful treats, and the smiles on loved ones’ faces when they take that first bite—it all comes together in the most beautiful way! Welcome to my little corner of the world, where our valentines bakery specializes in crafting those perfect Valentine’s Day goodies that speak straight to the heart.
As someone who grew up in a family that celebrated every holiday with homemade desserts, I can tell you that there’s no better way to show affection than with something sweet. This isn’t just about baking; it’s about pouring love into every ingredient and every step. Whether it’s for a romantic dinner, a thoughtful gift, or just to indulge yourself, baking for Valentine’s Day is a wonderful way to express your feelings. So, let’s roll up our sleeves and dive into creating some delicious memories together!
Ingredients List
Gathering the right ingredients is the first step towards creating those delightful treats that will make your Valentine’s Day extra special. Here’s what you’ll need:
- 2 cups all-purpose flour: This forms the base of your baked goods, giving them structure. Make sure to measure it correctly by spooning it into your measuring cup and leveling it off with a knife.
- 1 cup sugar: This sweetens your treats and helps them to caramelize beautifully in the oven. You can use granulated sugar for a classic taste.
- 1/2 cup unsalted butter: Bring this to room temperature before creaming. It’s the key to a rich flavor and tender texture in your cake.
- 1 cup milk: This adds moisture and helps to create a soft crumb. Whole milk works best, but you can use any milk you have on hand.
- 2 eggs: These add richness and help bind everything together. Make sure they’re at room temperature for even mixing.
- 1 tablespoon vanilla extract: This is where the magic happens! Vanilla enhances all the flavors and adds a lovely aroma.
- 1 teaspoon baking powder: This leavening agent helps your treats rise and become fluffy. Be sure it’s fresh for the best results!
- 1/2 teaspoon salt: A pinch of salt balances the sweetness and brings out all the flavors. Trust me, it’s essential!
With these ingredients at your fingertips, you’re all set to whip up something truly delightful. Let’s get ready to create some sweet Valentine’s Day magic together!
How to Prepare Instructions
Now that we’ve gathered our ingredients, it’s time to bring them together and create some Valentine’s Day magic! Follow these simple steps, and don’t worry—I’ll guide you through each one.
Preheat the Oven
First things first, let’s get that oven preheating to 350°F (175°C). Preheating is crucial because it ensures your treats start baking at the right temperature, helping them rise nicely and develop that perfect texture. Believe me, you don’t want to skip this step!
Creaming Butter and Sugar
Next, let’s cream together the unsalted butter and sugar in a mixing bowl. Start with room-temperature butter—this is key! Use a hand mixer or a sturdy wooden spoon, and beat until the mixture is light and fluffy. This step is super important because it incorporates air into the batter, which helps your treats turn out tender and light. Make sure to scrape down the sides of the bowl to get everything mixed evenly!
Mixing Wet Ingredients
Now, it’s time to add the eggs and vanilla extract. Crack the eggs into the bowl one at a time, mixing well after each addition. This helps to ensure everything combines smoothly. The vanilla is what makes your treats smell and taste heavenly, so don’t rush through this part!
Combine Dry Ingredients
In a separate bowl, let’s combine the flour, baking powder, and salt. When measuring your flour, spoon it into the measuring cup and level it off—this helps avoid packing it down, which could make your treats dense. Whisk these dry ingredients together to evenly distribute the baking powder and salt.
Mixing Wet and Dry Ingredients
Now comes the fun part! Gradually add the dry mixture to the butter-sugar-egg mixture, alternating with the milk. Start with a third of the dry ingredients, mix until just combined, then add half of the milk. Repeat this process until everything is mixed in, finishing with the dry ingredients. This method keeps your batter smooth and avoids overmixing, which can make your treats tough.
Baking the Mixture
Pour the batter into your greased baking pan, spreading it out evenly. Give the pan a little tap on the counter to release any air bubbles. Pop it into the preheated oven and bake for 30-35 minutes. To check for doneness, insert a toothpick in the center—if it comes out clean, you’re good to go!
Cooling and Serving
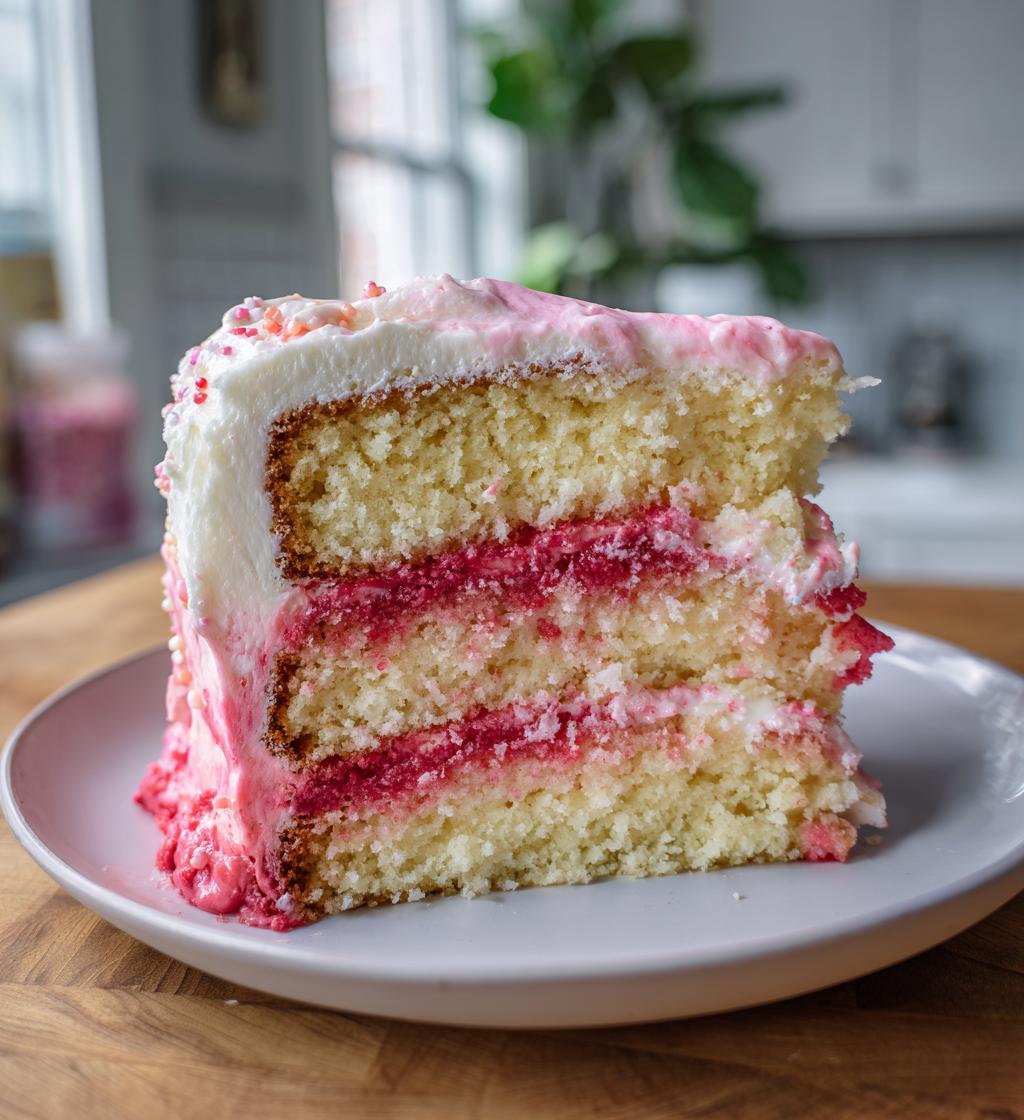
Once baked, let your creation cool in the pan for about 10 minutes before transferring it to a wire rack. This cooling step is crucial because it allows the structure to set, making it easier to slice and serve. For a festive touch, consider decorating with pink and red frosting or a simple dusting of powdered sugar before serving. Your loved ones will be in awe!
FAQ Section
Can I use whole wheat flour instead of all-purpose flour?
Absolutely! You can substitute whole wheat flour for all-purpose flour in this recipe. Just keep in mind that whole wheat flour has a denser texture, so your baked goods might turn out a bit heavier. I recommend starting with a 50/50 mix of whole wheat and all-purpose flour if you’re looking for a lighter result while still getting that wholesome goodness.
How can I store leftovers?
Storing leftovers is super easy! Once your treats have completely cooled, you can place them in an airtight container. They’ll stay fresh for up to three days at room temperature. If you want to keep them for longer, just pop them in the refrigerator. Just remember to bring them back to room temperature before serving for the best taste!
Can I freeze the baked goods?
You bet! Freezing your baked goods is a great way to enjoy them later. Allow your treats to cool completely, then wrap them tightly in plastic wrap or aluminum foil. You can also use a freezer-safe bag, squeezing out as much air as possible. They’ll keep well in the freezer for about 2-3 months. When you’re ready to enjoy, just let them thaw in the fridge overnight or at room temperature for a couple of hours, and they’ll be as good as new!
Why You’ll Love This Recipe
There are so many reasons to fall in love with this delightful recipe, especially when it comes to celebrating Valentine’s Day. Here’s why you’ll want to whip it up:
- Quick Preparation: With just 15 minutes to prep and 35 minutes of baking, you’ll have a delicious dessert ready in no time!
- Delightful Taste: The combination of rich butter, sweet sugar, and a hint of vanilla creates a flavor explosion that’s sure to impress your loved ones.
- Perfect for Sharing: This recipe yields 12 servings, making it ideal for sharing with friends, family, or that special someone.
- Customizable: You can easily dress it up with colorful frosting or keep it simple with a sprinkle of powdered sugar—whatever matches your Valentine’s vibe!
- Feel-Good Baking: Baking for someone you care about is a wonderful way to express your feelings, and this recipe will help you do just that!
Trust me, once you make this treat, it’ll become a cherished part of your Valentine’s Day traditions!
Tips for Success
To ensure that your baking adventure is a sweet success, I’ve gathered some pro tips that will help you achieve the best results with this recipe. Follow these suggestions, and you’ll be on your way to creating delicious treats that everyone will love!
- Room Temperature Ingredients: Make sure your eggs and butter are at room temperature before you start. This helps them combine more easily, creating a smoother batter and a better texture in the final product.
- Measure Accurately: When measuring flour, spoon it into the measuring cup and level it off with a knife. This prevents packing, which can lead to dense baked goods. A kitchen scale is also a great tool for precision!
- Don’t Overmix: When combining the wet and dry ingredients, mix just until the flour is incorporated. Overmixing can create tough treats, and nobody wants that! It’s okay to have a few lumps in the batter.
- Keep an Eye on Baking Time: Ovens can vary, so start checking for doneness a few minutes early. Remember the toothpick test: it should come out clean or with a few moist crumbs when your treats are ready.
- Let It Cool: Allow your baked goods to cool in the pan for about 10 minutes before transferring them to a wire rack. This helps them set properly and makes them easier to slice without falling apart.
- Have Fun with Decorations: Get creative with your frosting and toppings! Use pink and red sprinkles, fresh berries, or even edible glitter to give your treats a festive flair that’s perfect for Valentine’s Day.
With these tips in your back pocket, you’re all set to bake something truly special. Enjoy the process, and happy baking!
Variations
One of the most delightful things about baking is the opportunity to get creative! While this recipe is a perfect base for your Valentine’s Day treats, there are so many ways you can switch things up and add your own personal touch. Here are some fun variations to consider:
- Chocolate Chip Delight: Add a cup of semi-sweet or dark chocolate chips to the batter for a rich, decadent twist. Who doesn’t love a little chocolate in their life, especially on Valentine’s Day?
- Citrus Burst: Incorporate the zest of one orange or lemon into the batter. This brightens up the flavors and adds a refreshing zing that pairs beautifully with the sweetness.
- Nutty Goodness: Fold in some chopped nuts like walnuts or pecans for a lovely crunch. Just be sure to toast them lightly beforehand to enhance their flavor!
- Berry Infusion: Mix in some fresh or frozen berries such as raspberries or strawberries. They’ll create lovely pockets of fruity goodness throughout your treats!
- Coconut Craze: Add a half cup of shredded coconut to the batter for a tropical flair. This adds a delightful chewiness and pairs wonderfully with the other ingredients.
- Spiced Chai: Sprinkle in a teaspoon of chai spice blend or cinnamon for a warm, cozy flavor. It’s perfect for adding a little extra warmth and comfort to your baking.
These variations can easily transform your Valentine’s Day treats into something unique and personal. Don’t hesitate to mix and match ideas—after all, baking is all about having fun and sharing love through delicious goodies!
Nutritional Information Section
Understanding the nutritional values can help you enjoy your sweet treats while keeping an eye on your health. Here’s a typical breakdown for one slice of our delightful Valentine’s Day cake:
- Calories: 250
- Fat: 10g
- Saturated Fat: 5g
- Unsaturated Fat: 3g
- Trans Fat: 0g
- Cholesterol: 50mg
- Sodium: 150mg
- Carbohydrates: 35g
- Fiber: 1g
- Sugar: 15g
- Protein: 4g
Please note that these values are estimates and can vary based on specific ingredients and serving sizes. So, while indulging in your delicious Valentine’s Day treats, remember to enjoy every bite and savor the love baked into each slice!
Now that you’ve whipped up these delightful treats, I’d love to hear all about your baking adventure! Did you try any of the variations? What did your loved ones think of your delicious Valentine’s Day goodies? Sharing your experiences not only brings a smile to my face but also inspires others in the kitchen.
If you enjoyed this recipe, consider leaving a rating—your feedback means the world to me! And don’t hesitate to drop a comment below with any questions or tips you might have. We’re all in this baking journey together, and I can’t wait to see how you celebrate love through your creations!
Print
valentines bakery: 7 Sweet Ways to Celebrate Love
- Total Time: 50 minutes
- Yield: 12 servings 1x
- Diet: Vegetarian
Description
A delightful bakery specializing in Valentine’s Day treats.
Ingredients
- 2 cups all-purpose flour
- 1 cup sugar
- 1/2 cup unsalted butter
- 1 cup milk
- 2 eggs
- 1 tablespoon vanilla extract
- 1 teaspoon baking powder
- 1/2 teaspoon salt
Instructions
- Preheat the oven to 350°F (175°C).
- In a bowl, cream together butter and sugar.
- Add eggs and vanilla, mixing well.
- In another bowl, combine flour, baking powder, and salt.
- Gradually add dry ingredients to the wet mixture, alternating with milk.
- Pour the batter into a greased baking pan.
- Bake for 30-35 minutes or until a toothpick comes out clean.
- Let cool before serving.
Notes
- Decorate with pink and red frosting for a festive touch.
- Store leftovers in an airtight container.
- Can be made ahead of time and frozen.
- Prep Time: 15 minutes
- Cook Time: 35 minutes
- Category: Dessert
- Method: Baking
- Cuisine: American
Nutrition
- Serving Size: 1 slice
- Calories: 250
- Sugar: 15g
- Sodium: 150mg
- Fat: 10g
- Saturated Fat: 5g
- Unsaturated Fat: 3g
- Trans Fat: 0g
- Carbohydrates: 35g
- Fiber: 1g
- Protein: 4g
- Cholesterol: 50mg
Keywords: Valentine's Day treats, bakery, desserts


