Oh, the joy of giving homemade chocolates on Valentine’s Day! There’s something truly special about crafting a beautiful box of chocolates that come straight from your heart. These Valentine chocolate box ideas are not just about the sweet treats; they’re about the thought and love you put into each piece. I remember the first time I made chocolates for my partner—I was so nervous, but when I saw their face light up, I knew it was worth it. The best part? You can personalize these chocolates however you like! From choosing different flavors to adding special notes, it’s all about creating a delightful gift that’s uniquely yours. So, let’s dive into this simple yet creative way to make your Valentine’s Day unforgettable!
Ingredients
Now let’s talk about the delightful ingredients that make these Valentine chocolate box ideas truly special. Each element plays a crucial role in creating those gorgeous, heart-shaped chocolates. Here’s what you’ll need:
- Chocolate (Dark, Milk, White) – 500g: You can mix and match your favorite types of chocolate. Dark chocolate offers a rich, intense flavor, while milk chocolate adds sweetness. White chocolate brings a creamy touch!
- Heart-shaped molds – 2: These molds are vital! They’ll give your chocolates that adorable shape we all love. Silicone molds work best for easy removal.
- Sprinkles – 100g: Grab an assortment of colorful sprinkles. They’re perfect for adding a fun and festive touch to your chocolates.
- Nuts (Almonds, Hazelnuts) – 100g: Chopped nuts add a satisfying crunch and nutty flavor. Choose your favorites for a personalized touch.
- Dried fruits (Raisins, Cranberries) – 100g: These provide a wonderful contrast to the chocolate’s sweetness and add a hint of tartness. Feel free to experiment with different dried fruits!
- Flavor extracts (Vanilla, Mint) – 1 tsp each: A little flavor extract goes a long way! Vanilla adds warmth, while mint gives a refreshing twist.
- Gift box – 1: Don’t forget the gift box! It’s the perfect way to present your beautiful creations and make your loved one feel extra special.
Gather these ingredients, and you’re all set to create something truly magical for Valentine’s Day! Trust me, the love and effort you put into this will shine through every bite.
How to Prepare Valentine Chocolate Box Ideas
Now that we have all our delightful ingredients ready, let’s jump into making these scrumptious chocolates! This simple process will have you creating beautiful heart-shaped treats that are sure to impress. Follow these steps, and you’ll be on your way to crafting the perfect Valentine chocolate box!
Step 1: Melt the Chocolate
First things first, we need to melt that chocolate! You can do this using a microwave or a double boiler. If you’re using the microwave, break the chocolate into small pieces and place it in a microwave-safe bowl. Heat it in short bursts of about 30 seconds, stirring in between until it’s completely melted and smooth. If you prefer the double boiler method, fill a pot with a couple of inches of water and bring it to a gentle simmer. Place a heatproof bowl on top, making sure it doesn’t touch the water, and add the chocolate. Stir until it’s melted. Either way, keep an eye on it—burnt chocolate is a sad sight!
Step 2: Pour into Molds
Once your chocolate is melted and glossy, it’s time to pour it into those heart-shaped molds. Be careful here; you want to be neat! Use a spoon or a piping bag to gently fill each mold, leaving a little space at the top for toppings. This part is super fun—watching the chocolate fill those cute shapes is like magic!
Step 3: Add Toppings
Now for the fun part—adding your toppings! Sprinkle in your chopped nuts and dried fruits into the melted chocolate. I like to think of this as an opportunity to get creative! You can arrange the nuts and fruits in a way that looks pretty or just toss them in for a more rustic vibe. The crunch of the nuts and the chewiness of the dried fruits will add amazing textures to your chocolates.
Step 4: Add Sprinkles
Next, it’s time to add some sprinkles! Grab your colorful assortment and generously sprinkle them over the filled molds. This adds a festive touch that’s perfect for Valentine’s Day. Plus, who doesn’t love a little extra sparkle in their life? You’ll want to make sure they stick well, so don’t be shy!
Step 5: Let it Cool
Alright, now we need to let those chocolates cool and harden. This can take about 30 minutes at room temperature, or you can speed things up by placing the molds in the fridge for about 15 minutes. Just make sure they’re fully set before moving on to the next step—trust me, no one likes a gooey chocolate mess!
Step 6: Remove from Molds
Once your chocolates are fully cooled and hard, it’s time for the big reveal! Carefully pop them out of the molds. If you’re using silicone molds, they should come out easily with a gentle push. If you’re using plastic molds, you might need to tap them lightly on the counter to help release the chocolates. Be gentle—nobody wants a broken heart… or chocolate!
Step 7: Assemble the Gift Box
Finally, it’s time to present your delicious creations! Place the chocolates in your gift box, arranging them nicely for a lovely display. You can even add a personal touch by including little notes or messages between the chocolates. This is where your thoughtfulness really shines through, making your Valentine’s Day gift even more special!
Nutritional Information
Now, let’s talk about what’s in these delightful chocolates! While indulging in homemade treats is all about enjoying the moment, it’s good to know the estimated nutritional values too. Keep in mind these numbers can vary based on the specific ingredients you choose and how you prepare them. Here’s a rough breakdown per serving size of two chocolates:
- Calories: 150
- Total Fat: 9g
- Saturated Fat: 5g
- Unsaturated Fat: 4g
- Trans Fat: 0g
- Sodium: 5mg
- Total Carbohydrates: 15g
- Dietary Fiber: 1g
- Sugars: 12g
- Protein: 2g
- Cholesterol: 5mg
This info gives you a good idea of what you’re enjoying, but remember, these chocolates are made with love, and that’s what counts the most! So go ahead and savor each bite—after all, you deserve it!
Why You’ll Love This Recipe
- Quick Preparation: With just 30 minutes of prep time, you can whip up these delightful chocolates without any fuss!
- Endless Creativity: The beauty of this recipe lies in the freedom to customize. Choose your favorite chocolates, toppings, and flavors to make each box uniquely yours.
- Personal Touch: Adding little notes or special messages makes these chocolates more than just a gift; they become a heartfelt expression of your love.
- No-Bake Fun: This no-bake recipe means you won’t have to worry about ovens or baking times—just melt, mix, and mold!
- Perfect for Any Occasion: While it’s ideal for Valentine’s Day, this chocolate box is a sweet surprise for birthdays, anniversaries, or just because!
Tips for Success
Creating your own Valentine chocolate box is such a rewarding experience, but there are a few tips and tricks that can help you avoid common hiccups along the way. Trust me, these little nuggets of wisdom can make all the difference!
Use Quality Chocolate
First and foremost, always choose good-quality chocolate. The better the chocolate, the more delicious your final product will be. Look for chocolate that contains cocoa butter and has a high cocoa content for the best flavor and texture. Remember, you’re creating something special for your loved one, so go for the good stuff!
Don’t Overheat the Chocolate
When melting chocolate, be patient. Overheating can lead to a gritty or burnt texture that’s just disappointing. If you’re using the microwave, stick to those 30-second intervals and stir between each one. If you’re using a double boiler, keep the heat low and let it gently melt away. You want silky smooth chocolate, not a sad lump!
Keep Molds Dry
Make sure your molds are completely dry before pouring in the chocolate. Any moisture can cause the chocolate to seize up and not set properly. Give them a quick wipe-down if needed, and ensure they’re at room temperature.
Experiment with Flavors
Don’t be afraid to get creative with flavors! Besides vanilla and mint, consider adding a splash of almond extract, orange zest, or even a hint of espresso powder for an extra kick. Just remember, a little goes a long way, so start with small amounts and taste as you go!
Patience is Key
Once your chocolates are in the molds, resist the urge to rush the cooling process! Letting them set at room temperature ensures they harden evenly. If you pop them in the fridge, make sure to cover them to prevent any condensation from forming, which can make the chocolate look dull.
Practice Makes Perfect
Finally, don’t stress if your first batch isn’t perfect. Chocolate-making takes practice! Each attempt will teach you something new, so enjoy the process and learn along the way. Plus, even imperfect chocolates still taste amazing, and the effort you put in makes them all the more special.
With these tips in your back pocket, you’re all set to create beautiful and delicious chocolates that will wow your Valentine. Happy chocolate-making!
Variations
Now, let’s have some fun with these Valentine chocolate box ideas! One of the best things about making your own chocolates is the ability to play around with different types of chocolate, toppings, and flavor combinations. Here are some creative spins you can try to make your chocolates even more unique:
Chocolate Types
- Dark Chocolate Delight: If you’re a fan of rich flavors, go all-in with dark chocolate! It pairs wonderfully with orange zest or espresso powder for an extra kick.
- Milk Chocolate Magic: For a sweeter treat, stick with milk chocolate. It’s a classic that everyone loves, especially when combined with caramel drizzle or cookie crumbles.
- White Chocolate Wonder: Want to add a creamy and sweet twist? Use white chocolate! You can even swirl in some melted dark chocolate for a stunning marbled effect.
Creative Toppings
- Exotic Nuts: Try using pistachios or macadamia nuts for an unexpected crunch and flavor. They add a lovely color contrast too!
- Flavored Dried Fruits: Switch it up with tropical dried fruits like mango or pineapple. They bring a delightful chewiness and a burst of flavor that’s perfect for summer vibes!
- Decadent Sea Salt: A sprinkle of flaky sea salt on top of your chocolates can elevate the flavor profile beautifully, balancing sweetness with that savory touch.
Flavor Combinations
- Minty Fresh: Combine melted chocolate with mint extract for a refreshing mint chocolate experience! This is a classic combo that never gets old.
- Coffee Lovers: Mix in some finely ground coffee or espresso powder with your chocolate for a delightful mocha flavor that will perk up anyone’s day!
- Spicy Kick: Feeling adventurous? Add a pinch of cayenne pepper or chili powder to your chocolate for a surprising kick that will leave taste buds tingling!
With these variations, you can customize your Valentine chocolate box to suit anyone’s taste! Whether you stick with the classics or venture into bold new flavors, the important part is to have fun and let your creativity shine through. Each chocolate will tell a story, making your gift even more special!
Storage & Reheating Instructions
Now that you’ve crafted these delightful chocolates, you’ll want to ensure they stay fresh and delicious! Here’s how to properly store your Valentine chocolate creations:
First off, keep your chocolates in an airtight container. This helps prevent them from absorbing any unwanted odors from the fridge or pantry. If you’ve made a large batch, you can layer them between sheets of parchment paper to keep them from sticking together. Just be gentle when stacking!
Store the chocolates in a cool, dry place, away from direct sunlight. A pantry or cupboard is perfect for this. If you live in a warmer climate, consider placing them in the refrigerator. However, do remember to let them come to room temperature before enjoying them again, as this helps restore their luscious texture and flavor.
As for how long they last? Well, these chocolates can typically be stored for about 1-2 weeks if kept properly. After that, they might start to lose their freshness, but trust me, they probably won’t last that long with all the love you’ve put into them!
Reheating isn’t usually necessary, but if you find that your chocolates have become a bit too hard, you can gently warm them. Just pop them in the microwave for a few seconds, stirring in between until they soften slightly. Be careful—too much heat can ruin all your hard work!
Follow these simple storage tips, and your homemade Valentine chocolate box will be a delightful treat for days to come! Enjoy every moment of sharing and indulging in these sweet creations!
Print
Valentine Chocolate Box Ideas: 7 Sweet Ways to Impress
- Total Time: 40 minutes
- Yield: 20 chocolates
- Diet: Vegetarian
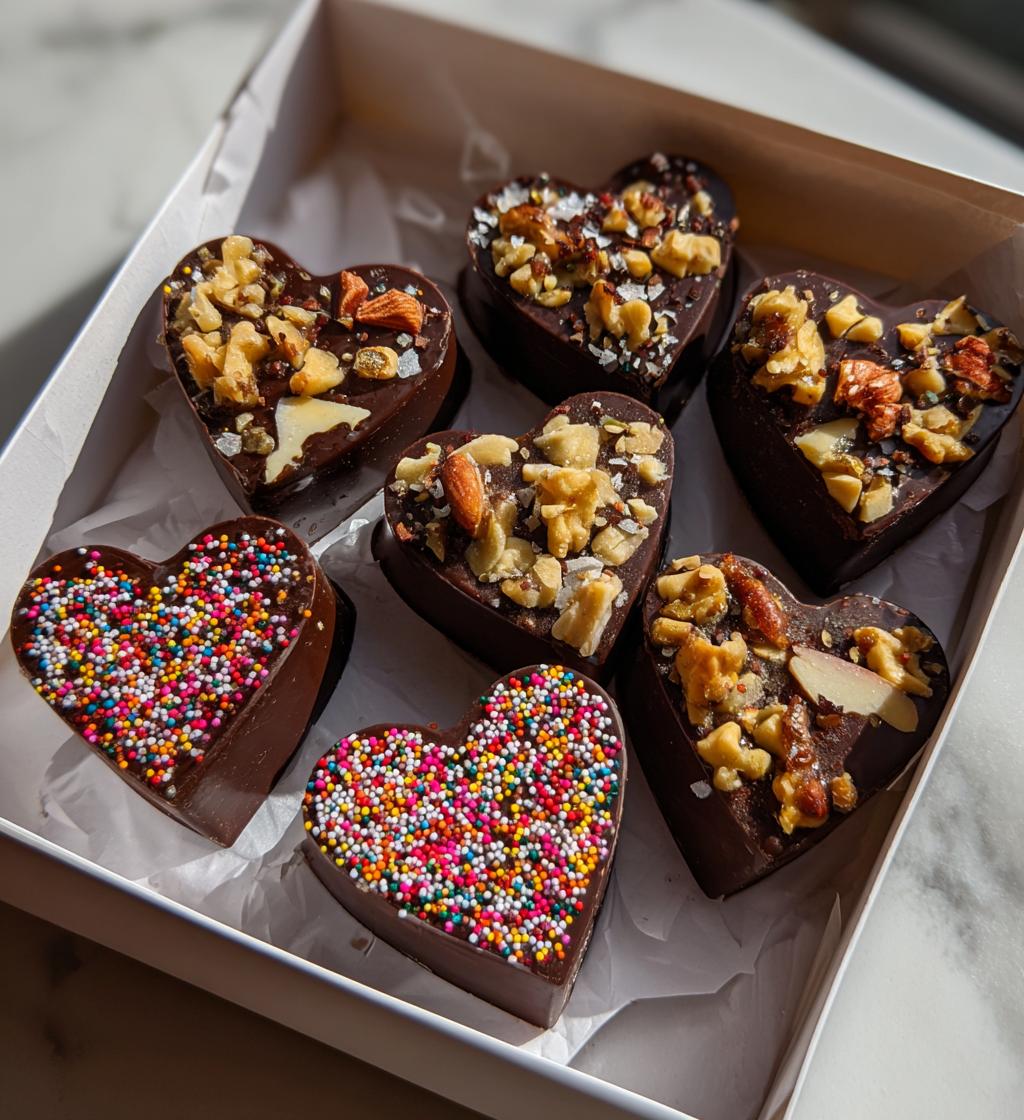
Description
Creative ideas for a homemade Valentine chocolate box.
Ingredients
- Chocolate (Dark, Milk, White) – 500g
- Heart-shaped molds – 2
- Sprinkles – 100g
- Nuts (Almonds, Hazelnuts) – 100g
- Dried fruits (Raisins, Cranberries) – 100g
- Flavor extracts (Vanilla, Mint) – 1 tsp each
- Gift box – 1
Instructions
- Melt the chocolate in a microwave or double boiler.
- Pour the melted chocolate into heart-shaped molds.
- Add nuts and dried fruits into the molds.
- Sprinkle with colorful sprinkles.
- Let the chocolate cool and harden.
- Carefully remove the chocolates from the molds.
- Place the chocolates in a gift box.
Notes
- You can mix different types of chocolate.
- Consider adding personalized messages.
- Store in a cool place to keep the chocolates fresh.
- Prep Time: 30 minutes
- Cook Time: 10 minutes
- Category: Dessert
- Method: No-bake
- Cuisine: American
Nutrition
- Serving Size: 2 pieces
- Calories: 150
- Sugar: 12g
- Sodium: 5mg
- Fat: 9g
- Saturated Fat: 5g
- Unsaturated Fat: 4g
- Trans Fat: 0g
- Carbohydrates: 15g
- Fiber: 1g
- Protein: 2g
- Cholesterol: 5mg
Keywords: Valentine chocolate box ideas, homemade chocolates, gift ideas, heart-shaped chocolates


