There’s something magical about a well-made tiramisu—that perfect balance of rich mascarpone, bitter espresso, and just the right amount of boozy kick that makes it irresistible. My first attempt at this classic Italian dessert was for a dinner party years ago, and let me tell you, I may have overdone the rum (oops!), but even that imperfect version disappeared in minutes. The beauty of this tiramisu recipe lies in its simplicity—no oven required, just layers of coffee-kissed ladyfingers and that dreamy, cloud-like cream that gets better as it chills. It’s become my go-to showstopper for birthdays, anniversaries, or honestly… just Tuesdays when I need a little pick-me-up.
Ingredients for Tiramisu Recipe
Gathering the right ingredients is half the battle with tiramisu – and trust me, you’ll want to measure carefully for that perfect layered texture. Here’s what you’ll need:
- 6 egg yolks (save the whites for another recipe!)
- 3/4 cup white sugar (don’t skimp – this balances the coffee’s bitterness)
- 2/3 cup whole milk (2% works in a pinch, but whole makes it extra rich)
- 1 1/4 cups heavy cream (must be cold straight from the fridge)
- 1/2 teaspoon real vanilla extract (imitation just won’t cut it here)
- 1 pound mascarpone cheese (set it out 30 minutes before using)
- 1 cup strong brewed coffee, cooled (I use espresso for maximum flavor)
- 2 tablespoons dark rum (or see substitutions below)
- 24 ladyfinger cookies (Savoiardi-style hold up best)
- 2 tablespoons unsweetened cocoa powder for dusting
Ingredient Notes and Substitutions
Mascarpone is non-negotiable for authentic tiramisu – that slightly tangy, ultra-creamy cheese is what makes it special. If your grocery store doesn’t carry it, check specialty markets (or make your own with heavy cream and lemon juice in a pinch).
The rum adds depth, but you can swap it for coffee liqueur (like Kahlúa) or skip it entirely for a family-friendly version. Just add an extra tablespoon of coffee to compensate.
Pro tip: Chill your mixing bowl and beaters before whipping the cream – it’ll give you those perfect stiff peaks faster. And whatever you do, don’t use pre-sweetened cocoa powder – the bitterness balances the sweet layers beautifully.
How to Make Tiramisu Recipe
Okay, let’s dive into the fun part! Making tiramisu is like building a delicious little tower of joy – but there are a few key tricks to get those perfect layers. Follow these steps, and you’ll have a dessert that’ll make you feel like an Italian nonna (even if your last name isn’t remotely Italian like mine!).
Step 1: Prepare the Egg Mixture
First, grab your egg yolks and sugar – this is where the magic starts. Whip them together with a hand mixer (or a very determined whisk arm) for a good 5 minutes until they turn pale yellow and thick enough to leave ribbons when you lift the beaters. This step is crucial – it’s what gives tiramisu that luxurious texture.
Now, heat the milk in a small saucepan until it’s just steaming (don’t let it boil!). Here’s the tricky part: slowly drizzle the warm milk into the egg mixture while whisking constantly. We’re tempering the eggs here – too fast and you’ll get scrambled eggs (yuck!). Return everything to the saucepan and cook over low heat, stirring nonstop, until it thickens enough to coat the back of a spoon. Remove it from heat immediately – overcooked custard turns grainy.
Step 2: Make the Mascarpone Filling
Let that beautiful custard cool to room temperature (I sometimes speed this up by placing the bowl in an ice bath). Meanwhile, whip your cold heavy cream with vanilla until stiff peaks form – when you lift the beaters, the peaks should stand straight up without flopping over.
Now for the mascarpone! Use a rubber spatula to gently fold the softened cheese into the cooled custard. No vigorous stirring here – we want to keep all that air in the mixture. When it’s mostly combined, fold in the whipped cream in two batches. The key word is FOLD – imagine you’re turning the mixture over itself rather than stirring. You’ll know it’s ready when no white streaks remain, but stop the second you get there!
Step 3: Assemble the Tiramisu Layers
Time for the fun part! Mix your cooled coffee and rum in a shallow dish (I use a pie plate). Quickly dip each ladyfinger in – I mean QUICK, like 1-2 seconds per side max. They should be moist but not soggy (soggy ladyfingers = tiramisu soup). Arrange them in a single layer in your dish.
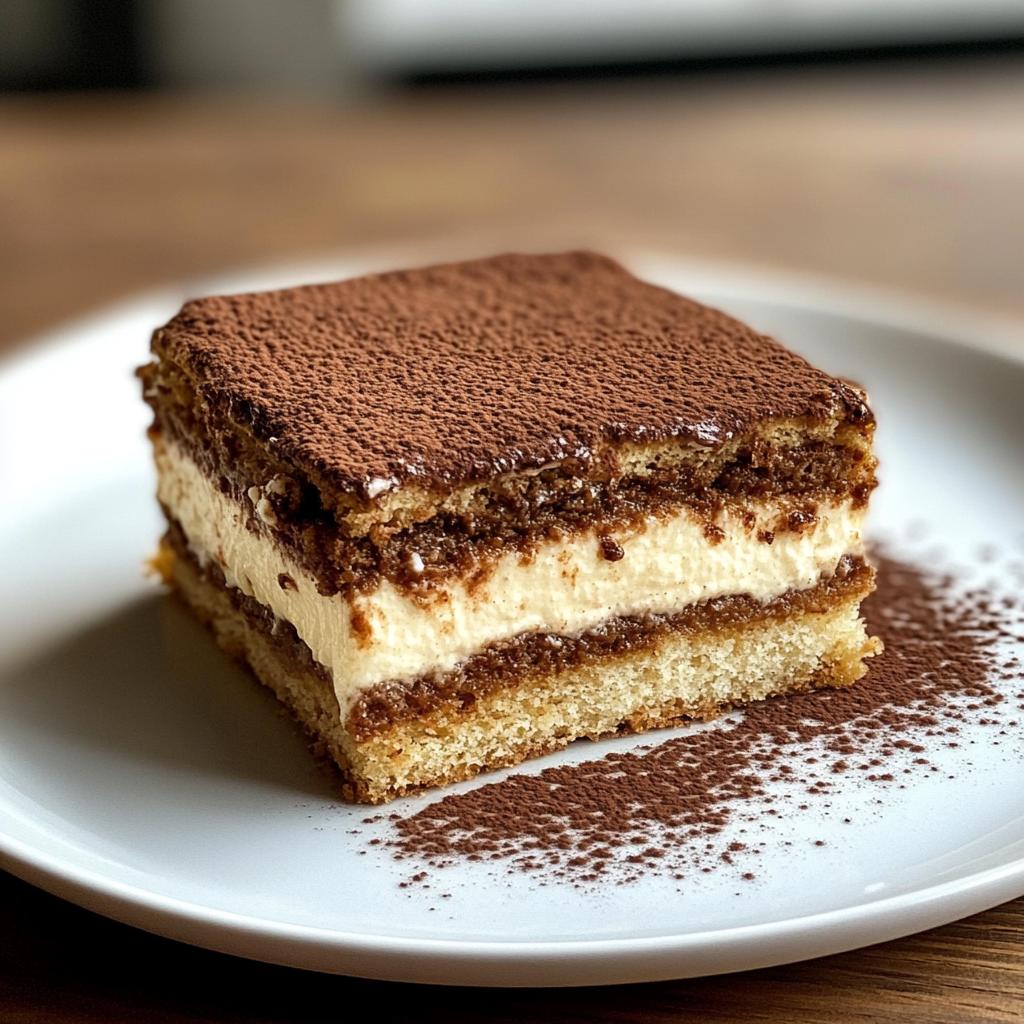
Spread half the mascarpone mixture over the ladyfingers with a light hand – don’t press down! Repeat with another layer of dipped cookies and the remaining cream. Now, the hardest part: cover it and refrigerate for at least 4 hours (overnight is even better). Right before serving, dust generously with cocoa powder through a fine sieve – it’s like putting the final sprinkle of fairy dust on your masterpiece!
Tips for the Best Tiramisu Recipe
After making this tiramisu recipe more times than I can count (and learning from a few delicious mistakes), here are my can’t-live-without tips:
Use the strongest coffee you can handle – I’m talking espresso or at least a dark roast. Weak coffee makes for wimpy flavor. Pro tip: brew it double strength if using regular coffee.
Chill everything that needs whipping – Your bowl, beaters, even the cream itself. Cold tools = fluffy peaks that hold their shape. If your kitchen’s warm, pop the bowl in the freezer for 10 minutes first.
Let it rest overnight if possible – I know it’s tempting to dig in after 4 hours, but trust me – that overnight chill lets the flavors marry and the texture set perfectly. The difference is night and day!
Dust cocoa powder right before serving – Otherwise it absorbs moisture and gets blotchy. For a fancy touch, use a stencil to create pretty patterns on top.
Slice with a hot, clean knife – Run your knife under hot water and wipe it dry between cuts. You’ll get those picture-perfect layers every time instead of a smeared mess.
Variations of Tiramisu Recipe
Once you’ve mastered the classic tiramisu recipe, it’s so much fun to play around with flavors! Here are some of my favorite twists that still honor the spirit of this Italian beauty:
Chocolate Lover’s Dream: Add 1/2 cup of finely chopped dark chocolate to the mascarpone mixture, or sprinkle chocolate shavings between layers. I sometimes swap the cocoa powder dusting for grated chocolate – pure heaven!
Fruit-Infused: In summer, I’ll layer fresh raspberries or sliced strawberries between the cream. The tartness cuts through the richness beautifully. For fall, try caramelized banana slices with a sprinkle of cinnamon in the coffee.
Flavored Syrup Swirl: Before assembling, drizzle 1-2 tablespoons of flavored syrup (hazelnut, almond, or caramel work great) over each layer of ladyfingers. Just a touch – we’re enhancing, not drowning!
Dietary Tweaks: Gluten-free? Use gluten-free ladyfingers (they’re surprisingly good!). For a lower-sugar version, reduce the sugar to 1/2 cup and use bittersweet chocolate. Vegan friends? Substitute silken tofu blended with coconut cream for the mascarpone – it’s shockingly close in texture.
The best part? These variations still give you that classic tiramisu experience while letting your creativity shine. My motto? Once you know the rules, you can break them deliciously!
Serving and Storing Tiramisu Recipe
The moment of truth! After patiently waiting for your tiramisu to set, here’s how to serve it like a pro. Always serve it chilled straight from the fridge – that cool, creamy texture is half the magic. I like to give it one final dusting of cocoa powder right before plating (it looks prettier and adds a nice bitter contrast to the sweet layers).
For special occasions, I’ll garnish each slice with a few coffee beans or chocolate curls. A little espresso martini on the side never hurt anyone either! Use a thin, sharp knife dipped in hot water for clean cuts that show off all those beautiful layers you worked so hard to create.
Now, about leftovers (if you’re lucky enough to have any!) – cover your tiramisu tightly with plastic wrap and it’ll keep beautifully in the fridge for up to 3 days. The flavors actually improve after day one, so it’s a fantastic make-ahead dessert. Just don’t freeze it – trust me, I learned this the hard way. The texture turns icy and grainy, and those perfect ladyfinger layers become a sad, mushy mess.
Pro tip: If making individual portions in glasses, they actually stay fresh a bit longer since there’s less surface area exposed to air. I’ve pushed it to 4 days with these, though let’s be honest – they rarely last that long in my house!
Tiramisu Recipe FAQs
After making tiramisu for years (and fielding countless questions from curious friends), here are the answers to the things everyone wants to know:
Can I make tiramisu ahead of time?
Absolutely! In fact, I highly recommend making it at least one day before serving. The flavors blend beautifully as it chills, and the texture firms up perfectly. Just keep it covered in the fridge – it’ll stay delicious for up to 3 days.
Why did my tiramisu turn out runny?
Nine times out of ten, this happens from over-soaking the ladyfingers. They should just take a quick dip in the coffee – any longer and they’ll continue absorbing liquid in the fridge, turning your masterpiece into tiramisu soup. Also, make sure your mascarpone filling is properly chilled and set before assembling.
Is there an alcohol-free version of tiramisu?
Of course! Simply leave out the rum – the dessert will still be delicious. I sometimes replace it with a tablespoon of vanilla extract or a splash of strong espresso for extra coffee flavor. Kids and non-drinkers won’t know the difference!
Can I use something besides ladyfingers?
While traditional Savoiardi ladyfingers work best, in a pinch you can use pound cake slices or even thin layers of sponge cake. Just adjust the dipping time – drier cakes need slightly longer, but still be careful not to oversaturate.
How do I know when the custard is cooked enough?
It should coat the back of a spoon thickly enough that when you run your finger through it, the line holds its shape. If it’s still runny, keep cooking on low heat while stirring constantly. But watch it like a hawk – eggs scramble fast!
Nutritional Information for Tiramisu Recipe
Let’s be real – we’re not eating tiramisu for its health benefits! But if you’re curious about what’s in each heavenly bite (or need to plan your dessert calories wisely), here’s the scoop. Remember, these values are estimates – your exact numbers will vary based on specific ingredients and how generous you are with those layers!
Per serving (1/8 of the recipe):
- Calories: 450 (worth every single one!)
- Total Fat: 30g (18g saturated – hello, mascarpone!)
- Carbohydrates: 35g (25g from sugars)
- Protein: 8g (those egg yolks pull their weight)
- Sodium: 80mg
- Fiber: 1g (not why we eat dessert, but good to know)
The fat content might look high, but that’s what gives tiramisu its luxurious mouthfeel. Most comes from the mascarpone and heavy cream – the good stuff! If you’re watching sugar, you can reduce it slightly (try 1/2 cup instead of 3/4), but the coffee’s bitterness balances it beautifully.
Pro tip: Since portions can vary, I like to cut mine into smaller squares for gatherings – that way everyone can enjoy without guilt (or go back for seconds… no judgment here!).
Rate This Tiramisu Recipe
Did you try making this tiramisu? I’d love to hear how it turned out for you! Drop a quick note in the comments below – was it as dreamy as promised? Any brilliant tweaks you discovered? Your feedback helps me (and other home bakers) keep improving these recipes.
If you snapped a photo of your masterpiece, share that too! There’s nothing I love more than seeing your gorgeous layered creations. Pro tip: Tag me @[yourhandle] so I can admire your work and maybe even feature it!
And hey – if this recipe earned a spot in your dessert rotation, consider giving it a star rating. Five stars means “I’d serve this to my Italian grandmother,” one star means “I accidentally made tiramisu soup” (we’ve all been there!). Either way, your honest thoughts mean the world to me.
Print
6-Ingredient Decadent Tiramisu Recipe That Melts Hearts
- Total Time: 4 hours 40 minutes
- Yield: 8 servings 1x
- Diet: Vegetarian
Description
A classic Italian dessert with layers of coffee-soaked ladyfingers and creamy mascarpone filling.
Ingredients
- 6 egg yolks
- 3/4 cup white sugar
- 2/3 cup milk
- 1 1/4 cups heavy cream
- 1/2 teaspoon vanilla extract
- 1 pound mascarpone cheese
- 1 cup strong brewed coffee, cooled
- 2 tablespoons rum
- 24 ladyfingers
- 2 tablespoons cocoa powder
Instructions
- Beat egg yolks and sugar until thick and pale.
- Heat milk in a saucepan and slowly add to the egg mixture.
- Cook over low heat, stirring constantly, until thickened.
- Remove from heat and let cool.
- Whip cream and vanilla until stiff peaks form.
- Fold mascarpone into the cooled egg mixture.
- Gently fold in the whipped cream.
- Mix coffee and rum in a shallow dish.
- Dip ladyfingers quickly into the coffee mixture and layer in a dish.
- Spread half the mascarpone mixture over the ladyfingers.
- Repeat layers and dust with cocoa powder.
- Refrigerate for at least 4 hours before serving.
Notes
- Use room-temperature mascarpone for easier mixing.
- Do not oversoak the ladyfingers to avoid a soggy texture.
- For a non-alcoholic version, omit the rum.
- Prep Time: 30 minutes
- Cook Time: 10 minutes
- Category: Dessert
- Method: No-Bake
- Cuisine: Italian
Nutrition
- Serving Size: 1 slice
- Calories: 450
- Sugar: 25g
- Sodium: 80mg
- Fat: 30g
- Saturated Fat: 18g
- Unsaturated Fat: 10g
- Trans Fat: 0g
- Carbohydrates: 35g
- Fiber: 1g
- Protein: 8g
- Cholesterol: 220mg
Keywords: tiramisu, Italian dessert, coffee dessert, mascarpone, no-bake


