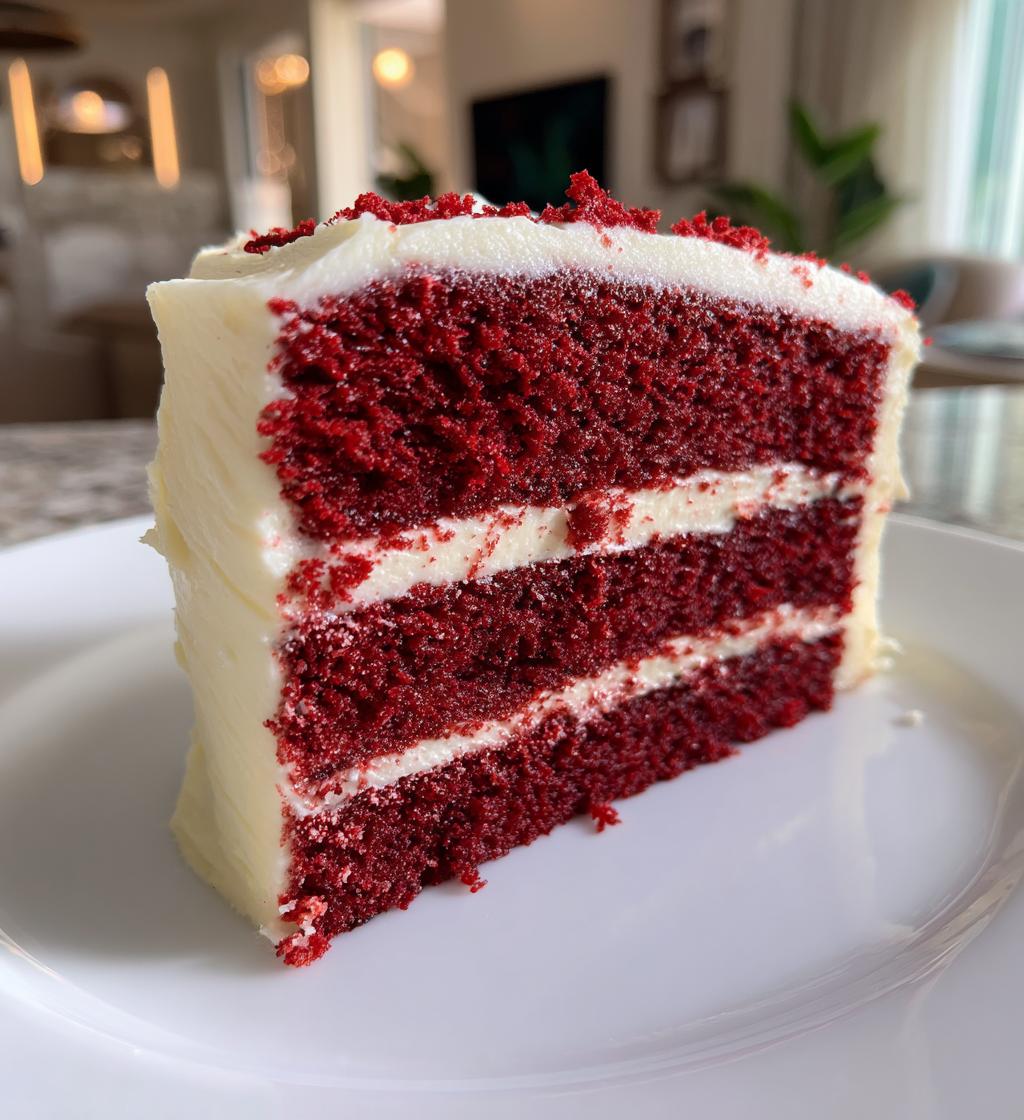
Oh my goodness, let me tell you about my absolute favorite red velvet cake recipe! It’s the kind of cake that makes people’s eyes light up when they take that first bite – rich, velvety, and just the right amount of sweetness. I’ve been making this exact version for years, ever since my Aunt Linda shared it with me at a family reunion. The secret? That perfect balance of cocoa and buttermilk that gives it that signature tang without being overpowering.
What I love most is how foolproof this recipe is. Even my first attempt turned out beautifully, and trust me, I’m not one of those naturally gifted bakers. The cake comes out moist every single time, with that gorgeous red color that just begs to be sliced. It’s become my go-to for birthdays, Valentine’s Day, or really any excuse to bake something special. The best part? The compliments never stop coming – everyone thinks you spent hours when really, it comes together so easily!
Why You’ll Love This Tempting Red Velvet Cake
This red velvet cake isn’t just another dessert – it’s an experience. Here’s why it’s always a crowd-pleaser:
- That perfect texture – Moist without being dense, with the softest crumb you’ll ever taste. The buttermilk works magic!
- Rich yet balanced flavor – Just enough cocoa to intrigue you, with that signature tang from the buttermilk and vinegar pairing
- Easier than you’d think – No fancy techniques here. Just simple, reliable steps that work every time (even for nervous bakers!)
- Total showstopper – That vibrant red color makes it perfect for celebrations, date nights, or whenever you want to feel fancy
I’ve served this at everything from backyard BBQs to wedding showers, and it never fails to disappear first. The compliments? Those are just the delicious bonus!
Ingredients for Tempting Red Velvet Cake
Gathering the right ingredients makes all the difference with this cake – trust me, I learned that the hard way after a few early baking disasters! Here’s exactly what you’ll need (and why each one matters):
- 2 ½ cups all-purpose flour – Spoon it into your measuring cup and level it off. No packing!
- 1 ½ cups granulated sugar – Regular white sugar works perfectly here
- 1 tsp each of baking soda, cocoa powder (the good stuff!), and salt
- 1 ½ cups vegetable oil – Makes it crazy moist without a heavy feel
- 1 cup buttermilk – At room temp (this is non-negotiable for perfect rise)
- 2 large eggs – Also room temp – I leave mine out for an hour before baking
- 2 tbsp red gel food coloring – Gel gives that deep red color without thinning the batter
- 1 tsp each vanilla extract and white vinegar – The vinegar’s magic with the baking soda
Pro tip from my many test runs: Use gel food coloring instead of liquid – the color stays vibrant and doesn’t water down your batter. And measure that flour right or your cake will be denser than my first attempt (lesson learned!).
Equipment Needed for Tempting Red Velvet Cake
You probably have most of these basics already! Here’s what you’ll want within arm’s reach:
- Two 9-inch round cake pans – I like the light-colored aluminum ones for even baking
- Mixing bowls – One large, one medium (glass or stainless steel both work great)
- Electric mixer – A hand mixer does the job perfectly – no fancy stand mixer needed!
- Whisk and spatula – For folding and scraping every last bit of that gorgeous red batter
- Cooling rack – Essential for preventing soggy bottoms (we’ve all been there)
That’s it! No special gadgets required – just good old-fashioned baking tools. Now let’s get mixing!
How to Make Tempting Red Velvet Cake
Alright, let’s dive into the fun part – making this gorgeous cake! I’ll walk you through each step just like I’m right there in the kitchen with you. Don’t worry if you’re a beginner – I’ve included all my hard-learned tips to make sure your cake turns out perfect.
Preparing the Batter
First things first – preheat that oven to 350°F (175°C). While it’s heating up, grab two 9-inch cake pans and grease them well with butter or non-stick spray. I like to dust mine with a little flour too – it guarantees easy release later!
Now, let’s mix the dry ingredients: whisk together your flour, sugar, baking soda, cocoa powder, and salt in that large bowl. Make sure there aren’t any cocoa lumps hiding in there – they’ll show up in your final cake (learned that the hard way!).
In your medium bowl, combine the wet ingredients: beat together the oil, buttermilk, eggs, food coloring, vanilla, and vinegar. Oh, that red color is going to look so vibrant! Here’s my secret – mix just until combined. Overmixing at this stage can make your cake tough, and we want that signature velvet texture.
Now, slowly pour the wet ingredients into the dry ingredients while mixing on low speed. Stop as soon as you don’t see any flour streaks – a few small lumps are actually okay! The batter should be smooth but not overworked.
Baking the Cake
Divide that beautiful red batter evenly between your prepared pans. I use a kitchen scale to be precise, but if you don’t have one, just eyeball it – about 2½ cups per pan works nicely.
Pop them in the center of your preheated oven and set your timer for 25 minutes. Resist the temptation to open the oven door! At the 25-minute mark, do the toothpick test – insert it in the center of a cake. If it comes out with just a few moist crumbs (not wet batter), your cakes are done. If not, give them another 2-3 minutes.
Pro tip: Rotate your pans halfway through baking if your oven has hot spots. This ensures even coloring and rise!
Cooling and Frosting
Here’s where patience is key – let those cakes cool in their pans for about 15 minutes before turning them out onto wire racks. Trying to remove them too soon? Disaster waiting to happen (ask me how I know!).
Let them cool completely before frosting – at least an hour. Warm cake makes frosting melt right off, and nobody wants that. While you wait, why not whip up some cream cheese frosting? It’s the perfect pairing with red velvet’s tangy flavor.
When you’re ready to frost, place one layer on your cake stand and spread about ¾ cup frosting evenly on top. Add the second layer and frost the top and sides. Decorate with sprinkles or fresh berries if you’re feeling fancy!
Tips for Perfect Tempting Red Velvet Cake
After making this cake more times than I can count, I’ve picked up some foolproof tricks that make all the difference:
- Gel food coloring is a must – Liquid coloring waters down your batter and fades during baking
- Flour measuring matters – Spoon it lightly into your cup and level it off. Packed flour = dense cake
- Room temp ingredients blend better – Take eggs and buttermilk out at least an hour before baking
- Mix just until combined – Overworked batter leads to tough cake (a sad lesson I learned early!)
- Check early for doneness – Start testing at 25 minutes – overcooked red velvet loses its magic
Follow these simple tips, and you’ll nail that perfect balance of moist crumb and vibrant color every single time!
Variations for Tempting Red Velvet Cake
While I adore the classic version, sometimes it’s fun to mix things up! Try folding in ½ cup of mini chocolate chips for extra richness – they create these melty little surprises in each bite. If you’re feeling adventurous, swap the standard frosting for a tangy cream cheese version (my personal favorite!). For holidays, I’ll add a teaspoon of peppermint extract to the batter and top with crushed candy canes. The possibilities are endless – that’s the beauty of this versatile cake!
Serving Suggestions for Tempting Red Velvet Cake
Oh, the ways you can serve this beauty! My absolute favorite is with a steaming cup of coffee – the bitterness perfectly balances the cake’s sweetness. For dessert lovers, try it warm with vanilla ice cream melting over the top (heaven!). Fresh berries add a lovely pop of color and freshness too. Last Christmas, I served slices with whipped cream and raspberry sauce – the plates were clean before I could blink!
Storage and Reheating Instructions
Here’s how to keep your red velvet cake tasting fresh – because let’s be honest, it rarely lasts long in my house! For short-term storage (1-2 days), keep it in an airtight container at room temperature. The frosting stays perfect this way. Need it to last longer? Pop it in the fridge for up to 5 days – just let slices come to room temp before serving for that soft texture.
Want to revive leftover cake? Microwave individual slices for 10-15 seconds – just enough to take the chill off. For a special treat, toast slices lightly in a dry skillet until the edges get slightly crisp. Trust me, it’s divine with morning coffee!
Nutritional Information
Just a quick note – these numbers are estimates based on the ingredients I use, but your exact nutrition may vary depending on specific brands or substitutions. Per generous slice, you’re looking at about 350 calories with 18g fat (3g saturated), 45g carbs, and 25g sugar. Not gonna lie – this is definitely a special occasion treat in my book! The good news? That velvety texture and rich flavor mean a little goes a long way for satisfying your sweet tooth.
Frequently Asked Questions About Tempting Red Velvet Cake
Over the years, I’ve gotten so many great questions about this recipe! Here are the ones that come up most often with my tried-and-true answers:
What can I use instead of buttermilk?
No buttermilk? No problem! Make your own by adding 1 tablespoon white vinegar or lemon juice to 1 cup regular milk. Let it sit for 5 minutes until it thickens slightly. I’ve also used plain yogurt thinned with milk in a pinch – works like a charm!
How do I get that deep red color?
Gel food coloring is the secret! Liquid coloring will fade during baking. I use 2 tablespoons of gel for that signature vibrant hue. Pro tip: Mix the coloring into the wet ingredients first so it distributes evenly.
Can I make cupcakes instead?
Absolutely! Fill lined cupcake tins 2/3 full and bake at the same temperature for 18-22 minutes. They’re adorable frosted with cream cheese swirls – perfect for parties!
Why did my cake turn out dry?
Usually means it baked too long. Start checking at 25 minutes – a toothpick should have moist crumbs, not come out completely clean. Also, measure that flour carefully (no packing!) and don’t skip the oil – it’s key for moisture.
Can I freeze the cake?
Yes! Wrap unfrosted layers tightly in plastic, then foil. Freeze for up to 3 months. Thaw overnight in the fridge before frosting. I always keep one in the freezer for last-minute guests!
Share Your Experience
I’d love to hear how your red velvet cake turns out! Did you add any fun twists? Snap a photo and tell me all about your baking adventure in the comments – the good, the messy, and everything in between. Nothing makes me happier than seeing others fall in love with this recipe like I did!
Print
Irresistible Tempting Red Velvet Cake Recipe in 6 Steps
- Total Time: 50 mins
- Yield: 12 servings 1x
- Diet: Vegetarian
Description
A rich and moist red velvet cake with creamy frosting.
Ingredients
- 2 1/2 cups all-purpose flour
- 1 1/2 cups granulated sugar
- 1 tsp baking soda
- 1 tsp cocoa powder
- 1 tsp salt
- 1 1/2 cups vegetable oil
- 1 cup buttermilk
- 2 large eggs
- 2 tbsp red food coloring
- 1 tsp vanilla extract
- 1 tsp white vinegar
Instructions
- Preheat oven to 350°F (175°C). Grease and flour two 9-inch cake pans.
- Mix flour, sugar, baking soda, cocoa powder, and salt in a bowl.
- Beat oil, buttermilk, eggs, food coloring, vanilla, and vinegar in another bowl.
- Combine wet and dry ingredients. Mix until smooth.
- Divide batter between pans. Bake for 25-30 minutes.
- Let cakes cool before frosting.
Notes
- Use gel food coloring for vibrant red color.
- Ensure ingredients are at room temperature.
- Do not overmix batter.
- Prep Time: 20 mins
- Cook Time: 30 mins
- Category: Dessert
- Method: Baking
- Cuisine: American
Nutrition
- Serving Size: 1 slice
- Calories: 350
- Sugar: 25g
- Sodium: 300mg
- Fat: 18g
- Saturated Fat: 3g
- Unsaturated Fat: 14g
- Trans Fat: 0g
- Carbohydrates: 45g
- Fiber: 1g
- Protein: 4g
- Cholesterol: 30mg
Keywords: red velvet cake, homemade cake, dessert recipe


