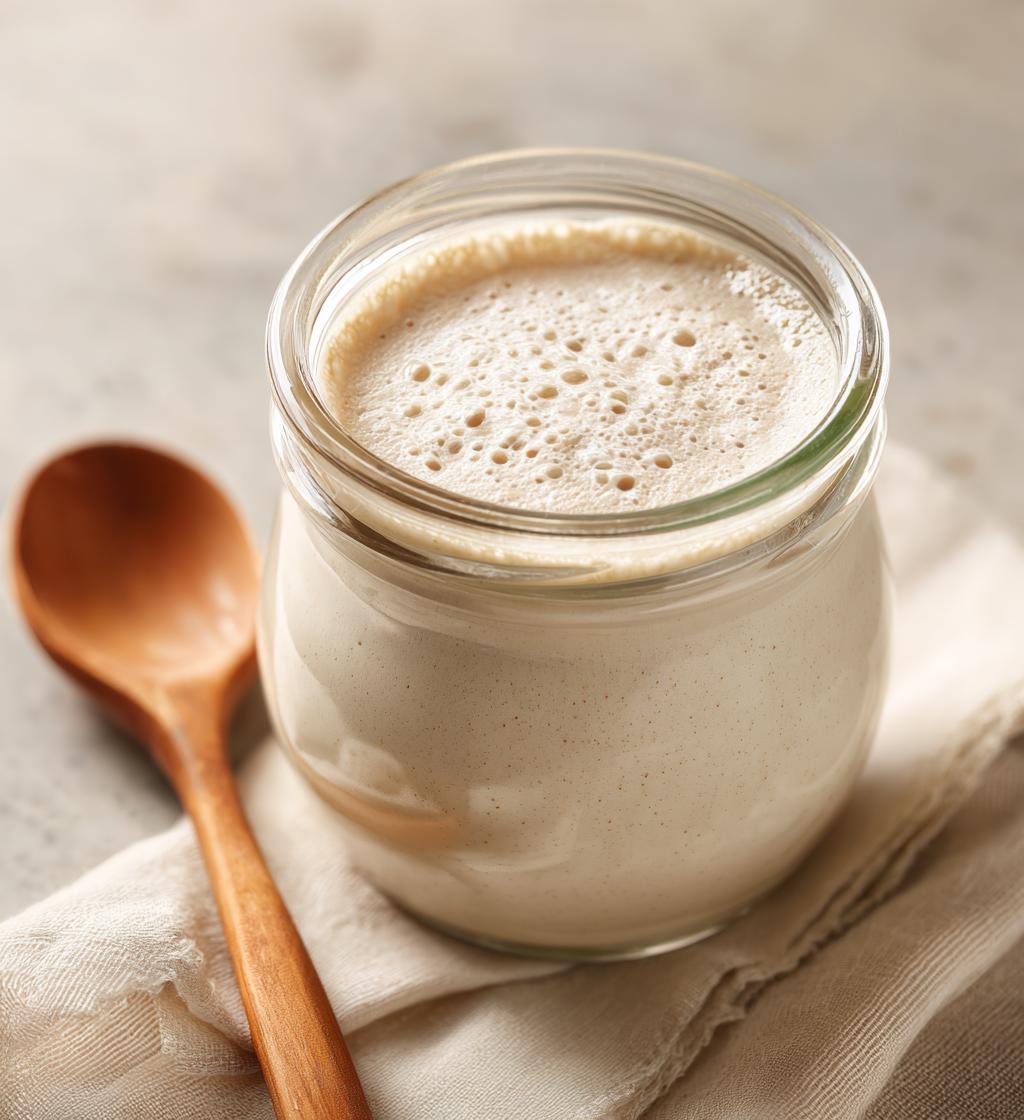
There’s something truly magical about making sourdough bread at home, and it all starts with the sourdough starter. This little mixture of flour and water captures wild yeast and bacteria from the air, beginning a fermentation process that transforms simple ingredients into something extraordinary. I can’t tell you how exhilarating it is to watch that starter bubble and grow over time! It’s like nurturing a tiny pet that rewards you with the most delicious bread. The unique flavors that develop in a sourdough starter are what set it apart from other bread-baking methods. Trust me, once you’ve tasted a slice of freshly baked sourdough, you’ll never want to go back! Not only does it have that perfect crust and tangy flavor, but it also brings a sense of accomplishment. So, let’s dive into the world of sourdough starter and explore how to create your very own starter that will be the heart of your baking adventures!
Ingredients for Sourdough Starter
Creating a sourdough starter is simple and requires just a few basic ingredients. Here’s what you’ll need:
- 1 cup all-purpose flour: This will be the base of your starter. Feel free to experiment with different flours like whole wheat or rye later on!
- 1/2 cup water: Use filtered water for the best results. It helps avoid any chlorine or other additives that might interfere with the fermentation process.
- 1 tablespoon sugar: This helps to kickstart the fermentation by feeding the wild yeast and bacteria right from the beginning.
Gather these ingredients, and you’ll be all set to start your sourdough journey!
How to Prepare Sourdough Starter
Preparing your sourdough starter is an exciting journey, and it all begins with mixing just a few ingredients! Follow these steps to create your very own starter that will be bubbling and lively in no time.
Step-by-Step Instructions
1. Start by combining 1 cup of all-purpose flour, 1/2 cup of filtered water, and 1 tablespoon of sugar in a medium bowl. Use a wooden spoon or spatula to mix everything until you have a smooth, thick batter. It should feel a bit like pancake batter.
2. Once mixed, cover the bowl with a clean cloth or plastic wrap. This allows the starter to breathe while keeping out unwanted pests. Let it sit at room temperature for 24 hours. You’ll want a warm spot, so avoid drafty areas!
3. After the first day, you should see some bubbles forming! This means the wild yeast is waking up. Now, it’s time to feed your starter. Discard half of the mixture—about 1/2 cup—then add another 1 cup of flour and 1/2 cup of water. Stir well until combined.
4. Repeat this feeding process every 24 hours. Don’t forget to keep it covered! After about 5-7 days, your starter will be bubbly, have a pleasant tangy smell, and is ready to use in your baking adventures.
5. When it’s ready, you can store it in the fridge if you’re not using it daily. Just remember to feed it once a week to keep it alive and thriving!
Important Tips for Maintaining Your Sourdough Starter
To keep your sourdough starter happy, always use filtered water and store it in a warm place, ideally around 70°F to 75°F. Regularly feed it every day or at least once a week if refrigerated. Discarding half before each feeding helps maintain a healthy balance!
Why You’ll Love This Sourdough Starter Recipe
- Simplicity: With just three ingredients, anyone can create their own sourdough starter at home!
- Joy of Baking: There’s something deeply satisfying about nurturing your starter and watching it transform into a bubbling, living thing.
- Unique Flavor: Homemade sourdough has a distinct tang and depth that store-bought bread simply can’t match.
- Personal Touch: Every starter reflects its environment, giving your bread a unique character that’s all your own.
- Endless Possibilities: Once you have your starter, you can experiment with countless sourdough recipes, from loaves to pancakes!
Nutritional Information
Understanding the nutritional content of your sourdough starter is a great way to appreciate the goodness you’re cultivating! Based on a typical serving size of 1 tablespoon, here’s an estimate of the nutritional values:
- Calories: 20
- Sugar: 0g
- Sodium: 0mg
- Fat: 0g
- Carbohydrates: 5g
- Protein: 1g
These values can vary depending on specific ingredients and how you maintain your starter, but this should give you a good idea. Enjoy knowing that you’re nurturing something wholesome and delicious!
FAQ About Sourdough Starter
As you embark on your sourdough starter journey, you might have a few questions pop up along the way. Don’t worry—I’ve got you covered! Here are some of the most common queries I hear from fellow bakers, along with my trusty answers.
How do I know when my sourdough starter is ready?
Your sourdough starter is ready when it’s bubbly and doubles in size within 4-6 hours after feeding. You’ll also notice a pleasant, tangy aroma wafting from the bowl. Another great test is the “float test”—take a small spoonful of the starter and drop it in a glass of water. If it floats, congratulations! It’s ready to make some delicious bread.
Can I use tap water for my starter?
While you technically can use tap water, it’s best to avoid it. Tap water often contains chlorine and other chemicals that can hinder the growth of your starter. Instead, opt for filtered or bottled water. This little switch can make a big difference in keeping your sourdough starter healthy and thriving!
What should I do if my sourdough starter smells off?
If your sourdough starter has an unpleasant smell—think something like rotten or overly sour—it might be a sign that it needs a little TLC. First, take a look for any signs of mold. If you see any, it’s best to discard the starter and start fresh. If it’s just a strong smell but no mold, try feeding it more frequently and adjusting the temperature. A healthy starter should smell tangy, not offensive!
Tips for Success with Sourdough Starter
Here are some pro tips to ensure your sourdough starter thrives and becomes the star of your baking adventures!
- Feed Consistently: Stick to a regular feeding schedule, ideally every 24 hours, to keep your starter strong and active.
- Temperature Matters: Keep your starter in a warm spot, around 70°F to 75°F, to promote fermentation. A cozy kitchen corner works wonders!
- Use a Scale: For precision, consider weighing your flour and water. This helps maintain the right balance for your starter.
- Store Properly: If you’re not baking daily, store your starter in the fridge after it’s well-fed. Just remember to bring it back to room temperature and feed it before using!
- Don’t Stress: If you miss a feeding or things seem off, don’t panic! Just give it some love and feed it again. It’s quite resilient!
Sourdough Starter: 5 Essential Tips for a Thriving Mix
- Total Time: 7 days
- Yield: 1 cup sourdough starter 1x
- Diet: Vegetarian
Description
A sourdough starter is a mixture of flour and water that captures wild yeast and bacteria from the environment. It ferments over time, allowing you to make sourdough bread.
Ingredients
- 1 cup all-purpose flour
- 1/2 cup water
- 1 tablespoon sugar
Instructions
- Mix flour, water, and sugar in a bowl.
- Cover the bowl with a cloth and let it sit at room temperature for 24 hours.
- Feed the starter daily with equal parts flour and water.
- After 5-7 days, the starter will be bubbly and ready to use.
Notes
- Use filtered water for best results.
- Keep the starter in a warm place.
- Discard half of the starter before each feeding to maintain balance.
- Prep Time: 5 minutes
- Cook Time: 0 minutes
- Category: Baking
- Method: Fermentation
- Cuisine: Global
Nutrition
- Serving Size: 1 tablespoon
- Calories: 20
- Sugar: 0g
- Sodium: 0mg
- Fat: 0g
- Saturated Fat: 0g
- Unsaturated Fat: 0g
- Trans Fat: 0g
- Carbohydrates: 5g
- Fiber: 0g
- Protein: 1g
- Cholesterol: 0mg
Keywords: sourdough starter, bread baking, fermentation


